Batman: Arkham Asylum Walkthrough
Nothing can defeat Batman…as long as he's prepared. Arm yourself with our guide for a complete walkthrough of Batman: Arkham Asylum.
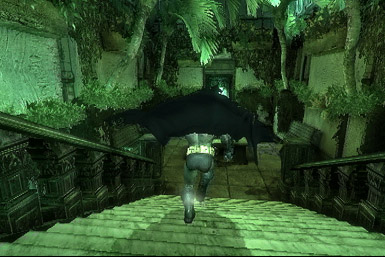
The big black bat is back in his darkest adventure yet. With the Joker running amok and the inmates of Arkham Island escaped, Batman's got his work cut out for him. But remember, Batman doesn't leave the Batcave unprepared, which is why he arms himself with a copy of GameSpot's Game Guide before each mission.
Here's what you'll find in GameSpot's Batman: Arkham Asylum Game Guide:
- General Tips: Learn how to hide among the shadows.
- Walkthrough: We'll take you step-by-step through Arkham Asylum, including how to solve Riddler's riddles.
- Achievements: Learn how to obtain Batman's achievements.
- Trophies: Want some of those sweet PS3 trophies? Here you go!
General Tips
Basic Combat Techniques
Madden 26 & College Football 26 - Official Announcement Trailer | "The Call" The Crew 2: Offline Mode Update Overview Trailer Micromega - Official Announcement Trailer Ghost of Yotei - The Onryos List | Release Date Reveal Trailer ELDEN RING NIGHTREIGN | Recluse Character Gameplay Trailer The Hundred Line -Last Defense Academy-: Official Launch Trailer Overwatch 2 - Official Gundam Wing Collaboration Gameplay Trailer AI:THE SOMNIUM FILES - Sleep For Kaname Date – Intro Trailer Tombwater - Playable Demo Reveal Trailer The Elder Scrolls IV: Oblivion Remastered - Official Full Reveal Presentation DRAGON BALL: Sparking! ZERO - DAIMA Character Pack 1 Gameplay Trailer Zenless Zone Zero - Vivian Character Demo | "Love Like a Bouquet"
Please enter your date of birth to view this video
By clicking 'enter', you agree to GameSpot's
Terms of Use and Privacy Policy
Of course, if you encounter a group of gun toting enemies, don't attack them head-on. Instead, employ some stealth Batman action and take them out from behind with a silent takedown to avoid alerting the others. You can also try setting traps and using distractions to gain the upper-hand For instance, use your explosive gel to set a trap then try getting everyone’s attention--when they come running to see what the commotion is all about, they'll be sent flying sky-high.
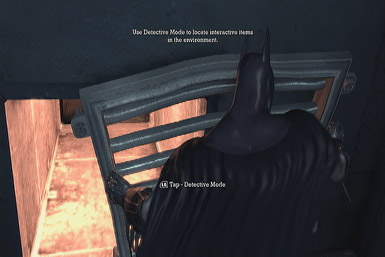
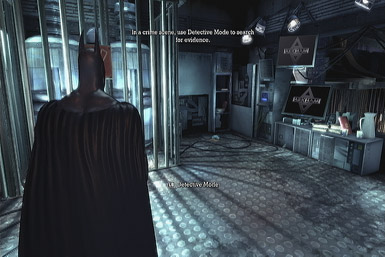
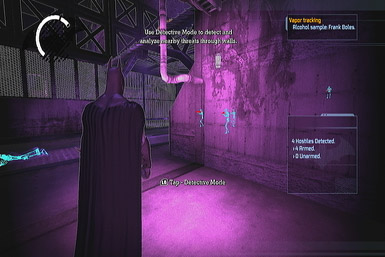
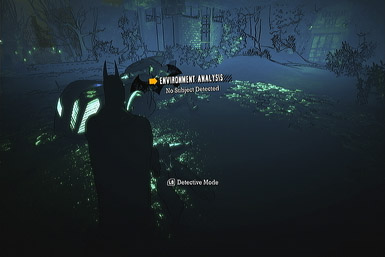
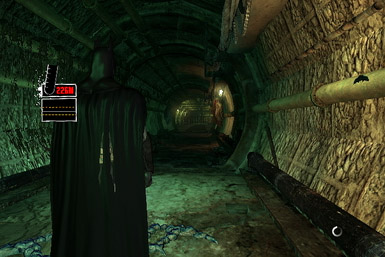
It’s also a good idea to keep detective mode on pretty much at pretty much all-times, particularly when entering a new area. Not only does it inform you of how many enemies are located in the vicinity, but its X-Ray capabilities allows you to easily spot them against the background.
When it comes to engaging a mixed group of armed and unarmed enemies, It’s generally a good idea to take on the unarmed opponents first, just to get them out of your way. As for the armed opponents, use your cape to stun them, before battering them into submission.
Upgrades and Abilities
Speaking of which, when it comes to upgrading your abilities, additional armor should be your first priority. The amount of times it'll save your hide more than makes up for its cost, particularly as it helps build your overall experience level. Also, we’ve found that having the remote controlled Batarang early on is also especially helpful, allowing you to drop several enemies with a single throw.
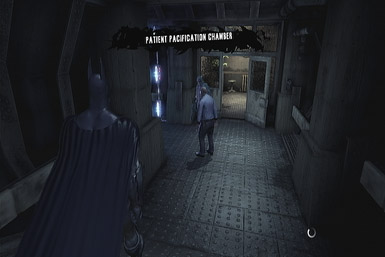
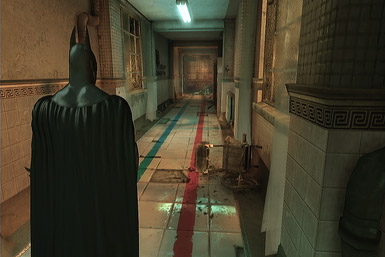
Intensive Treatment--Part 1
Rescue Commissioner Gordon
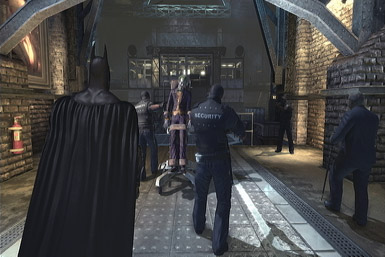
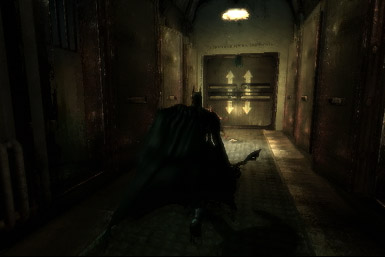
Well would you look at that; Batman's finally captured the Joker. Looks like your job is already done! Go ahead and escort the police as they drag the Joker through the asylum. This is a pretty lengthy sequence, so try and enjoy the stroll.

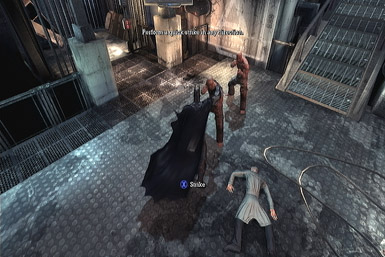
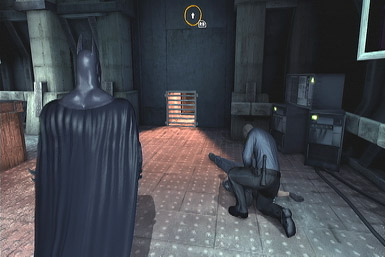
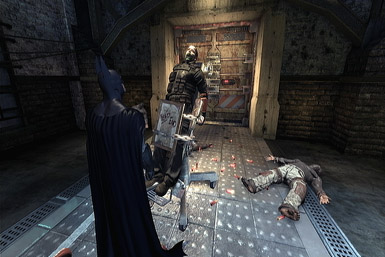
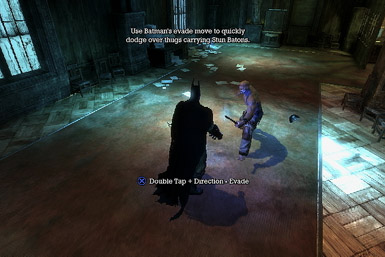
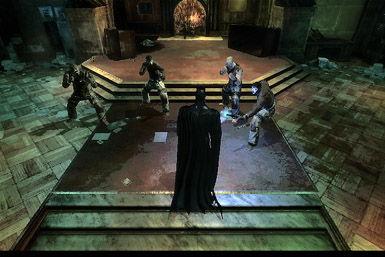
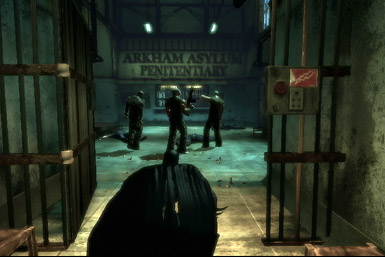
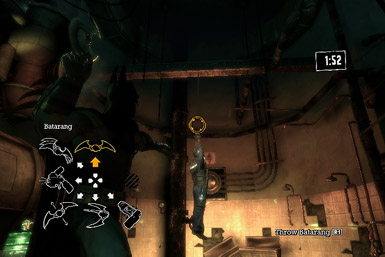
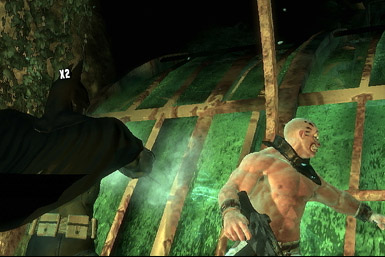
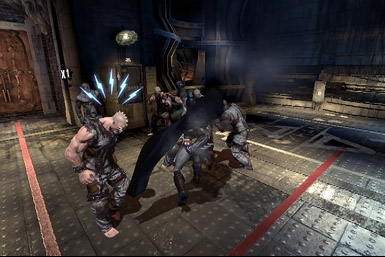
Uh-oh, the Joker's broken-free (what a surprise, huh?). After Batman breaks through the window after him, you'll have to take on a group of escaped inmates. This is a good chance to become acquainted with the battle system. Basic attacks can be performed with the "Strike" button; pressing it multiple times will create chain-attacks. This will be the move you use most often. Whenever an enemy's about to attack, a blue 'action' symbol will appear above their head--this indicates they're vulnerable to a 'counter.' To counter, simply tap the respective button anytime the blue symbol is displayed, this will knock your opponent back before they can attack, stunning them briefly. However, it doesn't inflict any damage itself. Finally, you can stun enemies by pressing the "Cape Stun" button when nearby; this will render them helpless for several seconds, which can be extremely useful when battling groups of baddies. Finally, after knocking an inmate to the ground, try to perform a "Ground Takedown" on them to finish them off before they get back up!

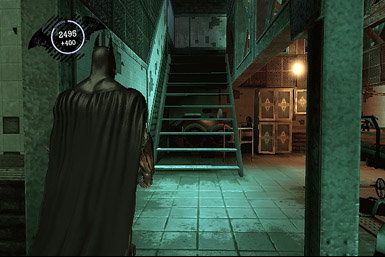
With the inmates defeated, the electrified gate at the top of the ramp will be disabled, allowing you to continue onward. Proceed down the hall until you run into a couple of inmates. Take them down and follow the split path to the right, through a door, to find a pair of cops. Continue into the room beyond and up the staircase.
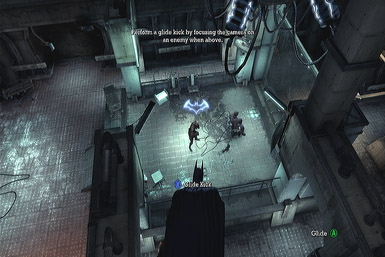
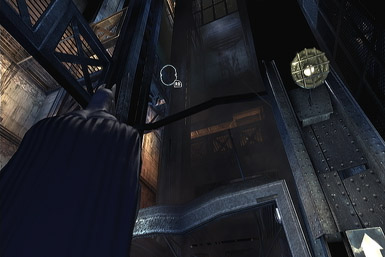
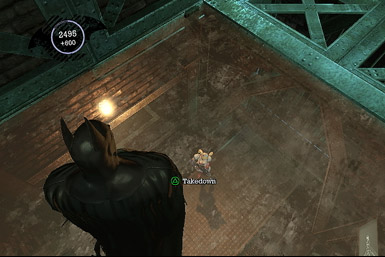
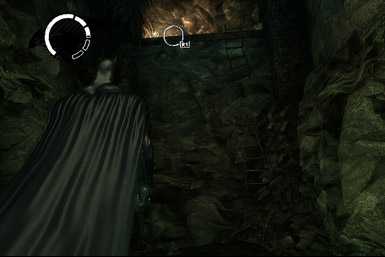
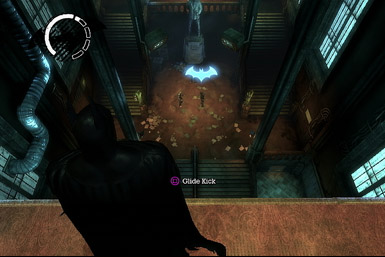
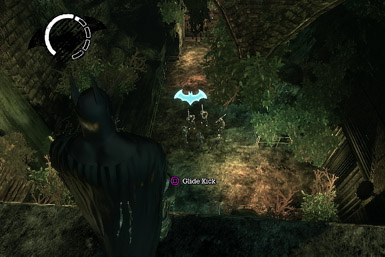
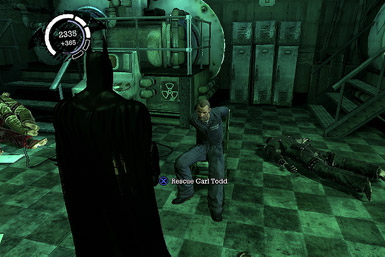
After climbing the stairs, you'll encounter two guards looking over the railing at their endangered buddy below. Activate 'detective mode' and look up to spot a pair of gargoyles you can grapple to. After grappling to either one, grapple to a second along the same wall. Now look down at the enemy below--there should be a 'bat' symbol above his head, indicating you can perform a 'gliding kick.' Simply tap the button shown on-screen to introduce his face to your foot, knocking him down. Now quickly perform a ground takedown before he can get back up.
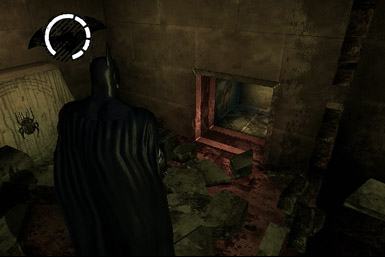
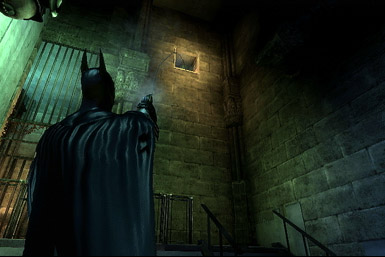
With the officer freed, approach the vent cover in the nearby wall (use detective mode if you have trouble finding it) and rip it off by tapping the button shown on-screen. Crawl inside and kick out the cover at the far end to escape.
Intensive Treatment--Part 2
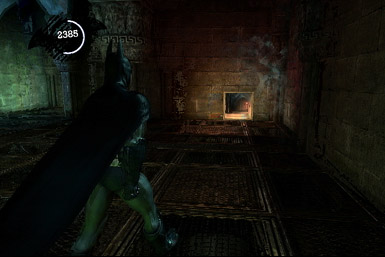
After dropping from the vent, proceed to the cop ahead, who's looking into a room filled with toxic gas. Look up when instructed to find a grapple point at the top of the vent directly above. Climb up, then bust into the nearby vent and out the other side.
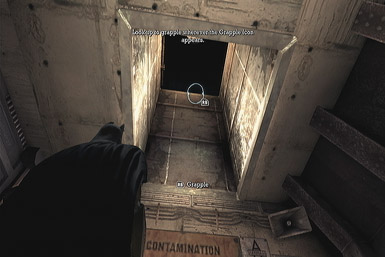
Rescue the guard clinging to the ledge, then jump the gap (simply by running toward it) to the next platform. Now grapple to a ledge above, just ahead, then glide to the far platform below (again, simply run off the platform toward it).
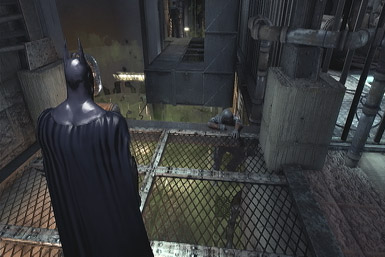
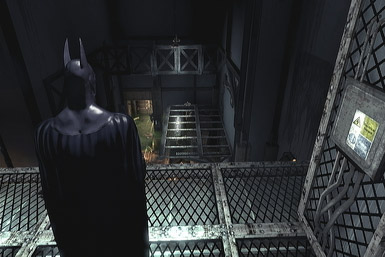
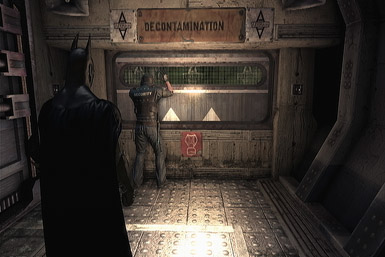
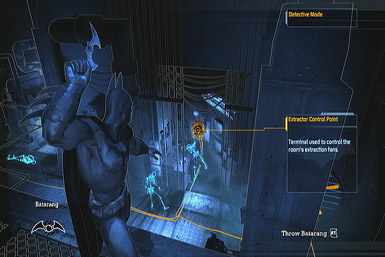
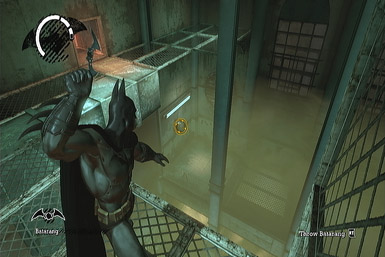
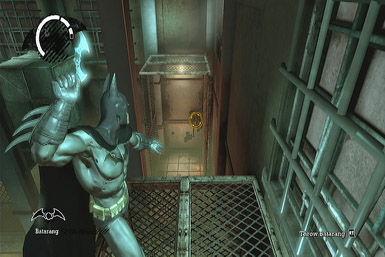
Upon landing, rescue the convict hanging from the ledge, then activate detective mode and look in the control room below to spot a control panel on the wall. Toss a Batarang at it to activate the fans, clearing the room of the toxic gas. Drop to the floor below and proceed through the door, just right of the control room, and follow the arrows on the floor to a far door, where a boss fight awaits.

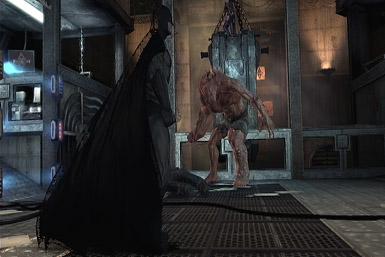
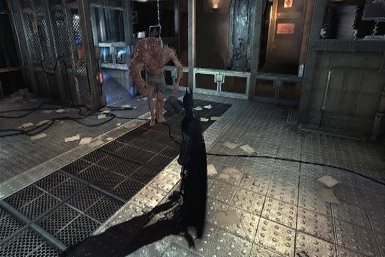
Alright, so the key to taking this guy down is…to do nothing at all! Seriously, just stay as far away as you can and use the evade move to dodge his attacks. After about a minute, he'll fall over dead. If only the rest of the game's bosses were so easy…With the boss defeated, talk to the guard inside the small control room to the left.
Intensive Treatment--Part 3
Locate and Analyze the Holding Cells for Evidence
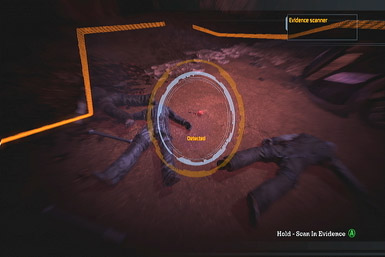
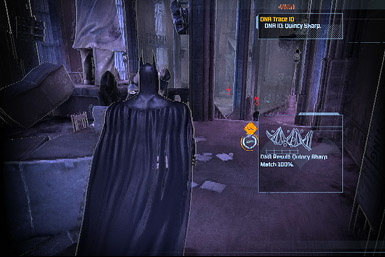
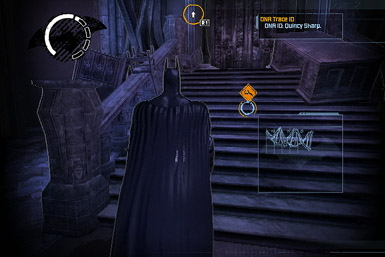
After the cutscene, head back to the Holding Cells by backtracking down the same hall you took to get here, making a left at the first junction, then a right at the second (use the map if you get lost). Take down the pair of thugs you encounter then continue through the nearby door into the Holding Cells area. Make a left into the room on the left and activate detective mode to scan the dropped whiskey bottle.
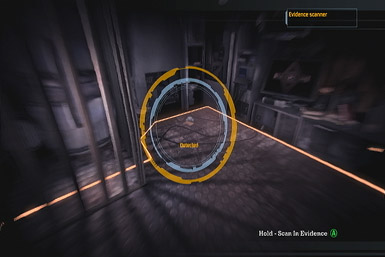
Track Gordon's Movements by Following Boles' Whiskey Trail
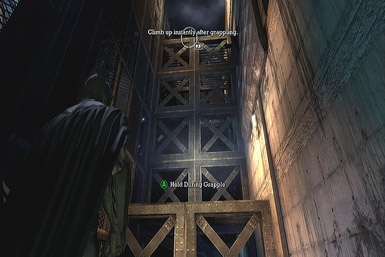
After scanning the bottle, use detective mode to follow the trail of whiskey, as marked by the on-screen markers. They'll lead you to the Secure Transit area, directly south of your present location. Once there, grapple up the elevator shaft then leap to the far wall, which you can shimmy across into a ventilation shaft. Follow it out the other side and grapple up a couple of ledges above and jump another gap.
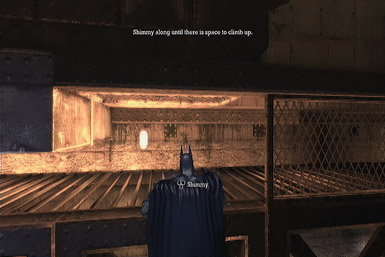
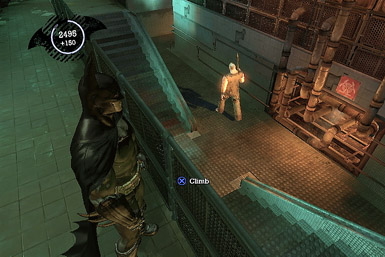
Climb up a couple more ledges, hop over a short wall, then crouch below a couple more to a wall you can shimmy along. Hop over the gate-thing and continue along until you reach a tall wall you can grapple up. Crouch into a ventilation shaft at the top and follow it to a drop-off, with a ledge you can grapple to on the other side. After grappling, take down the group of inmates, then enter the far ventilation shaft, which leads to Cell Block Transfer.

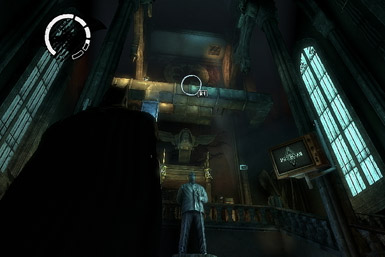
Inside the Cell Block Transfer room, use detective mode to spot several armed guards just around the corner. You don't want to tip them off to your presence, so you'll want to use stealth to get behind them instead. Grapple to a gargoyle directly overhead, then across a few more to cross the room. Drop from the last one, then crouch to sneak up behind the guards and perform a silent takedown.
With the guards taken care of, turn around and climb a staircase just right of the locked door--sneak up behind the guard talking to the Joker and take him down before entering the nearby vent.

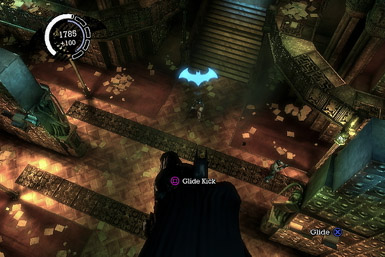
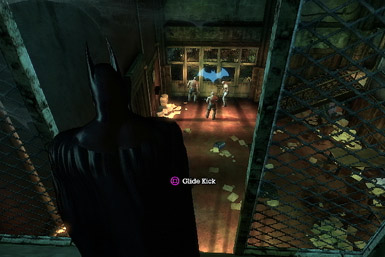
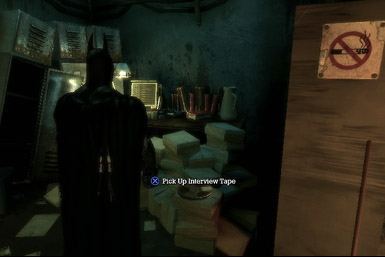
After exiting the other side, sneak up to the guard for a Silent Takedown. Now there are still two guards left, one of whom is roaming the catwalks above. Grapple to one of the gargoyles and use Detective Mode to find him--now either wait for him to expose himself and simply Glide Kick his face in, or drop down and sneak up behind him. Be careful, as the second guard may soon follow to check up on him--if not, you'll find him on the lower floor. Either way, grab the interview tape on a table in the central room and take finish off the baddies to trigger a cutscene.
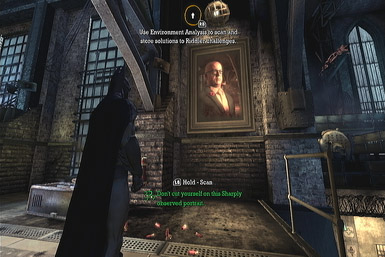
After the cutscene, three more guards will enter the room. Grapple to a gargoyle and wait for them to disperse so you can Glide Kick them from above, one at a time, without alerting the others. When done, grapple to the area they entered from (on the south side of the room) to find a corpse being used for one of the Riddler's riddles. To solve it, simply turn around and scan the painting along the left wall, just before the drop-off. Having solved the puzzle, meet-up with the friendly guard just ahead to learn of what's happened.
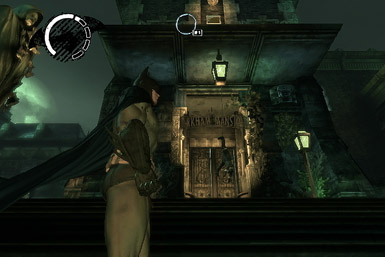
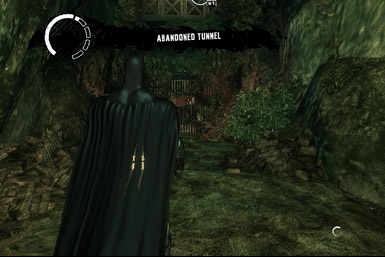
Escape from Intensive Treatment to the Island Surface
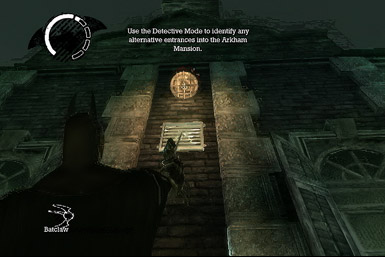
After speaking to the guard, continue down the stairs and follow the path, which eventually leads into a small room with a vent. Duck inside and follow it to escape outside. Once there, grapple up the cliff-wall to complete the objective. Now that you're overlooking much of the island, glide to the ground below and enter the Arkham Mansion ahead and speak to the guard inside, then exit back out.
Island Surface--Part 1
Protect the Batmobile
After exiting, you'll receive a call informing you that you need to protect the batmobile, which will be marked on your map. To get there, run down to the statue ahead and turn right, following the dirt path up to the door on ground-level (and not the one up the stairs).
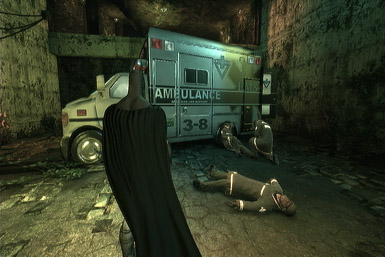
Once through, you'll spot an ambulance, with several armed guards waiting just on the other side. You'll want to avoid drawing their fire by grappling up to the ledge above them (try targeting it from the left side of the ambulance) and then dropping off the other side, behind them, for a couple of stealth takedowns, then proceed through the door.
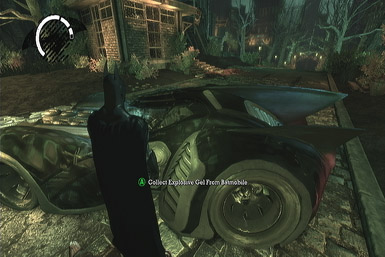
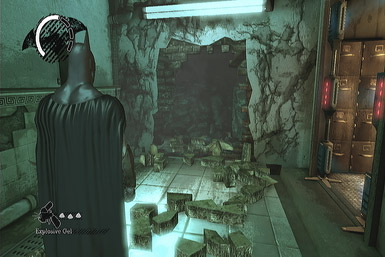
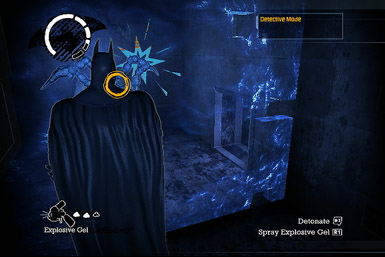
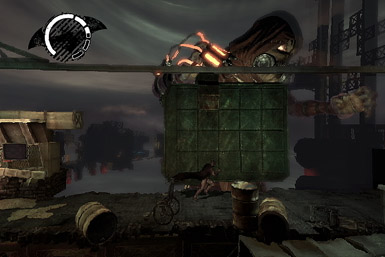
Back outside, you'll spot the batmobile just ahead, surrounded by some unruly inmates. Try grappling to the building just before them, on the right, allowing you to Glide Kick at least one of them in the face. Now make sure to disarm the enemies armed with melee weapons (by countering their attacks) before taking them down. After killing the group, approach the Batmobile and interact with it to obtain the Explosive Gel. This item allows you to plant and detonate charges to destroy weak walls or floors, creating entrances into otherwise inaccessible areas.

Island Surface--Part 2
Scan the Batmobile Crime Scene Area to Isolate a Forensic Trail
After grabbing the gel, activate detective mode and scan the pipe on the ground, near the front of the Batmobile, to complete this objective.
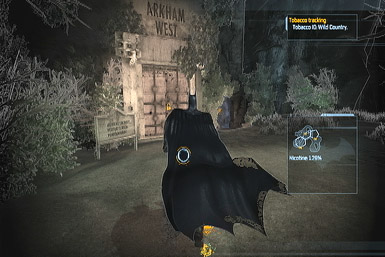
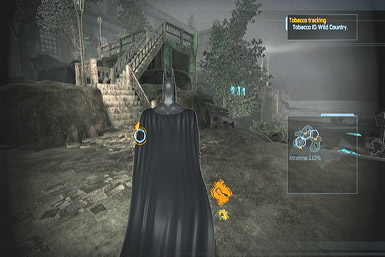
Locate Gordon by Tracking his Discarded Tobacco
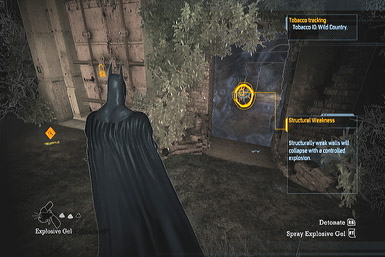
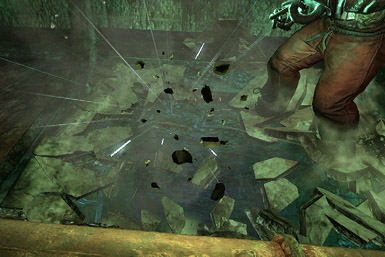
Use detective mode to follow the trail of tobacco leading from the nose of the Batmobile up to a locked door ahead. Thankfully, there's an alternate entrance on a weak wall just right of the locked door--detonate some gel there to reveal it.
Remain in detective mode and follow the path through the tunnel, back outside. Continue to stick to the path, following the tobacco down the ramp and up the staircase to a walkway which leads to a group of several inmates by the entrance of the Medical Facility. Take them down then proceed through the main entrance into the Medical Facility.
Find an Alternate Route Into the Medical Facility
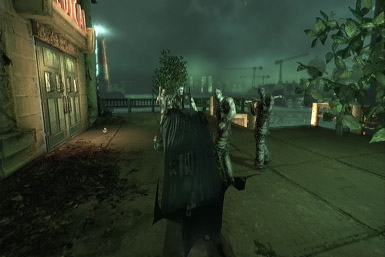
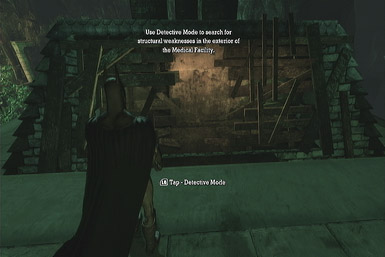
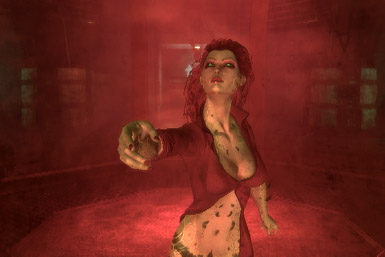
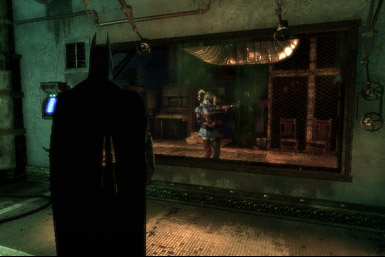
Inside you'll run into Harley Quinn, sheltered from attack by the electric fence. After she taunts you do find a way inside, you'll have to do just that! Exit back outside, then grapple to the roof of the facility. Now follow the roof to the left side and use detective mode to spot a weak wall amongst a damage portion of the building. Use your explosive gel to blow it open, revealing a hole you can drop into. Proceed through the door within.
Medical Facility--Part 1
Now that you're inside, clamber over a couple of gates to the far room, then bust into the vent on the right, which will drop you into a room with another vent you should trek through. It'll lead you to a split path, either way of which leads to one of several entrances into the large room. We suggest heading right for the quickest route, then grapple to one of the gargoyles overhead.

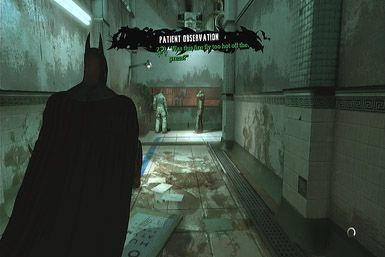
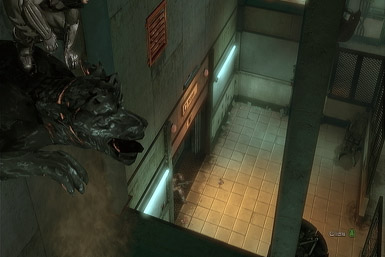
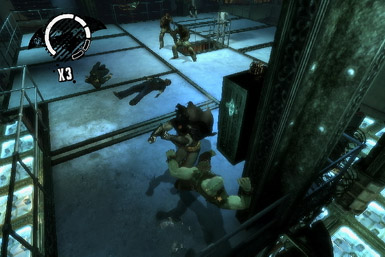
This room is chock-full of armed soldiers, so being stealthy is key. It's best to grapple from gargoyle to gargoyle until you have a good vantage point, then carefully watch the enemies below--as soon as one ventures away from the others (such as on the central walkway), glide down to him to and introduce his face to your foot with a glide kick, then promptly follow-up with a ground takedown. Once he's down, immediately grapple back to the gargoyles and continue to grapple from one to the next a few times to lose the attention of the remaining guards. Now repeat this tactic for the rest of them. That is, glide-kick one when he's isolated, perform a ground takedown, then return to the gargoyles and wait for your next victim. If you have trouble finding the guards, use Detective Mode to make them easily visible. With the room cleared, meet up with the doctors by the Morgue on the upper level.
Medical Facility--Part 2
Locate and Rescue the Three Doctors
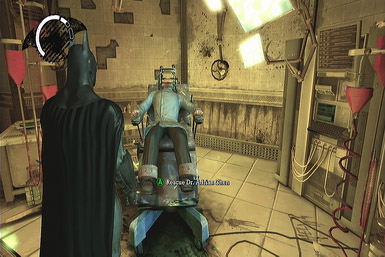
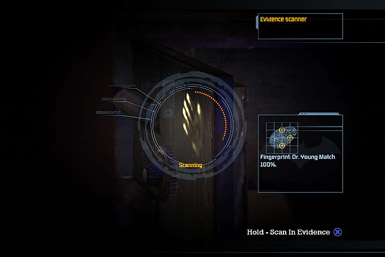
Doctor Young
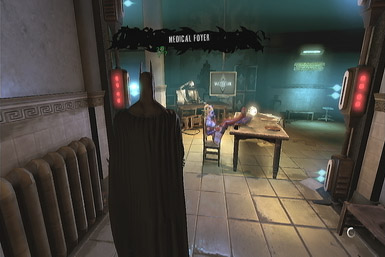
The three doctors locations are all marked on your map. You can meet-up with them in any order, though for the purpose of the walkthrough, we suggest heading for Dr. Young first. To get started, drop to the bottom floor and head right, through the door. Now follow the yellow line on the ground to the X-Ray room, where you'll hear some commotion inside the central room. In order to save Dr. Young, you'll have to plant two gel charges and detonate them at the same time. Use Detective mode to find the first weak wall on the front side, then run around to the back to find the second inside a small alcove. With both gels planted, detonate them to free the Doctor--just don't take too long, otherwise they'll kill Dr. Young before you can save her.

Doctor Chen
Exit the room where you freed Young and follow the hall to a red stripe on the floor, which leads to Dr. Chen. Inside, you'll have to battle some dudes who'll drop from the floor above. With the room cleared, interact with Dr. Chen to free him.
Doctor Kellerman
With Chen freed, head back through the hall and follow the blue painted stripe to locate the final Doctor. After going through a door, you'll spot the Doctor trapped within a small room, being guarded by two inmates. Kill them, then grapple onto the high pipe, left of the window, where you'll find a ventilation shaft you can bust into. Follow it into a large, poison-filled room.
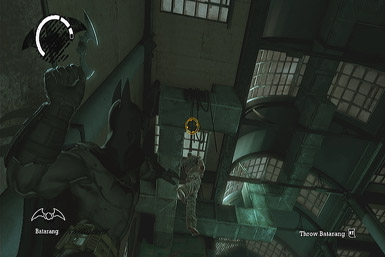
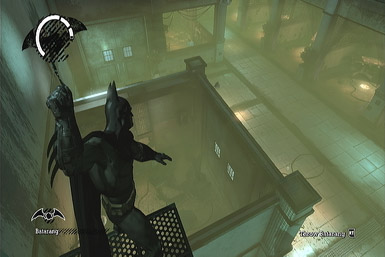
You'll have to ventilate the area by activating a couple of fans, similar to how you did before. For the first one, follow the walkway to the right and use Detective mode to find a control panel a few meters below the vent you emerged from--toss a Batarang at it to activate it, clearing the poisonous air from the upper levels. Now head to the opposite side of the walkway and glide from it to a platform ahead, then jump across a couple more. From the last platform, turn around to face the one you just leapt from to spot another control panel just below--toss a Batarang at it too to clear some more of the poisonous air.
With the second fan activated, glide to the low platform ahead (the one with the ladder). Now if you haven't already, use a Batarang on the hanging inmate above to cause him to crash through the roof of the room below, allowing you to toss another Batarang at the final control panel inside. This will clear the room of poison once and for all, freeing Doctor Kellerman. Before leaving, check the office the Doctor escaped from for an Interview Tape.
Return to the Doctors in the Sanatorium and Pick Up Gordon's Tobacco Trail
With the final Doctor freed, you'll have to return to the ones back in the Sanatorium. To get there, grapple back up to vent you used to enter the room, then follow the red and blue painted stripes to the door on the right. After the cutscene, Batman will automatically grapple to a gargoyle in preparation of three approaching enemies. Simply wait for them to walk by, then drop down and enter the lift they just exited from. However, if you really want to take them down, simply use the glide-kick and grappling to a gargoyle-to-a-gargoyle strategy that we've outlined before.
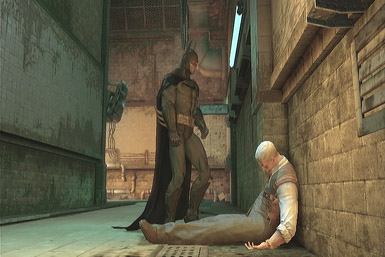
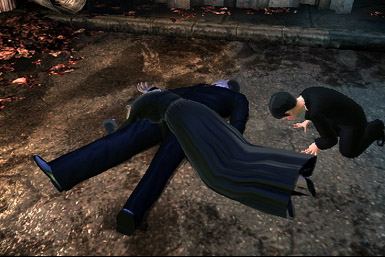
After riding the elevator and watching the cutscene, detonate some explosive gel on the weak wall, left of the window, to reveal a hidden tunnel. Follow it to spot Commissioner Gordon being dragged away--chase after him by busting into the ventilation shaft on the left and approaching his slain body after exiting.
Medical Facility--Part 3
Hunt Down Commissioner Gordon's Killer
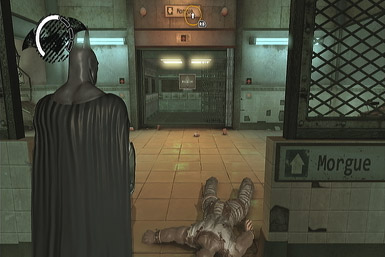
Hmmm, perhaps not everything is at it seems. Well, no matter for now--follow the hall left of Gordon into the Morgue. Once inside, turn around and exit back out…into the Morgue? Weird…anyway, open the three body bags in the room's center to see some more creepy stuff, then exit out the way you came in, which now leads outside.
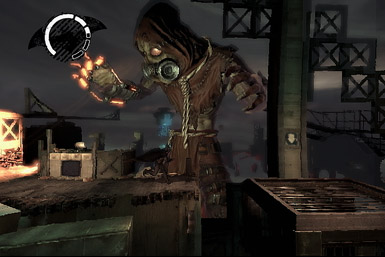
The towering scarecrow is a rather frightening sight, but you need not worry about him so long as you can evade his gaze, as shown via the cone of light shining from his eyes. Because the scarecrow rotates consistently in a circle, you simply have to duck behind a wall or some other object to avoid being seen as he glances your way. As soon as he's passed by, quickly head right, jumping and climbing when necessary, and hide again before he spins toward you. You'll soon reach a seemingly impassable wall, but using Detective mode reveals otherwise. Like before, wait for Scarecrow to turn away, then run up and plant a gel charge on it. Quickly return to the wall to hide where you can safely detonate it, but this has the side-effect of drawing the Scarecrow's attention. Wait for him to peer around the left side of the wall you're hiding behind, then dash onward to the spotlight, which can be used to take him down.


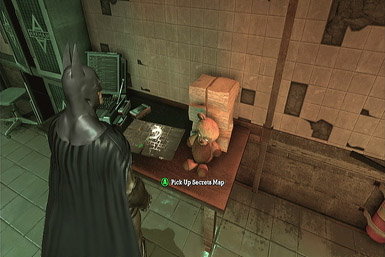
After waking from Batman's delusion, exit the Morgue through the door and follow the arrows on the ground up to a locked door--get ready, as three inmates are about to storm through. Focus on disarming them first before going in for the kills. Continue through the door and follow the painted arrows on the ground into the Experimental Chamber. When there, grab the Secrets Map from the table on the left (by the teddy bear) then bust through the vent on the right. Follow it down a drop-off, through a second vent, which leads into a large room full of armed guards.

Upon exiting the vent, sneak up on the nearby guard for a silent takedown. Now there are three more guards patrolling the room--you can take down two more easily by following the walkway in both directions to get behind one each way. Following that, you'll find the final guard likely walking around on the lower level.

With the first three guards down, it's time to go for Harley Quinn herself and save Gordon. Climb the staircase in the back of the room, then grapple to the opening just above the electrified doorway. Once there, walk over the glass floor above Harley Quinn and perform a "Takedown" when instructed to, well, take her down!
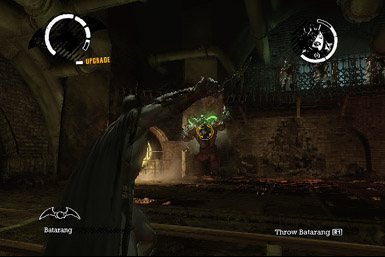
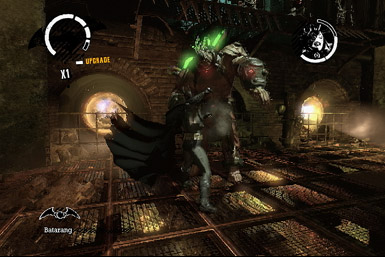
After dropping in on Harley Quinn, you'll have to take on Bane who's suffering from a bad case of roid rage. Although the battle begins with just you and Bane, he'll soon be joined by a few henchmen. The key to defeating him is to use the Quick Batarang (L1 or Left-Bumper) while he's charging toward you, before rolling to either side to evade his attack--this will temporarily stun him (as indicated by him holding his arm up to his face) giving you the chance to run up for a few quick melee attacks when he stops at the wall. After landing a solid two punches, get out of there before he recovers and counters. Repeating this technique will put you on the quick-path to defeating him, as after a few melee attacks, Batman will automatically clamber onto Bane and begin dismantling his backpack--do this three times in total to finish Bane off.


Of course, it's easier said than done, and Bane has a few tricks up his sleeve. First off, as mentioned, he'll charge toward you often--a simple roll to either side will put you out of harm's way (you can tell he's about to charge when he assumes a runner's starting-block stance). However, Bane will also attempt to throw debris at you that he rips from the wall--again, roll just before he tosses it your way to evade. He'll also periodically smash the ground, causing a shockwave--as you likely guessed, roll just after he performs the attack. Finally, as the battle wages on, Bane will be joined by several inmates. It's best to focus on them first, before returning to Bane. During this portion, stay as far away from Bane as you can, that way you can attack his henchmen, while giving you enough time to watch and evade Bane's attacks. It's important to perform a ground-takedown as soon as you've knocked down any of the henchmen to prevent them from getting back up. Oh, and if you're lucky, Bane may even help with the process as he'll bowl over anyone he touches during his charge attack, making for an ideal time to finish them off.
Batcave--Part 1
Analyze Dr. Young's Research in the Batcave
Locate Cave Entrance to Dead Man's Point in Arkham North
With Bane defeated, head straight from the dock, then up the wooden bridge on the left, then continue up to the corridor leading to Arkham North on the right. Just be ready to face a few enemies along the way.
Once inside the corridor, follow it through a normal-sized door on the left to proceed into Arkham North. As you exit the cave, follow the building on the right around the corner and grapple over the wall, just beware that four baddies will try and stop you from doing so.
Follow the Cave to Dead Man's Point
Now that you're over the wall, continue through the cave dead-ahead, grappling when necessary to climb the high-walls. You'll soon emerge outside, where Batman will automatically dive toward his well-hidden batcave.
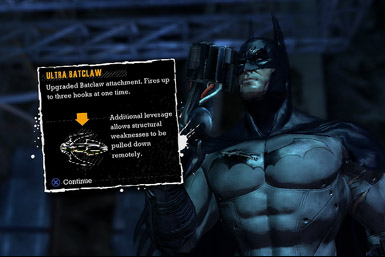
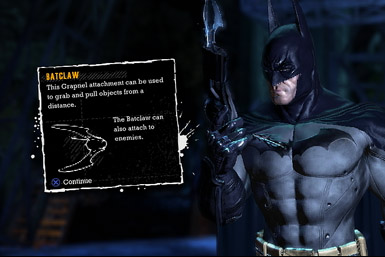
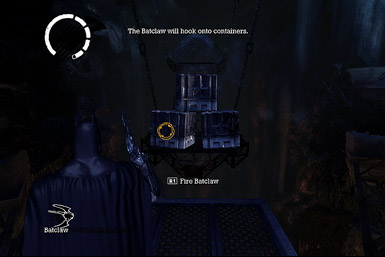
Proceed through the batcave up to the main computer terminal, where you'll obtain the Batclaw item, which allows you to pull distant items or enemies toward you.
Locate Dr. Young
Return to Surface Via Sewer System
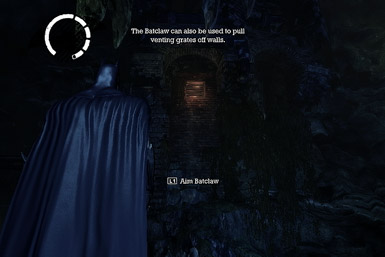
Alright, it's time to give the Batclaw a whirl. Head down the stairs to spot some boxes across the gap to the right. Select the Batclaw and use it to pull the blocks off the walkway, allowing you to jump across. Follow the walkway into a cave until you come to a dead-end. Look up and use your grapple to pull rip off the venting grate, allowing you to grapple inside. This leads to the sewers.
Sewers--Part 1
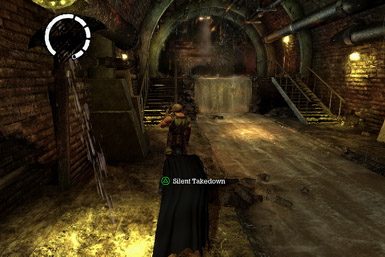
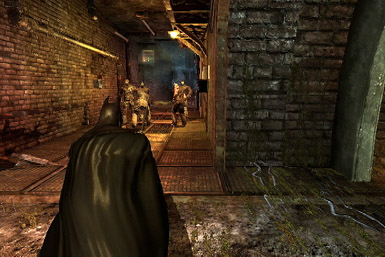
Follow the vent to the Old Sewer, and immediately Silent Takedown a distracted guard to the left. Afterward, look for a Chronicle you can scan, just to the right of where you dropped in. Now venture further up the sewer to find a group of baddies--now's a good time to try using the Batclaw on an opponent. From a distance, fire it at them by tapping the Left-Trigger twice, pulling them toward you and then to the ground, allowing you to finish them off with ease.
At the split-path just ahead, look for an Interview Tape on the ground (just below the vent containing the trophy) and head down the corridor on the left and through the door, leading to the Main Sewer Junction.
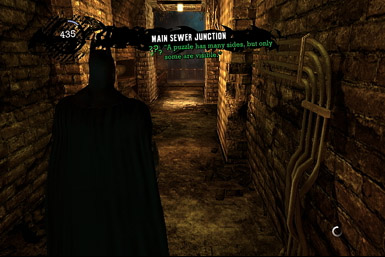
We hope you like platforming, as you'll be doing a lot of it in the Main Sewer Junction. Start off by heading right and climbing up the ledge of the structure and then leap to the platform out the other side.

Now jump the gap on the right, then head around the corner and leap to the bridge ahead, then to the platform beyond.

Clamber up the fallen support beam then leap back to the central support at the top. Climb the ledge within, then leap to the water duct ahead.
From the water duct, climb a second fallen support column, then leap to the nearby walkway and continue into the corridor on the left and through the door at the end.

Once through the door, grab the Interview Tape from the boxes on the left, then proceed up the staircase and blow your way through a weak wall, visible in Detective Mode. Jump the gap and go through the door, leading back outside.
Arkham Mansion--Part 1
Locate a Route into the Arkham Mansion
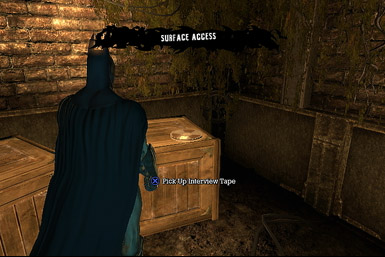
Before you go running around, you should know that the enemy has begun to deploy snipers to take you down. The first two of which are holed up in each of the nearby guard towers, so at least you know where to find them. As such, your primary objective should be to target them first, which you can easily do by grappling to each tower and sneaking up behind them for a Silent Takedown. Oh, and make sure to grab the Interview Tape from the table within the closest tower. You can also find a Secrets Map inside left security building (near the entrance to the Intensive Treatment center)--get inside by grappling to the roof and detonating the weak section.

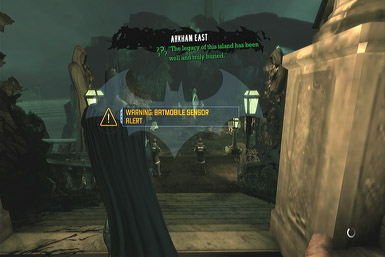
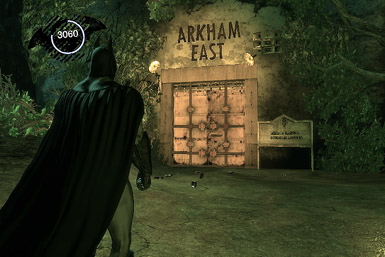
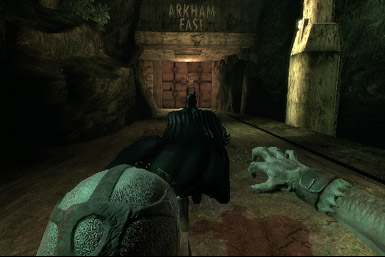
Once you've cleaned out the area, head through the door leading to Arkham East (found, fittingly enough, on the eastern side of the area). Inside you'll have to take on a small gang of enemies before exiting out the other side into Arkham East proper. Be careful, as Arkham Mansion is guarded by four snipers: two in the nearby towers, and two more just above the entrance. Like before, grapple up to the guard towers (head for the one on the left first) and use the Silent Takedown on both snipers. Also, be sure to check inside the second tower for an Interview Tape. Now you still have the two above the entrance to deal with. We suggest crossing the northern end of the field to evade their sight, then hug the mansion's wall to pass underneath them. Now grapple to the high-ledge, just right of their location, then glide-kick the nearest one in the face. While he's stunned, focus on taking down the other sniper, before returning your attention to the one already on the ground.
With the snipers dealt with, you now just after the small task of finding a way into the mansion (the main entrance is blocked by an electrified gate inside). To get around this, grapple to the ledge just above the main entrance to find a ventilation grate in the wall; pull it off with the Batclaw then grapple inside and go through the door.
Arkham Mansion--Part 2
Search Arkham Mansion to Find Dr. Young's Research Notes Before Joker
Inside, you'll spot three enemies just below. It's best to glide-kick the armed one to knock him down, then focus on the other two before he gets back up. Once clear, you'll find that the main door is locked--instead, grapple on top of the ventilation piped overhead, then use the Batclaw to rip off the ventilation grate just above before grappling inside.
There, use detective mode to spot a weak section of wall that can be detoated, revailing a Chronicle that can be scanned, as well as another vent that can be entered.
You'll drop onto a ledge overlooking numerous baddies below. This is the most amount of thugs you've fought yet, so make liberal use of your Stun Cape, giving you time to perform the ground-takedown when necessary. Once clear, head up the stairs, bust into the small office on the right via the vent for an Interview Tape, then proceed through the large door on the left, leading into the West Wing Corridor.


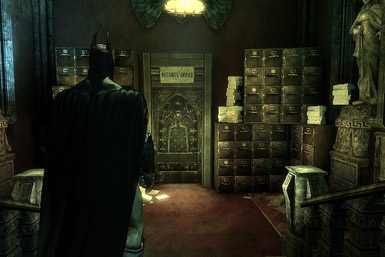
Take down the guard ahead to free the cops then continue through the far door into the Records room.
Two guards are being held hostage by a large group of baddies, all of whom are armed to the teeth. As such, stealth is going to be essential. Luckily, a single guard lurks on the raised walkway, to the left. Grapple up there and stealthily take him down. This will soon draw the attention of the others (thanks to the Joker's monitoring of the henchmen's vitals via their dog collars), so hightail it to a gargoyle to remain out of sight. Now you'll have to try and pick off the remaining enemies one-by-one, so that they don't open fire on you. The best way to do this is to use Detective Mode to easily keep an eye on everyone in the room, then swooping in on anyone who ventures out-of-sight of the rest of the group. For instance, if everyone but one drops to the lower level, target the single foe remaining on the walkway. The key is to be patient, and don't forget to use some of your advanced weaponry if you have it, such as the Remote Control Batarang or Auto Proximity Detonation, both of which are handy for stunning opponents from afar. Once you've cleared the room, proceed through the door on the northern side.

Arkham Mansion--Part 3
Investigate Dr. Young's Office
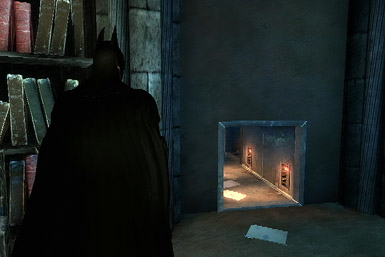
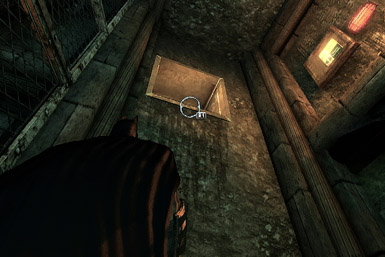
Proceed through the Northern Corridor, up the stairs, then into the vent by the locked door. It leads into a cell-block; look for a vent high-up on the western wall that you can grapple inside. It leads to a grate-covered floor, where you'll find another vent on the left that can be entered.
The vent exits into a room overlooking three inmates below--dive bomb the center one and perform a quick ground-takedown before taking on the other two. Afterward, head up the stairs and use the Batclaw to rip open a vent in the left wall and grapple inside. Kick out the vent covering the other side to drop into Dr. Young's office.

Isolate a Forensic Trail for Dr. Young
Use Detective Mode to scan the safe embedded in the northern wall to isolate the forensic trial.

Arkham Mansion--Part 4
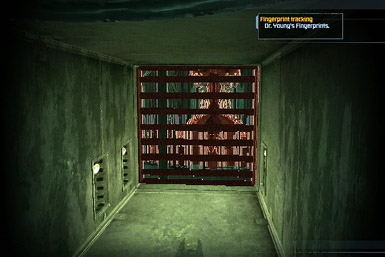
Track Dr. Young's Fingerprints
Grapple back into the vent and follow it back to the previous room. Battle the three thugs waiting for you, then proceed into the room they emerged from, grab the Interview Tape from the table, then continue through the door and down the stairs. Continue to use detective mode as you follow the fingerprints down the stairs on the left and through the door, into the Main Hall.
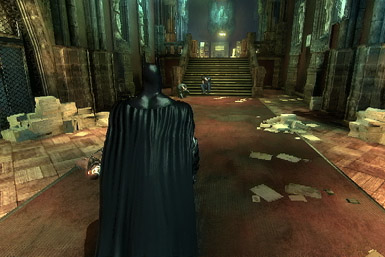
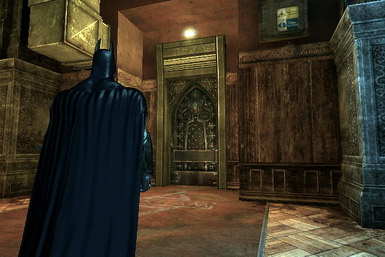
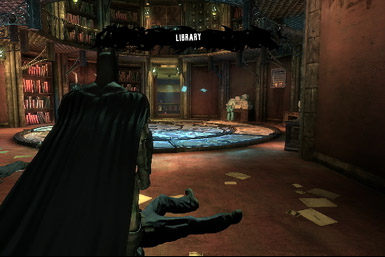
Inside the main hall, head right down the stairs then through the door on the left, into the South Corridor. Continue through the hall, take down a couple of guys, then grapple up to the pipes on the left and blow your way through the weak wall for a Chronicle scan, before returning to the ground-floor and proceeding through the far door, leading to the Library.
Take down the enemies inside the library, then grapple up to the top-floor balcony directly above and look for a vent you can enter.
Arkham Mansion--Part 5
Rescue the Hostages
About now, the Joker will come on the PA and warn that you only have a minute-and-a-half before be blows a couple of hostages away, but it's an empty threat, so don't sweat the timer. Anyway, the event will drop you off in a small room, look for a second vent you can enter embedded in same the wall, but on the opposite half of the room as the one you just came from. It leads to a wall you can grapple up, into another vent, which will lead you to the top floor of the library.
Now that you're on the top floor of the library, toss a Batarang at the cable holding the chandelier to cause it to drop through the 2nd level floor, allowing you to follow it down to save the hostages by interacting with the present. Once they're done yapping, use Detective mode and inspect the nearby bookcase on the left to find Dr. Young's research notes.
Arkham Mansion--Part 6
Rescue Dr. Young from Zsasz in the Warden's Office
Exit the library via the second-floor door you entered through. As you trek up the hall, small odd things will start to occur…like rain? Whatever, just proceed as far as you can up the hall until you hit a dead-end, then turn around and walk back until you're transported back in time to one of Bruce's memories. Soon thereafter, you'll regain control of Batman himself--head to the far door at the end of the alley. Now jump the gap and head up the staircase to find…the Scarecrow again?
This time, the Scarecrow shifts his gaze side-to-side, so you'll want to push forward only when he's looking away. Before long, you'll come across a couple of suspended boxes that you'll have to pull to the ground using the Batclaw in order to use them as hiding spots. A bit further up, the Scarecrow will smash through a wall and spawn skeletons from his gaze. Stay away from the light and let the skeletons come to you before engaging them. Once they're down, the Scarecrow will back off, allowing you to proceed forth. The rest of the level is self-explanatory: crouch behind low walls, sidle around the sides of the building only when the Scarecrow is looking away, and use the spotlight at the end to defeat him.
When all is said and done, you'll find yourself enclosed within a small room. To escape, target the rope suspending the bell with a Batarang to cut it loose, allowing you to hop down the shaft. Now proceed through the door, likely to your left (on the eastern side), leading into the East Wing Corridor. Around the corner, you'll find a baddie armed with a stun rod. You'll have to attack these guys from behind (to avoid being stunned) by rolling over them. Once he's down, proceed through the door into Warden's office.
Uh-oh, the Doctor's in trouble, and if Bain sees you, he'll kill her! To save her, crouch-walk up to the corner and take cover by the doorway. Now arm your Batarang and toss it his way once he moves his head so its visible (and the lock-on symbol appears). Unfortunately, Batman will be knocked out cold by an explosion soon after. After coming to, you'll be surrounded by four enemies, one armed with a stun rod--you know what to do.

Arkham Mansion--Part 7
Scan the Warden's Office to Isolate a Forensic Trail
Scan the object on the ground to obtain his DNA trail.

Locate the Warden Using His DNA Trail
Use detective mode to follow the DNA trail back outside.
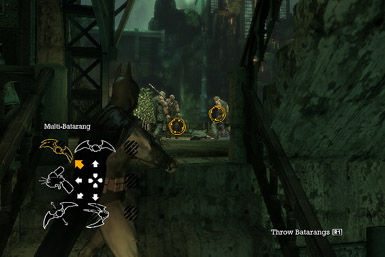
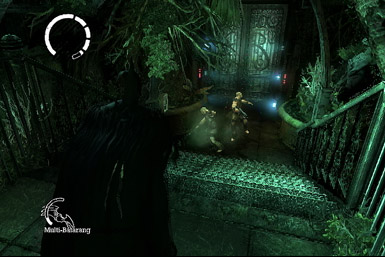
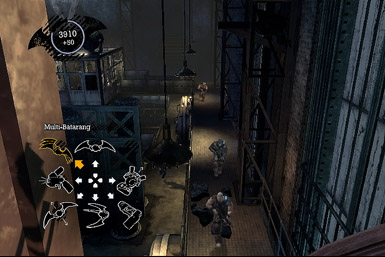
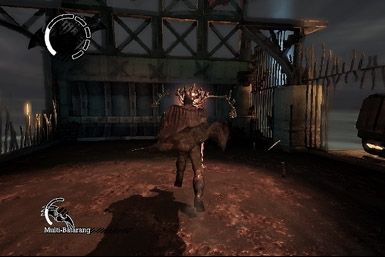
Proceed through the abandoned tunnel by grappling to the ledges above the closed gates until you're overlooking a group of baddies below. Two of them are armed, making this an ideal time to use you Multi-Batarang if you've unlocked it. You should be able to target the two armed inmates (they're the ones closest to you) and knock them out, giving you a chance to drop down and take them out before turning your attention to the remaining enemies. Once clear, exit through the large door into Arkham West.
Back in Arkham West, you'll find the DNA trail leads up a staircase to the west to a door guarded by several inmates. However, before venturing up there, you should grapple to the nearby sniper tower to take down the gunner there first. After clearing the area, proceed through the door leading into the Penitentiary.
Penitentiary Mansion--Part 1
Inside the Penitentiary, check the table by the entrance for an Interview Tape then take down the trio of inmates ahead (sneak up behind them for at least one stealth takedown). Now use detective mode to follow the DNA trail up to a door that will open.
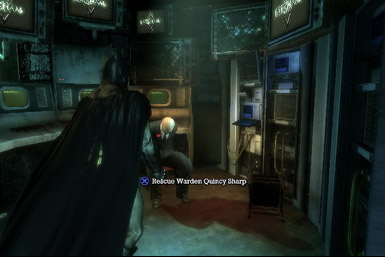
Inside the Main Cell Block, continue to follow the DNA trail down a hall in the back, through another door, leading to the Green Mile. After speaking with Poison Ivy, proceed through the door in the back into the Security Control Room. Climb the central tower to find Warden and free him.
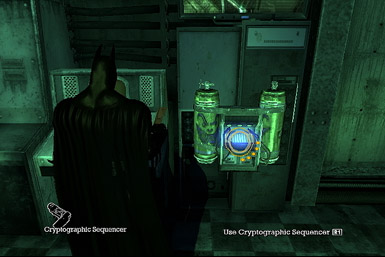
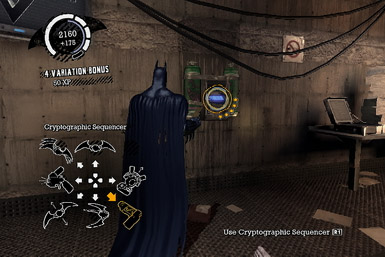
Gordon will provide you with the Cryptographic Sequencer, allowing you to bypass those darn electric fences finally. Try it out on the nearby control box, at the top of the stairs from the electric fence blocking your exit. After activating the Sequencer, use the control sticks to tune to the proper frequency, disabling the fence. Now head back to the Main Cell Block--a crazed inmate will jump you before you get there, but they're easy to deal with. Just mash the button shown on-screen then use a ground-takedown.

Penitentiary Mansion--Part 2
Apprehend Harley Quinn
Upon reentering the Main Cell Block, Harley Quinn will send electricity coursing through the ground. Get off the floor--fast--by grappling to the platform overhead. Take down Quinn's thugs (make sure to focus on the one with the gun first) to send her fleeing.

Proceed down the connected hallway and turn left first to find an Interview Tape then use the Sequencer on the nearby security box to deactivate the electrified floor. Now return to the platform and drop to the lower level and continue through the door along the western wall, leading to another cell-block, then proceed up the staircase on the opposite side into the Guard Room.
Inside the Guard Room, proceed through the door to find Harley Quinn torturing a couple of cops. Both have been strung up a pool of electrified water, and it's up to you to save them. Use the Sequencer on the control panel just left of Harley Quinn's window to cut off the electricity in the first of two pools of water. Now you have to hurry and deactive a second Security Panel in the pool of water next to the Quinn's control room, before she permanently reactivates the electricity in the third pool, beneath the second cop. With both panels disabled, cut both cops loose with a quick Batarang to their respective ropes. Now you only have 30 seconds to escape the room before the bomb goes off, so again use the Sequencer on the Security Panel by the door you entered, then head on through to safety!
After fleeing the room, venture into the nearby control room (where Quinn was) to find an Interview Tape, then exit back into the Main Cell Block, where Quinn will unlock a door on the opposite side you can continue through, leading to Controlled Access.
You'll find that the only exit out of the Control Room is blocked, but worry not, for you can rip the vent grate off overhead revealing a hole you can grapple through. Just be ready to take down a goon who drops down. After pulling yourself up, grab the Interview Tape from the table then use the Sequencer on the nearby security panel to disable the electric fence below, allowing you into Extreme Incarceration, where you'll be entered into a difficult brawl.

So here's the deal: There are three main platforms, and they'll alternatively become electrified in a counter-clockwise one at a time. You'll want to avoid the electrified platform at all times unless you like having your health dwindled away. All the while, you'll be battling large groups of henchmen, many of whom are equipped with bats and stun rods. Anyway, as mentioned, your primary concern should be to avoid being electrocuted, and the best way to do this is to head to each platform just after it stops being electrified--this should give you a good 20-30 seconds before you'll have to move again. In addition, if you know your platform's about to become electrified, try keeping your opponents there by stunning them (such as with your cape, or Batarangs), causing them to be taken out by the electricity. As for the enemies themselves, make liberal use of your stun cape, allowing you to perform ground takedowns unfettered, As the battle wages on, more guards will come armed--it's best to try and take on the ones equipped with stun rods first (remember to roll over them when they flash red, then attack from behind), otherwise you'll find yourself taking damage when you try to attack them as part of a group.
Botanical Gardens--Part 1
Pick Up Harley Quinn's Fingerprint Trail in the Botanical Gardens
With Quinn taken care of, proceed through any of the three doors on the north side to find a Secrets Map, then exit the room via the door you entered through. Now follow your map to exit into Arkham West, then from there, head through the abandoned tunnel the Botanical Gardens in Arkham East.
Track Harley Quinn's Movements to Locate Titan Production Facility
Once inside the Botanical Gardens, you'll find two armed guards by a locked door. Take them down then use the Sequencer on the security panel to deactivate the electric fence, allowing you to proceed through the door into the Botanical Glasshouse.
The Botanical Glasshouse is home to six armed guards, but thankfully the room in lined with gargoyles which helps immensely. Go ahead and grapple to one of them and plan your attack. You have several options, dependent on which abilities you've unlocked. If you're patient, you can simply wait for the guards to spread out, then take them down one-by-one with a glide kick + ground takedown combo whenever you find a guard all by himself. Now keep in mind that the other guards will be alerted to your presence shortly after each kill, so immediately return to a gargoyle afterward for protection. Speaking of which, if you've unlocked the Inverted Takedown, you may want to hang from the gargoyle just above your kill, ready to grab an enemy as they pass by underneath. Once you've cleared the room, proceed through the northern door into the Flood Corridor, where you'll find the Joker.

Botanical Gardens--Part 2
Find and Shut Down the Generator Powering the Flooded Corridor
After the Joker departs, you'll find the water has been electrified and you'll have to cut the power at the source. Use your Detective Mode and follow the cables back into the previous room, then through the eastern door, through the Statue Corridor, into the Generator Room.

Inside the Generator Room, you'll find a group of baddies, one of whom's armed with a stun rod. Focus on him first, then go for the remainders. Afterward, grab the Interview Tape from the console on the left, then use the Sequencer on the Control Panel along the left wall--you'll have to find the proper frequency three times to deactivate it. This will shut down the generator allowing you cross through the Flooded Corridor, so head back there!
Back in the Flood Corridor? Good--cross the room and enter the vent on the far side. After exiting, blow your way through a weak wall and continue through the door into the Abandoned Chamber.

The Abandoned Chamber can be confused, so follow these directions: From the entrance, head left, jump the gap, then proceed down the staircase (into the central structure), then up another set. Jump the gap and proceed through the door. Climb the ledges within, then grapple into the vent overhead.

Take down the pair of guards upon exiting the vent, then talk to Jordan Fraser, who's nearby.


Botanical Gardens--Part 3
Rescue the Orderlies Held Hostage in the Aviary
After speaking to Jordan, head down the stairs, check the bench on the left for an Interview Tape then proceed through the door into the Aviary.
Take Down the Henchmen Leader
Alright, so a couple of hostages are suspended in a pair of hanging cages, and they're guarded by four henchmen wandering around, each equipped with one of those security collars. As such, you'll have to take down the main operator within the control room without harming or alerting the others. To do so, start off by crouch-walking up to a vent on the left--take it slowly and make sure the guard at the end of the path turns away before entering. Grapple up the wall within to a vent at the top. You'll exit onto a ledge--glide to a pathway along the left wall, just above one of the guards. Now grapple up another ledge, then drop to the ground ahead--you're almost there! There's a guard on the walkway just overhead--grapple onto the railing and sidle along it to the right, close to the ladder leading into the contorl room. Now wait for the guard to turn around before climbing up, and take down the operator
With the Operator down, you simply have to kill the remaining three henchmen to free the hostages. Simply follow the path back and use Stealth Takedowns as you encounter each of the three guards (just make sure to wait for the first to turn away before approaching). After freeing the hostages, check a nearby bench for an Interview Tape.
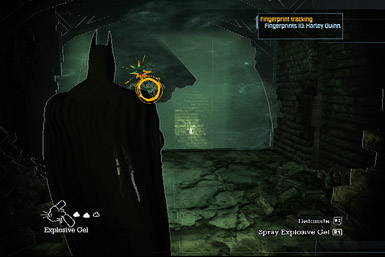
Now you have to look for the lab's hidden entrance. Use Detective Mode to follow Quinn's fingerprint trail up the first ledge (directly opposite the the freed hostage's location) to find a hidden panel that can be ripped off revealing a console. Use the Sequencer on it to discover a hidden doorway, leading into the Production Facility.

Inside the Production Facility, you'll have to take on two of the Joker's roided-up brutes. Although you'll initially battle them like Bane before--that is, quick-toss a Batarang at them while they charge at you, then dodge out of the way and punch them when they hit the wall--there's a new technique you can use. After a few punches, they'll fall over stunned--run up to them and press the attack button again to climb up on their back and ride them around! Simply steer him toward the other one, where he'll begin to pummel his friend--sweet! Just keep alternating between the two to inflict an even amount of damage.3

Botanical Gardens--Part 4
Locate Poison Ivy Using Her Pheromone Trail
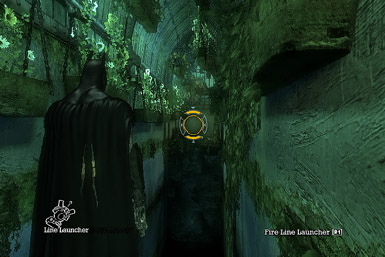
It's time to find Poison Ivy, but first, you need to escape from this room! Use the Sequencer on the control panel by locked door (the one you came through) to force it open…only to come across an impassable gulf. But worry not, for Batman summons his flying wonder, the Deux Ex Machina, to drop off just the tool he needs: the Line Launcher. Fire it at the opposing door to cross the chasm and go through the door.
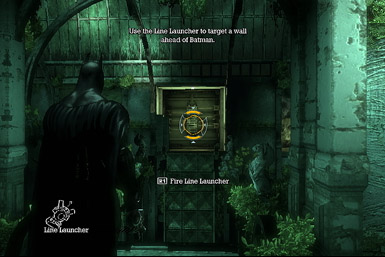
You'll find the Poison Ivy in Gardens directly on the opposite end of the room--simply use the Line Launcher once more to cross the chasm and venture inside.

Return to Arkham Mansion--Part 1
Talk to Aaron Cash in the Arkham Mansion
After meeting with Poison Ivy, you'll want to work your way back to the Arkham Mansion, using your map. But first, as you exit the room, a large group of baddies will be waiting for you across the chasm. Before Line Launching across, use the Batclaw to safely pull most of them into the abyss, leaving just a few stragglers for you to deal with upon crossing. Now enter the vent in the southwest corner and use your map to proceed through the Flooded Chamber, to the Botanical's exit. As you close in, Poison Ivy will block it off--simply drop through the exposed hole, scan the Chronicle, and follow the path to a grapple point, allowing you to exit the place proper.
Back outside, proceed onward to Arkham Mansion--remember to enter it via the vent above the entrance. Oh, and try to avoid the plants along the way, as they can and will attack.
Once inside the mansion, you'll find it's been filled with poisonous gas, so you'll want to avoid the ground-floor. Instead, use the Line Launcher to cross to the other side and enter a vent above, which leads into the next room. To cross this room, drop onto the walkway to the right and follow it as far as you can, then Line Launch to the walkway on the other side. Now follow that path as far as you can, then Line Launch to the far wall and speak with Aaron Cash.

Gain Access to Killer Croc's Lair Via Intensive Treatment
After speaking to Aaron, exit the way you came in by grappling back to the walkway and then into the vents until you're back outside. Now use your map to head for Intensive Treatment. Although taking the Arkham East tunnel to the northwest is faster, it's also heavily guarded. It's easier to take the Abandoned Tunnel to the southwest into Arkham West, then through the Arkham West into to the north, leading to Intensive Treatment.
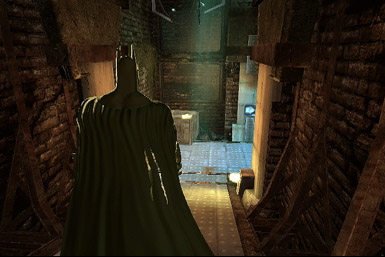
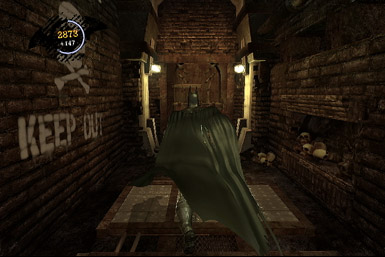
Intensive Treatment--Part 1
Gain Access to Killer Croc's Lair Via Intensive Treatment
Upon reaching Intensive Treatment, you'll find all the entrances blocked off and a sniper on a ledge above. To gain entrance, climb either of the sniper towers and use the Line Launcher on the wall behind the sniper to make it across, then proceed through the door.
Inside Intensive Treatment, proceed into the lower vent.
Grapple to the ledge, head into another vent, which will drop you into a room with a second vent you can enter.
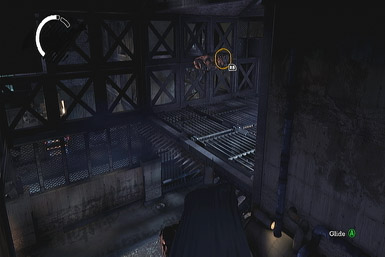
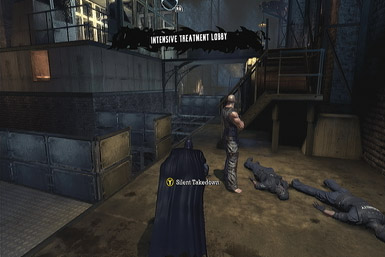
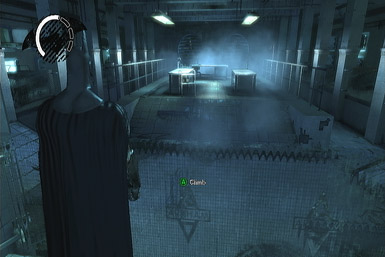
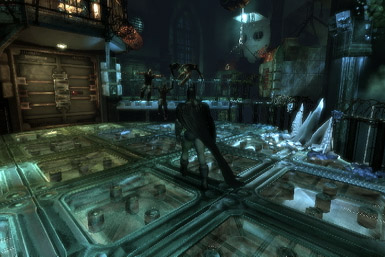
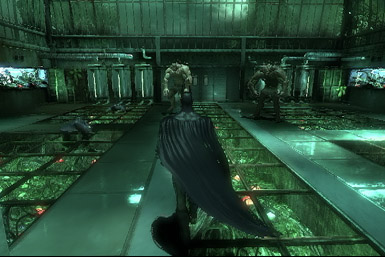
You'll wind up in the Intensive Treatment Lobby, where you'll discover the gargoyles have been booby-trapped. Unfortunate timing too, as you have a room full of armed thugs to take down. So here's the thing: you can still use the gargoyles…once per gargoyle. And even then, only for a few seconds, otherwise the resulting explosion will deal heavy damage. With these restrictions in place, you're better off using the rooftop of the central building as your base of operations--it provides a great vantage point of the entire room, and it's large enough to hide you from enemies simply by crossing from one side to the other. All you need now is patience; wait for the enemies to separate, then face-kick and ground-takedown them, and quickly return to the rooftop thereafter to remain out of sight. Don't forget you can also smash through the glass roof for an instant takedown if an enemy dares wander below.

Once you've cleared the room, use the Sequencer on the security panel inside that central room, unlocking the two doors on the northern side of the room. Proceed through either into Cell Block Transfer…where some weird stuff where start to happen. You may want to stop reading and go back to the game for this next part.
Yeah, you died, huh? Did you try clicking Retry? A resurrected Carrie…err, Batman, will emerge from the ground. Climb the nearby ramp then Line Grab across the gulf, but only after the giant wall-thing swings out of the way. Once across, you'll encounter your old pal, Giant Scarecrow again.

Like before, you'll have to use the various objects to hide while evading his gaze. Patience is key, and you should take a moment to pause at every low-obstacle you see until Scarecrow's gaze passes by. After battling a few skeletons, you'll reach a long span that you won't be able to cross without some help. Thankfully, there just so happens to be a swinging wall-panel nearby that you can trail as it moves along its track to safely evade being spotted. Shortly thereafter, you'll jump to a platform that drops under Batman's weight. Hang tight until the Scarecrow looks away, then grapple to a second overhead, and work your way to the spotlight (use the columns for cover).
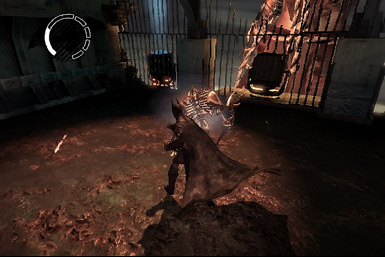
Upon reaching the Spotlight, Batman will be tossed into a ring with numerous skeletons. Throughout the course of the battle, a couple large ones will appear--these are based on the large thugs you battled earlier, and fighting them is similar--just toss a Batarang during their charge, and they'll shatter upon slamming into the wall.
When Batman reawakens in real-life, proceed through the northern doors into Secure Transit.
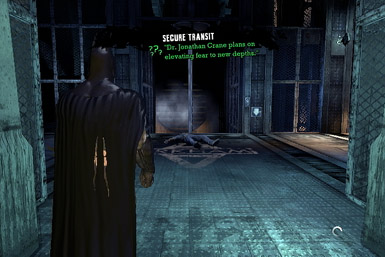
Once on the bottom floor, you'll encounter a group of guards. Take them down quickly, before they can grab a gun from the weapon stash. If they do happen to arm themselves, focus on those individuals first! After clearing the room, head into the small control room for a Secrets Map, then proceed through the door on the opposite side of the room.
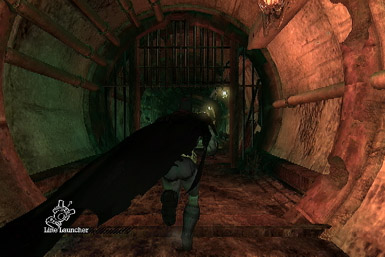
In the Control Room access, grab the Interview Tape from the box ahead, then follow the hall through the next door, leading into Croc's Lair.
Croc's Lair--Part 1
Collect Plant Spores From Croc's Lair
You're getting close to Croc's Lair. Head right and follow the walkways, using the Line Launcher to cross to the other side whenever you reach an impassable object. Before long, you'll reach a sewer tunnel which leads into Croc's Lair.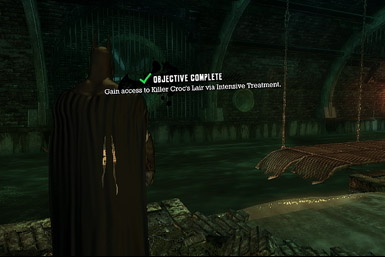
Spore #1
Although you won't be able to use your map to help navigate the cavern, there is an on-screen meter that shows how close you are to the next spore--the smaller the number, the closer you are. To find the first spore, head straight through the first intersection, then make a right. You'll spot it embedded in the ceiling--knock it down with a Batarang then collect it.Spore #2
Proceed along the walkway in the same direction you were before and make a right at the far end, hopping the fence to find the spore.Spore #3
From Spore 2, head straight along the pathway, around the corner, then make a right at the second intersection and follow that to a Spore at the very end.Spore #4
From Spore 3, follow the walkway dead-ahead, making a left at the very end for the final spore.Spore #5
The final Spore is also the furthest, but the path is super easy. The path practically leads right there, except for a right turn just before the Spore, so keep an eye on that meter! Oh, and Croc has a new trick up his sleeve: an underwater charge attack. Simply run along the walkway in a straight line whenever he performs this attack.Escape From Killer Croc's Lair
After grabbing the final Spore, it's time to escape Croc's Lair. The path is mostly straight-forward, just keep an eye on the meter to ensure you keep heading in the proper direction. As you close in on the exit, the camera will swing around to a more cinematic view--this is your cue to keep on running and don't look back! Just focus on the path ahead so you don't miss a turn. After escaping into a tunnel, a gate will suddenly slam shut trapping you with a pissed off Croc. Thankfully, Batman's always prepared, and has already setup an explosive gel trap! (You can spot it on the ground, just a few feet from the gate). Wait by the gate and arm your detonator, and get ready to blow it up just as Croc passes over it, causing him to fall to his doom.
Return to the Batcave--Part 1
Return to the Batcave to Formulate Anti-Titan Compound
With Croc defeated, use your map to return to the Batcave.