Crysis 2 Walkthrough
Stop the Ceph rampage in New York. Our Crysis 2 Walkthrough gets you ready for multiplayer with weapons and gear, a full campaign walkthrough, and unlockables.
 Stop the Ceph rampage in New York. Our Crysis 2 Game Guide gets you ready for multiplayer with weapons and gear, a full campaign walkthrough, and unlockables. Here's What's inside:
- Multiplayer: Learn about weapons, load outs, and nanosuit abilities
- Walkthrough: A full rundown of all 18 story missions
- Xbox 360 Achievements: Boost your Gamerscore with a huge list of Achievements
- PlayStation 3 Trophies: Gain new Trophies for your collection
Multiplayer
Class Load Outs
You will start with only the basic Assault class. You may purchase the Scout, Sniper and Gunner classes with unlock points gained from advancing Ranks. You can also purchase custom class load outs at Ranks 5, 10, 16, 20, and 25. Some of the default load outs have weapons and nanosuit abilities that you might not have access to until higher Ranks, so don't completely ignore them after gaining custom classes.
Assault
- Primary Weapon: Scar with Reflex Sight and Single Shot
- Secondary Weapon: Hammer
- Explosive: M17 Frag Grenade
- Armor: Air Stomp
- Stealth: Stealth Enhance
- Power: Side Pack
Scout
- Primary Weapon: Jackal with Single Shot
- Secondary Weapon: M12 Nova with Suppressor
- Explosive: M34 Flash Bang
- Armor: Air Stomp
- Stealth: Covert Ops
- Power: Weapon Pro
Sniper
- Primary Weapon: DSG-1 with Sniper Scope
- Secondary Weapon: M12 Nova
- Explosive: M34 Flash Bang
- Armor: Proximity Alarm
- Stealth: Stealth Enhance
- Power: Side Pack
Gunner
- Primary Weapon: MK.60 MOD 0 with Ironsight
- Secondary Weapon: Hammer with Laser Sight
- Explosive: M17 Frag Grenade
- Armor: Armor Enhance
- Stealth: Covert Ops
- Power: Weapon Pro
Weapons
You can purchase various different weapons with weapon specific unlock points. In most cases you will have to advance in Ranks before being able to buy the most powerful equipment. Each of your custom classes can have one primary weapon, one secondary, and one explosive. Most primary weapons and some secondary weapons can be further powered with attachments gained from Ranking up. These attachments include various scopes, silencers, extended mags, and under barrel weapons such as grenades and shotguns. In most cases assault rifles can make use of most attachments, while shotguns and heavy weapons tend to have a smaller selection.
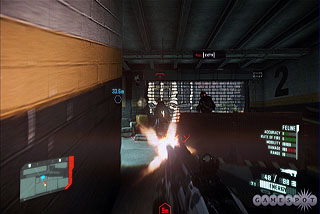
Feline
- Purchasable: Rank 13
- Weapon Type: Sub-Machine Gun
- Strengths: Rate of Fire, Mobility
- Weaknesses: Accuracy, Range, Damage
K-Volt
- Purchasable: Rank 21
- Weapon Type: Sub-Machine Gun
- Strengths: Rate of Fire, Mobility
- Weaknesses: Damage
Scar
- Purchasable: Rank 5 (Auto Purchased)
- Weapon Type: Assault Rifle
- Strengths: Accuracy, Rate of Fire
- Weaknesses: Damage
Grendel
- Purchasable: Rank 13
- Weapon Type: Assault Rifle
- Strengths: Accuracy
- Weaknesses: Damage, Mobility
Scarab
- Purchasable: Rank 27
- Weapon Type: Assault Rifle
- Strengths: Rate of Fire
- Weaknesses: Damage
DSG-1
- Purchasable: Rank 5
- Weapon Type: Sniper Rifle
- Strengths: Accuracy, Range
- Weaknesses: Rate of Fire, Mobility
M20 14 Gauss
- Purchasable: Rank 39
- Weapon Type: Sniper Rifle
- Strengths: Accuracy, Range, Damage
- Weaknesses: Rate of Fire, Mobility
Jackal
- Purchasable: Rank 5
- Weapon Type: Shotgun
- Strengths: Damage, Mobility
- Weaknesses: Accuracy, Rate of Fire, Range
Marshall
- Purchasable: Rank 21
- Weapon Type: Shotgun
- Strengths: Damage, Mobility
- Weaknesses: Accuracy, Rate of Fire, Range
MK.60 MOD 0
- Purchasable: Rank 5
- Weapon Type: Heavy (Machine Gun)
- Strengths: Accuracy, Range
- Weaknesses: Damage, Mobility
L-Tag
- Purchasable: Rank 27
- Weapon Type: Heavy (Tactical Grenade Launcher)
- Strengths: Range, Damage
- Weaknesses: Rate of Fire, Mobility
X-43 Mike
- Purchasable: Rank 39
- Weapon Type: Heavy (Mk.I Klystron Emitter)
- Strengths: Accuracy, Rate of Fire
- Weaknesses: Range, Damage, Mobility
M12 Nova
- Purchasable: Rank 5 (Auto Purchased)
- Weapon Type: Pistol
- Strengths: Mobility
- Weaknesses: Accuracy, Range, Damage
Hammer
- Purchasable: Rank 13
- Weapon Type: Heavy Pistol
- Strengths: Mobility
- Weaknesses: Accuracy, Rate of Fire, Range
AY69
- Purchasable: Rank 21
- Weapon Type: Machine Pistol
- Strengths: Rate of Fire, Mobility
- Weaknesses: Accuracy, Range, Damage
Majestic
- Purchasable: Rank 27
- Weapon Type: Heavy Revolver
- Strengths: Damage, Mobility
- Weaknesses: Rate of Fire, Range
M17 Frag
- Purchasable: Rank 5 (Auto Purchased)
- Weapon Type: Explosive
- Features: Frag grenade that damages enemies
M34 Flash Bang
- Purchasable: Rank 5
- Weapon Type: Explosive
- Features: Concussion grenade that blinds targets
JAW
- Purchasable: Rank 21
- Weapon Type: Explosive
- Features: Joint anti-tank rocket launcher
C4
- Purchasable: Rank 39
- Weapon Type: Explosive
- Features: Remote detonated explosive charge
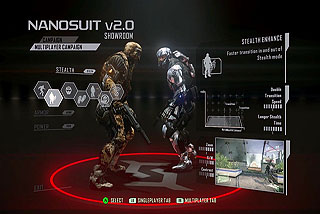
Nanosuit Abilities
You can purchase new suit abilities by gaining levels in each specific domain: Armor, Stealth, and Power. Much like your over all Rank, you gain exp during matches by using abilities and killing enemies while in these modes. You can have one Amor, Stealth, and Power ability equipped on each custom class load out.
Covert ops
- Purchasable: Stealth Level 1
- Ability Type: Stealth
- Features: Reduces sound of footsteps
Stealth Enhance
- Purchasable: Stealth Level 1 (Auto Purchased)
- Ability Type: Stealth
- Features: Doubles Stealth transition speed
Visor Enhance
- Purchasable: Stealth Level 6
- Ability Type: Stealth
- Features: Highlights enemies through scopes
Tracker
- Purchasable: Stealth Level 6
- Ability Type: Stealth
- Features: Highlights the footsteps of enemies
Cloak Tracker
- Purchasable: Stealth Level 6
- Ability Type: Stealth
- Features: Identifies where enemies enter Stealth mode
Blind Spot
- Purchasable: Stealth Level 1
- Ability Type: Stealth
- Features: Protects you from Maximum Radar
Jammer
- Purchasable: Stealth Level 1
- Ability Type: Stealth
- Features: Scrambles enemy radars
Air Stomp
- Purchasable: Armor Level 1 (Auto Purchased)
- Ability Type: Armor
- Features: Performs a downwards attack when in the air
Energy Transfer
- Purchasable: Armor Level 6
- Ability Type: Armor
- Features: Restores energy with each kill
Proximity Alarm
- Purchasable: Armor Level 1
- Ability Type: Armor
- Features: Warns when an enemy is nearby
Threat Tracer
- Purchasable: Armor Level 1
- Ability Type: Armor
- Features: Highlights incoming bullet paths
Nano Recharge
- Purchasable: Armor Level 6
- Ability Type: Armor
- Features: Faster Recharge
Detonation Delay
- Purchasable: Armor Level 6
- Ability Type: Armor
- Features: Delays the detonation of enemy grenades
Armor Enhance
- Purchasable: Armor Level 1
- Ability Type: Armor
- Features: Reduces drain of energy while in Armor mode
Mobility Enhance
- Purchasable: Power Level 6
- Ability Type: Power
- Features: Reduces energy drain when sprinting or jumping
Weapon Pro
- Purchasable: Power Level 1
- Ability Type: Power
- Features: Faster weapon reloading
Rapid fire
- Purchasable: Power Level 6
- Ability Type: Power
- Features: Faster rate of fire
Side Pack
- Purchasable: Power Level 1 (Auto Purchased)
- Ability Type: Power
- Features: Allows an additional mag of ammunition
Point Fire Enhance
- Purchasable: Power Level 1
- Ability Type: Power
- Features: Reduces the spread of weapons when shooting from the hip
Loadout Pro
- Purchasable: Power Level 6
- Ability Type: Power
- Features: Allows a second primary weapon to be carried
Aim Enhance
- Purchasable: Power Level 1
- Ability Type: Power
- Features: Decreases weapon recoil when aiming down sights
Retriever
- Purchasable: Power Level 6
- Ability Type: Power
- Features: Automatically collect Dog Tags from killed enemies
Dog Tag Killstreaks
When an enemy is killed they will drop a Dog Tag that can be collected. Because you must maneuver to the enemy's death point, collecting Dog Tags is better suited to mobile classes rather than snipers and other long range campers. However the Power ability Retriever will automatically allow snipers to snatch dropped Dog Tags. When between three to seven of these are collected a Killstreak can be preformed. The various Killstreaks depend on the map being played.
Maximum Radar
- Tags Needed: 3
- Features: Scans the area for enemies every three seconds
Radar Jammer
- Tags Needed: 5
- Features: Scrambles the enemy radar for 30 seconds
Nanosuit Jammer
- Tags Needed: 5
- Features: Disables the enemy teams' suit abilities
Orbital Strike
- Tags Needed: 5
- Features: Fires a huge laser directed by the player
Maximum Nanosuit
- Tags Needed: 7
- Features: Overcharges the Nanosuit's armor
Ceph Airstrike
- Tags Needed: 7
- Features: Summons in a gunship that shoots at enemy targets
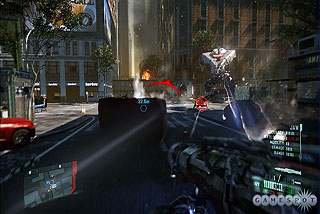
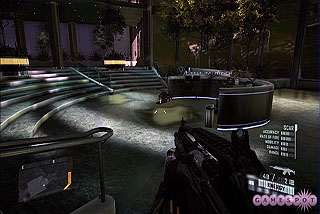
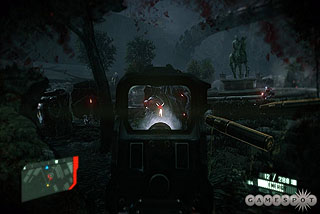
Mission 1 - Second Chance
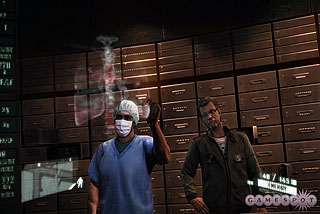
Grab the Dog Tag near Prophet's body and then smash through the locked door with a melee attack. Crouch under the next door and proceed up the stairs to the next level. Use your power jump to leap across the next pit and climb the ledge ahead. Exit through the door and turn on your visor to spot a few Cell troops. You can also use your visor to tag various items in the area. When ready, move down from the roof and load your pistol with the ammo crates. Move up to the two Cell agents and kill them with your sidearm. Be sure to snag their dropped SCARAB rifles for extra firepower.
Head to the mission objective marker and try out your cloak. While using the cloak you'll be nearly invisible to most enemies. Sneak up behind the Cell guard and execute him with a quick stealth kill. While remaining in stealth, kill the other Cell troops in the area. Proceed out to the courtyard and kill off the next three soldiers. Head north into the medical area and use the number pad to open the door. Head into the tents and stealth kill two more guards. Move into the small nook on the right and use the laptop to shut down the system.
Exit the building and use the look command to spot a Ceph ship off in the background. Head north-west into the shop and grab the souvenir on the counter. Head west, out of the building, and jump to the next set of roofs. You'll now gain the armor power-up, which can be used to enhance your defenses against enemy attacks and hazards, such as explosions. Kill off the next batch of enemies and consider looting a new FELINE gun in place of your old NOVA pistol. Travel to the next battlefield and tag any enemies and ammo with your visor. Take out enemies with grenades and stealth through any reinforcements. Head north-west into the subway station and open the main gate.
Set up nanovision and move through the darkened subway. With your heat-sensing vision you'll be able to spot Ceph bugs and other enemies in the area. Head west and leap up into the next building. Head up the spiraling stairs to end the mission.
Mission 2 - Sudden Impact
Head into the room in the east and equip your murderous paws with a new MARSHALL shotgun. Proceed ahead and after a brief scene you'll find yourself on the street. Head down the road and into the parking garage on the left. Climb up each ramp and fight the enemies inside. They will often get trapped on one another and unable to fight back, making them easy targets to stealth kills.
Grab a Stealth SCARAB from the stairwell and travel to the top to gain some collectible car keys. Tag the enemies with your visor and head below to kill them. Check the two wreckage pods on the north and west ends. When ready, head below and you'll get another call from Gould. Grab the JAW rocket launcher and destroy the Cell helicopter above. Continue following the objective marker to enter an elevator shaft. Drop down and you'll enter the dirty waters below.
Move up to the higher level and scan the biomatter with your visor. Exit out through the window and the aliens will start to attack. Due to the amount of dust you may want to consider turning on nanovision to catch their heat signatures. Kill at least one of these new alien enemies to gain nano catalyst which can be used to upgrade modules.
Travel under the bridge and kill any Cell troops and aliens along the way. You can also sit back and let the two enemy forces battle each other out, leaving you to simply pick off any survivors of the onslaught. Move through the last passage on the left and up the stairs to complete the mission.
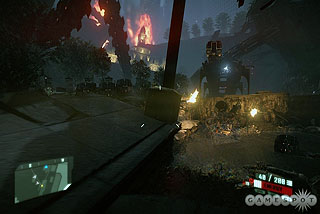
Mission 3 - Road Rage
Head up the stairs and smash the gate ahead. Jump up the ledge and listen in on the conversation between the Cell officers. Tag the enemies in the area and take them out with stealth. If you want, switch out your pistol from a MARSHALL shotgun. Head up to the top of the broken railroad tracks and avoid detection from the helicopter. Drop down to street level and climb up the debris to reach the overpass. Kill the guards or sneak by them and advance further along the freeway.
After a short scene the highway will shatter into pieces. Turn on nanovision to easily spot the Cell soldiers through the haze. Head through the passage to the east and take out any enemies manning turrets or guarding vehicles. When the coast is clear, steal one of the tanks. Move passed the blockades and take out enemies in this priority: tanks, helicopters, and last foot soldiers. You'll face two tanks at once at the end. Shoot down the one on the right first as it will delay firing its volley of missiles. Exit your tank and enter the building to end the mission.
Mission 4 - Lab Rat
Cloak and move through the window on the right. Stealth kill the sniper and steal his rifle. Use this new weapon to snipe the turret users on the opposite roof. Sneak over the dock and kill any remaining enemies on the roof.
Keep moving forward and climb up the steps, killing or avoiding enemies along the way. Dismount the turret ahead and use it to kill the Cell agents inside. Climb into the lift on the left and arrive at the next floor.

Cloak again and kill the three soldiers inside. Destroy the computer holding Gould's files. Shoot down the helicopter flying outside. First kill off both of the gunship's gunners. Next kill the Cell agents that enter the small room. Be sure to steal a JAW rocket launcher from one of them. Shoot this deadly missile at the helicopter to finish it off.
Drop down and smash open the gate. Head back up the next set of steps and across the beam bridging each roof. Sneak past or kill the next few Cell soldiers and smash through the door ahead. Head up the elevator and meet with Gould. Exit out the halls and destroy the last remaining Cell agents. You'll smash through one last wall to end the mission.
Mission 5 - Gate Keepers
At the start of the mission you may want to purchase the air stomp ability. First jump into the air and then hit the corresponding button to slam down, harming any nearby enemies. To reach the objective marker run south-east over the roofs and drop down through the smashed brick wall. Ride the scaffolding down to the ground level and keep moving south. Let the Cell and Ceph forces fight each other out, armoring or stealth up to take out any stragglers. Keep moving south and up into the building, bludgeoning anyone in the way. The two groups of enemies will keep each other busy, allowing you to easily slip into the garden area and west to the next set of roofs.
Take out the JAW trooper ahead with a stealth kill and steal his rocket launcher. Cloak again and tag key targets around the area: the enemies, C4, and a MARSHALL shotgun will all help. Loot up the Cell's scattered gear and head to the objective marker. Destroy the fuel reserves with either your C4 or manually plant a fuse. Quickly leave the fuel tent and let it explode, starting the first decoy. Follow the next objective marker and take out the Cell agents with cloaked shotgun attacks. Light up the next fuse and take out the Cell agents that emerge from the right. Be sure to exchange your FELINE for the new K-VOLT rifle.
Continue east and into the trailer. Hit the switch to open the tunnel access. Enter he north side of the church and enter the tomb. Kill the Ceph inside and head to the objective marker to end the mission.
Mission 6 - Dead Man Walking
Sneak up and drop off the starting roof. Stealth up and move passed the guards on the street level. Head to the objective marker, but you may only see a shut door. Once your energy restores stealth again and climb the building's construction scaffolding to reach the roof. Here, switch to armored mode and kill the numerous Cell soldiers. Be sure to also watch your back as many more troops will cross over the skyway bridge. If you run low on ammo, the Stealth SCARAB rifles dropped by Cell forces are fairly strong. Once the dust clears, destroy the door ahead with a grenade.
Head down the newly accessible stair case and kill the three Cell troops below. Move into the small room ahead and start up the security terminal. Take the elevator down and meet with Gould. After a long cutscene defibrillate yourself with the one screen commands. Wait for your suit to reboot and move to the objective marker to end the mission.
Mission 7 - Seat of Power
Wait for your suit to reboot and head south into the decontamination area. Make your way through to the west and jump over the ledges to hit the next objective marker. Head up to the top of the building and through the door on the other end. Grab the Stealth MARSHALL and rearm yourself with ammo.
Move outside and cloak up. Use your silenced shotgun to kill off the enemy. Move south towards the next marker, taking out any Ceph that notice you're sneaking. Move into the next building and be sure to grab the Spec Ops SCARAB.
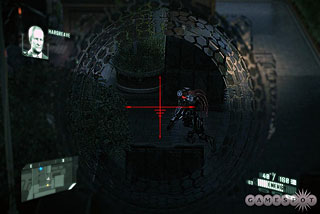
Continue to the open area and use your visor to tag a few key targets. You'll speak with Hargreave briefly before moving south-east. Climb up the steps to reach the rails and move south to find some collectible car keys. Move down the next ramp and perch there to kill the Ceph troops. The enemy can't grasp shooting passed the banisters, giving you free reign to kill them all while standing unhidden and out of cover. Move south-west and you'll come to another set of alien pods.
Keep in the bushes and kill the enemies with silenced weapons. Eventually they will come to you, allowing the chance to armor up and smack the Ceph with melee attacks. After the fight head up the ramp on the right and grab the C4. Continue to the left and either kill off the remaining Ceph or simply sneak to the objective marker to end the mission. The heavy Ceph takes a lot of fire power, so it might be best to avoid it if you wish to hold onto your JAW or C4 ammo.
Mission 8 - Dark Heart
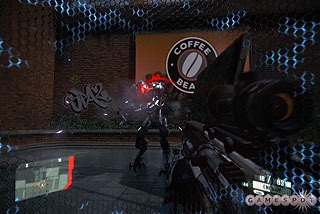
Head north and arm yourself with a HAMMER pistol. Smash open the small Ceph bugs for extra nano and use your look command to spot a run away crazy train. Turn on nano vision and let the Ceph kill off the Cell troops. Sneak up on the Ceph and kill them with stealth. Grab the dropped SCAR and continue on. Cloak and melee the next two Ceph and keep moving north to the fire exit.
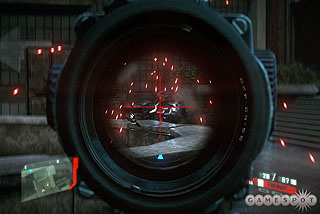
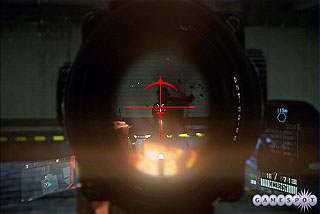
Crawl to the right and grab the DSG-1 sniper rifle. Move through the door and tag the area with your visor. There is an AY69 machinegun and an X-43 MIKE among other common items. Light the fuse ahead and run away to avoid the blast. Cloak again and move to the bottom and activate the Ceph vessel. Sneak again and move through the northern tunnels.
Grab the sniper rifle and tag the area. Snipe the Ceph while in stealth and move down to the lower ground. Smash open the Ceph structure and move to the other objective marker. Cross over the Ceph tendril beams. Snipe two more enemies and then keep heading towards the objective. Sniper down another few minor Ceph and armor up to take down one of the tougher foes.
C4 or JAW the heavy Ceph mech and destroy yet another spore conduit. Next, head into the alien structure to short out your suit. Complete the quick time event to climb back up and crawl over the highway. Rush towards the escape helicopter ahead to end the mission.
Mission 9 - Semper Fi or Die
Press the button on screen to receive a MAJESTIC pistol from the marines. Head up the hill and arm yourself with a Demolition SCAR. Meet with more marines and armor up to help them with the Ceph. One or two allies might die on the way to the next objective, but the majority of the marines will be able to deal with the aliens. Reach the next building and arm yourself with an AY69, JAW, C4, and more grenades.
Kill a few more enemies and steal the HMG turret on the crate above you. Shoot down more Ceph and use C4 and the explosive barrels to take out the heavy armored mech. Keep moving south-west along the highway.
Kill two more Ceph and cross the few pipes sticking out of the highway. Sneak passed another cluster of enemies and get in the army vehicle on the side. Ride across the rest of the road to the objective and a supply of ammo. Escort a few more marines across a battlefield. Much like before, C4 works best for the heavy Cephs, while armoring up and using your SCAR will be enough for the normal cannon fodder.
Meet with the rest of the marines at the outpost and grab a SWARMER. This new gun shoots out powerful bursts that are great for destroying the Ceph pods. Eventually you'll be attacked by a gunship that you'll want to destroy with the JAW rocket launcher. After the fight meet up with Chino. Continue forward into the tube to end the mission.
Mission 10 - Corporate Collapse
Follow Chino and the other marines to the north-west. Let the Ceph kill off the Cell and clean up any enemies that survive. Move to the south-west edge and grab the HMG turret. Armor up and uses this heavy weapon to kill the rest of the Ceph troops. Get inside the broken Cell craft to the east and blow open the garage door. Kill the heavy mech with C4 or simply swim through the newly created passage.
Inside the garage must of the clueless Cell soldiers will opt to use L-TAG grenade launchers, often times firing in places that will kill themselves and their allies. Add in your own mayhem of armoring up and shooting the enemy troops and turrets with your SCAR. If you wish, grab an L-TAG from one of the fallen enemies. Continue on into the Hargreave-Rasch building and kill them with your rifle while in armored mode. Towards the end of the hall is a HMG that is worth pilfering.
Take the elevator down to the main level and get ready to fight more of Lockheart's rogue Cell troops. Stealth passed the enemies and back to the elevators. From here switch to armor and take out the enemies while they stare aimlessly into the wall. Take out the L-Tag troops first, followed by the rest of the lesser troops. If you like, take a MK.60 MOD 0 machinegun for your collection. Head to the desk again to start a cutscene that will leave you swimming in the water.
Swim to through the pipes ahead and walk along the tunnels to reach street level. Rearm yourself with more ammo and grab the JAW rocket launcher on the ground. Take out the heavy mech by using your JAW with armor or cloak. If you run low on rockets, also try using C4. Your marine friends will supply plenty of distraction, allowing you enough time to set up the necessary explosions. After about six shots the Ceph mech should be done in, ending the mission.
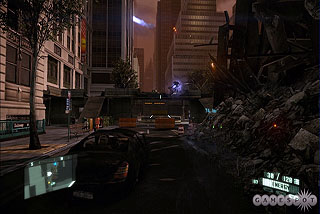
Mission 11 - Train to Catch
Head North-West and kill the Ceph that bludgeons the marines below. Use your look command prompt to spot a rampaging Ceph gunship in the background. Grab the JAW rocket launcher. Use the two shots from this to destroy the heavy Ceph sitting on the crate. Due to the heavy amount of both marines and Ceph troops, use stealth while each force fights each other. Sneak behind enemy lines and activate the two panels on each end of the road.
Move to the entrance of the library and travel through the burning wreckage. Descend down the exit stairs and help the marines kill a few more Ceph. Move south-east and resupply your ammo. With the help from your marine allies it's better to use armored mode for now and attack the Ceph directly. Kill the next wave of minions and move north-west.


Tag the area with your visor to locate more enemies and weapon caches. Head left and armor yourself with the C4, JAW and HMG. Use these powerful toys to take down the Ceph heavy and any other alien troopers that aid it. Head north and into the control room to find another set of collectable car keys. Exit and head left into the tarp tube. Resupply your weapons and ammo and head out to fight more Ceph. Armor up and take down the majority of the enemies with your HMG. A heavy will also appear that can be taken down with some C4 or grenades. After the battle head east and hit the panel marked with the objective. Next, climb into the lead armored car in the convoy to end the mission.
Mission 12 - Unsafe Haven
Start off the mission by detouring to the left and grabbing some extra C4. Afterwards, continue to the previous hall and head to the marker. Head into the garage ahead and open the right hand gate. Armor up and kill the three Ceph outside. Continue north-east and jump on top of the marine barricade. Head east through the next gate and into the battle.
Arm yourself with the HMG on the right, and mow down the enemies as you make your way across the south-eastern highway. Switch out your armor for cloaking and continue towards the objective marker to open the lock. While in the same room grab the souvenir on the desk and one of the three L-TAGs laying around. Move east, into the garage, and arm the three detonators in the area. There is also a GRENDEL rifle near the second charge that is worth nabbing.
After arming the charges, make your way to Torres in the building in the south-west. Kill the Ceph on the first floor and head into the elevator shafts to reach the next floor. Grab the detonator from Torres to ignite the fuses and set a huge explosion against the Ceph. Return to the terminal and take out the heavy Ceph with C4. Head to the next marker to finish the mission.
Mission 13 - Terminus
Head north-east to meet with Gould and Barclay. After a cutscene head to the right and up the spiral staircase to reach the outside. Arm yourself with the HMG and tear through the smaller Ceph before focusing your explosives on the heavy mech. Next head south-west and grab the SWARMER to take down the next wave of enemies.
A boss type mech will appear so you'll want to move counter-clock wise around the room. You'll find a second SWARMER, a few L-TAGs, some C4, and a JAW that will all be helpful in taking down this boss. You'll have the support of a few marines, but Ceph troops will also emerge. Kill the smaller Ceph first before using all of your heavy gear against the mech. After the fight jump into the armored car to end the mission.
Mission 14 - Power Out
Move forward and to the right, taking down the Ceph along the way with your rifle. Be sure to stop and grab a few JAW rocket launchers along with some C4. Use these to take down the first two waves of enemies, but try to conserve your explosives such as the C4.
Head south-west and get ready for another boss mech. The marines will scatter back, leaving you to deal with the rest of the Ceph. Like always stick with C4 to easily take down the largest Ceph craft. If more smaller Ceph troops come, deal with them before facing the boss again.
After the fight meet with Barclay and talk to Hargreave. Enter the alien spear that appears. After a cutscene, defibrillate yourself with the one screen commands. Next crawl forward and jump into the helicopter to end the mission.
Mission 15 - Eye of the Storm
Cloak and swim to the island ahead. Kill the Cell troops quietly with stealth kills and silenced weapons. If you haven't already, go ahead and spend your accumulated nano on the stealth enhancements. This will give you enough energy while cloaked to briskly walk passed the Cell agents.
When ready head into the building straight on and enter the second floor. Stealth kill the sniper and steal the mounted HMG. Leap up to the next level and navigate the broken building, leaping from door to door. You'll emerge outside, overlooking a Cell base. Use your visor to tag weapons, ammo, and the enemy locations.
Stealth kill the soldiers on the left hand side and cloak back up. Sneak into the building the objective mark points to and take the elevator inside. On this floor stealth again and take down the five Cell guards with headshots from a silenced SCARAB. Move into the nook on the far east to gain an e-mail. Return to the previous room and slide north to avoid the electricity. Hit the switch ahead to shut down the power.
Now that it's dark, turn on nano vision to see the Cell troops. Further, you can cloak while in the dark to make yourself extra hidden. Kill the enemies in your way and move north-east. There will be an elevator that will take you back to the top. Cloak again and sneak to the next marker. You'll be trapped in a garage, but just wait a few seconds and a side door will open up. Enter here and arm up with extra ammo.
Cloak again and circle around to the right, killing the Cell troops with silenced weapons. Make your way to the left and snatch a HMG. Use this in armored mode to clean up the enemy and ascend to Lockheart's location. Let your energy restore and head to the top door to smash it open. Press the onscreen button to kill Lockheart and steal his gun the M20 14 GAUSS. Cloak again and head to the next marker to complete the mission.
Mission 16 - Masks Off
After the cutscene you'll only have a simple SCARAB rifle with less than 100 bullets. Follow Tara and take the elevator. Mark the area with your visor, being sure to sneak or kill the Cell soldiers around the corner. Head to the top level and armor up. Kill the Cell guards at this level with your SCRAB or grab a GRENDEL from one of the fallen. The fight should be over quickly, as the Cell fighters will tend to throw grenades at their own feet.
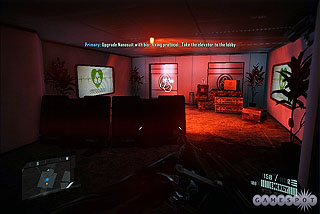
Head into Hargreave's office and use the syringe on the table. After the scene, ignore the Ceph intruders head south and charge towards the objective marker. Turn on armor and walk along the crates and pipes to avoid the electrically shocked ground. Exit out the roof and grab the GAUSS rifle on the ground. Descend to the street level and move south-east, staying either cloaked or armored to deal with the Ceph forces. After sneaking to the next goal, be sure to restock ammo and grab any guns off the dead Cell members.

Head under the gate to reach the next objective marker. Sneak by the Ceph heavies and huge amount of ground troops. Enter the two lifts to make it to the highway. Arm yourself with the X-43 MIKE and help Cell take out the Ceph aliens. Heed Gould's advice and leave the Ceph to the Cell forces. Cloak and run across the bridge. Hit the onscreen buttons to keep from falling, which will soon conclude the mission.
Mission 17 - Out of Ashes
Head over to Tara and Gould and let your suit reboot. You'll only have a NOVA pistol on your side, but there are a few extra weapons sitting around. Take the MIKE and K-Volt and head into the Cell armored vehicle. While riding in the turret kill the Ceph with your alternate fire rockets. They are powerful and can take out a mech in only three or four hits. You'll soon be back on foot as a Ceph tendril destroys your vehicle.
Cloak by the Ceph and enter the elevator inside the building. Use armor and your MIKE to instantly explode the aliens inside their armor suits. Once the area is clear, exit the window and tag the gunship with your visor. A marine ship will arrive and will eliminate the Ceph patrol. Head south through the building and take the HMG sitting on one of the ledges. Cloak again and move across the roof, avoiding detection from the heavies and smaller troops. Leap off the roof to the south to end the mission.
Mission 18 - A Walk in the Park
Head north-east and circle clock-wise around the park. Cloak and sneak passed the three alien Ceph patrol and then climb up to the top of the broken trailers. Load up on C4, two JAWs, and switch in a new SCARAB. Conserve any left over MIKE ammo and cloak passed the next set of guards. There will be a supply of weapons to the north. This location is also a great spot for tagging the area with your visor. Drop down to the tube on the right and make your way through. On the other side stealth kill two more Ceph and smash open the spore conduit.
Sneak back to the north until reach the second spore conduit. Kill three more Ceph with stealth kills and deactivate the conduit. Cloak yet again and head to the third conduit in the center. Smash this spore as well and head north-east. You'll enter inside a Ceph tendril to get to the other end. Armor up to protect yourself. Travel through the tube and armor yourself with the last cache of weapons. This will be your last stand so arm up with what ever. If you haven't purchased it already, use your remaining nano to be able to spot cloaked enemies.
Turn on this cloak detecting power and kill the four cloaked Ceph. They tend to run away and get stuck on the terrain, so being defensive isn't an issue. A few shots from a JAW or a C4 are enough to kill each of these enemies easily. After these Ceph are dead, cloak and ignore the rest of the enemies. Enter the alien spear and armor up to protect yourself. Press the on screen commands to crawl through the tube and jump down the spear, completing Crysis 2.
Xbox 360 Achievements
| Achievement Name | How To Earn | Reward |
|---|---|---|
| Band of Brothers | Keep all marines alive during the rescue in Semper Fi or Die | 15 |
| Blast Radius | Single Player: Kill at least 3 enemies with a single grenade | 15 |
| Can it run Crysis? | Complete In at the Deep End | 10 |
| City That Never Sleeps | Complete 6 levels on Veteran difficulty | 25 |
| Close Encounters | Single Player: Stealth kill 25 enemies | 15 |
| Crossroads of the World | Complete the evacuation at Times Square | 25 |
| Cry Spy | Multiplayer: Get 30 Spot Assists | 25 |
| Crysis, What Crysis? | Multiplayer: Reach Rank 50 | 35 |
| Dark Night of the Soul | Defend Central Station | 25 |
| Death Grip | Kill 10 enemies with grab and throw | 15 |
| Death Slide | Single Player: Kill 5 enemies while sliding | 15 |
| Dedication | Play online 6 months after your first time | 25 |
| Dress to Kill | Multiplayer: Fully level the Nanosuit | 30 |
| Evolution | Complete 12 levels on Veteran difficulty | 25 |
| False Prophet | Find Nathan Gould | 15 |
| Fast Ball | Kill 10 enemies by throwing an object at them | 15 |
| Fire Walker | Assist the evacuation at Bryant Park | 25 |
| Food for Thought | Kill a CELL operator with a giant donut in Lower Manhattan | 10 |
| Foreign Contaminant | Escape the Battery Park evacuation center | 10 |
| Headhunter | Single Player: Kill 4 enemies in a row with headshots | 15 |
| Heart of Darkness | Complete 6 levels on Supersoldier difficulty | 25 |
| Hole in One | Throw an alien down the sinkhole in Dark Heart | 10 |
| Home Stretch | Reach Central Park | 25 |
| Hung Out to Dry | Reach the Hargreave-Rasch building | 20 |
| I Am Not A Number | Create your first custom class | 10 |
| Internal Affairs | Infiltrate the CELL facility at Wall Street | 15 |
| Into the Abyss | Infiltrate the alien hive | 20 |
| Jack of all Trades | Multiplayer: Win a match of every game mode | 25 |
| League of Your Own | Multiplayer: Finish top of the Scoreboard | 25 |
| Literary Agent | Scan all of Richard Morgan's books in the NY public library | 10 |
| Maximum Module | Multiplayer: Fully level a Suit Module | 20 |
| Medal of Honor | Complete 12 levels on Supersoldier difficulty | 25 |
| Men of Destiny | Complete the single player campaign on Veteran difficulty | 45 |
| Modern Art | Unlock 150 Dog Tag displays | 5 |
| More than Human | Assimilate alien tissue at the crash site | 15 |
| Nomad | Multiplayer: Play a full game on every map | 10 |
| Once a Marine, Always a Marine | Assist the Marines in Madison Square | 20 |
| Popcorn | Single Player: Kill 20 enemies with the Microwave cannon | 15 |
| Start Spreading the News | Finish the single player campaign on any difficulty | 35 |
| Stealth Assassin | Re-route the power in Eye of the Storm without being detected | 15 |
| Supersoldier | Complete the single player campaign on Supersoldier | 65 |
| Team Player | Be in a squad of at least 3 people and play a full game | 10 |
| The Cleaner | Get 1 of each Skill Kill | 25 |
| The Collector | Collect 20 Dog Tags | 15 |
| The Tourist | Find all New York Souvenirs | 15 |
| Theseus at Last | Locate Jacob Hargreave | 25 |
| Tooled Up | Multiplayer: Unlock all the weapons | 30 |
| Try Me | Complete 3 Xbox LIVE matches | 10 |
| Two Heads Are Better Than One | Single Player: Kill two enemies with a single bullet | 15 |
| Speeding Ticket | Break the speed limit in front of 10 speed cameras | 10 |
PlayStation 3 Trophies
| Trophy Name | How To Earn | Reward |
|---|---|---|
| Band of Brothers | Keep all marines alive during the rescue in Semper Fi or Die | Bronze |
| Blast Radius | Single Player: Kill at least 3 enemies with a single grenade | Bronze |
| Can it run Crysis? | Complete In at the Deep End | Bronze |
| City That Never Sleeps | Complete 6 levels on Veteran difficulty | Silver |
| Close Encounters | Single Player: Stealth kill 25 enemies | Bronze |
| Crossroads of the World | Complete the evacuation at Times Square | Bronze |
| Cry Spy | Multiplayer: Get 30 Spot Assists | Bronze |
| Crysis, What Crysis? | Multiplayer: Reach Rank 50 | Gold |
| Dark Night of the Soul | Defend Central Station | Bronze |
| Death Grip | Kill 10 enemies with grab and throw | Bronze |
| Death Slide | Single Player: Kill 5 enemies while sliding | Bronze |
| Dedication | Play online 6 months after your first time | Bronze |
| Dress to Kill | Multiplayer: Fully level the Nanosuit | Silver |
| Evolution | Complete 12 levels on Veteran difficulty | Silver |
| False Prophet | Find Nathan Gould | Bronze |
| Fast Ball | Kill 10 enemies by throwing an object at them | Bronze |
| Fire Walker | Assist the evacuation at Bryant Park | Bronze |
| Food for Thought | Kill a CELL operator with a giant donut in Lower Manhattan | Bronze |
| Foreign Contaminant | Escape the Battery Park evacuation center | Bronze |
| Headhunter | Single Player: Kill 4 enemies in a row with headshots | Bronze |
| Heart of Darkness | Complete 6 levels on Supersoldier difficulty | Silver |
| Hole in One | Throw an alien down the sinkhole in Dark Heart | Bronze |
| Home Stretch | Reach Central Park | Silver |
| Hung Out to Dry | Reach the Hargreave-Rasch building | Bronze |
| I Am Not A Number | Create your first custom class | Bronze |
| Internal Affairs | Infiltrate the CELL facility at Wall Street | Bronze |
| Into the Abyss | Infiltrate the alien hive | Bronze |
| Jack of all Trades | Multiplayer: Win a match of every game mode | Bronze |
| League of Your Own | Multiplayer: Finish top of the Scoreboard | Silver |
| Literary Agent | Scan all of Richard Morgan's books in the NY public library | Bronze |
| Maximum Module | Multiplayer: Fully level a Suit Module | Bronze |
| Medal of Honor | Complete 12 levels on Supersoldier difficulty | Silver |
| Men of Destiny | Complete the single player campaign on Veteran difficulty | Silver |
| Modern Art | Unlock 150 Dog Tag displays | Bronze |
| More than Human | Assimilate alien tissue at the crash site | Bronze |
| Nomad | Multiplayer: Play a full game on every map | Bronze |
| Once a Marine, Always a Marine | Assist the Marines in Madison Square | Bronze |
| Popcorn | Single Player: Kill 20 enemies with the Microwave cannon | Bronze |
| Start Spreading the News | Finish the single player campaign on any difficulty | Silver |
| Stealth Assassin | Re-route the power in Eye of the Storm without being detected | Bronze |
| Supersoldier | Complete the single player campaign on Supersoldier | Gold |
| Team Player | Be in a squad of at least 3 people and play a full game | Bronze |
| The Cleaner | Get 1 of each Skill Kill | Bronze |
| The Collector | Collect 20 Dog Tags | Bronze |
| The Tourist | Find all New York Souvenirs | Bronze |
| Theseus at Last | Locate Jacob Hargreave | Bronze |
| Tooled Up | Multiplayer: Unlock all the weapons | Silver |
| Try Me | Complete 3 Xbox LIVE matches | Bronze |
| Two Heads Are Better Than One | Single Player: Kill two enemies with a single bullet | Bronze |
| Speeding Ticket | Break the speed limit in front of 10 speed cameras | Bronze |
| Platinum | Earn all available trophies for Crysis 2 | Platinum |
Got a news tip or want to contact us directly? Email news@gamespot.com
Join the conversation