Far Cry Instincts Walkthrough
Jack Carver's in deep trouble, but at least he's got GameSpot's Walkthrough to Far Cry: Instincts to help him. And so do you!
Design: Collin Oguro
When Far Cry was released in early 2004, it was something of a breath of fresh air for PC FPS gamers. Instead of dank corridors and darkened hallways, Far Cry modelled a series of tropical islands for its setting, giving players unprecendented freedom to move about as they wished and snipe at enemies over a kilometer away. It paired its technological chops with a lengthy and involving singleplayer game, featuring excellent enemy AI and a variety of unique foes to battle.
Now, a year and a half later, Far Cry: Instincts has hit consoles. Ubisoft wasn't content to just port the excellent PC version of the game over to your Xbox, though; instead, they enlisted their wildly talented UbiSoft Montreal studio to make a completely new game based on the license. While it is a different experience than the PC version of the game, Far Cry: Instincts is an excellent title in its own right, with some new twists and mechanics to keep even PC gamers entertained.
GameSpot's Game Guide to Far Cry: Instincts is intended to get you off of the island alive, with a rundown on the weapons and abilities you possess, as well as a complete walkthrough, including video. Enjoy!
Weapons
You're going to have plenty of weapons to choose from in Far Cry; this section of the guide will let you know which ones are actually worth using, and which ones should be left behind.
Pistol Slot
Handgun
The Handgun is among the simplest of the game's weapons; it can hold only seven rounds, and can only be fired in semi-automatic mode, making it difficult to quickly pound out shots while dual-wielding. It is the most powerful of the handguns, though, and there are few enemies that can survive two rounds to the head. If you're good at getting headshots, and don't care about noise, than the handgun should be your weapon of choice.
9mm Suppressed
Silencer-equipped handguns will pop up more than you might think, considering the mercs on the island have no real need for stealth. These are the weakest of the handgun selections, making them inappropriate if you're forced into a firefight (as you often will be), but if you have the opportunity to sneak up or underneath an unsuspecting opponent, they'll drop with a single headshot, and you won't alert any nearby guards. Dual-wielding these guys is kind of pointless, since most mercs will take a lot of rounds from a silenced pistol before actually dropping, but at least it's an option.
9mm Auto
Although you won't pick up the 9mm automatic until later in the game, it'll arguably be the best pistol you can get. Like the name implies, these bad boys are fully automatic, allowing you to hold down the triggers and let loose a stream of bullets without having to click for each individual shot. While you still won't be doing as much damage as you will with a pair of SMGs or P90s, you'll be able to conserve ammo for your main weapons and still pack a bit of a punch. Finding ammo for 9mm automatics can be tough, however.
Primary Weapons
SMG
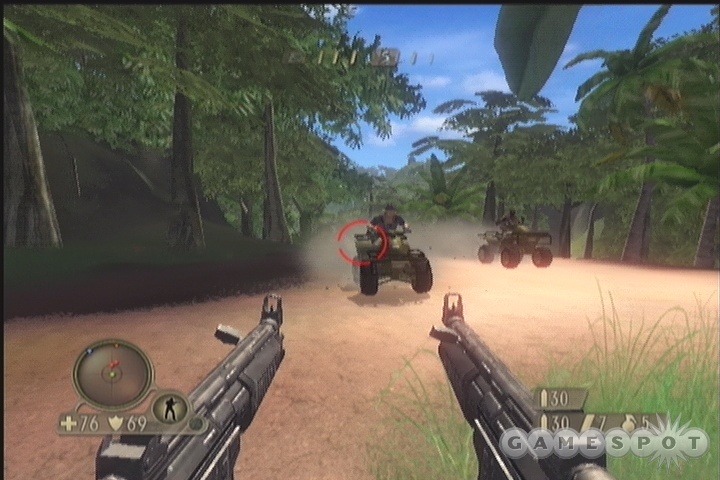
The SMG (or MP5 as it's more correctly called in the manual) is going to be your weapon of choice for the bulk of the game, if only because you can carry a lot of ammo, ammo is easy to find, and you can dual-wield them, leading to some easy kills against lightly-armored opponents. You won't exactly have much choice here, since the MP5 will be the only primary weapon you'll have the option of picking up for perhaps the first half of the game.
P90
When you start finding P90s, it'll be worth your while to switch up from the SMG, thanks to the P90's larger ammo capacity (50 rounds per magazine compared to 30 for the SMG) and increased power. Since the game's auto-lock is pretty forgiving, the slightly decreased accuracy won't be enough to outweigh the benefits of these powerful weapons.
Shotgun
The shotgun is something of a situational weapon. If you've ever played a first-person shooter before, then you're probably familiar with the basic tactical aspects of a shotgun: powerful when enemies are up close, almost useless when they're far away. Thus, if you find a shotgun, it might be worth using while you're inside a building or an area with small corridors, but if you're in the jungle, you're going to want to drop it for something that's actually going to be able to hit people at a distance.
Carbine
We'll be honest and say that we didn't find the carbine all that useful when we were playing Farcry. While it seems to be a pretty good bargain, since it's equipped with both a scope and a suppressor, unlike most other primary weapons, it simply doesn't pack enough of a punch to really make it worthwhile when compared to things like the assault rifle or dual P90's. You might find the carbine useful as a primary weapon if you have something like a machinegun in your heavy weapons slot, however, since it can be used as a quasi-sniper rifle. The scope can't be zoomed in any further than its default setting, however.
Assault Rifle
Late in the game, you'll come across Kreiger's highly-trained shock troopers, all of whom wield vicious assault rifles. While you can't dual-wield the assault rifle, it'll still likely be an upgrade from even dual-wielded P90s, thanks to its accuracy, powers, and the attached grenade launcher, which will let you place grenades much more precisely than you would when you throw them manually. They also detonate on impact, thus not giving your opponents any time to run.
Heavy Weapons
Recon Rifle
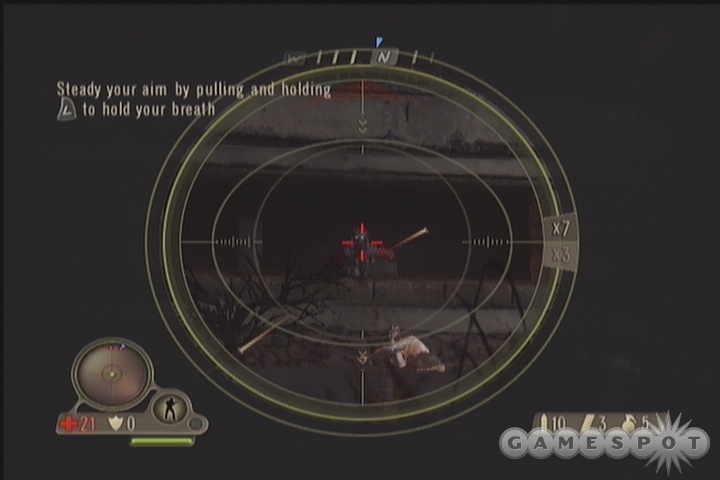
The recon rifle is going to be the first heavy weapon you come across, and it'll serve you well for most of the game. It's essentially a silenced sniper rifle, making it perfect for taking out isolated soldiers without giving away your position.
Sniper Rifle
The ubiquious-in-FPS-games sniper rifle won't show up until late in the game, but when it does, you'll be able to use it to pop heads from a good distance away. Unlike the recon rifle, the sniper rifle is unsuppressed, meaning that it'll make a lot of noise when you fire it, but it does a lot more damage than the recon rifle, and has a 10x zoom as opposed to the 7x zoom of its weaker counterpart.
Rocket Launcher
While the rocket launcher is essentially a one-shot kill weapon, you're almost never going to actually use it to do anything cool in the single-player game. Ammo for it is extremely rare, so your best shot at using it will be to pick it up off the corpse of a soldier, fire off the four rounds that you'll get for easy kills on four soldiers, and then return to whatever weapon you dropped and pick it up again. You don't want to face off against anyone wielding a rocket launcher in multiplayer, obviously, so try to grab it for yourself before anyone else can.
Machinegun
The machinegun is more of a replacement weapon for your primary weapon than any kind of special, unique-situation weapon, like most of the other heavy weapons are. Instead of letting you dish out damage from long range, or put explosives where you need them, the machinegun is your device when you just want to put a lot of metal in the air. Its fifty-round magazine will let you chop through numerous foes without having to reload. If you have an assault rifle handy, then the machinegun isn't technically needed, but it does do a number of enemies in either single-player or multiplayer gaming.
Feral Abilities
Throughout the game, Carver will consistently pick up new feral abilities. These abilities will help him move more quickly, regenerate his health, or even engage in some good old-fashioned ultraviolence. You don't get the clichéd time-slow or invisibility powers, but you should find that the abilities at your disposal will help you through some situations you might not survive.
Of course, nothing comes for free, so in order to use your feral abilities, you'll need to keep your adrenaline pumping. While adrenaline regenerates normally over time, you can increase its rate of regeneration (as well as your health regeneration) by getting close to your enemies. While the manual implies that you have to do this stealthily, it in fact works even if a whole squadron of enemies knows where you are; just hide behind an obstacle and wait for them to come to you, and you should find your health and adrenaline quickly recharging while you do so.
Feral Attack
The Feral Attack is definitely one of the best feral abilities that you have access to, as well as one of the funnest uses of ragdoll physics that we've seen in a game of late. When you get close enough to an enemy, you'll be able to press your B button to rush up to them and chuck them up into the air, instantly killing most enemies. It's hilariously amusing to watch people fly through the air, but this does take up a big chunk of your adrenaline. Still, if you can get your enemy's attention, then hide behind an obstacle and force them to come to you, this is a good, cheap way of killing someone without expending any ammunition. It works great on Big Boys and other boss-level enemies, as well. You can use your Feral Attack while jumping, as well, which causes a different animation to be performed.
Feral Speed / Feral Jump
There's not much to say about Feral Speed and Feral Jump. When you activate Feral Speed, you'll move much more quickly than you normally would, but only when you're moving straight ahead; attempting to change direction will sap your speed. If you build up a head of steam, you can hold down your jump button to perform a Feral Jump and get a good amount of extra distance on your jump.
Feral Senses
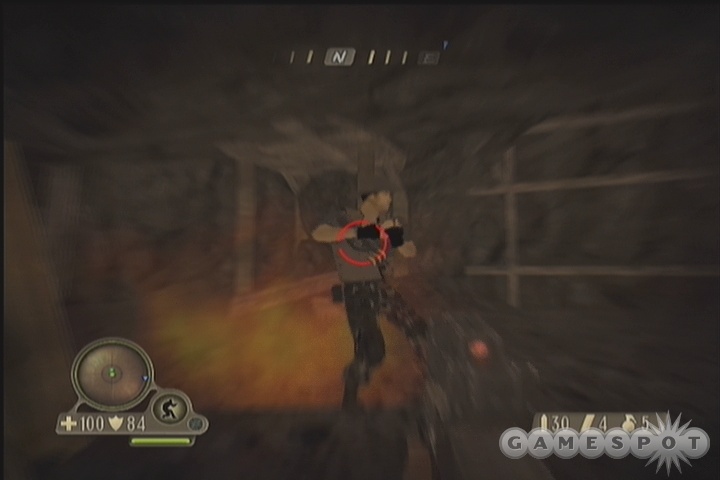
With your Feral Senses, you'll be able to track enemies by their smell, which can be especially helpful in darker areas, or when you're unsure where your foes are located. Later in the game, this ability will be upgraded to allow you to focus in on single enemies; this appears to slightly increase the damage you do while it's active. You'll also eventually earn nightvision, which, of course, makes dark spots bright as day.
Walkthrough
Training
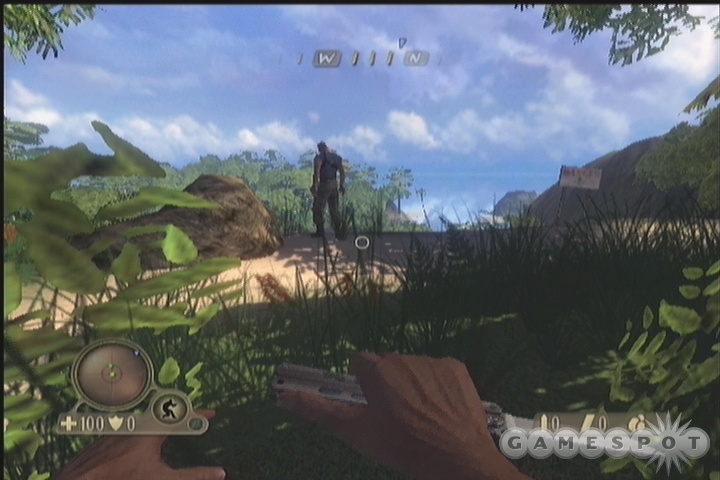
Well, it's a training map! After the lengthy intro, you'll find yourself in the water, under attack from a pair of attack helicopters. The choppers' bullets can indeed hurt you, so you'd be wise to get yourself to the aircraft carrier as quickly as possible before you wind up getting sliced and diced by their minicannons. You've got plenty of breath stored away, so you should be able to stay underwater for the entire duration of the trip. Just keep heading for the blue dot on your radar, and eventually you'll come to the aircraft carrier.
Despite the sounds of the enemies landing on the deck above you, you actually don't face any enemies during this section of the level, so just keep moving forward and you should eventually reach the far side of the carrier. As you jump out into the water, you'll spawn in some more enemies on the deck, so watch for fire and keep moving!
After climbing up the vines at the edge of the water, you'll come to your first unsuspecting victim. Somehow this guy didn't hear any of the gunfire or helicopter sounds coming from behind him, so he'll be looking away from you when you approach, allowing you to sneak up behind him and get a Manhunt-esque stealth kill (only not nearly as violent) by pressing the B button. This guy does have pretty good peripheral vision, so be sure to crouch down into the brush on the right side of the path and crawl from there until you get behind him.
Further down the path, you're going to come to another soldier. For this guy, you're going to be taught how to lay branch traps on trees. It's a fairly simple procedure, if you follow the on-screen prompts; you just want to make sure that you don't get spotted by the guy before the trap is lain, or he'll start shooting at you. Pick up his weapon when he's dead and start following the path again. You can use branch traps and rocks to take down anyone you spot, but from now on, it'll usually be easier to just use your pistol.
Move on and you'll come to a hut, where you'll learn all about crawling under the floorboards and shooting up at the enemies within. The benefit of ambushing soldiers in this manner is that they won't be able to see where you are after you start shooting, so you'll have a few seconds of uninterrupted firing time.
After all of this, you're almost at the end of the level. Scale the nearby hill, and you'll be looking down over a soldier radioing in for air support. Shoot him in the face, or in the head, or in some other part of his body. We prefer the face, but then, we're known for our proclivities involving violence to faces. You won't be able to stop this guy from radioing, but you can punish him for doing so! After he's down, grab the ammo off of his body, then walk into the nearby hut and trade your pistol for a silenced model before running to the water and ending the level.
Beach
The silenced pistol doesn't pack quite as much of a punch as the normal model does, but it does have the benefit of being almost completely silent, allowing you to pop off headshots without alerting nearby enemies. Don't forget that you also still have a knife in your possession; pressing the B button will give you a quick slash at any nearby target, whether you're in backstab range or not.
Start moving down the beach towards your objective dot on the radar. When you reach the soldier with the fishing poles, kill him and find the binoculars nearby. The binoculars here aren't quite as handy as the ones in the PC version of Farcry, due to the fact that they take a bit longer to lock onto enemies and mark them on your map, but it'll still be a vital tool to have; you can bring them up at any time by holding up on your d-pad.
Encampment
Up the hill from the end of the beach, you'll reach a large set of structures, near which a makeshift helipad has been set up. In order to reach it, though, you'll have to wade through a large number of soldiers. Luckily, these guys group together in sets of two or three, preventing them from being a huge amount of challenge. It's perhaps best to just avoid most of them by sticking to the foliage along the eastern side of the base and using it for cover while you wheel around towards the helicopter, which should become more audible as you approach.
When you reach the chopper, it'll take off, leaving seven or eight soldiers behind for you to deal with. When they're alerted to your presence, they'll charge into the woods, so be sure to set a few traps in the brush near the clearing before opening fire; note the presence of an explosive barrel near the tent here. Shoot that to start the fireworks, and you might get a few of the baddies to go with it. Also note that some of the soldiers have SMG's. If they open fire on you, hide behind a tree until they get closer, then dash out and pop them with rapid-fire pistol shots. Since you can't avoid alerting a bunch of them at one time (or it's at least very difficult), you'll probably want to drop your silenced pistol for a regular model before assaulting the helipad.
Jungle Paths
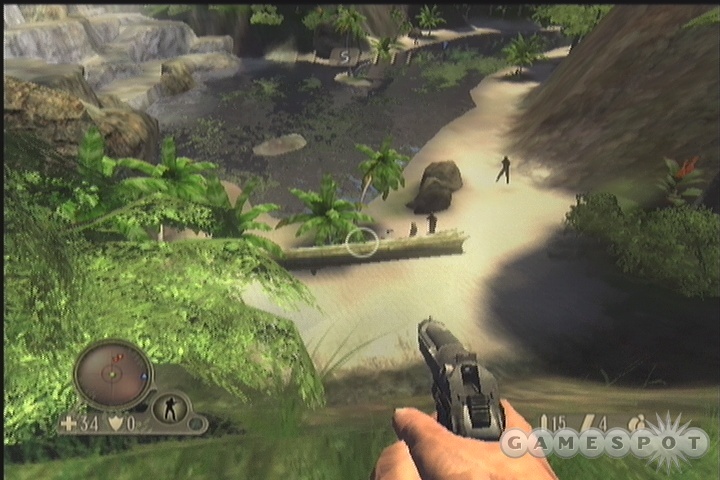
As your conversation with Doyle implies, there are indeed a number of paths you can take to reach your next destination; you can head to the southeast towards the waterfall and climb up the vines to reach a valley with a few soldiers, or you can head down to the river and start following that (watching out for the gunboat), or you can just keep following the road directly to the blue mark on your radar via the trail itself. Although there was talk about the shortest trail being the most difficult, we found the path along the trail to be fairly easy; when you hit the bridge, dive into the water and hide underneath it, using it for cover while you dart out and shoot anyone who comes looking for you.
When you reach the next objective point, you can use your binoculars to overhear Crowe and Valerie's conversation, if you wish, but it's perhaps wiser to just run down the path to the left until you reach the gate to the compound. If you wait until after you eavesdrop on the helicopter to approach the gate, then you'll definitely be spotted. If you manage to get there and lie prone in the grass before the chopper takes off, though, then you'll be able to get the first strike.
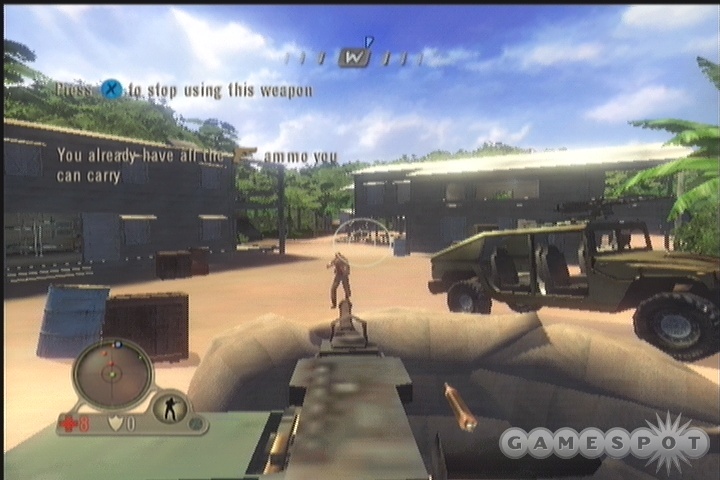
When the gate opens, shortly after the appearance of a RTV that's having problems getting started, you'll need to find some way to get inside without getting killed. If you have a decent amount of health remaining, we found it best to just chuck a grenade at the RTV, blowing it up, then run in with dual-wielded SMG's and kill anyone near the machinegun emplacement near the gate. If you get behind the gun, you can hold X to use it and wipe out anyone else in the area. You'll take a little damage, of course, and will still need to clean out the nearby buildings on your own, but the gun will let you quickly take out half a dozen of the defenders. If, on the other hand, you're running low on health, then you'll have to stay prone for a bit and try to spot enemies from a distance away and pound them with your pistol to weaken up the defenses before entering the gate. The machinegun is still going to be your best bet to get through the garrison, though.
After searching the buildings for health and ammo, you'll encounter another group of soldiers when you head towards the garage. You should have plenty of SMG ammo at this point, so don't worry about firing it, even in dual-wielded mode. Clear out everyone, then grab a Hummer and bust through the gate to reach the next objective.
Reach the Native Village
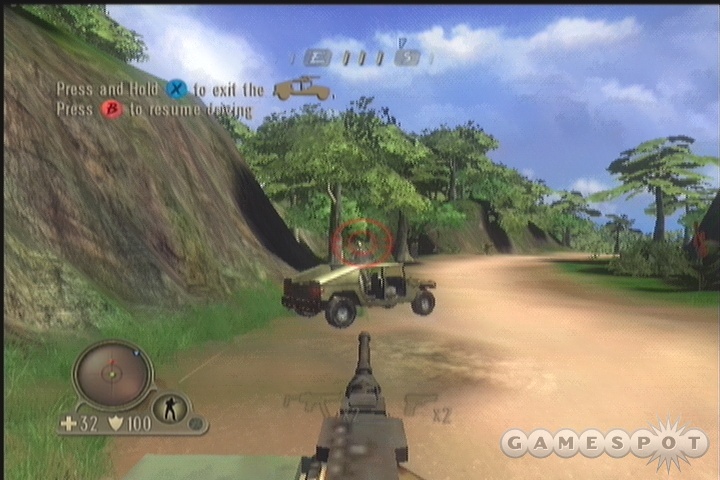
There isn't too much that actually requires explaining at this point; this is one long car chase through the jungle. The Hummer that you start out with will likely take a beating from the helicopter that continually fires at you, as well as all the individual soldiers in your path. You're likely going to take your fair share of bullets, as well. Whenever you see smoke start pouring in from your engine block, though, you'll probably want to stop by one of the parked RTVs on the side of the path and switch cars. There are also a few waystations with health and armor inside, such as when you first hit a tent near the roadblock, so be sure to take advantage of any likely-looking structures when you spot them.
Apart from that, though, all you can really do is just try to avoid the fire coming your way as well as the obstacles on the road, although thankfully there aren't many of the latter. If you spot an enemy hummer with a gunner in it, you'd be well advised to switch over to your own gun position (by pressing B) and firing away at the soldier in the turret, or they'll make quick work of your car. It's best to just ignore the normal soldiers, though, or run them down if they happen to be in your way. After passing next to a large antenna and satellite dish structure, you'll come to a covered bridge that'll be destroyed just as you attempt to jump across it, leading to the next level.
Native
Infiltrate the Armory
Well, you're hopelessly outnumbered, as Doyle said, so you're not going to have much choice but to go guerrilla. Doyle wants you to hit an armory, first off, so start walking down the stream in front of you to try and find it. As the game helpfully reminds you, branch traps are going to be the easiest way to deal with the first group of enemies due to the density of the brush.
You'll soon come across a smashed fence leading to another set of huts. The twist this time is that there are sniper towers scattered around, with real live snipers in them! The kind that shoot you! In the face! Luckily, you'll be able to reach the first huts before anyone's aware of your presence, and will be able to use the building itself as cover while you blast people in the legs. There's also a silenced pistol in the outhouse before you even reach the huts, letting you get your silent kill on. When you're able to pop the sniper, do so from the ground, then climb up the ladder underneath him and grab his weapon from the body.
(Keep in mind that snipers will alert all nearby enemies when they spot you automatically, so if you're approaching any other sniper towers in the future, you might want to try weakening the soldiers around it one by one before taking on the sniper himself. If you can't get a shot from the ground, then go ahead and climb the tower; snipers will drop their rifle and go for their pistol if you get close, making them easier to take down without taking a bunch of damage.)
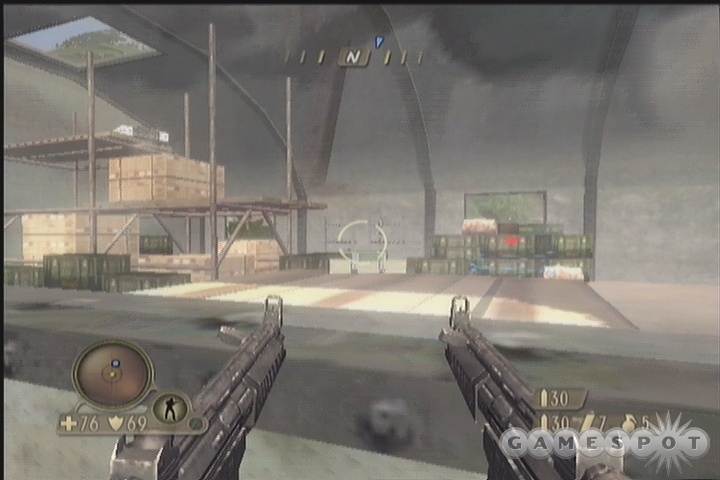
There are actually two paths leading on from here, one of which can be found by dropping down from the two-story building, and another which is found by just following the path. They both eventually come out to the same place, though, so don't fret over choosing one or the other. When you reach another jungle path and hear an ATV roar off, you'll be able to follow the path to the left to resume your trip towards the armory, but you should first head east to reach a small culdesac with more soldiers within. If you kill them off, you'll find a bunch of ammo for your SMG, as well as a lot of health and armor.
The armory is just up the hill beyond the first ATV sighting, so run up and start offing fools. If you snipe out the sniper, then stick to the brush on the left side, you should be able to reach the machinegun near the fence around the armory and use that to blast everyone in sight. Alternately, you can just lay brush traps all over the place, then get them all mad and force them to chase you into the woods. It's fun!
When you reach the armory itself, jump up onto a box and smash a window to crawl inside. You'll find a pack of C4 haphazardly laying about on top of a crate, so pick it up and plant it on the glowing spot to start the countdown. You only have around 15 seconds to get out of the armory before it blows, so hop onto the crate where you found the C4 and smash another window to get the heck out of Dodge.
Infiltrate the Command Center
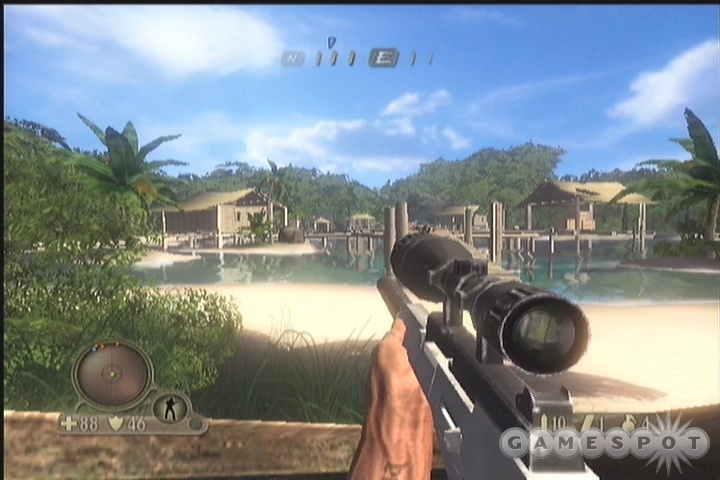
When you've blown the armory, a couple of soldiers on ATVs will come to investigate; time to claim one for yourself. Unfortunately, before you get too far down the trail, your ride will be blown to pieces beneath you, even though the explosion leaves you completely unharmed. Lucky, that. Crowe will demand that you head towards his HQ, and, well, you apparently agree to do so. Not without some coaxing, though; he does still have Valerie hostage.
You'll need to fight your way through the small village outpost at the edge of the lagoon nearby in order to proceed. Theoretically you might be able to proceed in a stealthy fashion, but you're unlikely to get too far before you're spotted and all hell breaks loose. There are around a dozen soldiers here, and more seem to spawn in as you start walking across the walkways, so be careful when doing so.
Around the corner from the beach is another set of huts built over the water, but all of the soldiers here are at least visible, thus letting you snipe one, then pick the rest off as they come to investigate the bodies. Just lie prone on top of the rocks you approach from, and they shouldn't be able to spot you. Even if they do, there's no cause for worry; there's plenty of health in the area.
Eventually, you'll come to the Command Center, near where Crowe's chopper is parked. There are a few entrances to the command center, so pick one and head inside. It'll be empty at first, but when you find the switch to the gate and flip it, half a dozen soldiers will spawn in and start rocking your world from multiple angles, so be ready for them.
The Docks
It would appear that Valerie has broken free of her captivity now, so you'll have to track her down while somehow avoiding death yourself. The initial rundown takes place on an ATV while you attempt to outrun another chopper. This is a fairly straight path here, at least until you come to the rice paddies; when you reach the plantation, go as far as you can towards the blue dot on your radar, then ditch the ATV and climb up the vines to move on.
The end of the level takes place on a little sniping spot overlooking Valerie's position on the docks. Valerie can't defend herself, and there are a number of troops attempting to take her down, so you'll have to use your sniper rifle to cover her movement across the docks until she can make it to a boat. This entails shooting a dozen or so soldiers as they come after her. You don't have a lot of time to cover her, though, as she will be taking damage as the soldiers fire away, so you'll need to be quick with the kills. Go after the soldiers closest to her first, getting headshots if possible to conserve your ammo, and eventually you'll manage to kill all of them, at which point the level will end. Don't be too frustrated if you have to try it a few times; you're really pressed for time here.
River
Escape From Captivity
Well, you've been captured by Crowe, given superpowers, and let loose on the island again. Sounds like a fortuitous turn of events. You now have the ability to regenerate your health while you're not in combat, and use a more powerful punching attack; more abilities will follow along as you discover them.
In order to escape from the set of fences that you're initially caught in, you'll need to use your Feral Attack ability on the fence doors; this requires you to hit B, and replaces the earlier knife attack you could perform with the same button. (Try it while jumping for extra fun!) Doing so will take you to a small tent, where you'll discover a possible drawback to your new-found powers; sirens and alarms actually cause you physical damage. You can shut them off the way you always could: by dealing them damage. You can just shoot them, if you wish, or punch them with your mighty fists of revenge. You can also punch the lamppost near the alarm tower to cause a bit of an explosion that will wipe out the incoming enemies. Go you.
Soon after passing through the tent, you'll come to the first major test of your new superpowers, when you reach a large metal gate that's guarded by a good seven or eight mercenaries. Killing these guys will be difficult if you charge in and go gung-ho, but if you hide behind some of the crates near the entrance to their little fort, you can use your Feral Attack power on them as they attempt to track you down and deal with them in that manner.
For the most part, your Feral Attack and health regeneration should make the next few encounters relatively easy, although you can still die if you expose yourself to too much fire. Just try to separate enemies or lure them towards your position before punching them to their incredibly amusing deaths. You'll eventually come to a garage, where you can pick up another ATV. While you're probably justifiably afraid of helicopters at this point, luckily for you, there aren't any around, and you'll be able to make it at least a bit of the way down the trail before hitting another group of enemies.
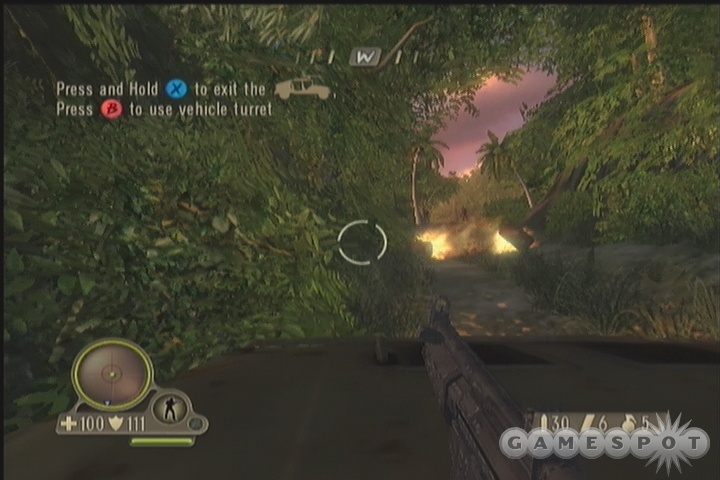
When you do reach another outpost, note the appearance of a RTV. This little guy will probably start chasing you if you leave it alone, so if you have the health to do so, try to take out the gunner with your SMG as you drive past. You should probably try to ditch the ATV and get into the RTV, in fact; it's better because it starts with an R, duh. And the ceiling-mounted turret doesn't hurt, either, as it'll let you fire on incoming vehicles and enemies without having to waste your precious SMG ammo.
The only real kicker in the next little driving segment is the appearance of a couple of flaming barrels that'll get kicked down a slope towards you when you attempt to move on. Shoot these before they impact you, or you may wind up being one toasty critter! You don't have any room to dodge, so just hop up into your turret and blast them from afar.
Riverboat Gambling
Keep driving your cute little car, and you'll eventually come to a set of wooden docks with a pair of inflatable boats. Hop onto one of them and get scooting. Immediately after you set out on your trip, you'll notice a couple of soldiers on the bank of the river; if you want to ditch your boat and kill them, you'll find another ATV which you can use for a ground trip, if you prefer.
Unfortunately, there's going to be a very large camp around the first turn in the river, which includes perhaps a dozen or so enemies as well as a pair of machineguns, and even (maybe) a gentleman with a rocket launcher. Approaching these guys quietly will greatly help your efforts to survive here, so we preferred to land our boat, grab the ATV, drive it up to the edge of the jump overlooking the camp, then walk down the hill and crawl around until we reached the large stack of crates. From behind that, you can dual-wield SMGs and take out most of the nearby enemies as well as the ones that come to find you. With the bulk of the enemies defeated, you can start looking around for health and armor.
When you need to move on, find one of the boats in the river beyond where it was blocked off and continue down the river. You'll come to a dam eventually; dismount your boat to open it, and you'll also have an interesting conversation with Doyle. He'll let you know that you have an implant inside of you that will make you vulnerable to certain countermeasures - such as hypersonics - and that the implant will have to be removed before you get taken out.
Jet Skis and Bombs
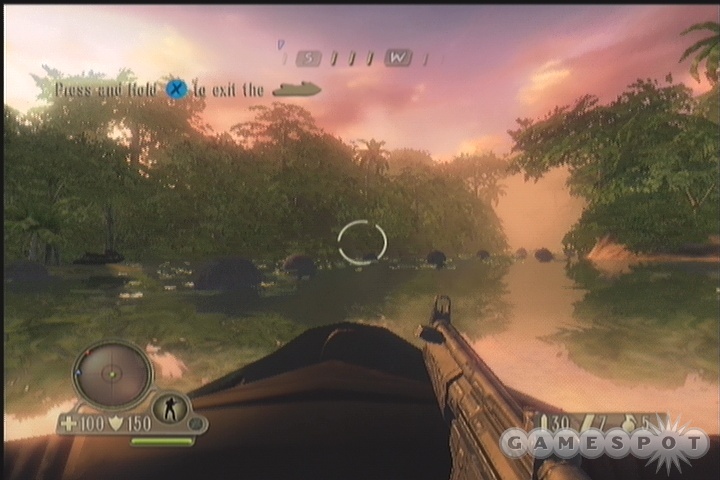
After opening the dam, grab the nearby jet ski and start cruising back down the river. The main obstacle to you now are the mines that'll be popping up from time to time; these big, black balls will deal a good amount of damage to your jet ski if you happen to hit one, so take it slowly and do your best to avoid them, even at the risk of being shot at. This is a fairly short trip, however, and you'll eventually hit a dead end that'll force you to ditch your jet ski and get back on dry land.
When you do, the first thing you'll overhear is a conversation between two soldiers regarding the mines that they're laying. There are indeed a number of claymores in the area, including a couple that haven't been set yet. If you find an unset claymore, then you can pick them up and use them in Trap Mode for extra carnage! They're not unlimited like branches are, but they do have the benefit of being set up-able anywhere you go. After you set a mine, though, they can't be picked up again, so be sure you've got it where you want it before committing to the placement. Like branches, they can also hit you if you get too close to their position after you lay them down, so it's best to evacuate the premises after dropping them.
Either path here (up the road behind the RTV, or beyond the claymores, which explode if you shoot them or launch a grenade at them) will lead you to another encampment. We found it best to approach along the water route, then dive into the water when you get discovered and swim around behind the machinegun emplacement here and use it to take down anyone you can see. Most of them will be out of range, forcing you to leave the gun and take them on individually, but you shouldn't have too much of a problem doing so. When you've cleared the area, grab one of the hovercraft near the machinegun and start working your way down the river.
Just Like My Bayou Days
After you reach the first large ramp here, you're going to come across another of those suspiciously large encampments that happen to lie just in your path. Apparently Krieger's resources are so vast that he can cover a quarter of this island's landmass with military camps designed solely to counteract any possible prison breaks of his experimental subjects. Anyway, there are a lot of guys, and another Blackhawk to deal with, so keep moving, but don't hesitate to flip over to your turret and waste people if you get too crowded.
Beyond the second ramp, you'll come to a pier that's been confusingly built over a pool of ankle-deep water. In order to move on from here, you'll need to smash the support pillars under the pier (either by ramming them with your hovercraft or punching them with your Feral Attack), which will create a ramp that leads up to the camp above. If you're running low on health at this point, feel free to duck underneath the pier and let your health regenerate a bit before dashing back to the hovercraft and moving on. You'll soon get a transmission from Valerie, telling you to take the river as far south as possible, then head inland on foot.
Loud Noises!
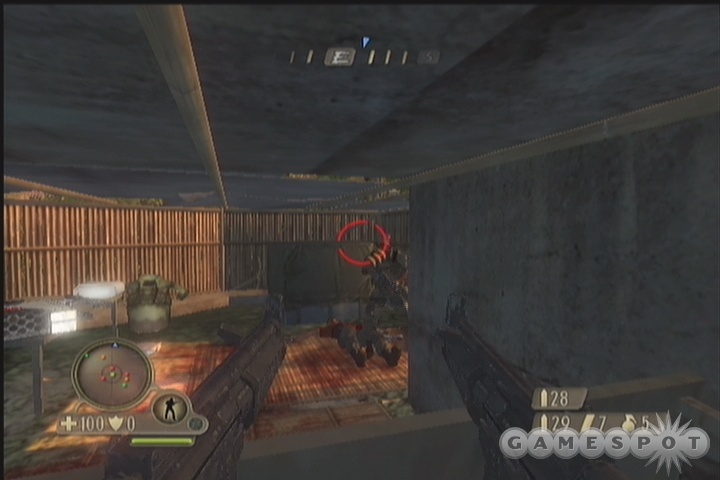
When you do reach the end of the river, grab the RTV at the top of the hill and head down the path; you'll have to ditch it before long, at which point you'll be able to open the gate beyond by using the switch in the gatehouse. The noises here portend your first encounter with some of Krieger's other creations, but it'll be a short one. As soon as you reach the seemingly-overwhelmed merc base camp, the mercs will charge in to take it back from the beasts, and they apparently aren't going to welcome your presence any more than they do that of the scavengers.
Your goal in the base camp is to just stay alive, for god's sake. Dammit, breathe! Breathe, damn you! It's going to get hot and hairy in here, so go in with a pair of SMGs, and as soon as you jump over the barricade, head for the structure in the center of the camp, where you'll find armor, health and more ammo. There are going to be around two dozen soldiers coming in in waves of five or six at a time, so you're going to be quickly overwhelmed if you don't manage to hunker down and find some cover. Doing so will be easier in the little supply closet than it will be anywhere else, as it'll let you funnel your enemies into the doorway and take them out with mines, grenades, and good old-fashioned bullets.
When all of the enemies here are dead, a gate to the northeast is going to open up; hopefully there'll still be an RTV intact nearby that you can grab and use to follow the road. It doesn't matter a whole lot regardless, due to the fact that the end of the level is fairly close by.
Rain Forest
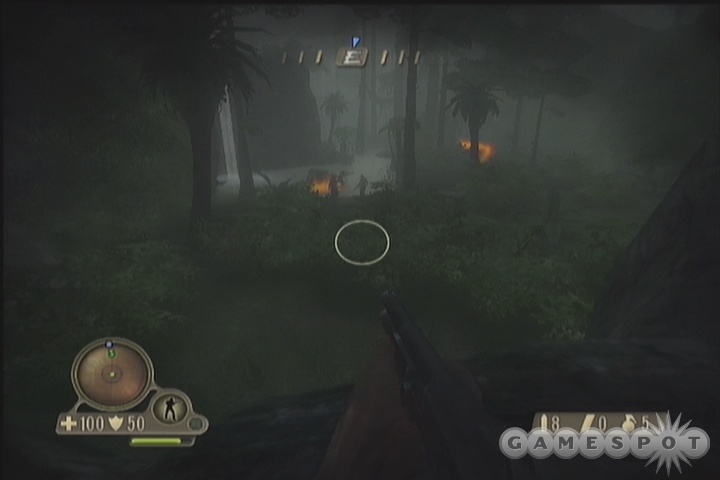
You can hop in the back of the truck near your start position to find a mine. As you head down the river here, you'll get your first taste of a new Feral ability: Feral Smell. Feral Smell will let you track enemies through the brush by highlighting their recent positions. By using it (it's flipped on automatically here), you can track the paths of enemies and follow them back to their source. Immobile enemies won't be highlighted by the smell factor, though, so you'll still need to keep your eyes open. Don't worry if your smell ability becomes unavailable to you after this first experience; it'll be available to you full-time soon enough.
After the first corpse that you find, you'll come across more of the small bird-like enemies; these little guys will rush at you and attempt to bite you at close range, so you'll want to keep your SMGs handy. If you lose sight of them when they charge, try locking back onto them and using a Feral Attack to pop them instantly. They also have a lightly-damaging ranged attack that sends a cloud of stingers your way. They do die quite quickly to SMG fire, though.
For the most part, the first section of this level is just a run-n-gun until you meet up with Val, who'll be just beyond the first objective marker. When you find her, she'll tell you to track down a crypto expert that's attempting to access the files on her stolen Pocket PC, then disappear into the night. Women.
Jungle Hunting
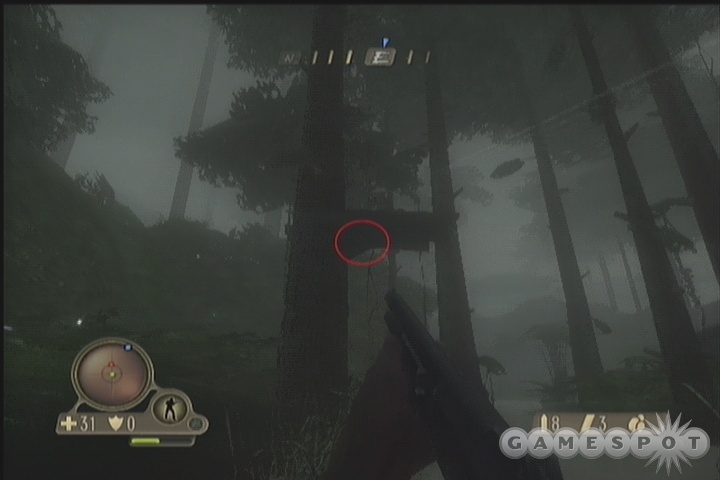
You can grab the shotgun near where you meet Val, if you wish, although it'll be woefully short on ammo at the moment. You will run into soldiers with more ammo for it soon, though. Your Feral Smell abilities will be fully available to you after this point, by holding down the Y button for a couple of seconds, and they'll be useful in tracking the nearby soldiers in the dark. Move carefully and set traps to conserve your ammo if possible.
Note that, on occasion, there will be snipers set up in roosts along the riverbed. You should have a bunch of rifle ammo by this point, or at least enough to spare a round or two to pop these guys in the head when you spot them. If they happen to see you first, then they'll alert all their nearby friends, so keep an eye out for suspicious platforms in the trees and make sure you kill them from a distance.
Again, the next long section of this map is just a bunch of individual skirmishes between yourself and small groups of mercenaries. The darkness does seem to impact their viewing distance a bit, so use your smell to track them down and whack them but good. If you have a silenced pistol or scout rifle, then try and use those weapons as best you can to avoid getting all of the enemies in an area drawn to your position.
After you cross a suspended rope bridge, you'll come to an abandoned WWII fort that's been commandeered by the mercs. After wiping them out (by setting lots of branch traps and luring them into the woods), head into the basement of the fort and follow the mine corridors there towards your destination marker.
Side Quest
The bunker corridors are only a brief part of the level, but they're fun nonetheless. The mercs here are patrolling individually, so you can feel free to run around and Feral Attack them all to death. Don't forget to explore the passages marked with a Danger sign, as there are some goodies at the end of them.
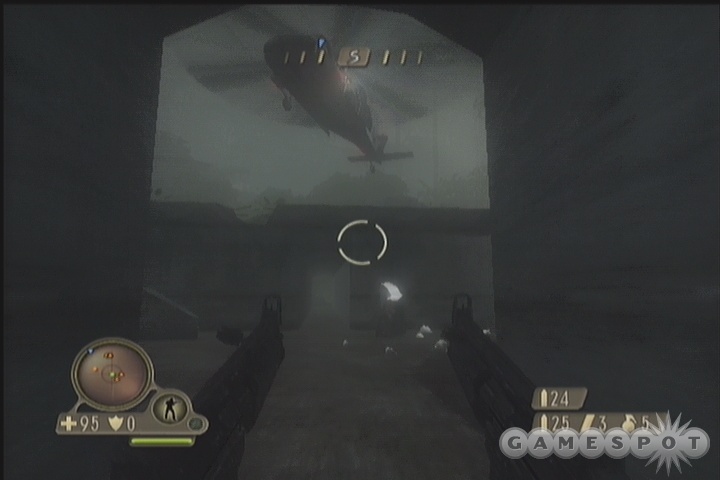
After another river-running expedition, you'll come to a large fort. Players of the PC version of Farcry will recognize it as being the same fort as appeared at the demo level of that game. The scripted event here is also more or less identical to the PC game; as you approach and enter the fort, a chopper will come by and offload a half-dozen soldiers, adding to the other soldiers already in the fort to make for something of a challenging fight. Luckily for you, there are tunnels running underneath the fort which you can hide in. In fact, if you find the tunnel to the left of the first staircase leading up to the fort, you can follow it all the way across the fort, walk up the steps there, and head into the bunker behind the fort without having to kill more than a few soldiers. If you're looking for more ammo, though, you may want to go after the soldiers with your Feral Attack. There's also some armor on the eastern side of the fort, down a set of steps.
Power Drain
When you reach the interior of the bunker, Doyle will ask you to shut down the power to the complex to slow down the hacker. Doing so will require you to delve into the complex and kill its defenders, but this shouldn't be too far outside your normal experience. The small corridors here make kills relatively easy to get, especially if you still have a few grenades at your disposal.
Shutting down the power is a simple matter of flipping a switch, so do it, then start making your way back upstairs. You'll have to follow a different path to reach Val's PDA, however, so climb up to the metal walkways in the next room and start fighting your way towards the elevator. It's been powered down, of course, but the stairwell around it is still perfectly functional. Follow it up a bit, punch through the gate, then take the stairs down to the top of the elevator. After killing the inhabitants of the car, you'll be able to drop through it and reach the next level of the facility.
Escape!
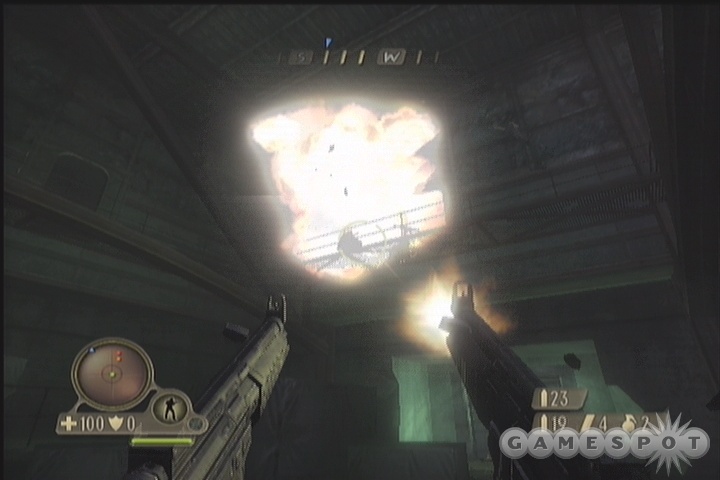
When you reach the cryptomaniac, slice and dice him to automatically pick up Valerie's PDA. After that's accomplished, you'll need to find some way to escape from the area before you get killed, as if that's really a danger at this point. What ensues is a long series of running into ambushes, thanks to the fact that most of the soldiers you encounter will be dug in behind cover. Still and all, these guys aren't too tough, so try to walk into their line of sight to alert them, then duck behind a doorway until they follow you and you can blast them with your shotgun at close range.
Eventually you'll come to what appears to be a dead end, but if you look around, you'll notice an air vent above some pipes. Crawl through it and you'll reach a large room with the wreckage of a downed plane in it. If you attempt to move towards the plane, an ambush occurs, leading numerous soldiers towards your positions from multiple points.
As per usual, the best strategy to pursue here is one of hiding; if you can duck into one of the rooms at the rear of the large area, then you should be able to funnel your foes into a smaller angle of attack and take them down as they come at you, or at least regenerate your health between attacks.
When you've cleared the hangar of enemies, one of the doors that was previously closed will be open to you now, allowing you to head out into the forest again. Unfortunately for you, as you proceed along the trail, enemies will automagically appear out of thin air behind you, so you'll need to turn around and deal with them before moving on. If you don't, they might wind up trapping you between a rock and a hard place, since there are also a number of mercs up ahead of you. Shortly beyond them, you'll find a lift that will end the level.
Mines
The bottom of the lift leads you to a set of mines through which you'll need to travel. You should know the drill by now; there's nothing really surprising down here, unless you count more mercenaries. This Krieger must have some exceedingly deep pockets if he's managing to exclusively hire out this many private security forces. Figure mine duty would have to warrant hazard pay, as well. Was he afraid of C.H.U.D.'s or Troggs or something?
Eventually you'll reach another elevator shaft, but you won't be able to enter it just yet; you'll have to circle around it and walk down the ramp nearby. When you reach the next mine tunnel, though, you'll find that you've become adapted to the dark surroundings; your Y button will now let you see in the dark. Time to get your Riddick on. Most of the mines are fairly well lit, though, so don't bother with nightvision unless you absolutely need it, since it does drain your adrenaline fairly quickly.
Keep moving until you reach the next checkpoint marker, where you'll be told to exit the mines. Well, duh. To restore power to the elevator here, you're going to need to open both fuel valves on the upper level of the walkways, flip the fuel pump to restore fuel to the generator, then flip the generator on to get the power flowing yet again. Doing so will let you call the lift, but be careful when you do so, as more enemies will come into the area looking for you. It's best just to hunker down next to the door and wait for the lift to arrive before hopping in and getting on your way.
The Lower Depths
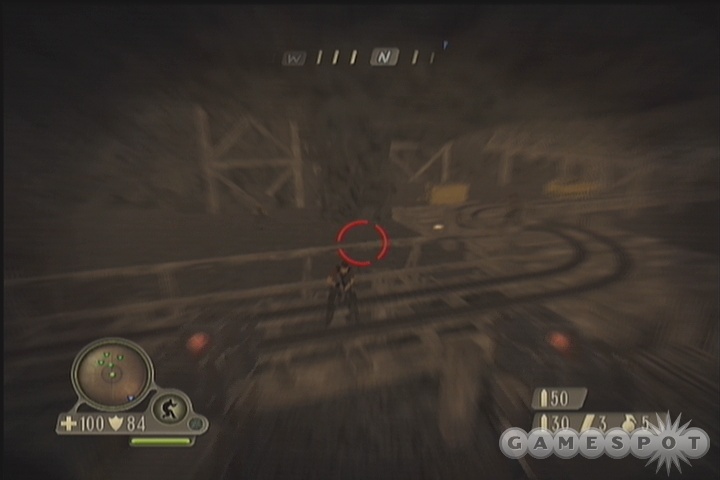
Now that you've reached the lower levels of the mines, your nightvision skill will start to come in a bit more handy, as the corridors here are almost pitch black. Luckily for you, the mercs are unable to see anything beyond a few feet, so if you want to sneak up behind them for some backstabs, feel free to do so. You should be able to counter the adrenaline drain from your nightvision with the stalking bonus you get. The two soldiers you first meet both pack P90s, which you can dual-wield, so feel free to trade in your SMGs if you want to give them a shot.
You shouldn't have many problems navigating the mines with your nightvision; just watch out for guards with flashlights, as they can light you up from a good distance away. You'll eventually reach a long corridor with some railcars overturned in it; the machinegun nest at the end of this area should be used against the numerous foes that will be attempting to follow you.
Keep fighting your way through the mines until you reach a large cavernous area with a steep fall underneath the rail tracks. You'll need to jump across the tracks via the wooden planks on the northeastern side of the area to move on.
You'll eventually start coming across more of the avian mutants if you keep moving along the path, so be ready for them; dual P90s will take them out just as easily as dual SMGs. After fighting through a number of them, you'll eventually come to a cave where you have to lay C4 to blow a passageway for yourself. Instead of actually creating a hole for you to pass through, though, it'll actually drop a rock and let you ascend to the top of the room by walking over it. Beyond that, you'll come to a tightwire room, where you'll need to move across a pair of small suspended boards across a huge drop. Seems safe enough.
If you get past that area, though, you're almost home free. Climb up to the zipwire and ride it across (after letting your health regenerate) to end the level.
Cliff
Destroy The Tower
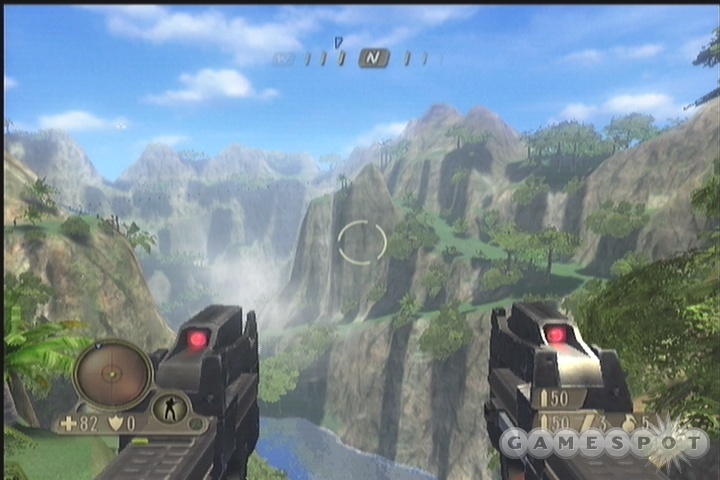
You've got two basic paths once you kill the first three soldiers here: you can either head to the left and go after the glider at the end of the path, or you can head right to find an ATV. There's also a boat in the water at the bottom of the canyon. You'll survive a jump into the deep water from any height. You'll probably be better off with a boat than a glider, if only because you'll be able to trade in your inflatable boat for a gunboat shortly after you start your little trip.
When you hit land again, your view is going to start messing up; it'll flash white periodically, and an intense buzzing sound will be heard. There's not much you can do about this at this point; you just have to fight your way through it and get to the damn antenna that they're using to track you down. That's what's causing the interference with your vision, so climb the ladder next to it and smash it as quickly as possible. When it's gone, you'll be back to normal, relatively speaking.
Hulk Jump
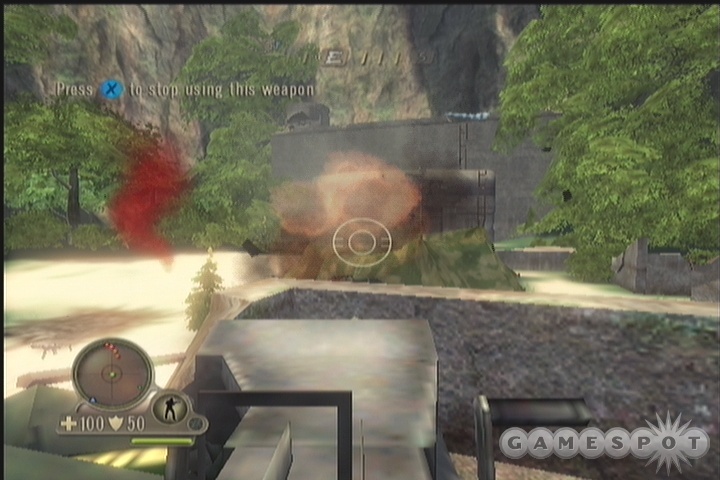
Soon after you defeat the mightily unanimated forces of the antenna, you'll come under fire from a helicopter. The last tool in your little bag of tricks will be unlocked here, though, as you'll find yourself leaping tall buildings in a single bound, and so on and so forth. Your Feral Speed ability will become available to you; press Y to activate it for super speed, and hold down A to charge up superjumps.
What follows this revelation is an insanely fun minute-long sequence where you have to charge down through a slowly sloping ramp while mercs flee in mortal terror. You should have plenty of adrenaline available to you, thanks to the liberal supply of MREs along the path, so feel free to unleash some of your Feral Attacks on the soldiers as you pass them by. It's fun!
You'll eventually get to the bottom of the slope, where another jet ski and river await you. This trip will be awfully short, though, as you'll come to land within a few hundred yards of the beginning of your trip. Soon afterwards, you'll have to scale another fortress-like installation to reach a glider. Be sure to butter up your opponents with the portable grenade launcher before moving in. You don't technically need to use the glider here; if you get over the water you can ditch it with the X button and hop onto the jet ski instead. Like before, though, you'll be hitting land soon after your disembarkation.
Storming The Beach
Around the corner from where Doyle contacts you, you'll come across one of those awkwardly-placed coastal defense fortresses that overlooks a small creek. Apparently the Japanese were afraid that the US might possibly airlift in a battleship and drop it on the water here. Anyway, you're going to have a few enemies in emplaced weapons here, so you'll need to either snipe them from a good distance away or just get right up next to the fort so that they can't fire at you. We preferred to do the latter with our jet ski; if you get enough of a speed boost, you can ride all the way across the beach and reach the fort, then hop off and start kicking ass.
Soon after you're past the fort, you'll come to the Observation Center, apparently designed solely to observe pretty trees. It's a tough job. From there, proceed outside to the observation towers around the area until you find an elevator leading down to the Control Room, where you'll meet another of Kreiger's experimental pets, a Big Boy. You'll be running into more of these guys later on, but for now, it'll scamper away from you, so you won't have to fight it.
...at least, not yet. You'll continue to hear its roars as you make your way past the control room, and when you reach a little arena with numerous broken barrels, you'll come face to face with the Big Boy for the first time.
Big Boy!
Your little fight with the Big Boy is unavoidable, but if you're lucky, you shouldn't wind up taking any damage. The Big Boy only possesses melee attacks, but can also fling junk at you through the air, so you'll need to be careful to avoid anything it throws while staying out of range of its melee blows, which do a severe amount of damage. That said, it's not very fast, and there are plenty of SMGs and P90s scattered about, so use them in dual-wield mode to do the bulk of the damage required to take down the Big Boy.
There are also a pair of machineguns in this area, but the baddie seems to be able to knock you out of them as soon as you attempt to use them, so they can't be relied upon. If you run low on ammo, you can also try walking into the northwestern cargo container, stand on the armor behind the explosive barrels, and blow them when the Big Boy attempts to follow you in. If it survives, you might have a hard time getting out alive, but you might be able to squeeze through with your Feral Speed.
When the Big Boy goes down, you'll be able to walk through the smashed gates to end the level.
Sub-Aquatic Facility
After the first skirmish in the jungle area, you're going to come up to the heavily defended science building. Some of the enemies here will be dropping the carbine for the first time; this automatic rifle isn't as powerful as the SMG or the P90, thanks to the fact that it can't be dual-wielded, but it does have a scope and a suppressor on it, making it a decent choice for general engagements, especially when you're trying to keep things on the down-low. You also might run across a 9MM Automatic, a worthy addition to your arsenal, since it resides in your handgun slot and enables fully-automatic firing.
Assaulting the position will take a little luck, and a lot of health. Since you have your super speed now, though, you may be able to just bum rush the area and go in guns blazing, especially if you're packing dual SMGs. When you get close to the doors, more enemies will spawn in from the direction you came, forcing you to turn around and deal with them before you move on inside, but hey - you will have a machine gun at your disposal, so use it and try not to die. The doors won't open here until you manage to kill everything that moves, so it's not like you have much choice in the matter.
Through the Facility
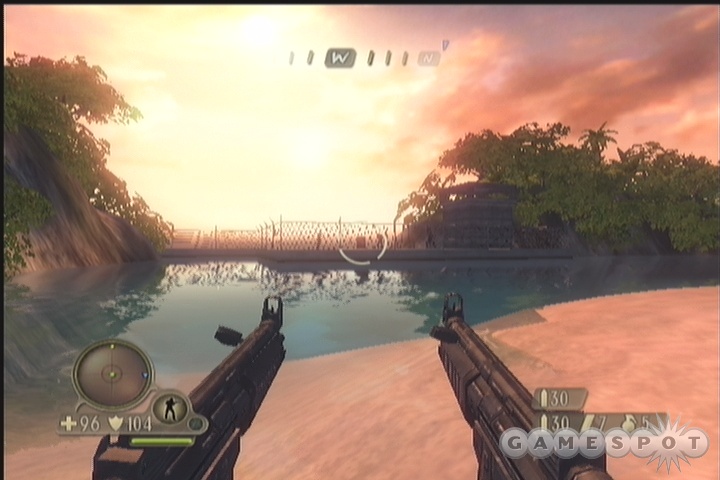
When you reach the interior of the facility, you'll come to a control room with a soldier inside, and will get more of that lovely ear-splitting (and health-reducing) alarm sound. You'll need to smash the window and shoot out the alarm from there. Alternately, you can break the grate on the vent and crawl through to reach the room itself, but that'll take a little while. There is armor inside, on the plus side.
When you're through the facility, you'll be able to crawl through a vent in a bathroom to reach another portion of the base. You'll have some tough fights in your path before you can reach the exterior; you'll know you're almost there when you reach the locker room and start hearing an announcement about requiring an amber passcard to reach the surgical ward. Since you'll need surgery to get your implant out, keep your eyes out for one of those.
Soon thereafter, you'll reach the pools of the facility, which are overwatched by a half-dozen snipers or so. Since you're probably running low on sniper ammo at the moment, you'll probably want to get up close and personal to take their weapons from them and fill back up on rounds, even if it does mean that you'll have to lose a bit of your armor supply. Alternately, you can just stay in the water and swim towards the end of the lake area, where there's a vent underneath the waterline you can pass through. You'll have to shut off the hot water switch to the right of the path first, though.
Science Wing
When you reach the first fork in the road past the locker rooms of the Science Wing, you'll be able to head left to reach the surgical ward, although the door is currently locked. The Amber passcard that you require is located down the right hall, past the autopsy bays and the science lab. Grab it, then return to the science wing to finally get your little implant out.
When the operation's over, you'll find that you've...changed...again. Alarms no longer seem to hurt you, thankfully, but all of your equipment has been removed, leaving you with only your claws for company. Making your way out of the science wing will require you to blast through a couple of soldiers, then swim out through one of the access tubes in one of the nearby rooms.
Outbreak Outbreak Outbreak!
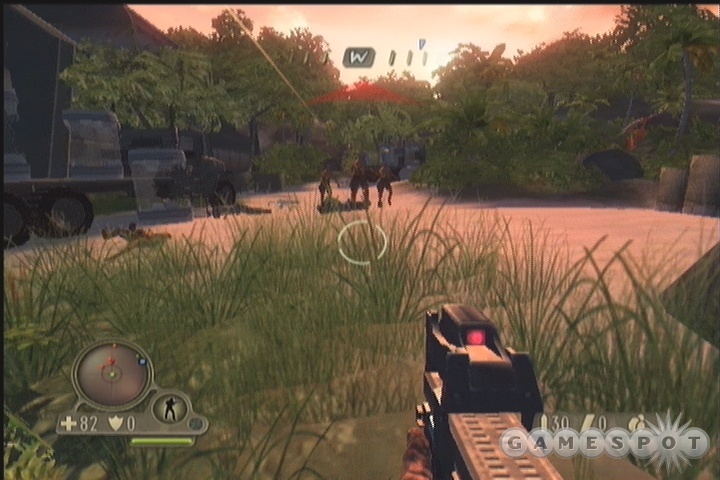
Well, as you'll soon discover, Krieger's experiments have come back to haunt him, or at least haunt the highly-trained mercenary forces he's hired. The mutated men will quickly break out of their containment cells after you escape from the facility, and start causing all kinds of P90-fostered trouble on their guards, which you'll be in the middle of. It's all-out war between the freaks and the mercs, but everyone's still gunning for you, so you're not going to be able to pick sides.
When you sneak up on a firefight, let it play out before you deal with the survivors, as it'll give you fewer targets to worry about. All of the mutants will be wielding P90's, so you should be able to rack up a good amount of ammo for that weapon, especially if you use your feral attack to do most of your killing. Your regenerative properties seem to have been increased a bit, so you'll be gaining health back much more quickly than you were previously, at least when you're near enemies. If you start to fill up on P90 ammo, though, feel free to use that instead of your Feral attacks. The mutants can take a bit more damage than the normal mercs, but still go down relatively easily.
Keep moving through the fences and you'll eventually reach a wall on which some mercs are attempting to hold back the barbarian horde. The machinegun here seems to do more damage than is normal for an emplaced weapon, so just run up to the wall underneath it as quickly as possible before climbing the ladder to get on top and kill the mercs.
We Who Are About To Die, Salute You
Soon thereafter, you'll come to another arena, similar to the one in which you fought the first Big Boy. As you can probably surmise just from looking at the area, there's going to be a fight here, and indeed, as soon as you hop down into its interior, Crowe will appear on the command center nearby and start firing his rocket launcher at the trailers around the area, causing massive numbers of mutants to pour out. He'll also take potshots at you from time to time.
The key to surviving here is to hide; just stay out of sight of Crowe, at least, to avoid his rocket fire. There's a good hiding spot on the end of the yard opposite from Crowe, between the wall and one of the trailers, where you can park yourself and wait for the mutants to appear. If you just wait there and pound on any mutants that pop out at you with your dual P90s, you shouldn't have a problem taking them down, especially not if you aim for their heads. You might need to dart out to pick up more ammo from time to time, so just be sure that you have your Feral Speed activated before you do so.
Eventually, you'll get a message indicating that Crowe is retreating; when you do, you'll be able to jump on top of the fallen antenna structure to get on top of the building he landed on and walk across it.
Fun With Soldiers
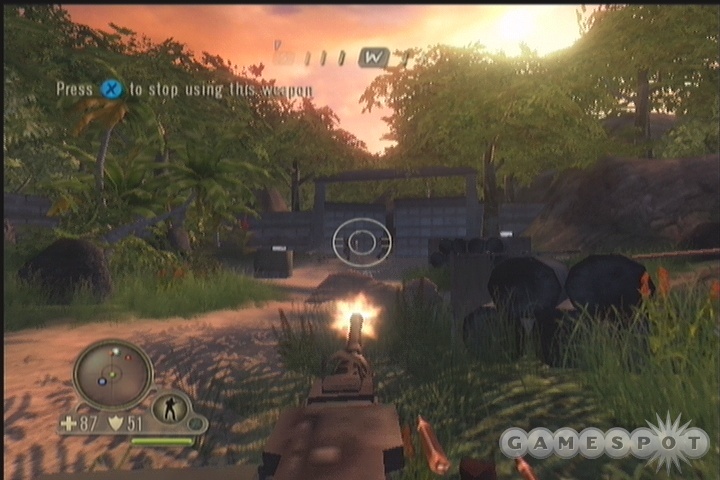
When you meet up with Val again, she'll tell you that she can clear a path for you to proceed, but that she'll need to move on by herself for a bit, and will leave you behind to deal with the influx of enemies that will be coming your way, thanks to the alarm. In order to best defend yourself here, get behind the emplaced weapon, but instead of simply using it (there's a sniper that will be able to hit you there), rip it out of the emplacement by holding down the B button. Now you're playing with power!
The machinegun should allow you to mow down your enemies as they come at you, especially if you hide in the little crevasse formed by the crates near where you came through the wall. When Val finally pops the security door, head in and meet up with her in the control room. There you'll get your next objective: find and stop Crowe, who's heading to a helipad nearby.
I Invented Boat
Well, before you can get great rewards, or at least the satisfaction of killing a guy who was once somewhat rude to you, you'll have another difficult vehicle racing section in store. This time, you not only have to use a jet ski to get down a river, you have to use a jet ski to get down a river while dodging floating mines and rockets fired by soldiers on the riverbanks.
Whether or not you find this sequence to be fun or a major pain in the butt will depend on your temperament, for the most part. You're not going to get through unscathed, we can promise you that, but if you picked up the armor in the control room, near Val, then you should at least be able to survive a hit from a mine. More than that, though, and you'll have to retry the sequence over from the beginning.
There isn't much strategy we can offer you here, except to say that it'll probably take you a few tries before you get a feel for where the mines are placed in the river. The rocket launchers are less of a threat, unless you move too slowly; if you keep the speed up, then most of the rockets will impact the river behind you and will only do mild splash damage.
When you get a quarter-mile downstream or so, you'll come up to another beach, where you'll note a helicopter taking off. The beach is absolutely crawling with mercs, though, so your best bet to get past them is to just charge the beach full on with your jet ski. You should be able to get pretty far back onto the beach, where you'll be able to hop off the jet ski and use your super speed to get up the ramp and into the small cave on the top of the hill there. When you do so, you'll be almost home free.
Catching Up With Crowe
Unfortunately, when you reach the helipad, you'll find that Crowe has just taken off for his own private island. You won't be able to stop him, but you will be able to take out your frustrations on his little security squad. They deserve no better.
When you've finally fought your way to the launch on the far side of this little dock area, which will require you to open the gate and then super-jump across a ruined bridge, you'll be able to end the level.
Dead Marshes
Well, you've reached Crowe's stronghold, but you're going to have a hard time getting up to his little base without first taking out his defenses. Doing so will require you to blow a generator on the island, and doing that will require you to find some explosives.
Start making your way towards the objective marker, but when you hear the helicopter fly overhead, slow down a bit and take stock of Crowe's new weapon: self-detonating mutants that run at you and explode! While these have been done before, in games like Serious Sam and Painkiller, they're still fun to fight. The main problem with these guys is that, due to the darkness, they're going to be almost indiscernable from the normal, P90-wielding mutants. Take no chances, and shoot everything you see. If something happens to fire back at you, then you can flip to your Feral Attack if you wish.
When you reach a busted bridge, you'll need to drop down to the river below it and head to the south to pick up the trail again. When you approach the firefight between the mercs and the explosive mutants, it's best to just try and run past them. You'll hit a fence eventually, but a hole will be blown in it by another mutant shortly after you reach it. You'll also get an upgrade to your Feral Smell ability, but don't waste time trying it out; just keep booking it towards the mark on your radar.
Finally, A Structure
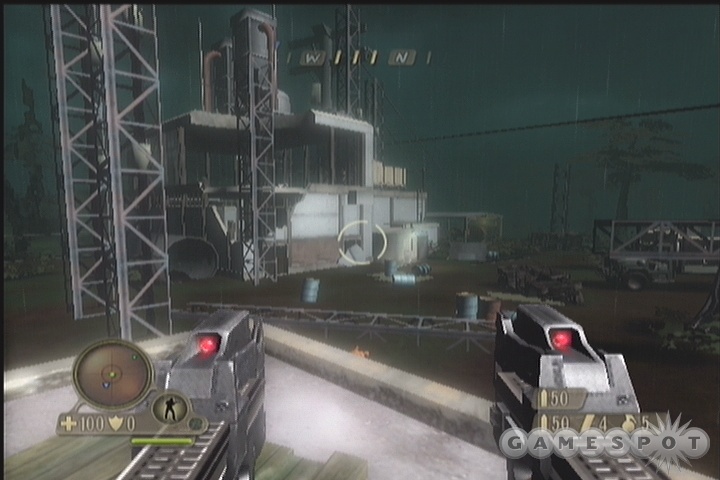
Shortly after picking up your Feral Smell upgrade, you'll come to Crowe's power station, which apparently isn’t actually supplying any power to anything, since it and the rest of the buildings around it are all blackened. Still, it must be destroyed! For your own peace of mind, if nothing else.
To do so, first you'll need to find some C4. It's located in one of the two squat structures in the rear of the compound, but the building it's in is locked tight. To reach it, head into the other nearby building, climb to its roof, and super jump across the gap. You might want to rip the machinegun off of its emplacement before grabbing the C4, though, as you'll be ambushed by numerous mutants when you do so. They'll rip through the wall and start shooting you through the hole, but your MG ought to swing the pendulum of power in your direction.
When you've cleared out the foes here, head towards the ladder on the larger building (near the sole working lightbulb) and jump and climb up to the top of the power station. After planting and detonating the C4, the path leading on will be opened, so enter Crowe's territory and get ready to boogie.
The Run
Another longish traipse through the rain forest will occur now, and again, we recommend that you just activate your Feral Speed power and beat your feet as fast as you can through all of the enemies. You might get shot a couple of times, but you'll at least won't have to deal with the dozen or so soldiers and mutants between yourself and your destination. When you find a small hut, get on top of it and walk along the small path at the top of the ramp to move on.
After a bit more meandering, you'll face another fight against a Big Boy; you'll know you're near it when you start to hit a massive amount of weapons and first aid scattered on the ground. Switch your P90s for the shotgun here and use that to take the beast down; between your boomstick and some Feral Attacks you shouldn't have too bad of a time with it, if you can avoid getting smacked yourself. When the Big Boy goes down, a pair of explosives will appear and knock a hole in the rear wall, allowing you to move on.
River Running
After you clear the next little compound of soldiers, you'll have to traverse a long, long river to get to the next waypoint. There'll be plenty of mercs on the islands and banks of the river, so you may want to just stay submerged as much as possible if you're trying to preserve your armor.
You'll eventually run into another closed-in arena. This time, however, you're going to be facing two Big Boys, with precious little other than your fists and P90s to take them down. Doing so, again, isn't as horrific a proposition as you might imagine, especially if you can lure them towards the many explosive barrels in the arena, then shoot them when they get near. Also chuck any remaining grenades at their feet for extra damage. When they get in close, force them to overcommit with their overhand blow, then use your own Feral Attack while they're recovering, all while unloading dual P90 fire on their butts. Try not to move too far up the path beyond the gates, as doing so will spawn in numerous mutants.
When the Big Boys are dead, head to the little armory nearby and grab as much ammo as you can. You can find your first truly portable version of the machine gun here; it'll take up your sniper rifle spot, but it should be worthwhile if you enjoy getting up close and personal. When you move through the second gate, the level will end.
Wasteland
After killing a few dozen soldiers, you'll eventually come to the waypoint marker here, which will let you speak to Val. No rest for the weary, though, as she'll send you after Doyle, who's apparently been kidnapped by Crowe. But who shot J.R.? The world may never know...
After a bunch more fighting, driving, swimming through sewers, etc., you'll reach another abandoned structure. As per usual, let the soldiers and mutants deal with each other, and they'll reward your efforts with a mass murder-suicide spree. Be careful when rushing into the courtyard with the destroyed helicopter, as there is one soldier with a rocket launcher running around inside. Kill him, and you'll be able to grab his weapon, if you wish.
Abandoned Buildings
When you reach the interior of the next complex, you'll come across a surprising sight: Crowe's finest troops have arrived, and the've brought their favoritest assault rifles with them. The assault rifle can't be dual-wielded, but it does possess a handy grenade launcher which will let you dish out explosive justice without having to wait to toss a grenade.
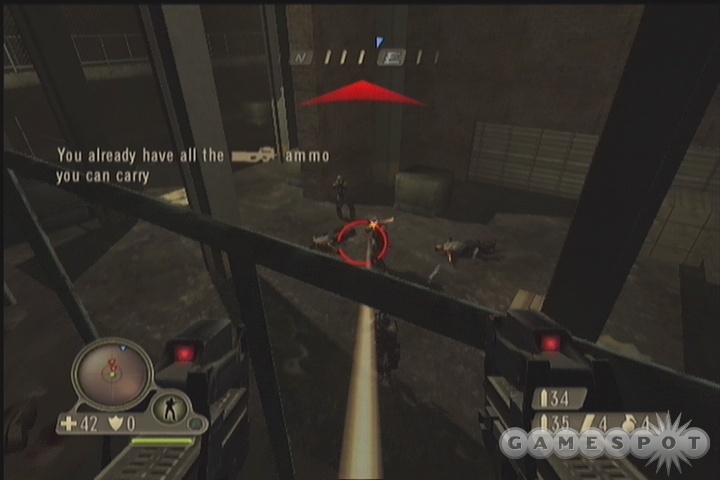
You'll soon reach a lift that'll take you further up into the building, but it's unpowered, so head outside and flip the switch. You'll probably need to use your nightvision to see the passage leading to the exterior portion of the level, and of course doing so will cause more soldiers to spawn in behind you, so be careful.
We'll trust that you know how to get through a jungle corridor section by this point in the game; suffice to say there's another one between you and the greenhouse. Be wary of charing into the greenhouse, though, as there are plenty of soldiers within. It's better to try and lure them to the door and plant mines or use grenades to off them there. You'll have a one-on-one fight with a Big Boy before you can leave the greenhouse, so let your adrenaline recharge before hopping over the fence and use your Feral Attack to slice and dice it.
Moving On
When you reach the area with all the cargo containers, you can expect a mutant ambush, but if you hide inside one of the containers, such as the one in the very middle of the clearing, you should find that you can fire out the small gap in the middle of it, allowing you to easily take down your opponents with minimal risk to yourself.
When you finally arrive at the hospital, charge in and start looking for your objective markers. Soon enough, you'll come across Doyle, and one of the more annoying setpieces of the game will begin. You'll have to escort Doyle through the rest of the building, through the woods, and to a nearby helicopter before the game will end. As when you covered Val's escape to the boat lo those many levels ago, Doyle will have a life meter for this, so you'll know how much life he has left, but it'll go down rapidly if he's exposed to fire.
Doyle here travels from hotspot to pre-set hotspot on his own accord; you can't command him, no matter how much you might wish to. He does have predesignated hiding spots that he'll move from, but when he's en route, he won't stop for nothing, and it's during his transit times that he'll be most vulnerable. Luckily, he won't move until you've killed most of the opponents between one hiding spot and the next, but more enemies will of course spawn while you're moving, so you'll need to keep your head up and always be checking the radar for more enemies. You're going to have a hard time regenerating health between fights, so check all of the little waystations along the path here for more health packs and armor before moving on from each one.
Black Forest
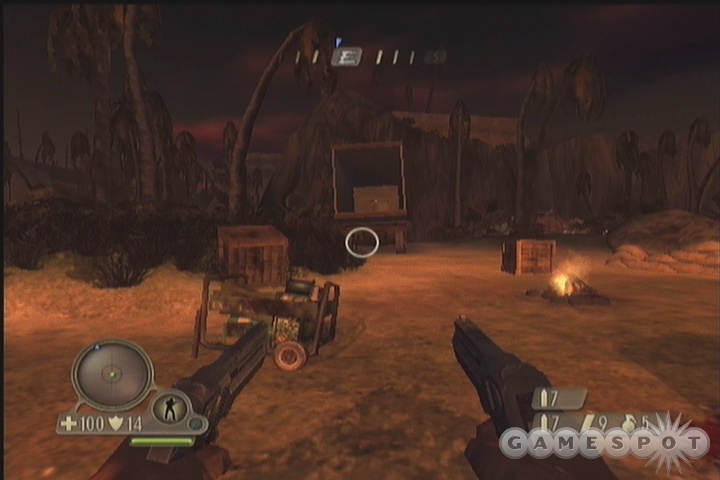
So, you're a mad scientist with 200 million dollars to blow. Over 20 years, the interest on that must've doubled your investment, at least. Where do you build your headquarters? On an unstable volcano. Yeah. Genius.
After you crest the first hill, wait for the fireworks to die down a bit, then snipe out any remaining soldiers before scavenging any weapons you can. You can also superjump into the back of the trailer to find 100 armor. When that's done, do your best to super speed your way up the hill, past all of the mutants, until you find the drainage pipe that'll lead you on further up the volcano.
Swamp Them With Your Bodies
The next little area features a sweeping slope of volcanic rock that's overwatched by a pair of pillboxes. Try to sit back for a while and let the mutants rush the turrets; they might actually manage to kill one of the gunners, and you'll be able to sneak up with your sniper rifle and take down anyone who's still alive. Search both pillboxes for ammo and armor before moving on.
There's a zipwire atop the building the sniper's on, so head inside, clear it up, then run up the stairs to reach the roof. After you're across, you'll find another group of soldiers with an ATV, so kill them and nab it. This section of the game is going to get pretty difficult, so try not to get frustrated if you wind up having to restart a few times. We personally preferred to hop onto the large rock on the western side of the wall and use it as a sniping platform to kill everyone near the ATV, but that's just us.
Terrible Journey
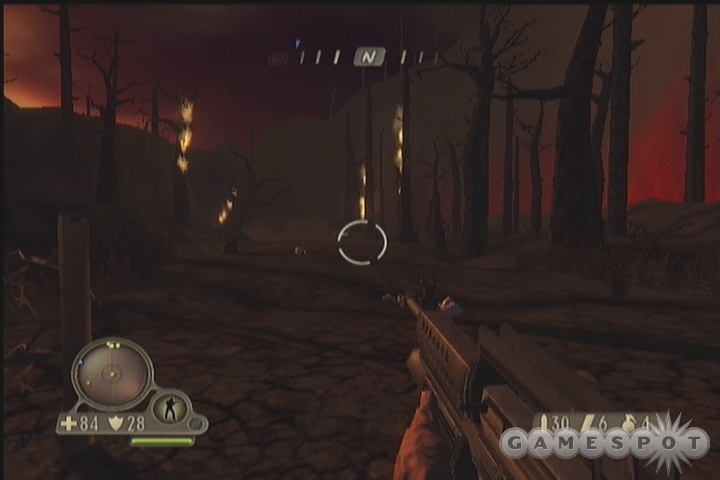
When you start riding out on the ATV, the next mini-section of the course will feature one (1) exploding humvee, one (1) guy with a mortar firing at you, and at least one rocket launcher soldier attempting to take you down. There's also a nasty bump in the road which can easily knock you off the ATV if you're not going full speed. This section alone will cause you a few restarts. If the bump is giving you problems, you might want to try going through this section with superspeed instead of the vehicle and just jump over the bump. The rockets and mortars should still be too slow to hit you (although if they do, you'll likely die.)
Next up is a long road scattered with mines. Since a single mine will likely kill you if you hit it on an ATV, it'd be best to just abandon the vehicle and travel the road on foot, with your Feral Sense ability to light the way. If you spot a mine, either shoot it or avoid it and move on.
At the end of the road, you'll come to another installation that's under assault by the mutants. Wait for the soldiers to repel the invasion, then sweep in with your bad self and grab the armor and health from behind the barricade. The mortar here, like the machinegun, can be ripped from its emplacement and used as a weapon, so grab it before heading inside the facility. You'll be ambushed by four mutants when you enter, but you'll be able to kill them all with one round from the mortar without a problem. There'll be more of them in the bunker area nearby, so be ready with your mortar and hide if you get too low on health.
The Villa
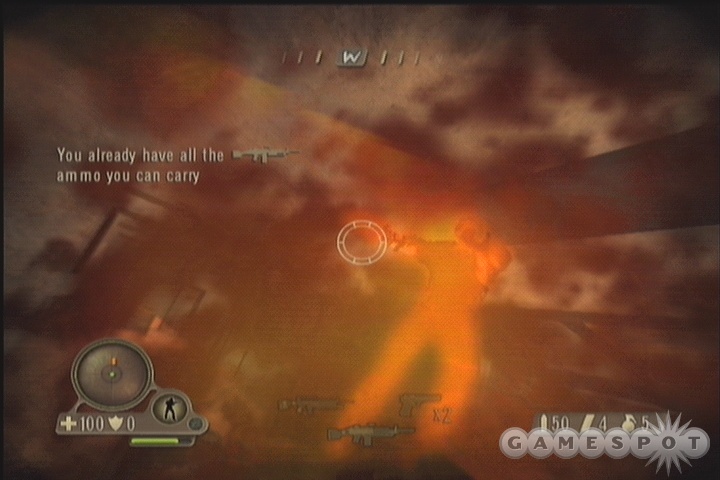
After riding the elevator down to the villa, you'll find yourself facing off against more mutants, all of whom wield machineguns. The villa itself is a fairly small, self-contained area with plenty of corridors and side rooms to duck into. You're not going to be able to leave immediately, though, and will instead just have to survive for a while until the exit is opened for you. Don't do anything unwise here; just stick to the kitchen, let your enemies come to you, and off them with Feral Attacks when they pop their heads out at you.
Eventually, you'll feel an explosion, and will notice a blue dot appear on your radar; this indicates that you're able to move on, by jumping atop the smashed exterior area of the villa's walls. Do so, then ride the elevator up to the upper floor.
Endgame
Well, it's finally time to take down Crowe and Kreiger, or, rather, just Crowe to begin with. He'll be tough, no doubt about it, but with a little practice, you should be able to defeat him.
Crowe himself is pretty tough; he'll jump up on top of a little cliff at the beginning of the fight and take potshots at you with a mounted machinegun from his perch throughout the fight, as well as chuck grenades at you from time to time. He's not your most pressing concern, though; that distinction belongs to his little mutant honor guard, which will continually pop down from the cliff's edge to engage you. These guys come in both melee and machine-gun oriented variants, and will be the primary source of damage to you during the first portion of the fight.
The key thing to realize here is that the mutants aren't infinite in number; if you can kill a couple dozen of them, then they'll stop popping up, and you'll be able to focus on Crowe. You can use your own machinegun to do so, of course, but we found it a bit easier to switch out your assault rifle for a shotgun and use that, in conjunction with your Feral Attacks, to dish out the hurt on the mutants. If you can aim anywhere near their heads, a single shotgun blast should kill a mutant instantly, as of course will a Feral Attack.
Actually staying alive through all this will be a bit more difficult, since the machineguns that your foes wield can quickly chop through your health, so try to ace them as soon as they drop down into the pit. There are only three locations that they drop in from, so at least you'll know where they're going to appear. There are also a number of health packs in the area, as well as a couple of suits of armor, so you can at least get some quick restorations when necessary.
When the mutants stop coming in, you can focus on Crowe himself, who'll still be firing away from his perch. If you get right up underneath him, you'll be able to pound him with your machinegun or shotgun from close range, and he'll have a hard time hitting you in return. After you deal enough damage to him, he'll jump down into the pit, allowing you to spam Feral Attacks on him. If you run out of adrenaline, go for an adrenaline pack or just rotate around the helicopter so that he can't fire at you, while hitting him with your machinegun. After a while of this, he'll keel over dead and you'll be home free.
When Kreiger's dead (which happens automatically), all that's left to do will be to jump into the helicopter that Val has miraculously procured for her and Doyle, which entails running back down into the pit and towards the cliff's edge - no actual jumping required. When that's done, it's game over, man! Game over!
Got a news tip or want to contact us directly? Email news@gamespot.com
Join the conversation