Gears of War 3 Walkthrough
Rev up that old Lancer, COG! Our Gears of War 3 Walkthrough gets you ready with info about new weapons, changes to Horde 2.0, the brand new Beast mode, and a video walkthrough.

- Weapons: How returning weapons have improved and new guns to wield
- Maps: The ten multiplayer maps for Versus, Horde, and Beast
- Horde: Horde 2.0 boosts more strategy and teamwork than its old man
- Beast: Take the role of the Locust and smash puny humans
- Walkthrough: Find out how we handled the Locust Hordes and discovered hidden collectables
- Xbox 360 Achievements: Boost your Gamerscore with a huge list of Achievements
What's New:
- September 21, 2011: Version 1.1 of the Guide is ready. The video walkthrough now spans the entire game. We also added the Achievement list.
- September 20, 2011: Version 1.0 of Gears of War 3 Walkthrough Guide is up and at them. We will be updating in the next few days, so check back later for more info.

Weapons
The Terminator Operator Bundle | Call of Duty: Warzone & Black Ops 6 The Sims 4 Businesses & Hobbies Expansion Pack | Official Reveal Trailer Apex Legends: Takeover Gameplay Trailer Capcom Fighting Collection 2 | First-ever Hands-on | 30 mins of CVS2, SFA3, Project Justice Like a Dragon: Pirate Yakuza in Hawaii | Story Trailer Space Marine 2 - Datavault Update Overview Trailer The Gun Show - Holiday Special Dead Rising 3 Weapon Tips: The Good, the Bad, and the Pukey Killzone: Shadow Fall - Multiplayer Starter Guide The Gun Show - Extinction Mode from Call of Duty: Ghosts Battlefield 4 Levolution Guide: Survival of the Fittest Battlefield 4: Top Ten Test Range Tips
Please enter your date of birth to view this video
By clicking 'enter', you agree to GameSpot's
Terms of Use and Privacy Policy
Gears of War 3 features all new additions to the COG and Locust arsenal. Even some of the returning guns have improvements and changes that set them apart from the Gears 2 versions.
Rifles
There are three different Rifles to select for your default loadout. The Lancer and Hammerburst make a return from Gears 2, while the Retro Lancer is brand new to part 3.

For Gears 3 you can now aim down the sights of the Hammerburst. This allows for even more long ranged accuracy and stability. Still, the Hammerburst isn't nearly as lethal as either Lancer, but it is great for when you want to secure a down and Execution.
The new Retro Lancer has a huge recoil and poor accuracy. It's best to use short controlled bursts of fire to maximize the Retro's strong damage. The Lancer is further equipped with a sharp bayonet that can be used to charge in and skewer enemies. Though the Retro Lancer charge is powerful, it isn't the only means of close damage: you can still wield it as a melee weapon and perform Executions.

Related to Rifles but not part of the default loadout is the tried and true Longshot. This sniper rifle has the same powerful force that can obliterate enemies with a well placed headshot. One slight disadvantage to the gun is that enemy targets will be given a very brief glint to warn them of possible headshots.
Close Range Weapons
For your default shotguns you have the selection of the popular Gnasher or the brand new Sawed-Off. The Gnasher is more or less the same, though it does seem a tad less powerful compared to its Gears 2 days. It might take an extra (or simply well placed) shot to mutilate your enemy.

The high powered Sawed-Off can instantly kill one or more enemies at very close range. However, this weapon is among the slowest weapon. If you miss or simply fail to kill all of your targets, get the hell out of there. Waiting to reload your Sawed-Off will simply leave you a bloody corpse.
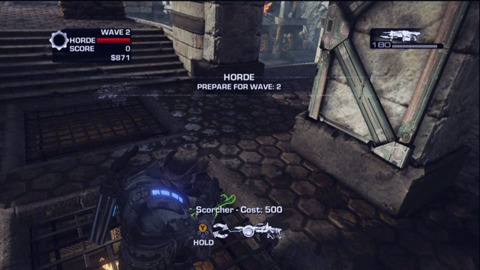
The Scorcher can also be considered a CQC weapon, though you can't use it in your default loadout. The only true upgrade to the Gears 3 flamethrower is the added Execution.
Explosive Launchers
In Gears of War 3 you can now find the Boomshot mounted on the Locust Multi-Turrets. Both the Boomshot and Torque Bow return, but the main attraction is the Digger.

This launcher will send out an underground burrowing creature that will leap out and explode when coming in contact with enemies. This is a great weapon for killing enemies behind cover (or forcing them out into the crossfire). It does have some drawbacks, such as being hard to aim while standing at a very different height than your target.
Pistols

The Snub and Boltok work just like their Gears 2 builds (One being rather weak and fast, the other damn strong). The real change is the Gorgon. Unlike the Gears 2 Gorgon Pistol that only shot short bursts, the Gears 3 Gorgon is now a fully automatic Sub-machinegun. This upgrade makes the Gorgon almost into a bite sized Lancer and is great when paired with a Boom Shield or meaty hostage.
Heavy Weapons
The biggest and strongest guns in the game. Holding on to these will slow you down, but are over all worth it. Returning to Gears 3 are the Mortar and Mulcher. The brutal Mulcher now has the added benefit of firing while moving, making it deadly even without cover.

The real treat is the new Oneshot. As the name implies, you simply amount, aim, and let loose a deadly shot that will destroy anything in its path. This is a seriously overpowered monster that can lay waste with a fast trigger finger.
Additionally the campaign features the Vulcan, a two manned minigun that hails down an absurd amount of bullets. However, the wielder cannot reload on their own, and requires a teammate to manually crank the ammo box. Get used to being daisy chained to your brothers in arms.

Last, you can now wield the Butcher's powerful Cleaver. Yes, it's not a gun, but it still has durability, meaning you have to handle it with care. The Cleaver's damage is brutal, taking out Drones in one hit, and can down boomers over its three hit combo. Unlike the other heavy weapons you can also run while armed with this mighty slap chop.
Maps
There are ten default maps to engage in heated multiplayer action. Each map has 3-5 Command Posts, where humans can set up a base in both Horde and Beast modes. There are default weapon spawns, but can be adjusted in the match type setting.
Checkout

- Command Posts: 5 (North, South, West, East, and Center)
- Primary Weapons: Digger (South Checkout)
- Pistols: 2 Boltok (West and East side of Electronics)
- Grenades: Frag (Photo Center), Incendiary (North of Checkout)
- Heavy Weapons: Mulcher (Between Electronics and Photo Center)
Drydock

- Command Posts: 4 (North, South, West, and East)
- Primary Weapons: Scorcher (Security Trailer), Torque (Anchor)
- Pistols: 2 Boltok (Pump Station and west of Cargo Spawn)
- Grenades: Ink (Pump Station), Incendiary (Center of map lower level)
- Heavy Weapons: Oneshot (Banner)
Gridlock

- Command Posts: 5 (Outside Bank, south of Bank, Boardwalk, Restaurant, and east of Boardwalk)
- Primary Weapons: Longshot (Boardwalk), Digger (Belltower)
- Pistols: 2 Gorgon (Bank and Restaurant)
- Grenades: 2 Smoke (west and east of Boardwalk), Incendiary (Center of map)
Hotel

- Command Posts: 3 (APC, Garden, Lobby)
- Primary Weapons: Torque (Elevator), Digger (South center)
- Pistols: 2 Gorgon (Near APC and Garden Posts)
- Grenades: Incendiary (Front Entrance)
Mercy

- Command Posts: 4 (North, South, West, and East)
- Primary Weapons: Digger (Sanctuary)
- Pistols: 2 Gorgon (Cellar and Library)
- Grenades: Frag (North of Sanctuary), 2 Ink (West and east of Sanctuary)
- Heavy Weapons: Mortar(Balcony)
Old Town

- Command Posts: 5 (North, South, West, East, and Center)
- Primary Weapons: 2 Scorcher (West and east of Alley), Longshot (Belltower), Digger (North Alley)
- Pistols: 2 Gorgon (West and east of Belltower)
- Grenades: 2 Smoke (West and east of Market), Frag (Market)
Overpass

- Command Posts: 5 (Northwest, Southeast, Southwest, Northeast, and Center)
- Primary Weapons: Scorcher (Center Post), Hammer of Dawn (Collapse)
- Pistols: 2 Boltok (East of Bridge, South of Steps), Boom Shield (Steps)
- Grenades: 2 Incendiary (Office and Subway)
Sandbar

- Command Posts: 5 (North, South, West, Southeast, and Center)
- Primary Weapons: 2 Longshot (West and east of fortress), Digger (Fortress)
- Pistols: 2 Gorgon (Bunker and west of Valley Spawn)
- Grenades: Incendiary (Center of Map)
- Heavy Weapons: Oneshot (Cargo Ship)
Thrashball

- Command Posts: 4 (North, South, West, and East)
- Primary Weapons: Digger (Scoreboard)
- Pistols: Boltok (Scoreboard)
- Grenades: Smoke (Concession Stands), Incendiary (Downed Raven)
- Heavy Weapons: Mulcher (Balcony)
Trenches

- Command Posts: 4 (North, South, West, and East)
- Primary Weapons: Scorcher (Cave underground), Digger (North of crane)
- Grenades: 2 Ink (West and east of Nest)
- Heavy Weapons: Mulcher (Nest), Mortar (Crane)
Horde
Horde has undergone some major changes from its Gears 2 incarnation. There is a greater emphasis on teamwork and base control. You'll want to stick together with your team to increase chances of survival. A lone wolf might score some kills, but in the end won't have the proper protection to outlast the many waves of Locust and Lambent.
The Terminator Operator Bundle | Call of Duty: Warzone & Black Ops 6 The Sims 4 Businesses & Hobbies Expansion Pack | Official Reveal Trailer Apex Legends: Takeover Gameplay Trailer Capcom Fighting Collection 2 | First-ever Hands-on | 30 mins of CVS2, SFA3, Project Justice Like a Dragon: Pirate Yakuza in Hawaii | Story Trailer Space Marine 2 - Datavault Update Overview Trailer Metal Gear Solid Delta: Snake Eater - Official Release Date Reveal Trailer Onimusha 2: Samurai's Destiny - Announcement Trailer Monster Hunter Wilds: 6th Trailer | Into the Iceshard Cliffs Street Fighter 6 - Mai Shiranui Update Launch Trailer Capcom Fighting Collection 2 - Release Date Reveal And Pre-Order Trailer Welcome to the Kingdom - Kingdom Come: Deliverance II
Please enter your date of birth to view this video
By clicking 'enter', you agree to GameSpot's
Terms of Use and Privacy Policy
You start with a small sum of $1000, but gain more by killing enemies and completing objectives. You can also give money to your teammates by placing your crosshairs on them; use this to pool for a single powerful upgrade. Sometimes it's better to quickly build a strong Turret, rather than spread around dozens of weaker Spikes.
Also, you can spend your personal cash to respawn after dying. This starts at $1500, but increases as you progress along the waves.
Command Posts
Each map has between 3-5 Command Posts in which to set up your base of operations. You can only build Fortifications that are in close proximity to your Command Post. The first Command Post is free, but the rest will require a good sum of cash at $2000. Choose your position wisely, as you'll need to make sure you have adequate cover. For example, on Checkout you may want to avoid making your first Post at the Photo Center, as it is very open and right smack in the middle of the map. A better alterative is to hunker down in Electronics, which only has a few openings and is close to a Mulcher spawn.

In some cases, being in the center of the map can be fairly useful. At Old Town, setting your base in the Market gives you rather secure cover. The Locust have to come through a few small openings and can be shot through the short walls on the east and west sides of the market square. On other maps such as Hotel, there isn't a clear best spot. Both the APC and Garden Spawns are far too open, while the Lobby has several places to build spikes, but has too many far off entrances.
Still, having well built spikes and turrets should be enough to overcome a Command Post's tactical position.
Fortifications

There are five different Fortifications you can purchase with your earned cash. As you spend more on a particular ability, it will slowly level up and become stronger. At first you'll only have access to the lowly level 1 Spikes, but gain the new Fortifications by spending more money on the earlier defenses. You will keep all of your accumulated unlocks for future Horde games, so feel free to grind and spend to your heart's content.
First off are Barriers (starting as Spikes, but upgrades include Wires). These will slow down and damage approaching enemies. These are great for deterring melee enemies such as Butchers and Wretches. However, Barriers won't do much against ranged Locust such as Drones armed with Lancers or Longshots.
The second set of Fortifications are Decoys. These dummies will draw enemy fire until they are destroyed. At higher levels the Decoys are more durable and convincing, attracting more enemy attention and leaving you free to blast the Locust from behind.

Next you'll gain access to Retro Lancer Turrets (Which can upgrade to Lancer and Troika versions). These bad boys have a good rate of fire, but leave you grounded and a key target for snipers and Boomers. The Turret also has limited ammo and can be destroyed by enemy attacks. The turret is great in a defensive pinch, such as a boss wave, but most of the time can be left alone.
The fourth Fortification is the automated Sentry. This will defend a small area and actively shoot at the first Locust that comes into range. This is great for covering areas of the map your team can't currently reach. The main weakness of the Sentry is its limited range, making it a prime target for Longshot and Hammerburst users.
The final Fortification is the Silverback Minigun, an exoskeleton mech that is armed with rapid-fire machineguns and rockets. This is great for taking on large slow bosses, such as the Brumak. The Silverback costs loads of dollars, so be sure to save it for just the right occasion.
Weapons and Bonuses
At the start of the match you'll only be equipped with your default Loadout. To gain extra weapons and ammo crates on the map you'll need to spend money. Your purchase is only good for one weapon, and you will need to spend more cash to grab a second or third spawn of that much needed Scorcher or Frag Grenade. Despite most items costing a pretty penny, the Boom Shield is still free.
Besides spending money (and looting the items off of dead Locust), some bonus waves will reward dollars or supply drops for completing a particular objective. These typically include making a number of Executions or getting a set amount of kills in a short time. As with other aspects of Horde, working with your team and planning out these bonus tasks will hasten their completion.
Other waves include boss waves where Myrrah will unleash some of the strongest enemies. These can include multiple Berserkers, Brumaks, Gunkers, and Reavers and Corpsers. Single large bosses, such as the Brumak, are actually fairly easier to deal with than storms of strong Gunkers or Berserkers. Keep your money saved up for Silverbacks and Turrets to help defend against these ominous threats.
Beast
Beast mode is the reverse of Horde. You have control over several types of Locust, each purchased with different amounts of money. Keep in mind that the playable Locust do not have regenerating health, so defense is as important as offense. Your goal is to break down fortifications and kill every human in the area. You have one minute to complete this objective, but will be rewarded with time and money for each down and kill your team scores. If you fail to kill all enemies within the time period, you'll be struck down by the Hammer of Dawn.
Locust
The Terminator Operator Bundle | Call of Duty: Warzone & Black Ops 6 The Sims 4 Businesses & Hobbies Expansion Pack | Official Reveal Trailer Apex Legends: Takeover Gameplay Trailer Capcom Fighting Collection 2 | First-ever Hands-on | 30 mins of CVS2, SFA3, Project Justice Like a Dragon: Pirate Yakuza in Hawaii | Story Trailer Space Marine 2 - Datavault Update Overview Trailer Metal Gear Solid Delta: Snake Eater - Official Release Date Reveal Trailer Onimusha 2: Samurai's Destiny - Announcement Trailer Monster Hunter Wilds: 6th Trailer | Into the Iceshard Cliffs Street Fighter 6 - Mai Shiranui Update Launch Trailer Capcom Fighting Collection 2 - Release Date Reveal And Pre-Order Trailer Welcome to the Kingdom - Kingdom Come: Deliverance II
Please enter your date of birth to view this video
By clicking 'enter', you agree to GameSpot's
Terms of Use and Privacy Policy
You have four different tiers of Locust, each of which are unlocked as you gain more money. As a rule of thumb lower end enemies are weaker and cheaper, but can still be useful when paired with the beefier (and costly) allies. Try to balance your budget, typically using tier 2 and 3 Locust for the bulk of your team, and reserving tier 4s for enemy miniguns and clustered heroes.
Among our favorite team of five includes a Mauler, Savage Drone, Boomer, Savage Grenadier, and Armored Kantus. The Mauler acts as a tough frontline tank that can smash down barriers. The Boomer is equally strong and causes further havoc with his explosions. The Grenadier is the main form of surprise damage, sneaking and rolling around back, getting in quick kills with their Gnasher. The three of them are supported by the Drone's cover fire and quickly healed by the Kantus' Screams.
Level 1 Locust

The first wave of Locust are cheap and defensively weak, however they have some great utility skills that will still help the rest of the team. The Wild Ticker ($75) has a huge bonus for taking down enemy fortifications and can eat grenades. Your team should have two or three of these early on to quickly hit the enemy. The normal Ticker ($75) is good for a single quick explosion, but their kamikaze attack might waste precious seconds as you wait for a respawn. Rounding out the smaller runts includes the Wretch ($225), which can use cover and stun enemies. Once fortifications are removed, the Wretch's quickly and wily movement will help with taking down basic Stranded.
The more humanoid Locust includes the Savage Drone ($450) and the larger Butcher ($300). The Savage Drone is armed with a Retro Lancer, making for a good mid range attacker that can be placed in the back rows. As this is your first ranged Locust, you can use the Savage Drone to attack passed fortifications and forgo having to break them down with a Wild Ticker. Finally, the Butcher is a hulking Boomer type Locust armed with a cleaver. They are slow, but make up for it with strong attacks and extra resistance. However it's better to wait for the next upgrade of Boomers: the Mauler.
Level 2 Locust
The second level of playable Locust requires quite a jump in money. Overall their power, defense, and buffs make the price tag worth it. First to join the fray is the Kantus ($975), who are armed with a Gorgon Pistol and Ink Grenades. Their most potent ability is Scream, which heals and revives injured teammates (Note that it doesn't affect the caster). Having one--or even two--Kantus on your side will greatly boost your survivability.
The more attack based units include the Bloodmount ($750) and Mauler ($1350), both of which make great additions to the party. The Bloodmount can stomp on enemies for high damage. They are additionally mounted with a Rider that freely guns down enemies. The Rider normally goes after who ever they see (including wasting time on Human decoys), but can be directed with spotting. The Mauler is a stronger version of the Butcher, this time geared with a Flail and Boom Shield. Use of the shield will greatly slow down movement, but can make you near invincible while advancing. The Flail is a powerful melee weapon capable of both destroying fortification and killing clusters of Humans.
Level 3 Locust

Level 3 Locust are more situational, but still provide heavy damage. First on the list are Giant Serapede ($1350), who have a strong electrical bite and are well protected from the front. Their only vulnerable area is their back, so make sure your team has some type of Drone or Boomer to help with protection. They aren't very good at destroying fortifications, so make sure a path is cleared before switching to a Serapede.
Rounding out the beast types is the Corpser. Savage Corpsers ($900) have good defense from their armored legs and have a strong stomp attack. They can burrow into the ground to surprise enemies, but if usually too defensive for most fights.
This tier also includes new Drones and Boomers, the Savage Grenadier ($1050) and the species named Boomer ($1500). Grenadiers are armed with Frag Grenades and a Gnasher Shotgun. They can deal out heavy damage but require getting in close. Like with Wretches and Serapede, you'll want to create a path to the enemy before switching to a Grenadier. Alternately, they make for a good rear support as the rest of your team distracts the Humans. Last, the Boomer is armed with a Boomshot that can easily lay waste to Turrets and Miniguns.
Level 4 Locust

The Level 4 Locust include the heartiest of the bunch. First is the deadly Berserker ($5625) who can soak up ridiculous amounts of damage. Their charge and smash and instantly kill or down most enemies, but can be hard to control. It's best to leave these expensive monsters for the hardiest fights, including the final wave against Prescott.
Among the best defensive units is the Armored Kantus ($3375). While it loses the Ink Grenades from its earlier form, the Armored version is blessed with dual Gorgons, high defense, and the ability to make attack rolls. It is recommended that you always have one of these tough cookies to help protect the team.
The final ally is the Savage Boomer ($1650), who is armed with a Digger Launcher. The Digger is a great weapon for taking out clusters of baffled Humans, but keep in mind that it can often stop short of its intended target.
Humans
The Humans are your intended target, but it's not like they are going to willingly bend over and take it lightly. They have a number of defensives and weapons to keep your Locust Army at bay.
Fortifications

The Humans are bunkered down in a small area of the map, and are using a number of creations of various quality to hinder your assault. Barriers slow down and damage your advance; you can walk through them, but your movement will be so slow that you'll be incredibly vulnerable when crossing them. It's best to first break down these walls with a Wild Ticker or Mauler before advancing.
The Humans will also set up Decoys, which can distract those not paying clear attention. The main obstacle of Decoys is for Bloodmounts who will need to manually spot for their Rider, or else the mounted Drone will waste their time gunning down a piece of cardboard.
Among the more deadly Fortifications includes the automated Sentry and the Mounted Lancer Turret. Sentries will fire at anyone that comes in close, while the Turret needs to be controlled by a living character. Both of these should be taken on by either a swift unit (Such as the Serapede) or a very strong one (Boomer).
The final Fortification is the Silverback Minigun, an exoskeleton mech that is armed with rapid-fire machineguns and rockets. It is tough as nails and require Boomers (or even Berserkers) to take on. It's strong enough that you might even need a Kantus or two to help keep your Boomers alive. Keep in mind that if a vacant Silverback can be manned by other Humans, so be sure to destroy the armor fully before moving on.
Soldiers
The Human survivors are mainly comprised of weaker soldiers and refugees, still with their array of weapons and Fortifications they can still be deadly. Stranded are the most basic type of enemies, whom are easily killable with one or two melee hits. Next up are the COG Gears who have more health and access to stronger weapons. They aren't much of a threat, but should still be quickly dealt with like the weaker Stranded. The strongest grunt is the Onyx Guard, who typically only arrive to help important heroes such as Hoffman and Prescott. They are more lethal than the other COGs, often starting with Silverbacks. Outside of Heroes, Onyx Guards should be the number on priority target.
Heroes

Hero units are the best of the Human forces. They include the main stars of the game: Marcus, Dom, Baird, Anya, Sam, Dizzy, Carmine, Jace, Cole, Hoffman, and Griffin. Prescott also joins for the final 12th wave and your main objective is to eliminate him. As a rule of thumb Heroes are much more deadly and intelligent than soldiers, making them a higher priority to engage and kill.
Unlike the lower grunt soldiers, Heroes can survive the initial kill and will only be downed. This will require you to quickly follow up with another attack or execution, otherwise the Hero might be revived, or worse alert the rest of the enemies to your presence. As a bonus Heroes will grant more time and money than the generic troops.
Act 1: Prologue-Chapter 2
Troubled Past
The Terminator Operator Bundle | Call of Duty: Warzone & Black Ops 6 The Sims 4 Businesses & Hobbies Expansion Pack | Official Reveal Trailer Apex Legends: Takeover Gameplay Trailer Capcom Fighting Collection 2 | First-ever Hands-on | 30 mins of CVS2, SFA3, Project Justice Like a Dragon: Pirate Yakuza in Hawaii | Story Trailer Space Marine 2 - Datavault Update Overview Trailer Metal Gear Solid Delta: Snake Eater - Official Release Date Reveal Trailer Onimusha 2: Samurai's Destiny - Announcement Trailer Monster Hunter Wilds: 6th Trailer | Into the Iceshard Cliffs Street Fighter 6 - Mai Shiranui Update Launch Trailer Capcom Fighting Collection 2 - Release Date Reveal And Pre-Order Trailer Welcome to the Kingdom - Kingdom Come: Deliverance II
Please enter your date of birth to view this video
By clicking 'enter', you agree to GameSpot's
Terms of Use and Privacy Policy
Anchored Part 1
The Terminator Operator Bundle | Call of Duty: Warzone & Black Ops 6 The Sims 4 Businesses & Hobbies Expansion Pack | Official Reveal Trailer Apex Legends: Takeover Gameplay Trailer Capcom Fighting Collection 2 | First-ever Hands-on | 30 mins of CVS2, SFA3, Project Justice Like a Dragon: Pirate Yakuza in Hawaii | Story Trailer Space Marine 2 - Datavault Update Overview Trailer Metal Gear Solid Delta: Snake Eater - Official Release Date Reveal Trailer Onimusha 2: Samurai's Destiny - Announcement Trailer Monster Hunter Wilds: 6th Trailer | Into the Iceshard Cliffs Street Fighter 6 - Mai Shiranui Update Launch Trailer Capcom Fighting Collection 2 - Release Date Reveal And Pre-Order Trailer Welcome to the Kingdom - Kingdom Come: Deliverance II
Please enter your date of birth to view this video
By clicking 'enter', you agree to GameSpot's
Terms of Use and Privacy Policy
Anchored Part 2
The Terminator Operator Bundle | Call of Duty: Warzone & Black Ops 6 The Sims 4 Businesses & Hobbies Expansion Pack | Official Reveal Trailer Apex Legends: Takeover Gameplay Trailer Capcom Fighting Collection 2 | First-ever Hands-on | 30 mins of CVS2, SFA3, Project Justice Like a Dragon: Pirate Yakuza in Hawaii | Story Trailer Space Marine 2 - Datavault Update Overview Trailer Metal Gear Solid Delta: Snake Eater - Official Release Date Reveal Trailer Onimusha 2: Samurai's Destiny - Announcement Trailer Monster Hunter Wilds: 6th Trailer | Into the Iceshard Cliffs Street Fighter 6 - Mai Shiranui Update Launch Trailer Capcom Fighting Collection 2 - Release Date Reveal And Pre-Order Trailer Welcome to the Kingdom - Kingdom Come: Deliverance II
Please enter your date of birth to view this video
By clicking 'enter', you agree to GameSpot's
Terms of Use and Privacy Policy
Abandon Ship
The Terminator Operator Bundle | Call of Duty: Warzone & Black Ops 6 The Sims 4 Businesses & Hobbies Expansion Pack | Official Reveal Trailer Apex Legends: Takeover Gameplay Trailer Capcom Fighting Collection 2 | First-ever Hands-on | 30 mins of CVS2, SFA3, Project Justice Like a Dragon: Pirate Yakuza in Hawaii | Story Trailer Space Marine 2 - Datavault Update Overview Trailer Metal Gear Solid Delta: Snake Eater - Official Release Date Reveal Trailer Onimusha 2: Samurai's Destiny - Announcement Trailer Monster Hunter Wilds: 6th Trailer | Into the Iceshard Cliffs Street Fighter 6 - Mai Shiranui Update Launch Trailer Capcom Fighting Collection 2 - Release Date Reveal And Pre-Order Trailer Welcome to the Kingdom - Kingdom Come: Deliverance II
Please enter your date of birth to view this video
By clicking 'enter', you agree to GameSpot's
Terms of Use and Privacy Policy
Act 1: Chapters 3-6
Homecoming
The Terminator Operator Bundle | Call of Duty: Warzone & Black Ops 6 The Sims 4 Businesses & Hobbies Expansion Pack | Official Reveal Trailer Apex Legends: Takeover Gameplay Trailer Capcom Fighting Collection 2 | First-ever Hands-on | 30 mins of CVS2, SFA3, Project Justice Like a Dragon: Pirate Yakuza in Hawaii | Story Trailer Space Marine 2 - Datavault Update Overview Trailer Metal Gear Solid Delta: Snake Eater - Official Release Date Reveal Trailer Onimusha 2: Samurai's Destiny - Announcement Trailer Monster Hunter Wilds: 6th Trailer | Into the Iceshard Cliffs Street Fighter 6 - Mai Shiranui Update Launch Trailer Capcom Fighting Collection 2 - Release Date Reveal And Pre-Order Trailer Welcome to the Kingdom - Kingdom Come: Deliverance II
Please enter your date of birth to view this video
By clicking 'enter', you agree to GameSpot's
Terms of Use and Privacy Policy
Helping Hand
The Terminator Operator Bundle | Call of Duty: Warzone & Black Ops 6 The Sims 4 Businesses & Hobbies Expansion Pack | Official Reveal Trailer Apex Legends: Takeover Gameplay Trailer Capcom Fighting Collection 2 | First-ever Hands-on | 30 mins of CVS2, SFA3, Project Justice Like a Dragon: Pirate Yakuza in Hawaii | Story Trailer Space Marine 2 - Datavault Update Overview Trailer Metal Gear Solid Delta: Snake Eater - Official Release Date Reveal Trailer Onimusha 2: Samurai's Destiny - Announcement Trailer Monster Hunter Wilds: 6th Trailer | Into the Iceshard Cliffs Street Fighter 6 - Mai Shiranui Update Launch Trailer Capcom Fighting Collection 2 - Release Date Reveal And Pre-Order Trailer Welcome to the Kingdom - Kingdom Come: Deliverance II
Please enter your date of birth to view this video
By clicking 'enter', you agree to GameSpot's
Terms of Use and Privacy Policy
MVP