Hitman: Contracts Walkthrough
Agent 47 is back with characteristic vengeance in the newest iteration of IO Interactive's stealth action franchise. This walkthrough includes walkthroughs for all twelve missions, as well as general tips and hints on achieving "silent assassin" rating on each mission.
Design by Marty Smith
Io Interactive and Eidos Interactive’s Hitman: Contracts places you inside the mind of Agent 47. Knocking on death’s door, Agent 47 relives several of his most infamous contract hits: the work that molded him into a brutally efficient assassin. Guide Agent 47 through the missions of his past using the brute force of firearms or the finesse of disguises and stealth kills.
This GameSpot game guide to Hitman: Contracts includes:
- General Strategies: Check this section for general strategies for mission completion.
- Weapons: Look here for a table revealing all firearm statistics.
- Walk-through: This section provides complete walk-throughs for all twelve Hitman: Contracts missions.
- Silent Assassin Tips: Check this section for tips on completing a level with a Silent Assassin rating,
- Cheats and Secrets: This section reveals Hitman: Contracts cheat codes (for PlayStation 2, Xbox, and PC versions) and secrets, including unlockable and hidden weaponry.
Table of Contents
General StrategiesWeapons
Walk-Through
The Meat King's Party
The Bjarkhov Bomb
Beldingford Manor
Rendezvous in Rotterdam
Deadly Cargo
Traditions of the Trade
Slaying a Dragon
The Wang Fou Incident
The Seafood Massacre
Lee Hong Assassination
Hunter and Hunted
Cheats and Secrets
Chapter 1 - General Strategies
This section offers general strategies for completing Hitman: Contracts missions successfully.
- The overhead map is an extremely powerful tool. Consult the map frequently throughout each mission. The map is even more vital if you’re trying to complete tasks with perfect Silent Assassin ratings. The map reveals the location of civilians, guards, targets, stairs, elevators, and many other objects. Points of interests are marked with an exclamation point. If you’re having trouble completing levels, check each point of interest location and consider what might be done with the particular item found there.
- You can use the map to track the movements of civilians, guards, and targets. This provides valuable information, such as when to move out of cover or when to enter a room. You can cycle through other map layouts--you aren’t restricted to the map of your current location. If you’re having trouble with a particular mission, use the maps to track the movements of mission targets to learn where they go and when, so you can best gauge where you need to be.
- Unless you want every guard firing at you on sight, learn to sneak around effectively. Finding other clothes is one of the most effective ways to remain undetected. When inside new clothes, don’t run around or rub up against enemies. Don’t stand and stare at an enemy or sneak around suspiciously. The disguise is good enough to fool enemies at first sight but it still raises some suspicion. If you fail to walk around calmly, the rising suspicion can be enough to blow your cover.
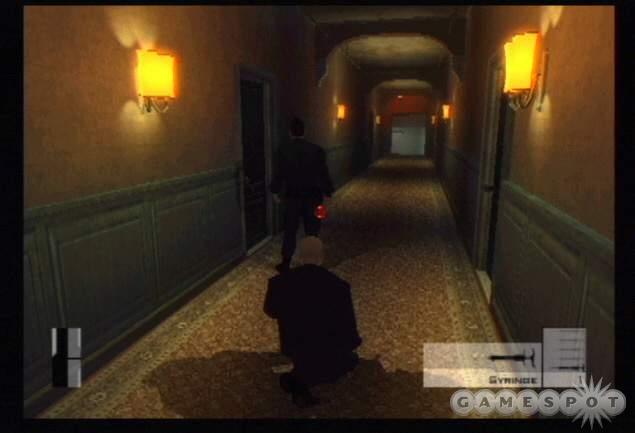
- Be prepared to use the fiber wire and syringe frequently if you plan to kill enemies using stealth techniques. Use the sneak button to move around silently and behind the current target. Equip the fiber wire or syringe and use the stealth weapon once you’re close to the target. Note that the fiber wire kills the target while the syringe only temporarily disables the victim. If you’re striving for Silent Assassin ratings then you must use the syringe to disable civilians. Using the fiber wire adversely affects your aggression meter, which in turn jeopardizes your Silent Assassin rating.
- Pattern observation is key to sneaking through a mission successfully. Have patience and watch how a guard patrols around a room or what actions a target takes over the course of time. Doing so will help you get past a guard or find the best room in which to eliminate a target. Obtaining a Silent Assassin rating means not tipping off the guards to your presence and eliminating targets without disturbances. Watching patterns will help you attain that goal.
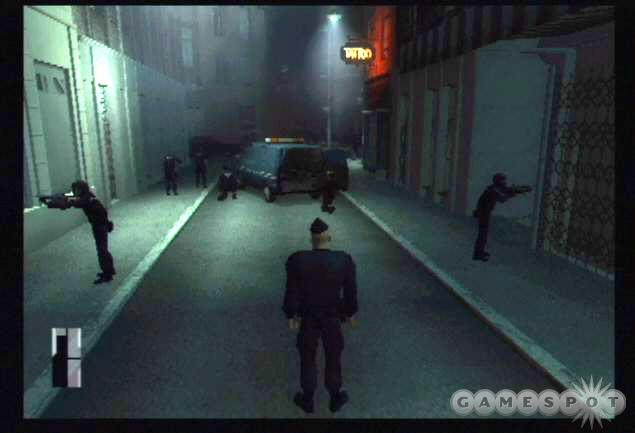
- Shooting your way through a level is certainly a viable strategy. Silenced weapons will keep your kills silent and won’t attract the attention of nearby guards. Aim for headshots to better ensure one-shot kills. If you just wound the enemy, he’ll open fire and the loud discharge will inevitably alert his comrades to the gunfight. Duck for cover behind stationary objects and lure foes into your line of fire. Try to have available cover nearby at all times to quickly duck out of view when it comes time to reload your firearm or firearms.
Chapter 2 - Weapons
This section provides a rundown of available firearms in Hitman: Contracts. Note that this table includes weapons unlocked through achieving "Silent Assassin" ratings as well as additional hidden firearms.
| WEAPON | DESCRIPTION | CALIBER | CLIP CAPACITY | LENGTH | WEIGHT | CONCEALABLE? | TWO-HANDED? |
| AK74 Assault Rifle | Assault Rifle | 5.56mm | 30 | 94 cm | 3.3 kg | No | Yes |
| AK74 Assault Rifle .S | Assault Rifle Silenced | 5.56mm | 30 | 94 cm | 3.3 kg | No | Yes |
| AUG Sub-Machine Gun | Submachine gun | 9mm | 25 | 66.5 cm | 3.3 kg | No | Yes |
| CZ2000 | Semi-automatic pistol | 9mm | 15 | 18.5 cm | 780 g | Yes | No |
| CZ2000 Dual | Semi-automatic pistols | 9mm | 30 | 18.5 cm | 780 g | Yes | Yes |
| Double-Barreled Shotgun | 12 gauge double-barreled shotgun | 12 gauge | 2 | 115.7 cm | 3.2 kg | No | Yes |
| Dragunov Sniper Rifle | Semi-automatic sniper rifle | 7.62mm | 10 | 125.5 cm | 4.31 kg | No | Yes |
| Enforcer Sniper Rifle | Bolt action sniper rifle | 7.62mm NATO | 10 | 120.5 cm | 4.75 kg | No | Yes |
| GK17 | Semi-automatic pistol | 9mm | 17 | 18.6 cm | 625 g | Yes | No |
| GK17 Dual | Semi-automatic pistols | 9mm | 34 | 18.6 cm | 625 g | Yes | Yes |
| Gold Desert Eagle | Semi-automatic pistol | Magnum | 7 | 26 cm | 1,897 g | Yes | No |
| Gold Desert Eagle Dual | Semi-automatic pistols | Magnum | 14 | 26 cm | 1,897 g | Yes | Yes |
| M4 Carbine Assault Rifle | Carbine Assault Rifle | 5.56mm | 30 | 84 cm | 2.54 kg | No | Yes |
| M4 Carbine Assault Rifle .S | Carbine Assault Rifle. Silenced | 5.56mm | 30 | 84 cm | 2.54 kg | No | Yes |
| M60 Light Machine Gun | Light machinegun | 7.62mm NATO | 100 | 110 cm | 10.5 kg | No | Yes |
| Magnum 500 | Double action revolver | Magnum | 5 | 38.1 cm | 2,055 g | Yes | No |
| Magnum 500 Dual | Double action revolvers | Magnum | 10 | 38.1 cm | 2,055 g | Yes | Yes |
| Micro Uzi | Submachine gun | 9mm | 20 | 25 cm | 1.5 kg | Yes | No |
| Micro Uzi .S | Submachine gun. Silenced | 9mm | 20 | 34 cm | 1.75 kg | Yes | No |
| Micro Uzis Dual | Submachine guns | 9mm | 40 | 25 cm | 1.5 kg | Yes | Yes |
| Micro Uzis Dual .S | Submachine guns. Silenced | 9mm | 40 | 34 cm | 1.75 kg | Yes | Yes |
| Mini Gun | Electrical driven gatling gun | 7.62mm NATO | 10000 | 100 cm | 18.8 kg | No | Yes |
| MP5 Sub-Machine Gun | Submachine gun | 9mm | 30 | 66 cm | 2.88 kg | No | Yes |
| MP5 Sub-Machine Gun .S | Submachine gun. Silenced | 9mm | 30 | 66 cm | 2.88 kg | No | Yes |
| MP9 Sub-Machine Gun | Submachine gun | 9mm | 25 | 55.6 cm | 3 kg | Yes | No |
| PGM Sniper Rifle | Bolt action sniper rifle | .338 | 10 | 129 cm | 6.6 kg | No | Yes |
| PGM Sniper Rifle .S | Bolt action sniper rifle. Silenced | .338 | 10 | 129 cm | 6.6 kg | No | Yes |
| R93 Sniper Rifle | Bolt action sniper rifle. | 7.62mm NATO | 5 | 119 cm | 4.8 kg | No | Yes |
| Sawn Off Shotgun | 12 gauge double-barreled shotgun. | 12 gauge | 2 | 65.4 cm | 2.8 kg | Yes | Yes |
| Sawn Off Shotgun Dual | 12 gauge double barreled shotguns | 12 gauge | 4 | 65.4 cm | 2.8 kg | Yes | Yes |
| SG200 .S Dual | Semi-automatic pistols. Silenced | 9mm | 14 | 19.3 cm | .72 kg | Yes | Yes |
| SG220 .S | Semi-automatic pistol. Silenced | 9mm | 7 | 19.3 cm | .72 kg | Yes | No |
| Silverballer .S | Semi-automatic pistol. Silenced | .45 ACP | 7 | 41.6 cm | 1.257 kg | Yes | No |
| Silverballers .S | Semi-automatic pistols. Silenced | .45 ACP | 14 | 41.6 cm | 1.257 kg | Yes | Yes |
| Silverballers Dual | Semi-automatic pistols | .45 ACP | 14 | 21.6 cm | 1.076 kg | Yes | Yes |
| Spas 12 Shotgun | Semi-automatic combat shotgun | 12 gauge | 8 | 93 cm | 4.2 kg | No | Yes |
| W2000 Sniper Rifle | Collector’s sniper rifle. Silenced | 7.62mm NATO | 6 | 90.5 cm | 8.31 kg | No | Yes |
Chapter 3 - Walk-through
This section provides complete level walk-throughs for all twelve Hitman: Contracts missions. The beauty of Hitman: Contracts is the relatively open-ended mission design. There’s no single linear path through each mission. You could decide to shoot your way through each mission. You can ignore alerts and stealth and equip a couple firearms and blast your way through hordes of enemy guards. Conversely you could eschew firearms completely and sneak your way through each mission and eliminate targets with poisons, strangulation, or other alternate methods.
These walk-throughs primarily emphasize a stealthier approach to each mission. Nearly all of the strategies and tactics employed in these levels can be approached with a more aggressive use of firearms. However, some tips require special timing to complete. These situations are noted in the walk-through. For additional tips on completing these missions to achieve a "Silent Assassin" rating (near perfect stealth, low aggression), see the Silent Assassin Tips section of this game guide.
Asylum Aftermath
Objective: Escape from the Sanitarium.
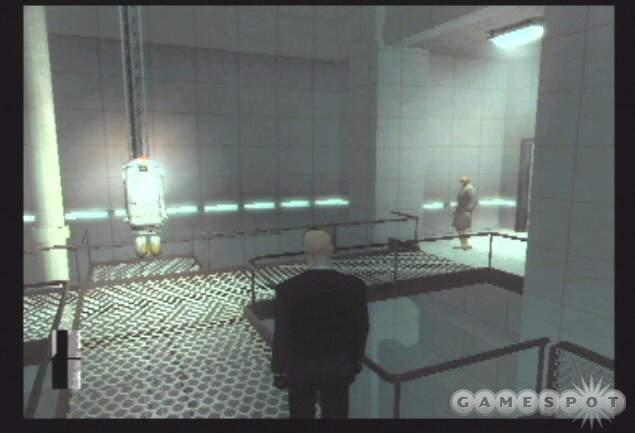
SWAT police surround the sanitarium. You must either shoot your way out to leave the asylum or find a way to escape undetected. You begin in an extremely bright room. Walk forward and pick up the car key off of the body on the floor. Continue forward to the door.
Make a quick check of the overhead map. You’re currently in the sanitarium basement. Note the green line on the map marking your optimum path through this floor. Move through the room and grab whatever ammo and weaponry you wish. Don’t worry about the wandering patients. They’ll ignore you. Feel free to search side rooms but your goal is to reach the elevator.
Cross the catwalk, still following the green line on the map, and advance through the next room. Check your map and enter the room marked with the point of interest. It includes an extra syringe to add to your inventory. The syringe can incapacitate an enemy without killing him. You could also use the syringe on the patient in this room and steal his clothes. Disguised as a patient, the SWAT members won’t bother you as long as you aren’t holding a weapon in hand.
Continue along the green line marked on the map and move toward the elevator on the eastern side of the basement. Approaching the table covered with ammo triggers a cut scene showing the SWAT members entering the sanitarium. Grab whatever ammo you want off of the table then move into the elevator.
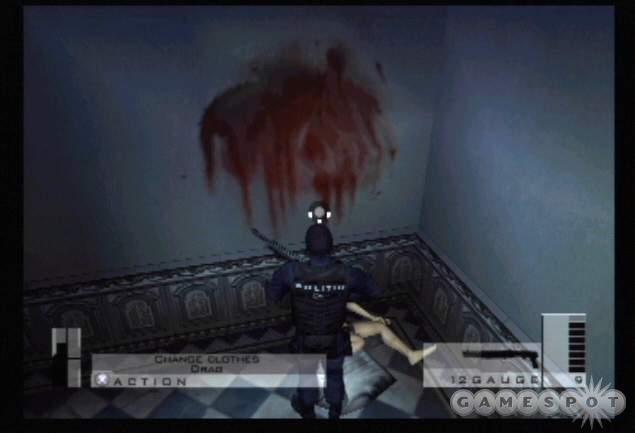
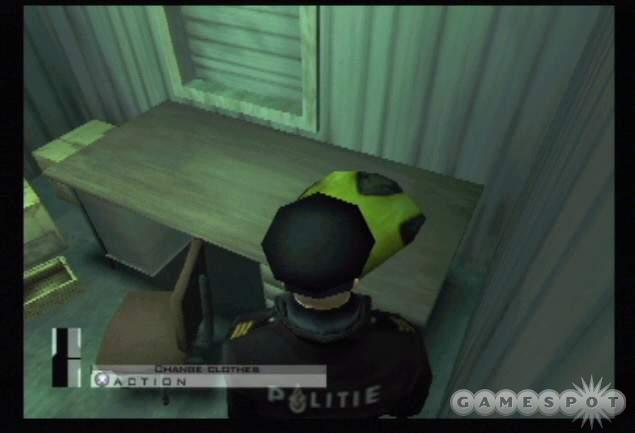
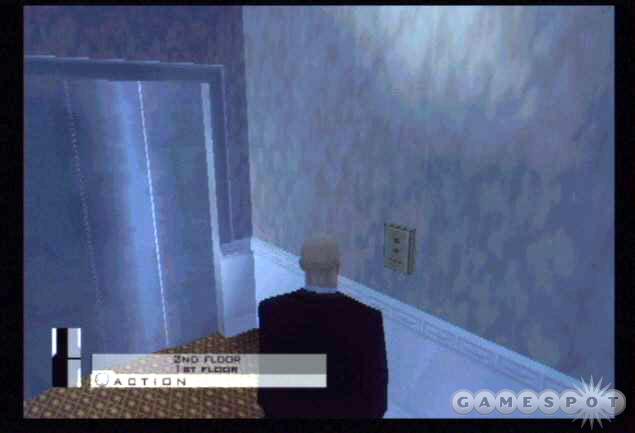
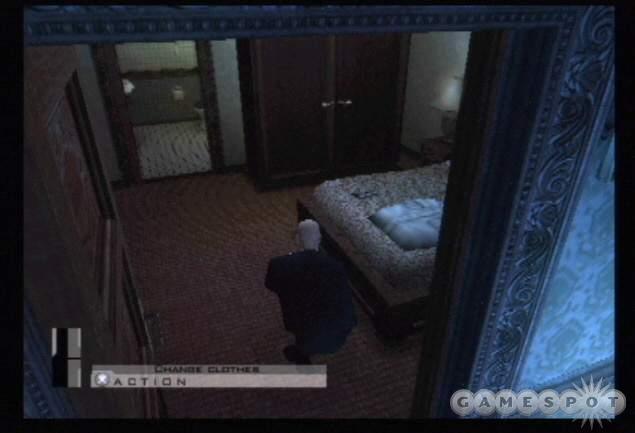
The exit is on the first floor but if you want an easier time escaping the sanitarium, use the elevator to reach the second floor. Exit the elevator and quickly look along the wall on the left. You’ll spot a slain SWAT member. Change your clothes into the SWAT outfit. Note than on difficulty levels higher than normal, other SWAT members won’t be fooled by your costume. You’ll have to fight your way out or use a patient costume (there’s one just outside the elevator on its right side) to avoid detection. Beware of sanitarium staff on these floors. Consult the map to check the location of staff or SWAT members so you can avoid contact.
With SWAT uniform on walk calmly forward through the door ahead. Note the green light above the door indicating an exit. If you failed to pick up the car key in the initial room then consult the map. There’s a point of interest marker inside a nearby room. Search inside to find another car key.
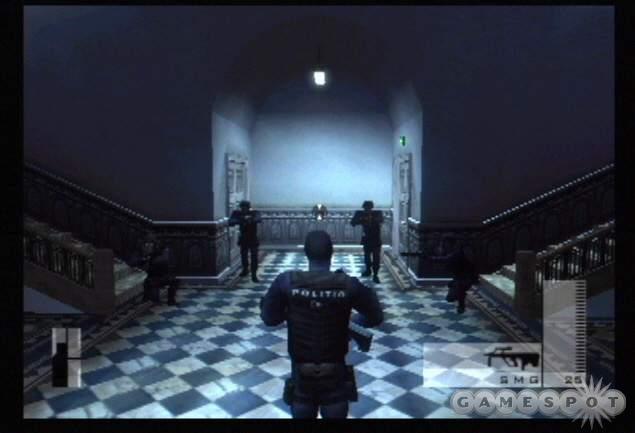
Walk calmly through the door marked with the green light. You may encounter SWAT inside. Remain calm and walk past them. Continue through the door on the opposite side. Descend the staircase to the left or right. Alternatively you could descend the elevator to the first floor and escape through the marked green doors. Each route ends up at the same spot: at the bottom of the stairs with a small group of SWAT.
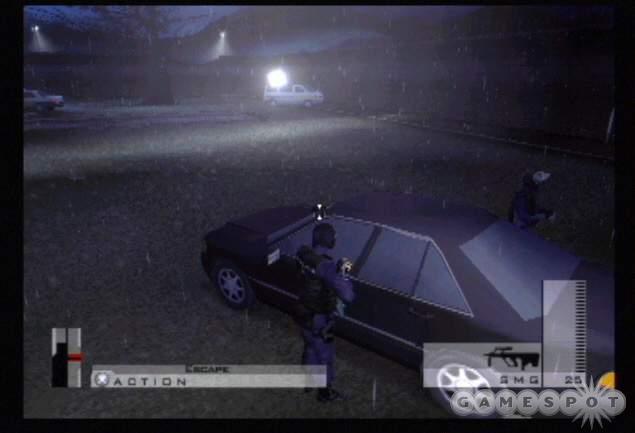
Move carefully beyond the SWAT at the stairs’ bottom. Open and enter through the door on the right. Follow the path beyond a patrolling guard and exit outside. Once outdoors, turn right immediately and proceed to the corner. Continue walking and find the car in the right corner. Approach the car and escape (must have the car key). If you’d rather exert some aggression, you can blow everyone away here and exit through the front gate.
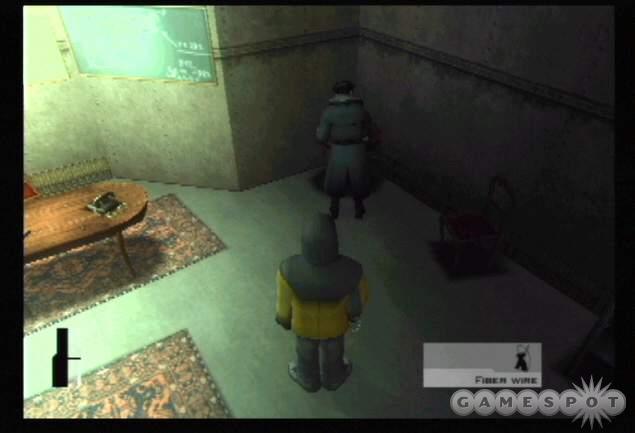
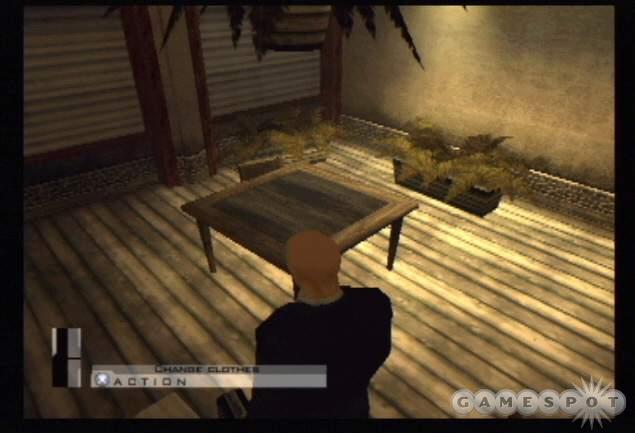
The Meat King’s Party
Objectives: Assassinate "Meat King" Campbell Sturrock. Assassinate lawyer Andrei Puscus. Rescue the client’s daughter. Escape the compound.
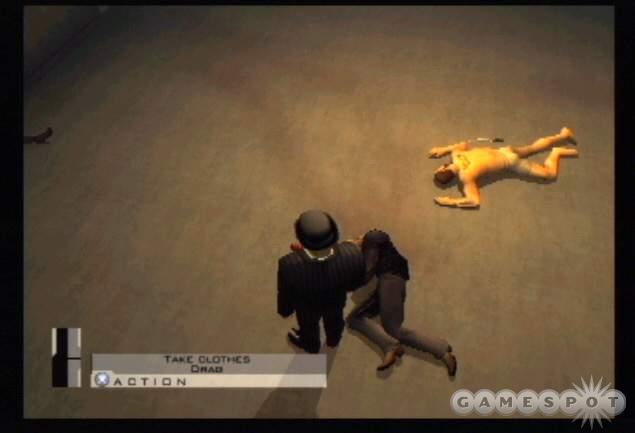
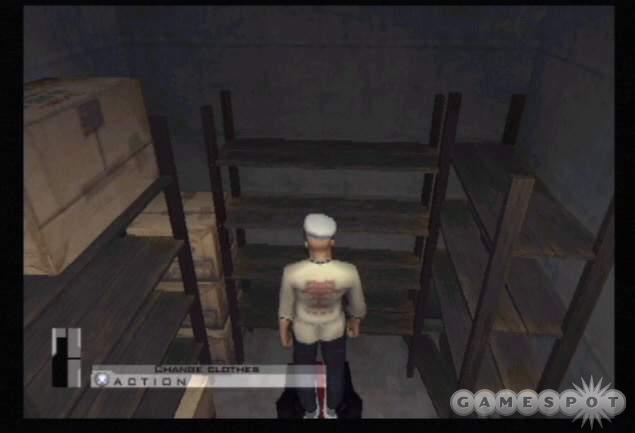
The mission begins inside a meat packing truck; the body of the butcher rests at your feet. Your first challenge is getting inside the Meat King’s exclusive party. You aren’t exactly dressed for the occasion. Plus, certain items in your inventory won’t make it past the door guards. Although you could blast your way past security, the safer route is to use the butcher’s clothes. Switch clothes with the butcher. You won’t be able to get your firearms past security so drop them inside the truck. Exit the truck. Before moving on, close the truck’s back door by using the red button on the truck’s left side.
Calmly walk toward the party entrance. The door guard searches your inventory. As long as you’ve dropped the firearms, you’re safe to continue onward. Enter the party. There are three tasks to complete inside this compound. You need to find and rescue the client’s daughter and assassinate two separate individuals. Seeking out the client’s daughter should be completed first.
Move forward through the door and spot a staircase on the left side of the hall. Continue to walk in a calm fashion so the party guests aren’t tipped off to your disguise. Ascend the staircase. Check the map and spot the point of interest in the room in the back left corner of the floor. Move toward that point of interest.
The primary danger in this location should also be monitored via the map. Spot the guard in the lower left room on the floor. When you move to investigate the point of interest, be sure this guard is away from your location and in another room. Proceed to the left and follow the rooms to the point of interest in the upper left corner.
You find the girl...what’s left of her. Pick up the "murder proof" off of the ground (just below the hanging girl) and exit the room. Monitor the map if necessary to ensure the nearby guard (the Meat King’s even more psychotic bro) isn’t approaching. Maneuver out of the room and back down the staircase. Move slowly as to not alert any enemy guards or party patrons.
Your next task should be the assassination of Andrei Puscus, the lawyer. He’s currently in the main party area. Optimally, you should kill him away from the other party patrons so you don’t create a chaotic disturbance and alert the guards to your position.
One of the best ways to accomplish the task is to use the waiter’s uniform to infiltrate the party. After descending the staircase, turn around and enter the door on your right. Go right through the door on the left. At the next set of three doors, enter the door on the left.
The map reveals a point of interest in this room. Enter this locker room and find the waiter’s uniform on a bench on the far side of the area. Check to make sure the party’s real waiter isn’t around then switch clothes. There’s only one waiter for the party. If you’re spotted near the actual waiter, you could alert the guards to your presence.
Exit the locker room and turn left. Go through two sets of double doors into the main party area. Scan the area for the other waiter. You can also track the lawyer on the overhead map. It’s best to wait until he’s moved into the room in the lower right corner of the map.
Approach the bar and pick up the opium pipe. Walk calmly to the room in the lower right corner of the map and find the lawyer on the bed. Place the opium pipe on the side table and wait for the lawyer to use it and pass out. Grab the gun from under the lawyer’s bed and shoot the lawyer in the head. The lawyer may already be asleep. In either instance just equip the silenced silverballer and terminate the target.
The last target, the "Meat King" himself, is found upstairs in his private room. Getting there won’t be easy. A guard protects the top of the stairs and he won’t let weaponry through without a fight. Plus the Meat King has a couple girls hanging around that can cause a scene if you aren’t careful. Of course you can blast your way through the guard, the girls, and the Meat King but there’s always a quieter way. It begins in the kitchen.
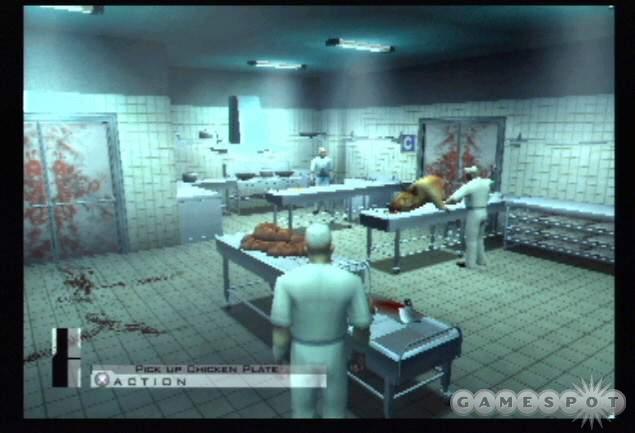
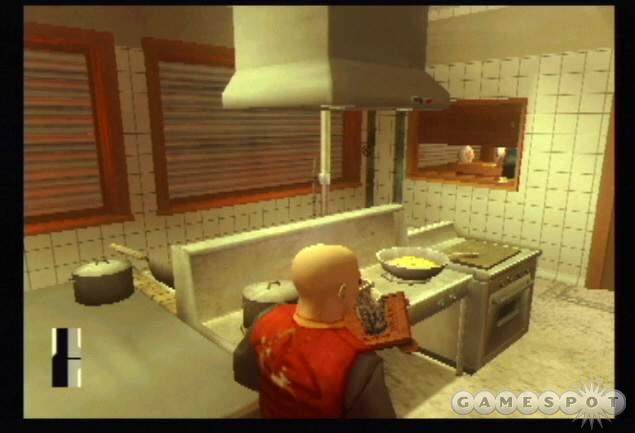
Return to the locker room and change back to the butcher clothes. Exit the locker and move through the double door on the left. Instead of continuing forward toward the party, enter the first door on the left. It’s into the kitchen. Walk forward and hear orders from the chef: Sturrock wants his chicken meal! Pick up the chicken plate from the table.
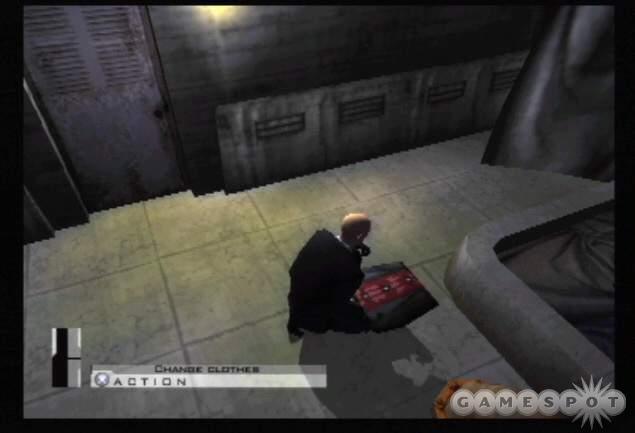
The problem of getting a weapon past the guard still remains. However, the chicken can be stuffed. Return to a safe location (such as the locker room) and drop the chicken plate. With a weapon in your inventory (such as the silenced silverballer used to slay the lawyer or even a meat hook), place the weapon inside the chicken plate. Make sure all other weapons are discarded and return to the party.
Enter the party room and proceed to its right side (left on the overhead map). Follow the path to the staircase to the upper level. Approach the guard and wait for the guard to frisk you. Once no weapons are found, enter the door on the right into Sturrock’s chamber.
The large windows are a big problem. If you want to remain undetected, you can’t have anyone see you terminate Sturrock. Move to the left side of the Meat King’s chamber and find the button on the wall. Use it to pull the curtains. This encloses the room. Approach Sturrock and wait for his girls to move and exit the room. Once they are out of the room completely, doors closed, and curtains pulled, retrieve your weapon from the chicken plate and eliminate Sturrock.
Time to make an escape. Drop your weapon. Calmly exit Sturrock’s chamber and move through the party room. Return to the locker room and exit through the far door. Use the overhead map to locate the level’s exit to complete the mission.
The Bjarkhov Bomb
Objectives: Assassinate Fabian Fuchs. Assassinate Commander Bjarkhov. Destroy dirty bomb production capability. Escape via cargo plane.
You begin the mission inside the cargo plane. Your first goals lie in the same location. You’ll meet with a contact to receive some additional information; plus, you’ll discover Fabian Fuchs in the same location. It’s a mess hall complete with kitchen. But getting off of the cargo plane and into the mess hall undetected will be the first challenge. Of course you could use your weapons to blast the numerous guards around the cargo plane (and recover their better weapons) and shoot your way into the mess hall. But there is a safer alternative.
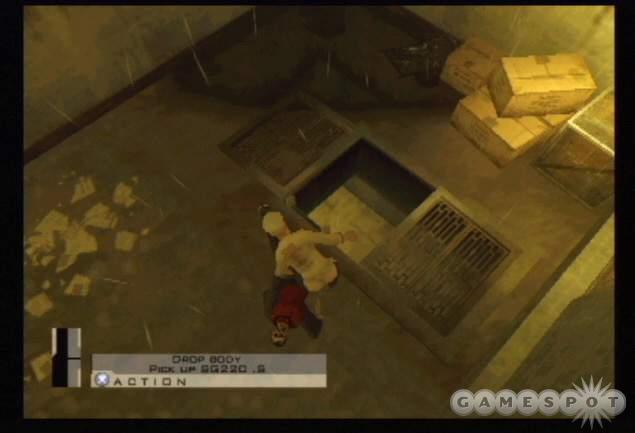
Blend into the environment by recovering clothes from a nearby enemy. There are a couple reasonable alternatives. First, you can turn around and exit the plane’s rear. Turn right and spot the tower. Enter the tower and descend the ladder into the underground tunnel. Find the small room on the left. Spot the guard watching television inside. Disable the guard with a syringe and change clothes. Return to the cargo plane. Another method is to hide behind the crates in the cargo plane and wait for the guard to pick up the grocery crate. Sneak up behind the guard and disable him. Drag the guard’s body behind the crates. Take his clothes and grab a grocery crate.
While in disguise, exit the plane and turn to the right. Approach the building ahead. Move slowly past the guards to remain undetected. Enter the mess hall and turn left. Enter the left door into the kitchen. Speak with the man inside to receive additional information about the lab on the submarine, the location of dynamite and the sub’s weak spots, and the location of a radiation suit required to board the sub.
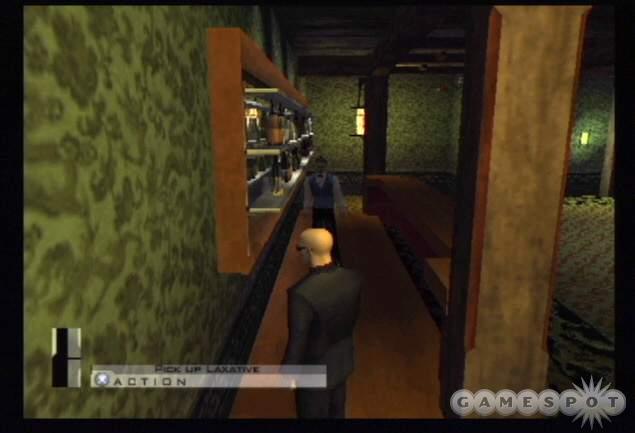
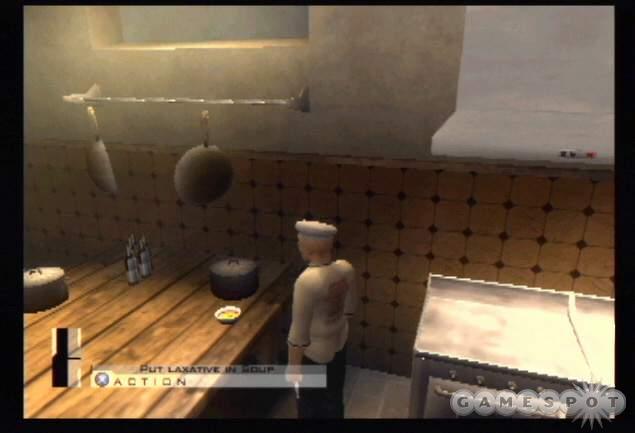
Drop the grocery crate and search the kitchen for the laxative to the left of the stove. Approach the pot of stew on the right side of the stove and poison it with the laxative. Exit the kitchen into the mess hall and stand away from any guards. Observe the cook deliver the stew to Fuchs. Wait until Fuchs feels the laxative’s effects; Fuchs will enter the bathroom. Follow him inside. Get inside before a nearby guard follows Fuchs into the bathroom. Close the door to prevent the guard from entering the bathroom with you and Fuchs.
You can wait until Fuchs finishes on the toilet (it takes awhile) or just shoot him with your silenced pistol. Kill him with a headshot for a quick kill. Change clothes into Fuchs outfit. Exit the bathroom and automatically speak with the guard. He offers to take you to Commander Bjarkhov at the ship.
Follow the guard calmly outside and across the runway. The guard leads you to a tram that connects to the submarine area. Remain calm and stand away from the guard while riding the tram. Once you arrive, disembark the tram and proceed toward the bottom of the map. Walk to the back corner to find the entrance. Listen to the soldier’s instructions and enter the door.
There are three doors here. Enter the second door on the right. Move up the stairs to the top. Go around the right corner and exit through the door. The guard here frisks you. He’ll remove any firearms in your possession. Move beyond the guard and through the next door on the right. It’s Commander Bjarkhov.
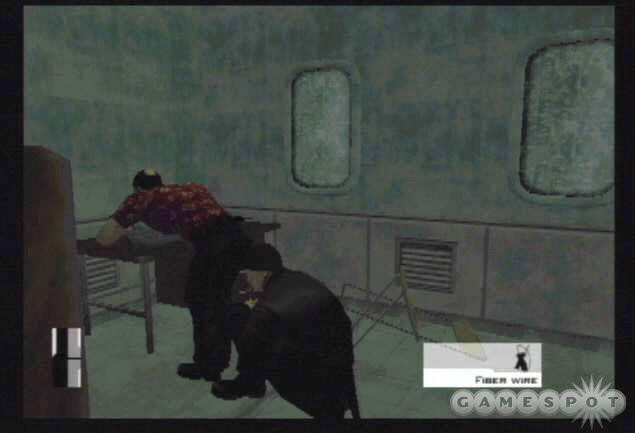
He approaches and speaks with you. Wait for him to approach the vodka. Be patient and wait for him to turn around a second time. Once he’s preoccupied with the drinks, strangle him with the fiber wire. Grab the master key off of the desk. Exit through the door on the left side.
Descend the staircase and open the door ahead. Follow the hall around to the exit door. You’re back in the room with the three doors. Exit out the door ahead. Remain calm so the guards don’t get suspicious.
Both targets have been eliminated. The final task remains: destroy the dirty bomb production facility, which is essentially the submarine. Exit and go to the left. When you reach the tram, turn left and proceed forward. Continue past the structures. Steer clear of guards unless you just want to shoot your way through the level. Find the largest structure at the end. Enter the warehouse. Upon entering, turn right immediately and enter the alcove in the right corner. You’ll find the radiation suit inside. Change clothes.
Exit the warehouse and proceed forward. Spot the sub ahead. Go down the staircase, across the frozen lake, and up the next staircase onto the catwalk. Avoid the guards. Cross the catwalk and find the sub entrance on the left side after the fence. Walk onto the sub and receive the radiation warning. As long as you’re in the suit, you’re safe. Search the back corner of the room for the bombs and the bomb remote. Exit the sub.

Turn left and find the ladder. Descend the ladder. Check the map and note the points of interest around the submarine. Place one bomb at each of the three points of interest. Once all three bombs are placed, return up the ladder and back to the tram. Get onto the tram and use it to proceed back to the other map area.
Equip the bomb remote. Turn around. Once you can no longer see the former map area, use the bomb remote to detonate the explosives around the sub. Ride the tram into the next map area. Board the cargo plane and move to its rear. Climb the ladder to complete the mission.
Beldingford Manor
Objectives: Assassinate Lord Winston Beldingford. Assassinate Alistair Beldingford. Rescue Giles Northcott. Escape Beldingford.
You begin at the map’s exit point. Calmly walk to the opening and observe the guards below. If you’re trying to remain undetected, wait until the guards split up and go their separate ways. You can drop down and sneak up on one and grab some new clothes but it’s not necessary. Sneak forward into the hedge maze and you can remain undetected in your own outfit.
Once inside the hedge maze, maneuver inside to the point of interest. It’s a hatch that leads into the manor’s basement. Follow it forward until you encounter the indoor guard. Use your syringe on the guard and take his clothes. Meanwhile, you may see messages about Alistair ordering his whiskey. Every so often, Alistair Beldingford orders whiskey. A butler enters the basement and retrieves the whiskey and delivers it to Alistair. If you wait long enough, you can spot the butler retrieve the whiskey from the cask on the left side of the basement.
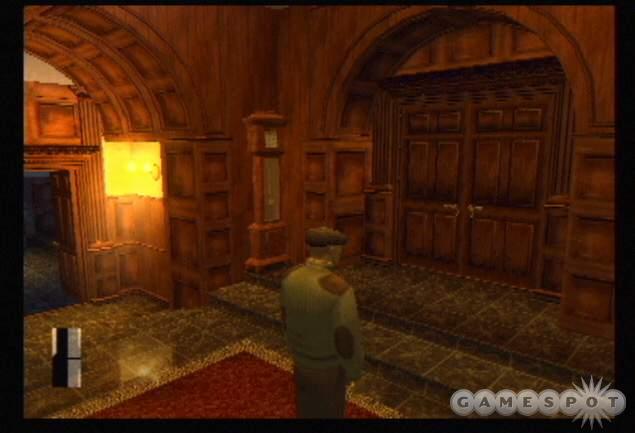
Ascend the staircase on the right side of the basement and into the manor. Don’t stand close to guards unless you want to shoot your way out of the building. Move calmly through the manor and don’t stare down other guards.
Your objectives inside the manor are the assassinations. Lord Winston Beldingford is on the upper floor inside his bedroom. He occasionally gets up and wanders around and returns to his slumber. Alistair is enjoying his whiskey inside the study on the manor’s first floor.
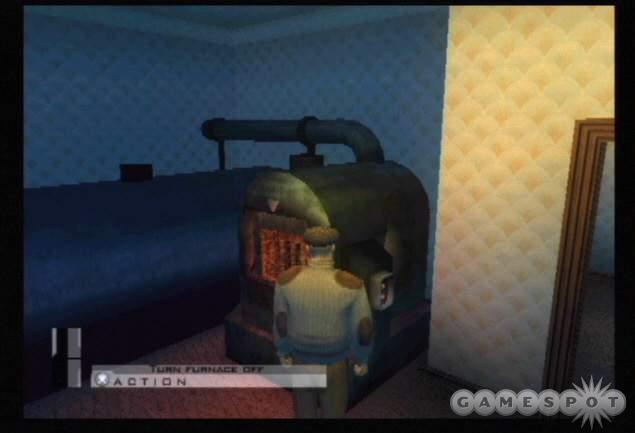
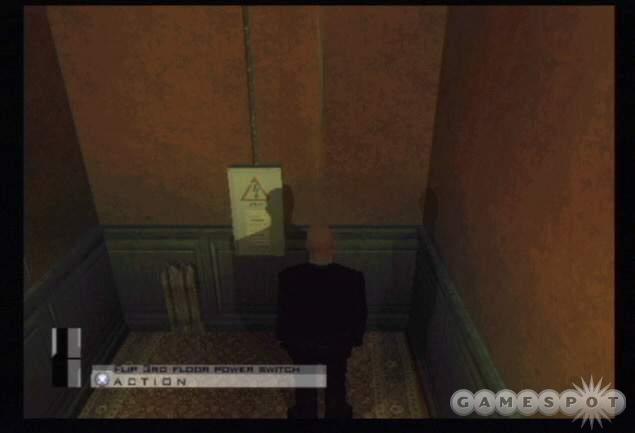
First, proceed to the kitchen area on the left side of the first floor map. You’ll notice a power symbol on the far left corner. It’s the furnace. Switch off the furnace to cause the shower water to turn from hot to cold. This causes the woman taking a shower to exit the bathroom and move down to the furnace. Take the opportunity to pass her and move through the bathroom undetected.
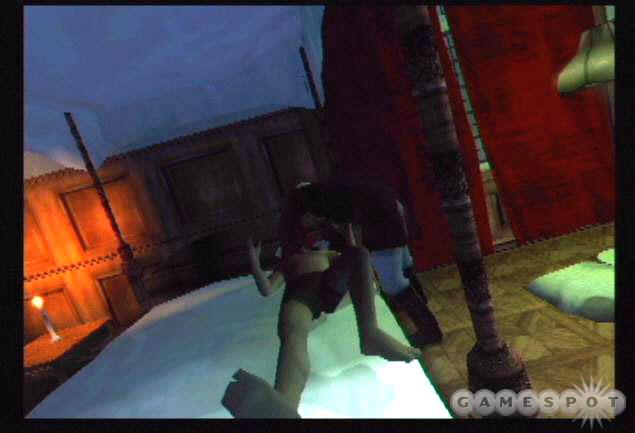
Once you’re upstairs, search the room on the left to find the vial of poison on the side table. You’ll use it later on Alistair’s whiskey. Use the map and approach Lord Beldingford’s room. Hide by the door and wait for Lord Beldingford to lay down and fall asleep. Use sneak mode to carefully move around the bed and to Lord Beldingford’s side of the room. Stay in sneak mode or he’ll wake up and go for a shotgun. You can either poison his milk or use the pillow to suffocate him. Leave the room after completing the objective.

Return downstairs and enter the cellar on the side of the wine cask. Make sure the butler isn’t nearby and use the vial of poison on the cask. Now just move away and eventually Alistair will want more whiskey. When he does, the butler will move down into the cellar, obtain the poisoned whiskey, and deliver it to your target.
Exit the manor calmly as to not alert any guards or create a disturbance. Your goal is to reach the stable. It’s in the far lower left corner of the map. Take note of the power symbol on the left side. That’s where you’re headed. Avoid detection by the guard patrolling around the stable. Move to the power symbol. It’s a satellite transmission. Guards inside the stable are watching the transmission. Disable it and they’ll head outside to see what’s happening.
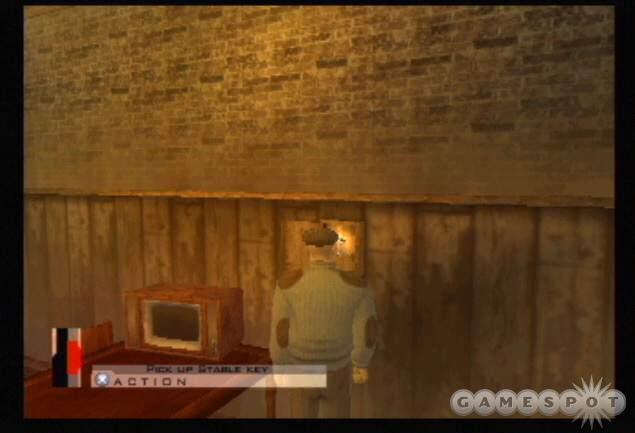
Quickly enter the stable and hide on the left side behind the hay. Wait for the guards to walk outside. Enter the door on the left. Check the map to ensure the horse handler isn’t nearby. Enter the guard’s room on the right side and pick up the stable key. Enter the door on the left side and grab the weed killer. Return to the first room and use the weed killer on the green fluid. This feeds the weed killer to the horses, which disables them.
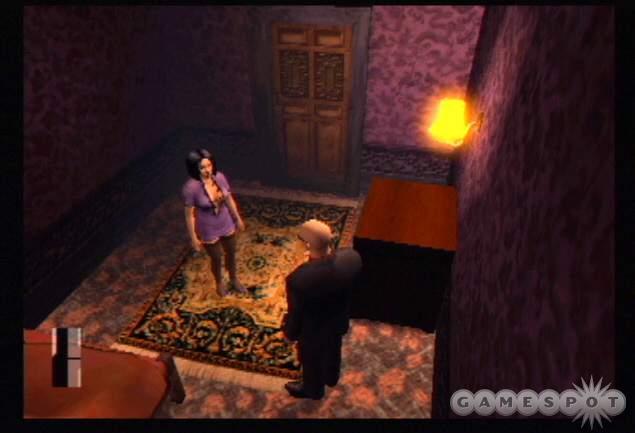
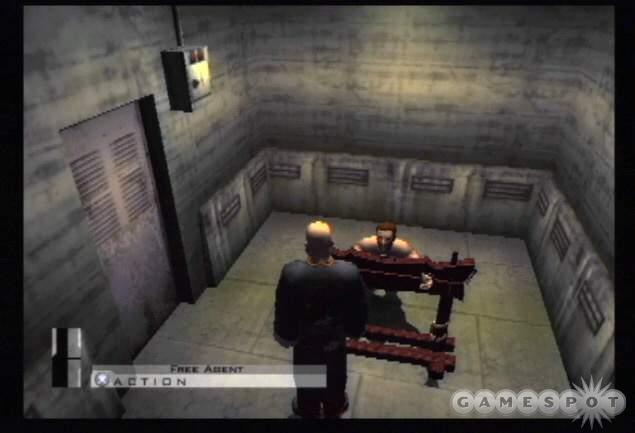
Move back through the left door and through the door ahead. Check the map for the horse handler to ensure he’s away. If he spots you, he may alert the guards. Enter the stables on the right side and find Giles Northcott in the stall in the back right corner. Use the stable key to unlock the gate and free Giles Northcott.
Exit the stable and proceed toward the exit point. It’s a long trek; just avoid close contact with guards and don’t run unless there’s no one else around you. The exit point is the level’s start location. Reach the raft to complete the mission successfully.
Rendezvous in Rotterdam
Objectives: Assassinate Klaas Teller. Assassinate Rutdert Van Leuven. Retrieve the photographs. Escape.
The biker gangs defend your targets well. Getting close won’t be easy. There are multiple ways inside the structure but one is foolproof. For instance, you could exit your hideout and follow the men into the factory. Once inside, locate the point of interest to find the biker clothes (nearby, an almost naked biker threatens a woman). You can use these clothes to sneak through the factory and into the biker hideout. But that’s not the best way. The optimum way into the hideout is to impersonate the reporter that’s meeting with Rutdert Van Leuven.
At the level’s start, quickly exit your hideout and check your map. Spot the reporter standing near the street lamp on the corner. Move toward his position. He doesn’t stand still for long. Eventually he begins moving toward the gate into the hideout. Once he gets inside, your opportunity is lost. So run up behind the reporter then pull out your syringe. Sneak up behind the reporter and disable him with the syringe. Grab the pictures and change your clothes. Drop your firearms.
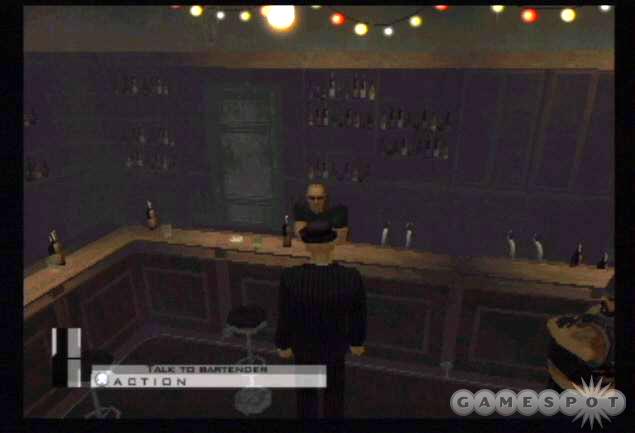
Approach the gate. Stand in front of the gate and wait for it to open. The guard frisks you. You’re safe as long as you’ve dropped the firearms. Now it’s time to talk to the bartender about the pictures and gaining a meeting with Van Leuven. After being frisked, move forward and enter the open bay. Move through the door on the right side and through the offices. Continue to the right side of the map. Approach and speak with the bartender. He’ll lead you to the meeting with Van Leuven.
Follow the bartender to the burly guard. You’re frisked again. You’re safe as long as you dumped the firearms earlier. Continue following the bartender upstairs and into Van Leuven’s office. After a brief conversation, Van Leuven moves to the safe. Wait for him to use the safe with his back to you then sneak up behind and use the fiber wire to eliminate the target. If the safe isn’t open, pick up the combination. Grab the pictures.
Exit the office and return to the staircase. Descend the staircase to the bottom floor. The second target is found on this lowest level. Getting to him is the problem. You’ll have to use the overhead map to avoid the patrolling guards. The reporter isn’t supposed to be down here; if you’re spotted, your cover will be blown.
Remain inside the stairwell and use the map to monitor the guard movements. Once the area is clear, go to the right side of the map and into the room in the bottom corner on the left side. There’s a power symbol inside. Turn off the power. Check for guards then move to the room on the upper right corner of the map. There’s a point of interest on the map within this room. Inside find the biker’s body. Take the clothes to change outfits.
Now cross the hall to the upper left corner of the map. The target is inside and vulnerable. Grab one of the weapons off of the table and eliminate the target. Escape the hideout. You won’t be able to escape through the front gate (the one you entered from). Instead, move through the opening in the fence on the other side and make your way through the factory. Avoid close contact with any guards inside the factory’s first floor and follow the hallways to the exit door on the far right side of the map. Once outside, maneuver toward the exit to complete the level.
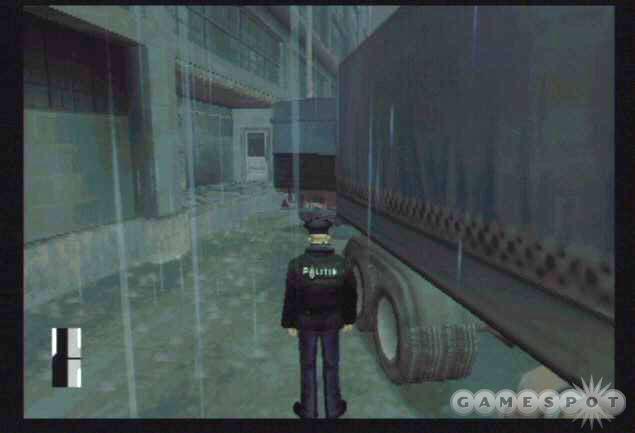
Deadly Cargo
Objectives: Assassinate Boris Ivanovich Deruzhka. Escape.
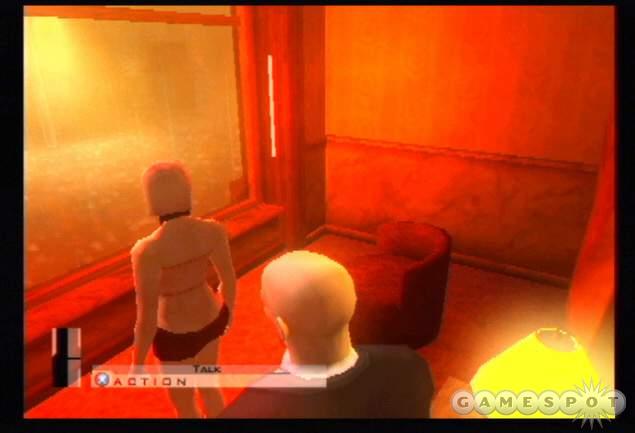
Walk forward down the road and enter the strip bar on the right side. Open the door into the bar area then move around the left side. Move through the hall to the door at the end. Open it up to find the stripper looking out the window. Speak with her. You ask her to cheer up the driver outside; she accepts for a thousand dollars. Follow her outside and watch her speak with the guard standing near the car. Wait for them to walk away to the left side.
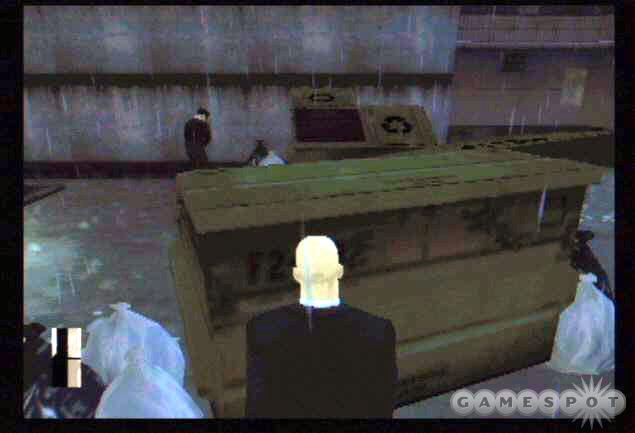
Approach the car and place the GPS transmitter. Turn right and walk down the street past the stripper and her new man. Continue forward toward the power symbol marked on the map. It’s a TV signal switch. Turning this off annoys a policeman inside the guard station. He’ll come out and check the switch. Hide away from the switch (behind the nearby crate) and wait for the cop to check the switch. When his back is turned, sneak up on the cop and use your syringe to disable him. Change clothes and drag the body into the open crate on the left side.
Return up the street to the guard station on the left side. Open the gate and proceed through. Move slowly to not alert the other policemen. Continue straight down the street until you spot the small shack on the left side (there’s a point of interest marked inside). Avoid close contact with all of the patrolling guards. Check inside the shack for the new clothes and the toolbox. Change into the dock worker clothes and grab the toolbox. Drop your firearms as you’re about to move through an enemy checkpoint.
Exit the shack and proceed to the right toward the bottom of the map. Approach the two guards at the checkpoint. You’ll be frisked but make it through safely as long as you don’t have any firearms in your inventory. Move down into the corner near the large crate and find the entrance into the underground tunnel. Descend the ladder into the tunnel. Follow the underground tunnel to the exit ladder. Use the middle exit on the far right side of the map.
Climb to the top of the ladder and wait for the guard to move through the door. Ascend the ladder and follow the guard calmly through the door. Ascend the staircase on the right side. Search the upper level for some guard clothes on a crate. Change clothes to better fit in with the enemy guards. Descend the ladder and return to the tunnel. Retrace your steps to the original ladder entrance and ascend to the dock.
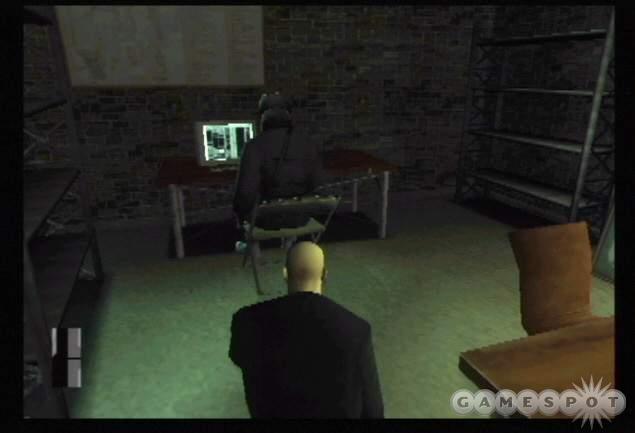
Approach the ship entrance on the left side. Walk calmly past the guard and onto the ship. Turn right and approach the doors. Enter the bottom door on the left side. Avoid close contact with the guards and move forward around the corner. Ascend the staircase to the door. Exit the door and move around the left side through the door around the corner. In the next hall, open and enter the door on the left. This is Deruzhka’s office. Crouch and hide behind the cabinet and watch the desk. Wait for Deruzhka to enter and examine the items on his desk. With his back turned, sneak up on Deruzhka and strangle him with the fiber wire.
Calmly make your way off of the ship. Your goal is to return to the shack where you originally found the dock worker clothes so you can return to the policeman’s garb. Work quickly because SWAT teams are approaching the ship. Don’t get caught in the crossfire. Make your way past the checkpoint and sneak around the policemen into the shack. Change clothes into the cop’s gear.
Getting past the cops will be easy if you haven’t created any disturbances. However, if you’ve seen the message "Guards are looking for a suspicious harbor policeman" warning then you’ll have a tougher time. Cops will blow your cover on sight so you must sneak around them. Exit the shack and retrace your steps toward the guard station.
Wait for the policeman patrols to move away from your view. Hide behind the truck on the right side and wait for the cop to move around to the left side. At the next patrols, sneak behind the trucks on the left side. Observe the next cop’s patrol pattern. Once the cop patrols toward the right side, scurry along the left wall and move through the door on the left wall. Continue carefully through the structure and eventually toward the exit to complete the level.
Traditions of the Trade
Objectives: Assassinate Franz Fuchs. Assassinate Fritz Fuchs. Retrieve the chemical bomb. Escape with the chemical bomb.
You begin the mission outside of the hotel. You’re carrying a suitcase containing a sniper rifle. Drop it; you won’t be able to get it inside the hotel yet. Pick up the conference ID and Diana’s note to the left of your start position. Drop the rest of your firearms. Exit the start position and approach the front of the hotel.
The officer asks for the ID; you automatically show him the conference ID. Maneuver through the metal detector. You’re safe as long as you aren’t carrying firearms (the fiber wire isn’t detected). Enter the hotel.
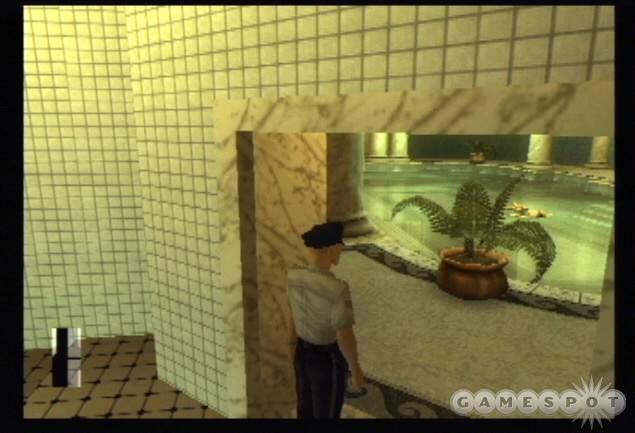
Fritz Fuchs is on the first floor. He’s inside the hotel swimming pool. Eventually he moves into the hotel sauna and finally leaves the pool area completely. If you hope to assassinate Fritz Fuchs with the least amount of fuss, you should work quickly to get to the pool area and either drown him in the water or fry him inside the sauna. It’s possible to accomplish the task in your original clothes but you’ll have to be cautious of the security guard patrolling the pool area. It’s possible to obtain guard clothes and then proceed to the pool area but you’ll have to work quickly.
Upon entering the hotel, follow the passage to the right side. Maneuver down the hall until you reach the locked door ahead of you. Wait for any patrolling guard to leave and be sure the door is closed behind you--the guards won’t appreciate you picking hotel locks. Pick the lock and continue through the passage. Open the door ahead and go left around the spooky hallway (spot the ghost if you’re lucky). Pick the lock on the second door on the right (room 108). Enter this room and be quiet. Sneak into the room’s right side and find the security guard clothes. Change your outfit and quietly leave the room.
Return to the hotel’s lobby and proceed calmly to the door on the left side of the stairs. Wait for the patrolling guard to leave then pick the lock. Maneuver toward the pool area. Check the map. You should see a target either in the pool’s center or inside one of the rooms along the pool’s edge. Peer into the pool area and find the target. If he’s in the pool, remain at a distance and away from the patrolling guard. Wait for Fritz Fuchs to exit the pool and enter the sauna. If he’s in the sauna, walk past the guard carefully and approach the sauna door.
As mentioned, it is possible to drown Fuchs in the pool. You must do so out of the other security guard’s sight and sneak carefully down into the water. Maneuver behind Fuchs head and use the fiber wire to drown the target. If you prefer the easier sauna route, wait until Fuchs enters the sauna completely then approach the door. Use the valve to the left of the door to fry Fuchs while he's trapped inside the sauna.
Once Fuchs is dead, open the door to the sauna and pick up the key to the X-ray room. Drag Fuchs deeper inside the sauna and leave. Close the door behind you. Return to the hotel lobby.
Since you’re dressed in security guard garb, it’s possible to enter the security station to deactivate the metal detectors. This will permit you to get a weapon past the metal detectors and eventually into the room of your second target. If you’ve read Diana’s note, you’ll realize that there’s a "gift" for you at the flower shop. It’s a box of roses holding a weapon inside. You can carry the box around undetected--particularly if you deactivate the metal detectors.
To do so, return to the lobby and ascend the stairs. Go to the right side and through the metal detector. Go right and through the door. At the end, turn left down the hallway. Check the map for the stairwell. Continue down the hallway. Don’t stand too close to guards or other hotel patrons so you don’t rouse suspicion. Go to the third floor. Check the map for the point of interest. That’s the security office. Enter it and use the switch inside to deactivate the metal detectors.
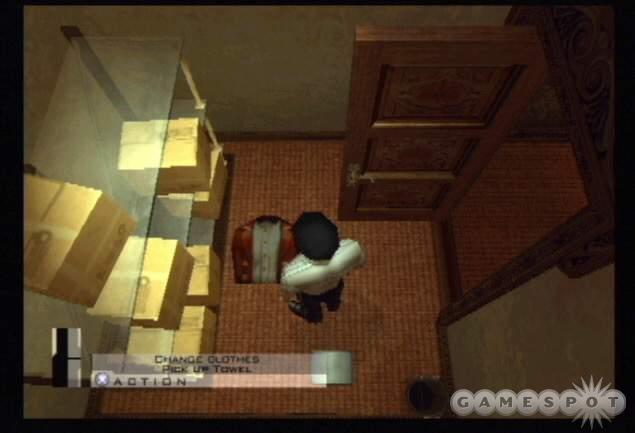
Now you can recover a weapon, such as the one you dropped at the beginning of the mission, the one inside the room where you took the security guard’s uniform, or even the one inside the box of roses within the flower shop. Return to the second floor and check the map. Spot the location of the target on the left side. Move down this hallway and find a supply room across from the target’s room. Pick the supply room lock then go inside. Find the bellhop uniform inside as well as the towel. Change clothes and pick up the towel.
Approach the guard in front of Franz Fuchs’ room. Timing is very difficult here. Save your game beforehand if possible. First you must check the overhead map to ensure that the guard inside Fuchs’ room has moved out onto the balcony. Second, the guard at the door will only let you inside alone for 10 seconds. You need to conduct the hit and begin your exit before the guard can catch you. Speak with him and then move inside the room.
With the interior guard out on the balcony, you can make the move. Drop the towels and open the bathroom door on the left. Sneak inside the bathroom so you don’t disturb Franz Fuchs’ shower. Close the door. Shoot him in the head. Exit the bathroom and close the door and begin the walk to the room’s exit.
Check the map and look for a civilian inside one of the hotel rooms. That’s another bellhop. Follow him. When he moves into a room, check the door to find a master key. Take it. Go to the room to the left of Franz Fuchs’ room and use the master key to open the door. Alternatively you can pick the lock but you must do so out of sight of any guards.
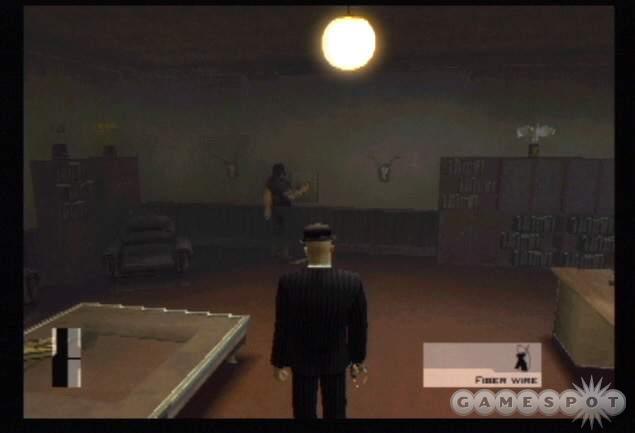
Move through this room to the balcony. Wait for the guard on the adjacent balcony (it would be Fuchs’ balcony) to move back inside the room then walk to the left edge of your current balcony to receive a new action: jump to the adjacent balcony. Hide to the right side of the door in a crouched position. Move far enough away so the door can open fully. It will help conceal you against the guard. When the guard moves onto the balcony, sneak up behind him and use the fiber wire to strangle him.
Walk inside Fuchs’ room and pick up the letters on the table on the right. Your primary objective is to pick up the suitcase on the other side of the room. It will hold the chemical bomb. Pick up the suitcase and return to the balcony. Jump back to the previous balcony and exit the room. Go to the right then through the double doors on the left. Ascend the staircase to the upper floor.
At the top, go left then through the double doors (marked 306-309). Exit through the door on the right (with the green light above). It leads out onto the roof. Cross the roof forward to the open windows. There’s a guard inside lurking on the right side. Hop through the window and sneak past the guard into the room on the left side. Alternatively you can eliminate the guard and steal his clothes. Sneak up behind him and eliminate him with the fiber wire.
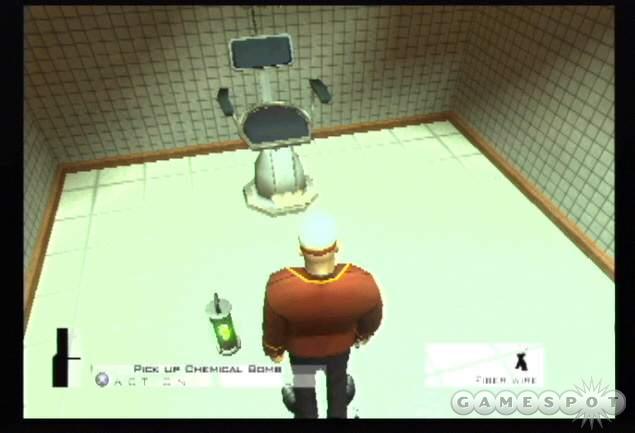
Open the door on the left side. Maneuver carefully through the next room to the far door. Inside you’ll find the chemical bomb. Pick it up and place it in the suitcase. Retrace your steps back to the roof. Now calmly make your way downstairs and out of the hotel. Move cautiously so you don’t create a disturbance. Maneuver to the exit point with chemical bomb in suitcase to complete the mission.
Slaying a Dragon
Objective: Assassinate Red Dragon negotiator. Blue Lotus negotiator must survive. Escape the area.
Check the map and note the point of interest just south of your start position. It’s a sewer entrance. Move to the entrance and descend the ladder into the tunnel. Pick up the rat poison inside the tunnel. Climb out.
Make your way to the eastern side of the map. You can run; the civilians won’t be alerted to your quick pace. Move to the building in the middle of the eastern side of the map. You can see its entrance on the left side of the building. Enter and ascend the staircase to the fifth floor. Pick the lock on the door to the right of the floor entrance. Search the room for the gardener’s clothes. Change your outfit. Drop all of your firearms.
There’s an alternate way to get gardener’s clothes. When the level begins, the real gardener is walking along the road south of your start position. Run and catch him and use the syringe to disable him. Steal his clothes and continue the level!
Descend out of the apartment building and cross the street toward the map’s center. You’ll spot two guards ahead. Approach the guards and be frisked. With no weapons in your inventory, you’re safe to pass into the central area.

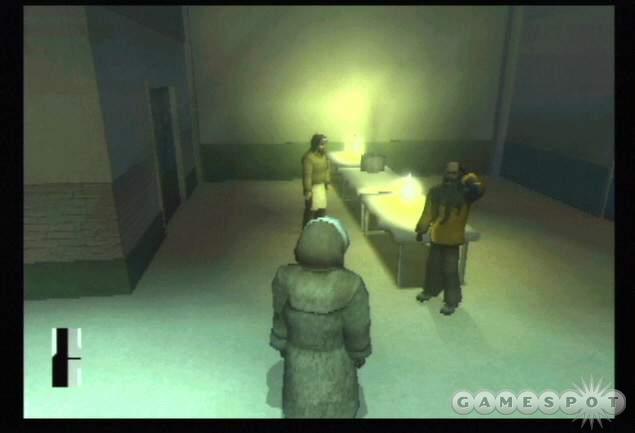
Walk to the center gazebo. The Red Dragon and Blue Lotus negotiators conduct their business here. Take note of their pattern. The two walk together around the gazebo. At some point, the Blue Lotus negotiator moves away and speaks with a guard. Meanwhile the Red Dragon negotiator continues to move around to the tea. There are a couple ways of dealing with the Red Dragon negotiator here.
You can’t poison the tea with the rat poison while the nearby guard is watching (you can check the map and see he’s facing the tea). If you run around the guard you can cause him to look away then wait for the negotiators to move away from the tea then administer the poison.
Alternatively, wait for the two negotiators to end their talk. The Blue Lotus negotiator moves away. When he’s out of sight, sneak behind the Red Dragon negotiator and eliminate him with your fiber wire. Drag his body out of the gazebo.
After completing the hit, calmly walk out of the center area and to an exit to complete the level.
The Wang Fou Incident
Objectives: Assassinate Blue Lotus negotiator. Assassinate Blue Lotus Triad Members (six total). Escape from mission.
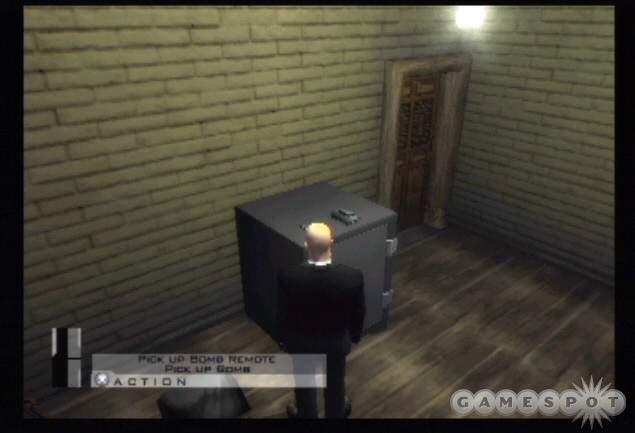
Proceed to the north and find the ladder on the northeastern side of the map. Climb the ladder. Sneak along the catwalk so you don’t disturb the nearby guard on the left side. Pick the lock on the first door on the right. Change clothes into the enemy garb and pick up the bomb and bomb remote off of the safe. Grab the sniper rifle. Exit the room and descend the ladder.
Move to the map’s center--just south of the restaurant. Wait for the limo to arrive and drop off the Lotus members. Hide in the map’s center behind the dumpers on the southeastern side. Wait patiently until the limo driver comes to relieve himself. He does so just to the right of the sewer entrance in the middle area. Sneak up behind the limo driver and disable him with a syringe.
Note that if you take too long with the first part of this walk-through, the limo driver may have already come and gone. You need to complete the first part quickly to catch the limo driver. Otherwise you can take out the limo driver first then grab the bomb and the remote.
Drag the limo driver’s body into the sewer. Change clothes and drop the sniper rifle for now. Exit the sewer tunnel and calmly approach the limo with bomb in your inventory. Walk to the driver’s door and use the place bomb action.
Calmly walk to the far northeastern road on the map. Proceed down this road until you can spot the two Lotus guards in the distance. Check the overhead map to verify their location. With the guards in view, equip the bomb remote from your inventory.
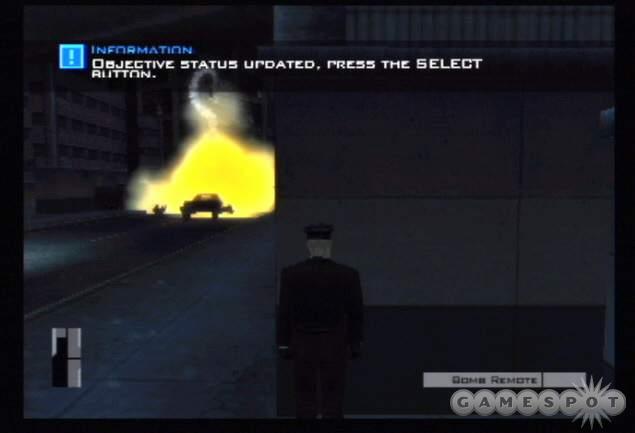
Save your game here because timing is important. Wait patiently for the limo to gather three Lotus members and drive along this road. When the limo is just in front of the two outside guards, detonate the bomb. If successful, five of the six Lotus guards will be dead.
Return to the map’s center and change back to the guard clothes. Grab the sniper rifle. Move toward the northeastern side of the map. You want to enter the restaurant from the side entrance. It’s just to the left of the limo explosion. Move through the doors here into the first floor of the restaurant. Steer clear of guards by checking the mini map.
Follow the hallway to the staircase to the second floor of the restaurant. It’s in the southeastern corner of the first floor map. Ascend to the second floor. Follow the halls to the elevator. Open the door to the left of the elevator.
You’ll spot a guard in front of you. Don’t go inside yet and don’t get close to him. There’s no reason to raise suspicion. Wait for the guard to leave to the right side. Move around this balcony area toward the right side and look back to the left. In the distance--on the floor below--you’ll spot a small dining room. The remaining targets are in this room.
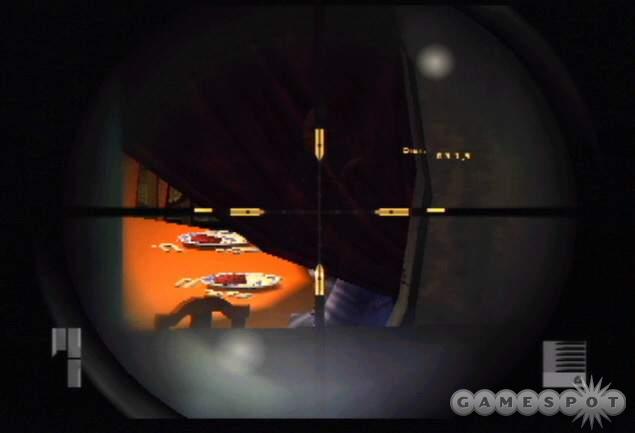
Position yourself so you can use the sniper rifle to zoom in on the targets. They sit on the right side of the room. Adjust your position so you can see as much of the target as possible through the railing. Use the sniper to eliminate both targets (check your objectives to ensure both are dead). Drop the sniper rifle and exit the restaurant calmly. Proceed to the exit point marked on the map to complete the level.
The Seafood Massacre
Objectives: Assassinate the Red Dragon negotiator. Conceal the Red Dragon negotiator’s body. Assassinate the Chief of Police. Assassinate the Blue Lotus negotiator. Place amulet at restaurant. Escape in the car.
Unless you want to shoot your way through the level and don’t mind an alert or two then completing the timing on the first part of Seafood Massacre can be tricky. At the start of the level, drop the briefcase and take the first right through the alley. Cross the next street and find the alley just ahead and to the left. Inside the alley you’ll find a staircase. Descend the staircase and pick the door lock at the bottom.
Move inside the room and sabotage the gas in front of you. This will cause the cook from the restaurant to come down and check the controls. Enter the door on the right and find a uniform inside. Change clothes. You won’t be able to get inside the restaurant with this disguise but it will keep you safe from exterior guards. Exit back up the stairs.
Go over to the dumpster and descend the ladder into the underground tunnel. Pick up the rat poison. If you’re not sure of the location, check the map to see the point of interest.
Exit the alley toward the map’s top. Check the map and spot one of your targets in an alley on the northern edge of the map. This is why the timing is important. He walks along the street and makes a pit stop here to look in the sewer tunnel. If you’re too slow, he’ll continue on and eventually enter the restaurant. Catch him here if you’re trying to remain undetected.
Sneak up behind this Red Dragon negotiator and strangle him with the fiber wire. Pick up the triad amulet. Pull his body into the sewer, which completes one of the objectives. Remain in your current clothes. Return to the alley that leads into the basement of the restaurant. The guards won’t bother you as long as you act natural.
Inside you’ll find the other chef working on the gas problem. Sneak up behind him and use the syringe to disable him. Take his disguise. Alternatively you can avoid this guy altogether and put on the clothes of the Red Dragon negotiator. But you still should sabotage the gas to get him out of the kitchen. You can enter the restaurant with them but you’ll have to be especially careful around the interior employees. You’ll also be frisked at the entrance and your weapons will be taken.
Enter the restaurant through the front entrance and go into the kitchen on the right. Approach the serving tray and use the poison. Pick up the tray with the poisoned drinks and place it on the counter. Do it while the waiter is looking away to be safe. Duck down behind the counter when you ring the bell to avoid detection. Ringing the bell cues the waiter to pick up the tray and bring the drinks to your next targets.
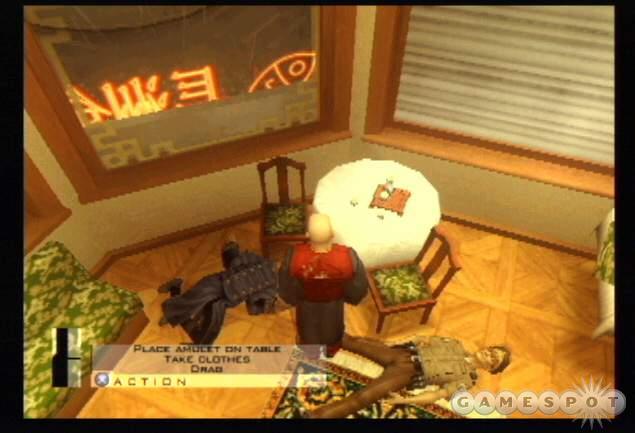
Wait for the notification that they have been killed. Ascend the staircase and approach their table. Place the amulet on the table to complete the task. Calmly exit the restaurant and make your way to the exit point to complete the level.
Lee Hong Assassination
Objectives: Assassinate Triad Leader. Obtain Jade Figurine. Escape from the area.
You should recognize this mission layout from the Wang Fou incident a couple missions back. Proceed toward the restaurant side entrance. It’s in the northeastern corner of the map. Go through the wooden double doors then approach the three entrances ahead. Go into the far left door; it’s closest to the staircase. You may want to check your maps and ensure the guard isn’t lurking around. There are also some crates to hide behind once you’re through the door.
Don’t go up the staircase on the left side. Instead, find a door on the right side of the room. Descend the stairs there into the basement area. Go to the bottom room. You’ll spot some sheets hanging to the left and another door on the right. Go through the door. Spot the clothes on the ground. Change clothes. Exit the basement and the restaurant. Return to the street.
Proceed toward the western side of the map and approach the restaurant’s main entrance. Walk calmly into the restaurant. Open the door on the left side and enter the bar area. Pick up the bottle of laxative on the far left side of the bar counter. Speak with the bartender. He tells you about a CIA agent locked up in the basement. Pick up the brothel invite left on the counter.
Exit the bar and move to the staircases in the adjacent room. Move past the guards through the double doors and ascend the right staircase to the upper floor. Go through the door ahead then the first door on the left. Continue forward until you move through a storage room. For reference you’re headed toward the southeastern corner of the map. Cross the bridge toward the brothel.
Move into the first alcove on the left to find the contact. Wait for their conversation to conclude then follow the girl into the room. She tells you that she’s been kidnapped and also mentions the CIA agent in the basement (he knows where the jade figurine is). She proposes a trade: a combination for helping her escape. You must get her to the restaurant’s side exit.
Don’t go back through the brothel. Exit out the back door. Follow the catwalk around to the left. When you reach the gap, select jump to balcony. She’ll follow you. Help her up when she almost falls. Continue around the next left corner to the bridge. Slowly sneak across the bridge toward the right side. Go through the double doors.
Hide behind the crates to avoid any guards inside. You can kill the guard if necessary. Use the fiber wire. A second guard patrols the staircase. Rotate the camera so you can see him leave the staircase. When he does, sneak down. Use the crates at the bottom for cover and sneak out the door on the right side. Don’t forget to utilize the map so you can track the guard’s movements. Exit and approach the double doors to free the girl in exchange for the combination for the safe containing the jade figurine. Now you just need to know which safe and where it is.
Move along the road to the right and find the ladder along the right wall. Cross the catwalk to the first door on the right. You will recognize this location from the Wang Fou mission. Pick the door lock and enter. Inside you’ll find a safe--but it’s just one of the mission’s safes. The jade figurine could be in here but it could also be elsewhere. The location is randomized. Save your game if you want to check the safe. If it’s the wrong one an alarm sounds. The CIA agent, once found, will tell you the exact location.
Quietly open the door to the safe’s right. There’s a guard inside the room with his back turned. Use the syringe quietly to disable him. Take his clothes. Open the door on the right and go around the left corner to find the elevator. Call the elevator and proceed to the basement. Exit the lift.
Walk carefully past the guards. Check the map and note the point of interest. Follow the basement passage north. Don’t stick too close to the guards as you move past them. Search the room containing the point of interest to find the CIA agent. Free him from the shackles. He tells you where the jade figurine is located and also provides some hints about getting to Hong. Note the clue about Zun, the bodyguard, always tasting Hong’s food. On lower difficulty levels, the location of the jade figurine is now marked as a point of interest on the map.
Retrace your steps toward the elevator. Check a room on the left just before the elevator to find the weapons depot. The jade figurine could be in there depending on how it was randomized. There are also a lot of weapons here if you want to start shooting. Search the safe for the figurine if it’s located here. Other safe locations include the brothel and the second floor. Use the elevator to reach the second floor. Obtain the jade figurine before continuing with the mission’s final task: assassinating Lee Hong.
Return to the restaurant’s basement. Search the area where you first found new clothes (with the sheets hanging on the walls) to find chef clothes. Change your clothes and return to the elevator. Proceed to the first floor.
Exit and proceed through the doors ahead. At the intersection, move through the double doors on the right into the kitchen. Approach the soup on the back corner of the table. The other chef tells you to take the soup to Mister Hong. Time to use the laxative. Poison the soup with the laxative then pick up the soup.
Exit to the hallway and open the double doors ahead. Cross the room to the dining hall ahead where Hong and his bodyguard sit. Place the soup on the table. The bodyguard takes a sip and runs off to the bathroom. Sneak behind Hong and eliminate him with the fiber wire. Check the corpse for the safe combination (needed if you didn’t rescue the hooker) and the Chinese sword. Drag Hong’s body to the rear side of the dining table. The bodyguard will be back soon; work quickly. Calmly walk out of the restaurant and proceed to the exit point.
Hunter and Hunted
Objectives: Assassinate Inspector Albert Fournier. Escape to DeGaulle Airport.
Check the locker for some weaponry. You’ll need it if you plan to shoot your way out of this level. If you want to leave without weaponry, quickly exit the door on the left before SWAT arrives. Next open and move through the first door on the right. Exit out onto the balcony and jump to the far balcony. Turn left and go to the corner and jump to balcony again. Exit this room and turn right. Spot the power switch on the back wall. Use it to turn off the lights.
Turn around and spot the SWAT team in the dark hall. Move through the hall and avoid contact with the SWAT. Quickly drop down the elevator shaft on the left. Open the door at the bottom and exit onto the second floor hallway.
Go to the left and around the corner. Sneak quietly up behind the guard ahead of you. Use the syringe to disable the guard. Steal his clothes. Drag his body into the room. Search near the body on the bed for another syringe (useful just in case you need it). Exit the room.
Proceed down the hall to the left. Walk calmly past any SWAT members and descend the staircase. Exit out into the alley at the bottom.
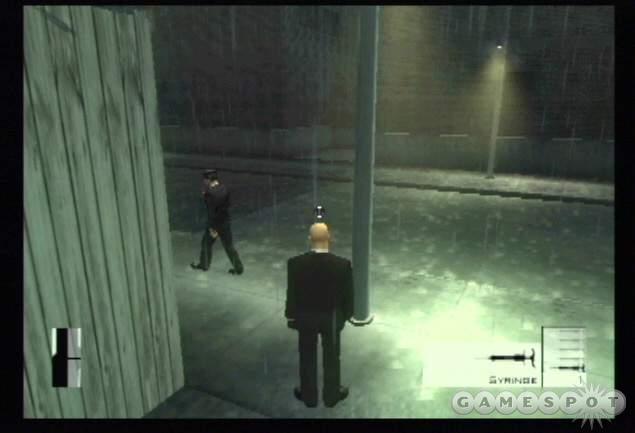
Move forward and take the first left. Follow it to the sewer entrance. Don’t stand too close to patrolling guards or your cover may be blown. Follow the underground tunnel to the upper right exit. After exiting, check the map and spot the target south of your position. Cross the street and use the alley to reach the area just before the target’s location.
The problem is that there are guards looking at the target. If you sneak around the two guards, they’ll face away from the target. With no guards looking, sneak up behind the target and eliminate him with the fiber wire. Exit via the alley on the right side. At the next street, go to the left toward the road block. Stay away from the cops and wait for them to move away then run through the blockage to the exit point.
Chapter 4 - Silent Assassin Tips
Completing Hitman: Contracts levels with a Silent Assassin rating requires patience, strategy, and, usually, the lack of firearms. To score the coveted rating, you have to move undetected through the level. Your cover must remain intact. Plus, you’ll have to reserve killing blows for targets only. If a civilian must be disabled, use the syringe or other non-lethal method. Be ready to become adept with disguise changes and locating alternate killing methods like poisons, bombs, pillows, and switches.
This section provides walk-through tips on completing all twelve Hitman: Contracts missions with in Silent Assassin rating. Each level completed offers a new weapon reward that becomes available in training mode and in level replays.
The following table reveals the weapons unlocked by achieving "Silent Assassin" ratings.
| LEVEL | WEAPON |
| Asylum Aftermath | CZ2000 Dual |
| The Meat King’s Party | Micro Uzi |
| The Bjarkhov Bomb | Silverballers Silenced |
| Beldingford Manor | Magnum 500 Dual |
| Rendezvous in Rotterdam | Sawn Off Shotguns Dual |
| Deadly Cargo | M4 Carbine Assault Rifle .S |
| Traditions of the Trade | SG220 .S Dual |
| Slaying a Dragon | MP5 Sub-Machine Gun .S |
| The Wang Fou Incident | AK74 Assault Rifle Silenced |
| The Seafood Massacre | GK17 Dual |
| Lee Hong Assassination | Micro Uzis Silenced |
| Hunter and Hunted | PGM Sniper Rifle Silenced |
Asylum Aftermath
- Grab the car key in the first room and run all the way to the elevator. Don’t worry about being detected. You’re safe all the way to the elevator.
- Get off on the second floor and put on the SWAT uniform.
- Calmly descend the second floor stairs or use the elevator to reach the first floor. Follow the map (and green marked doors) to the first floor exit.
- Exit the sanitarium and proceed to the immediate right.
- Use the car to escape undetected.
- You can also put on a patient’s clothes (right outside the elevator) and use them to make your escape. Consult the map to observe the movement of enemy SWAT. Use the second floor stairs and bypass the SWAT at the bottom. Enter the door on the left (across from the exit) and use the spiral stairs to reach the roof. Climb down the ladder on the roof to the car. When the guard isn’t looking, drop down and use the car to escape.
The Meat King’s Party
- At the level’s start, change clothes with the butcher at your feet.
- Drop your firearms and exit the truck. Use the red button to close the truck’s rear doors.
- Calmly walk to the party entrance and get frisked by the door guard. Make sure you have no firearms to enter the party safely.
- Explore the upper floor and find the client’s slain daughter. Pick up the murder proof. Don’t get detected by the Meat King’s psycho brother.
- Enter the locker room and switch to the waiter’s clothes.
- Avoid the real waiter. There’s only one waiter at the party. If the patrons or guards see two, it raises suspicions.
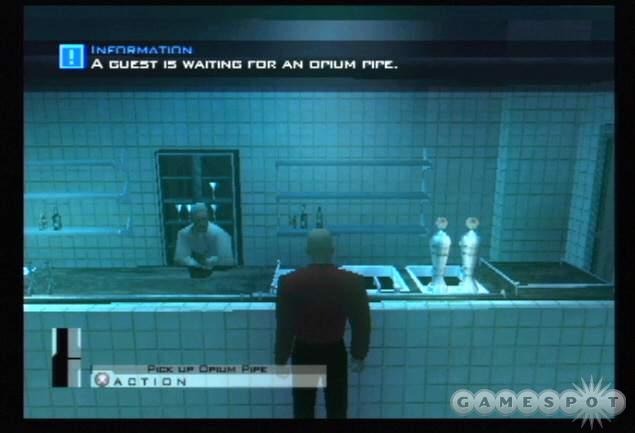
- Grab the opium pipe from the bar inside the party area.
- Find the lawyer in the room on the bottom right corner of the map. If he’s awake, place the opium pipe on the desk and wait for the lawyer to fall asleep. If he’s already asleep, pick up the silenced pistol on the ground and terminate him.
- Return to the locker room and switch to the butcher’s clothes.
- Enter the kitchen and grab the chicken plate.
- Return to the locker room and place a weapon inside the chicken plate. Drop all other weapons.
- Return to the party area and go to the right side to find the stairs to the upper floor.
- Get frisked by the Meat King’s guard. Enter the Meat King’s chamber.
- Use the button on the left wall to pull the curtains. Wait for the girls to leave.
- Retrieve the weapon from the chicken plate and kill the Meat King.
- Exit the compound through the locker room.
The Bjarkhov Bomb
- Acquire enemy clothes: either sneak up on the guard carrying the grocery crate in the cargo plane or turn around, enter the watch tower, descend the ladder, and find the guard watching television in the room on the left. Use the syringe.
- In disguise, enter the mess hall. Find the contact in the kitchen and speak with him to receive information on the dirty bomb production facility.
- Pick up the laxative inside the kitchen. Use it to poison the stew. Enter the mess hall and stand away from the guards.
- Wait for Fuchs to get sick and enter the bathroom. Follow him inside before the guard can.
- Slay Fuchs in the bathroom with a silenced weapon or using the fiber wire after he gets off the toilet.
- Change clothes with Fuchs.
- Exit the bathroom and automatically speak with the guard. Be led into the next map area.
- Find the entrance to Bjarkhov’s quarters on the bottom right of the map. Follow the guard’s instructions to find the correct room.
- Wait for Bjarkhov to approach the vodka then strangle him with fiber wire.
- Exit and find the large warehouse northwest from the sub. Turn right immediately and find the radiation suit in the alcove.
- Board the sub while inside the radiation suit and grab the bombs and bomb remote.
- Place the bombs at the three points of interest around the sub.
- Ride the tram and detonate the bomb using the remote. Do so just before the remote cuts off. If the remote cuts off, walk back in the tunnel until you can use it. Don’t detonate too soon or dead bodies might be found creating a problem for your rating.
- Board the cargo plane and climb the ladder to complete the mission.
Beldingford Manor
- Enter the manor through the hatch entrance within the hedge maze.
- Use the syringe on the interior guard wandering through the wine cellar. Change clothes.
- Enter the manor kitchen on the left side of the first floor. Turn off the furnace to turn the shower water cold. This causes the woman to leave the bathroom and move down to the furnace.
- Take the opportunity to move through the empty bathroom. Search the bedrooms for the vial of poison.
- Carefully move inside Lord Beldingford’s bedroom. Wait for him to fall asleep on the bed.
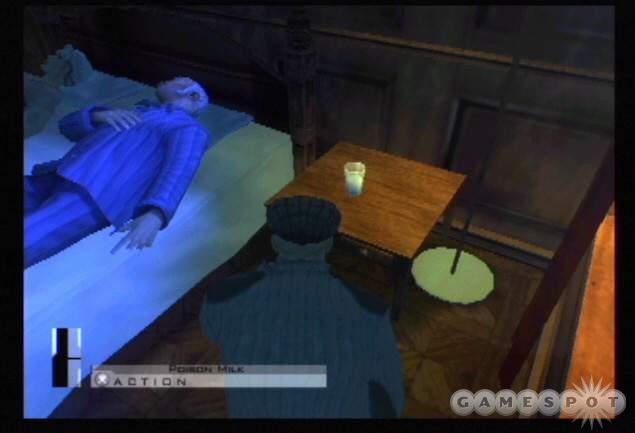
- Sneak around his bed (do not move out of sneak mode) and pick up the pillow. Suffocate Lord Beldingford.
- Return to the wine cellar while avoiding the butler.
- Use the vial of poison on the whiskey cask.
- Exit the manor and move to the bottom left corner of the map: the stables.
- Move to the power box and disable the satellite transmission.
- Hide inside the first room while the guards exit and check the power box.
- Enter the guard’s room and pick up the stable key.
- Enter the opposite room and grab the weed killer.
- Fill the horse’s feed with the weed killer.
- Avoid the horse handler and enter the stables on the right side. Find Giles Northcott in the stall in the back right corner.
- Open the gate with the stable key and speak with Giles Northcott.
- Calmly escape the stables and return to the level’s start position. It’s also the exit point.
Rendezvous in Rotterdam
- Find the reporter before he enters the biker compound. Exit your hideout and find the reporter near the street corner. He moves toward the biker compound’s front gate.
- Use a syringe to disable the reporter and switch clothes. Grab the envelope and drop your firearms.
- Approach the compound’s front gate and successfully bypass the guard.
- Enter the compound and talk to the bartender at the bar.
- Follow the bartender to the first target’s office.
- Wait for the target to use the safe and turn his back to you. Use the fiber wire to strangle the target.
- Pick up the pictures. (Grab the safe combination and open the safe if you can’t get the pictures).
- Descend to the lower floor of the compound.
- Avoid the guards carefully.
- Turn off the power in the room on the lower right corner of the map.
- Maneuver to the upper right corner of the map and switch clothes with the unconscious biker.
- Move to the upper left corner of the map and slay the second target with one of the weapons inside the room.
- Escape the compound by moving through the factory.
- Avoid the guards in the factory and exit via the door on the far right side.
- Once outside, move toward the exit point to complete the mission.
Deadly Cargo
- Enter the strip bar and find the stripper near the window. Talk with her and she’ll "cheer up" the guard outside by the car.
- Approach the car and place the GPS transmitter on the vehicle.
- Follow the street past the guard station and find the switch to deactivate the television signal.
- Take cover and wait for the security guard to check the television signal switch.
- Use a syringe on the security guard and drag his body behind the crates. Change into the security guard clothes.
- Open the gate next to the guard station and follow the route to the small shack (contains a point of interest marked on the map).
- Enter the shack and change into the dock worker clothes. Grab the tool box.
- Drop your firearms inside the shack.
- Move south along the dock and to the enemy checkpoint. You’ll be frisked.
- Continue to the crates and descend into the underground tunnel.
- Climb out through the middle exit. Climb the staircase on the right side and find the enemy guard clothes at the top. Return to the dock.
- Board the ship. Turn right and enter the door on the left.
- Go around the right corner and ascend the staircase. Exit through the left door and around the left corner. Open and enter the passage. Enter the target’s office on the left.
- Hide behind the cabinet and wait for the target to enter the room. Sneak up behind him and use the fiber wire to eliminate the target.
- Exit the ship and return to the shack and switch to the security guard clothes.
- Move toward the guard station and use the trucks for cover. Exit through the door on the left side. Navigate the structure and proceed to the level exit.
Traditions of the Trade
- Drop the sniper briefcase and your firearms. Pick up the conference ID.
- Enter the hotel after being frisked by the door security personnel.
- Move through the door to the right of the lobby staircase. Pick the next door’s lock when the security guards aren’t looking.
- Proceed down the hall to room 108 and silently enter the room. Change into the guard clothes and exit.
- Return to the lobby and approach the door to the left of the lobby staircase. Pick the lock when security personnel aren’t watching.
- Wait for Fritz Fuchs to leave the pool and enter the sauna. Walk to the sauna door and use the valve to the left of the door to eliminate Fritz. Pick up the key and drag Fritz into the sauna.
- Return to the lobby and ascend the staircase. Go to the right and through the metal detector. Reach the staircase and move to the upper floor. Enter the security room and disable the metal detectors.
- Exit the hotel and pick up your silenced firearm. Return to the hotel and ascend the lobby staircase and go to the right.
- Find the door into Franz Fuchs’ room.
- Pick the door on the opposite side of the hall. It’s a supply room. Change into the bellhop clothes and pick up the towel.
- Check the map to ensure the guard inside Franz Fuchs’ room is on the balcony.
- Speak with the door guard and get let inside.
- Drop the towel, open the bathroom door, sneak inside, close the door, and shoot Franz Fuchs’ in the head. Exit, close the door, and leave the room.
- Find the bellhop on the floor and follow him to his next room. Pick up the master key from the door.
- Use the master key to open the door to the left of Franz Fuchs’ room.
- Jump to the adjacent balcony when the guard isn’t there.
- Hide to the right of the door and wait for the guard to emerge onto the balcony. Eliminate him with the fiber wire.
- Search the room for the bombcase.
- Return across the balcony. Move to the staircase and ascend to the third floor.
- Exit onto the roof. Cross it and enter the open window. Go to the left and find the chemical bomb in the back room. Place it in the bombcase.
- Escape the hotel without creating a disturbance.
Slaying a Dragon
- Move south from your start position and enter the sewer at the point of interest. Pick up the rat poison.
- Enter the eastern apartment building and ascend to the fifth floor. Pick the lock to enter the room with the point of interest.
- Change clothes into the gardener’s outfit. Drop all firearms.
- Exit the apartment and enter the map’s central area.
- Distract the guard looking at the tea by moving around him. Poison the tea when no one is looking.
- Alternatively, wait for the Blue Lotus negotiator to move away. Sneak up on the Red Dragon negotiator where no one can see and strangle him with the fiber wire.
- Move the negotiator’s body out of the gazebo.
- Escape the center area and exit the level.
The Wang Fou Incident
- Follow the street to the ladder in the northern corner of the map.
- Climb the ladder and sneak carefully to the first door on the left.
- Pick the lock and enter the room.
- Change clothes, grab the sniper rifle, and pick up the bomb and bomb remote.
- Exit and descend the ladder. Move to the map’s center.
- Hide behind the dumpsters on the southeastern section of the center. Observe the spot just to the sewer entrance’s right.
- Wait for the limo driver to relieve himself. Sneak up behind him and use the syringe to disable the limo driver.
- Dump his body in the sewer tunnel. Change clothes and don the limo driver disguise.
- Move to the limo in front of the restaurant. Approach the driver’s side door. Place the bomb.
- Walk to the northeastern side of the map just out of range of the two Lotus guards.
- Wait for the limo to reach the two guards and detonate the bomb using the bomb remote. This kills five guards.
- Return to the map’s center and change to the guard outfit recovered earlier. Grab the sniper rifle.
- Enter the restaurant via the side entrance just to the left of the burning limo.
- Ascend to the second floor using the staircase in the southeastern corner.
- Move to the elevator and go through the door to the left of the elevator. Wait for the guard to leave.
- Move to the right side of the balcony and face the room’s center.
- Spot the dining room on the first floor. Use the sniper rifle to zoom in on the room and kill the two targets inside.
- Leave the restaurant calmly and proceed to the exit point.
The Seafood Massacre
- Move through the alley and across the street to find the entrance to the basement of the restaurant.
- Once inside, sabotage the gas and change into the chef’s uniform found in the side supply room.
- Exit and cross to the nearby dumpsters. Descend into the underground tunnel and pick up the rat poison.
- Climb out and maneuver to the map’s north edge to find the Red Dragon negotiator distracted.
- Sneak up on the Red Dragon negotiator and strangle him with the fiber wire.
- Drag the Red Dragon negotiator’s body into the underground tunnel.
- Pick up the triad amulet.
- Either change into the Red Dragon negotiator clothes and enter the restaurant or return to the restaurant basement (in chef disguise) and find the real chef fixing the gas. Syringe him and get his clothes.
- Once inside the restaurant, enter the kitchen on the right side of the first floor.
- Poison the drinks with the rat poison.
- Put the serving tray on the counter to the left of the door. Avoid the waiter.
- Ring the bell out of the waiter’s view if you’re in Red Dragon disguise.
- Wait until the remaining two targets have been eliminated by your poison.
- Ascend to the restaurant’s upper floor and place the triad amulet on the targets’ table.
- Escape the restaurant and reach the exit point to complete the mission.
Lee Hong Assassination
- Enter through the restaurant’s side entrance. Go down the stairs into the basement and find the guard clothes. Change clothes.
- Exit back to the streets and move through the restaurant’s main entrance.
- Find the bar area to the left side.
- Pick up the laxative on the far left side of the bar.
- Speak with the bartender. Grab the brothel invite.
- Ascend the main staircase to the right. Proceed to the map’s southeast corner.
- Cross the bridge to the brothel. Follow the woman to the side room.
- Receive the offer: safe combination for leading woman to freedom.
- Exit brothel through back door. Follow catwalk around to the left to the bridge. Sneak across bridge and downstairs. Exit through the restaurant’s side entrance to free woman.
- Return to streets and climb ladder on northern edge of map.
- Pick the lock on the first door on the right.
- Enter the room then quietly enter the next room on the right.
- Use the syringe on the guard and change clothes.
- Reach elevator and descend to basement.
- Calmly walk past the basement guards and find the CIA agent’s cell.
- Speak with CIA agent to receive location of jade figurine safe: it’s randomized and found either in the basement’s weapons depot, brothel, second floor of mansion, or in the room just before the guard you used the syringe on. He tells you the location. On lower difficulty levels it’s marked on the map as a point of interest.
- Find the jade figurine safe. Save beforehand because if it’s the incorrect safe, your cover will be blown.
- Return to the restaurant’s basement and find the chef clothes.
- Use the elevator to proceed to the first floor.
- Enter the kitchen and approach the soap. Poison the soup with the laxative.
- Cross the restaurant to Hong and his bodyguard in the dining hall.
- Place the soup in front of the bodyguard.
- Once the bodyguard leaves to the bathroom, eliminate Hong with the fiber wire.
- Drag Hong to the other side of the table and leave the restaurant. Reach the exit point.
Hunter and Hunted
- Exit your start position through the left door then go into the first door on the right.
- Jump the balcony, move to the left corner, and jump to the balcony again.
- Exit the room to the right and use the power switch to turn off the lights.
- Avoid the SWAT team by jumping down the elevator shaft to the left.
- Use the syringe on the security guard in this hallway. Drag his body into the side room and change clothes. Grab the extra syringe if desired.
- Descend the staircase and exit into the alley.
- Use the sewer tunnel to reach the eastern side of the map.
- Alternatively you can find the fireman on the west side of the map and use the extra syringe to disable him. Change into his clothes. It’s a great disguise. He also has the "PM key", which starts the ambulance on the northern edge of the map. It’s a great escape vehicle.

- Find the target near the SWAT members on the southern street.
- Distract the SWAT members looking at the target by sneaking around them. Don’t get too close so you don’t raise too much suspicion.
- Once the SWAT members look away, sneak up behind and use the fiber wire on the target.
- Exit the level at the exit point. Move carefully past any SWAT members. Avoid close contact. If you’re detected, quickly run to the exit.
Chapter 5 - Cheats and Secrets
This section reveals Hitman: Contracts cheat codes for PlayStation 2, Xbox, and PC versions. You’ll also find a compilation of secret weaponry found in the game.
Cheat Codes
When all other means have failed, don’t fail to cheat. Here are cheat codes for the PlayStation 2, Xbox, and PC versions of Hitman: Contracts.
Level Select (PlayStation 2) - Square, Triangle, Circle, Left, Up, Right, L2, R2 at the main menu.
Level Select (Xbox) - X, Y, B, Left, Up, Right, L, R at the main menu.
Complete current level with Silent Assassin rating (PlayStation 2) - R2, L2, Up, Down, X, L3, Circle, X, Circle, X during gameplay. Note that performing this code during the training level unlocks all weapons.
Complete current level with Silent Assassin rating (Xbox) - R, L, Up, Down, X, A, L-Thumbstick, B, A, B, A during gameplay. Note that performing this code during the training level unlocks all weapons.
If you’re playing the PC version, add the lines "ENABLECONSOLE 1" and "ENABLECHEATS 1" to the hitmancontracts.ini file in your Hitman: Contracts directory. During gameplay press the SHIFT and ESC keys to open the cheat menu. Then you can toggle the following cheats on and off.
Give Some: Provides weapons and ammo, excluding secret weaponry.
Give All: Provides all weapons and ammo.
End Level: Ends the current level.
God Mode: Toggles on invulnerability.
Infammo: Toggles infinite ammunition.
Invisible: Makes you invisible to other characters.
Unlockable Weapons
The following table reveals the weapons unlocked by achieving "Silent Assassin" ratings.
| LEVEL | WEAPON |
| Asylum Aftermath | CZ2000 Dual |
| The Meat King’s Party | Micro Uzi |
| The Bjarkhov Bomb | Silverballers Silenced |
| Beldingford Manor | Magnum 500 Dual |
| Rendezvous in Rotterdam | Sawn Off Shotguns Dual |
| Deadly Cargo | M4 Carbine Assault Rifle .S |
| Traditions of the Trade | SG220 .S Dual |
| Slaying a Dragon | MP5 Sub-Machine Gun .S |
| The Wang Fou Incident | AK74 Assault Rifle Silenced |
| The Seafood Massacre | GK17 Dual |
| Lee Hong Assassination | Micro Uzis Silenced |
| Hunter and Hunted | PGM Sniper Rifle Silenced |
Hidden Weapons
There are two additional weapons that aren’t unlocked from Silent Assassin ratings. The minigun and gold desert eagles dual must be unlocked from special actions in two levels.
First you must play The Wang Fou incident and use the elevator in the restaurant’s basement to reach the mansion’s first floor. Turn on night vision goggles and search the room for stairs. Go up to the next floor and find the office containing a key card. Complete the level with the card in your inventory and save your progress.
From the main menu start a "current game" and select Asylum Aftermath. There are two doors locked with keycard. Behind one you’ll find a patient wielding the minigun. Kill the patient and recover the weapon. The second locked door contains the gold desert eagles dual in the room.
Got a news tip or want to contact us directly? Email news@gamespot.com
Join the conversation