Newcastle Guide - Apex Legends
This defensive-minded legend brings a whole lot of useful abilities to the fight.
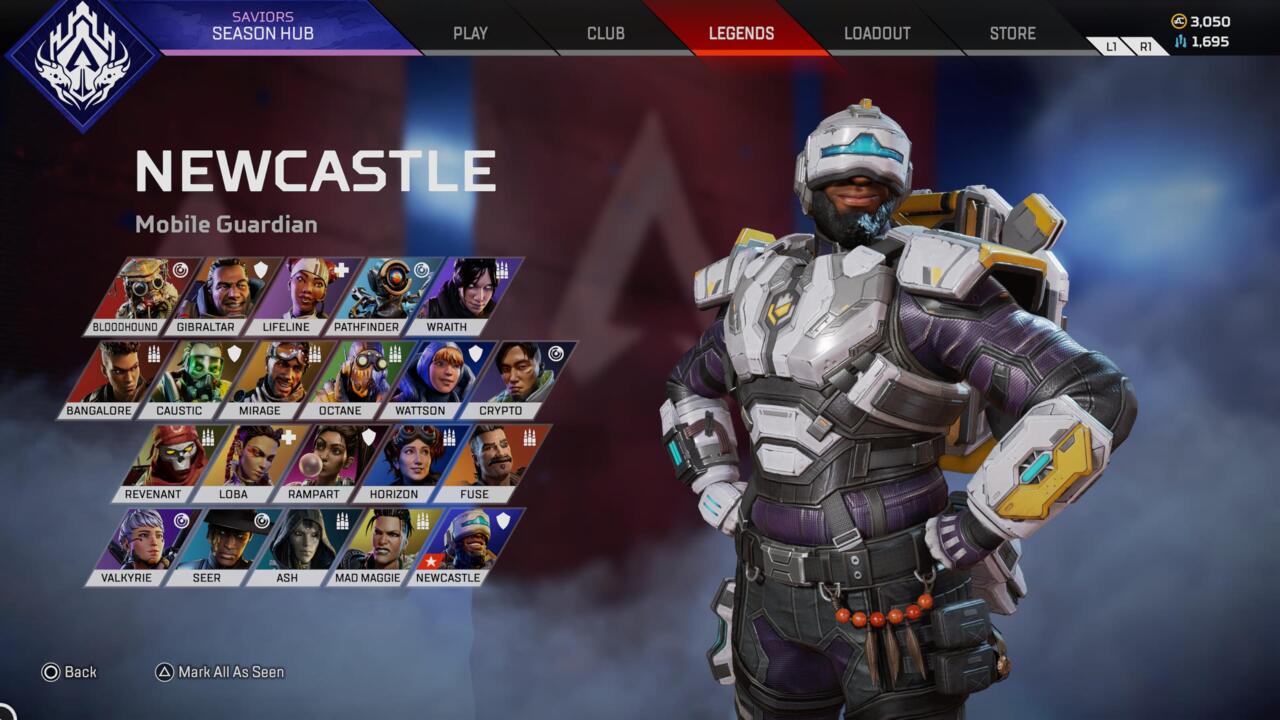
Although Apex Legends has always been--and likely will always remain--a largely movement-focused battle royale game, there has been a growing place for defensive play in recent seasons. Characters like Gibraltar and Rampart have proven that opting for protection over aggression can be very successful in some situations, and it seems Respawn has started to take notice of that trend. Enter Newcastle, who brings 100% defense to the table with various shields that make him an extremely viable option for almost any team composition--at least when used effectively. In this guide, we'll share a few tricks that can help you make the most of your time as Newcastle.
Defensive abilities all the way
Newcastle's abilities are entirely based on defense. If you're hoping to have options available to you for aggressive pushes or movement, you'll want to look elsewhere. However, what he brings to the table is invaluable levels of protection that can make or break an encounter when the character is used to his maximum potential.
Newcastle's passive ability is Retrieve the Wounded, which allows him to drag downed allies to safety while rezzing them. During this time, he protects them with a small shield that can protect his fallen pal from enemy gunfire.
His tactical ability Mobile Shield deploys a fairly large and tall energy shield that he can reposition and angle in any direction he wishes to protect himself and his allies from gunfire. This is an incredibly helpful tool when repositioning or simply being caught out in the open.
Lastly, Castle Wall is Newcastle's ultimate ability, which sees the legend leap forward and slam down a massive wall shield with varying heights. This allows teammates to fire over the shorter section or hide behind the taller areas. Gunfire will destroy individual sections over time, but it can take quite a beating.
You're the tank, so be sure to act like it
If you're used to being more mobile in Apex Legends, playing Newcastle may throw you off just a bit. While you'll need to remain on the move like any legend in the game, your goal is largely to offer non-stop utility to your team. You should always stay close to your allies so that you can provide a Mobile Shield during a sticky situation or quickly pull them to safety if they go down near you.
While you should certainly be an active participant in gunfights, just remember that playing this character to his strengths means thinking about your teammates' lives over all else. In this case, the best offense is a good defense. If your squad is alive and protected by your abilities during an encounter, they're able to keep shooting and pushing you ever closer to victory.
Pick a loadout that goes well with your abilities
Since all of your abilities are focused on directional protection from gunfire, you'll find a lot of success engaging at mid-range where you have some space to make the most of your shields. This makes assault rifles and LMGs excellent picks for Newcastle, as you can use your Castle Wall as cover and whittle away at your foes' health bars without needing to worry about having to reposition very quickly. However, it also doesn't hurt to carry a shotgun or SMG as a secondary for when you're faced with hyper-aggressive opponents or when you need to rush in and save a downed teammate.
You should have knockdown shield priority
You can grab your downed teammates a pull them to safety while you rez them, and the shield that is deployed during this process is actually powered by your own knockdown shield. Because of this, you should have priority over the best knockdown shield found among the lot of you. Luckily, the shield recharges over time when not in use, so you should have plenty of protection to offer to your squad if one of them goes down.

Your Mobile Shield can be destroyed
While your Mobile Shield can take a bit of a beating, it's not indestructible. If enemies focus their fire on it, you'll soon find yourself exposed again. The shield is divided into upper and lower halves, so smart players will focus on the bottom part to ensure they expose your legs for easy damage. If they only destroy the upper segment, however, you can still duck behind the lower section in a pinch until they destroy it, too.
Know how to make the most of your Castle Wall
Your Castle Wall ultimate ability serves as your ace in the hole for many encounters. Knowing exactly how and when to use it is vital to your success, though.
For starters, aiming the ability at your allies can let you jump higher and further. This lets you cross larger distances to provide them with very rapid protection. Plus, the initial slam will repel knock back nearby enemies, giving you a chance to get your position behind the wall while they're a little bit disoriented.
Also, the wall is electrified, so enemies who touch it will be briefly stunned and take a small of damage. Use this to your advantage when someone pushes in too close. Be sure to jump over and around the shield in an attempt to force them to mantle over a shorter section or accidentally brush against the wall while tracking you, then promptly capitalize on your opportunity to dish out damage while they're stunned.
You pair well with nearly anyone
Due to the fact that his abilities will be useful in any number of scenarios, Newcastle pairs well with nearly any team composition. His defensive kit can either be used to provide aid when more aggressive squadmates need a safe retreat or to be rescued after going down, or he can team up with other defensive characters for some impressive levels of fortification that can make opposing squads think twice before pushing.
All of that said, it never hurts to have a recon specialist like Bloodhound or Seer on your team to give you the necessary info that will help you set your shields up in the right spots. It's also undoubtedly beneficial to have a character like Wraith or Valkyrie along for the ride, as you can use your ult as cover while they get set up to reposition your team with their own ultimate abilities.
Beware your counters, though
Unlike Gibby, who has a full dome to protect his allies, Newcastle is a very direction-based protector. This makes you susceptible to flanks and certain ultimate abilities that can create genuine havoc for your team. Most notably, you'll want to keep an eye out for people throwing grenades behind your shields or abilities that allow enemies to sneak behind you in some way and catch you off guard.
One of your biggest counters is Bangalore, who can disrupt your fortified area with smoke grenades and allow her squad to push you while you're disoriented. Her and Gibraltar also have large area-of-effect ultimates that can flush you out of cover in open areas. When possible, try to avoid being caught in spots where you can't retreat to natural cover when facing off against these types of legends.
Got a news tip or want to contact us directly? Email news@gamespot.com


Join the conversation