Ninja Gaiden II Walkthrough
Ninja Gaiden II isn't an easy game, but our guide will lead you to victory in Ryu Hayabusa's toughest adventure yet.
Team Ninja’s Ninja Gaiden series is infamous for its challenging gameplay and Ninja Gaiden II continues the tradition. Expect to battle resilient enemies, seemingly unbeatable bosses, and insurmountable odds. Once again, you control Ryu Hayabusa. You’ll wield powerful new weaponry and perform frenzied action moves that include spectacular obliterations and ultimate combinations. Add this game guide to Ryu’s arsenal and you have everything you need to conquer one of the toughest games around, Ninja Gaiden II.
Here you’ll find locations for all weapons, ninpo, and the most important items. There’s a complete walk-through with strategies for the game’s most difficult sections and boss battles. Plus, you’ll get locations for all 30 crystal skulls, nine Lives of the Thousand Gods, and the full list of Xbox 360 achievements.
This Gamespot Ninja Gaiden II game guide features:
- Weapons, Ninpo, and Items: Check here for strategies for all the melee and ranged weapons, ninpo, and locations for vital and rare items.
- Walk-through: A complete walk-through including battle and boss strategies, item locations, and Test of Valor tips and rewards.
- Boss Battle Strategies: We’ve compiled boss strategies in this section.
- Crystal Skull Locations: All 30 crystal skull locations divided by chapter.
- Lives of the Thousand Gods Locations: Find 9 Lives of the Thousand Gods to maximize your health bar.
- Xbox 360 Achievements: Full list of Xbox 360 Achievements.
Chapter 1: Weapons, Ninpo, and Items
This section reveals all Ninja Gaiden II weapons and ninpo and provides moves and strategies for using each. You’ll also find locations and tips for various items. Melee weapons are gained throughout the game and they can be missed. Should you miss a melee weapon, you can purchase the weapon later from a Muramusa shop. Obviously it’s better to just locate the weapon so you can save the yellow essence for items that can’t be gained for free, such as weapon upgrades!
Note that there are some spoilers in this section as we reveal where to locate each weapon and ninpo as well as where to find some of the game’s rare items.
Dragon Sword
The dragon sword is Ryu’s starting weapon and it’s arguably the most balanced in the game with a decent mix of power, speed, and range. Flying Swallow, and its upgrades (Azure Swallow and Divine Flying Swallow), is an essential maneuver. Many of the game’s most challenging battles can be solved through a liberal use of Flying Swallow. Use to remain elusive against a group of melee enemies or even quickly close distances against ranged enemies.
Note that the dragon sword is one of two weapons that can be upgraded to a fourth level. You can’t purchase this upgrade at a Muramusa shop; this upgrade will occur during the missions.
| COMBO | MOVES | LEVEL |
|---|---|---|
| Piercing Dragon’s Fang | X, X, X, X, X | 1 |
| Dragon Tear | X, X, X, Forward + X | 3 |
| Steel Splitter | X, X, X, Y | 4 |
| Tiger Roar | X, X, Y | 1 |
| Fang of the Wolf | X, X, Y, Y | 2 |
| Fortuitous Phoenix | X, X, Y, Y, Y, Y | 3 |
| Ikaruga | X, X, Y, Forward + Y | 2 |
| Seal of Ten | X, X, Forward + X, X | 1 |
| Three Lights | X, X, Forward + X, Y | 1 |
| Wrath of Izanagi | X, X, Forward + X, Y, Y | 2 |
| Blade of the Empty Air | X, Y, X | 1 |
| Blade of Susano’o | X, Y, X, X, X, X | 2 |
| Izuna Drop (Throw) | X, Y, X, X, X, Y | 2 |
| Scarlet Dragon | X, Hold Y | 1 |
| Cloud Dragon Flying Swallow | X, Hold Y, Y, Y, Y | 4 |
| Windmill Slash | Forward + X | 1 |
| Violent Wind | Forward + X, X, Forward + X | 1 |
| Violent Gale | Forward + X, X, Forward + X, X | 2 |
| Piercing Wind | Forward + X, X, Forward + Y | 1 |
| Dragon of Heaven | Forward + X, X, Forward + Y, Y, Forward + Y | 2 |
| Dragon of Earth | Forward + X, X, Forward + Y, Y, Forward + Hold Y | 2 |
| Crimson Tempest | Y, Y | 1 |
| Undefeatable Demon | Y, Y, Y | 2 |
| Haze Straight Slash | Hold Y | 1 |
| Oblivion Cross Cut | Hold Y with essence | 1 |
| Blade of the Dragon’s Scales | Hold Y with maximum essence | 4 |
| Azure Dragon | Forward + Y | 1 |
| Scarlet Dragon | Forward + Hold Y | 1 |
| Violent Wind | X (while running) | 1 |
| Violent Gale | X, X (while running) | 2 |
| Piercing Wind | Y (while running) | 1 |
| Dragon of Heaven | Y, Y, Forward + Y (while running) | 2 |
| Dragon of Earth | Y, Y, Forward + Hold Y (while running) | 2 |
| Flying Crane | Circle + Y | 2 |
| Gleaming Blade | Circle + Hold Y | 3 |
| Roaring Gleam | Circle + Hold Y with essence | 3 |
| True Dragon Gleam | Circle + Hold Y with maximum essence | 4 |
| Deep Crimson | X, X (while blocking) | 1 |
| Gleaming Cross | Y (while blocking) | 1 |
| Rising Dragon | Y (next to downed enemy) | 1 |
| Blade of the Empty Air | X (while jumping) | 1 |
| Blade of Nirrti | X, X, X, X (while jumping) | 2 |
| Izuna Drop (Throw) | X, X, X, Y (while jumping) | 2 |
| Helmet Splitter | Y (while jumping) | 1 |
| Air Destruction Slash | X (while jumping forward) | 1 |
| Falling Dragon Blade | Y (while jumping forward) | 1 |
| Flying Swallow | Forward + Y (while jumping forward) | 1 |
| Azure Swallow | Forward + Y, Y (while jumping forward) | 2 |
| Divine Flying Swallow | Forward + Y, Y, Y (while jumping forward) | 3 |
| Spinning Blade | X (while landing jump) | 2 |
| Guillotine Throw (Throw) | A + X (while jumping near enemy) | 1 |
| Flying Swallow | X or Y (while wall running) | 1 |
| Flying Dragon Blade | X (on wall) | 1 |
| Cicada Slash | Y (on wall) | 1 |
| Divine Flying Dragon | X (during Flying Bird Flip) | 1 |
| Divine Cicada Slash | Y (during Flying Bird Flip) | 1 |
| Divider of Waves | X, X (while running on water) | 1 |
| Blade of Empty Water | X, Y, X (while running on water) | 1 |
| Blade of Empty Seas | X, Y, X, X (while running on water) | 2 |
| Aquatic Flying Swallow | Y (while running on water) | 1 |
| Heavy Mists | X (at water surface) | 1 |
| Flying Osprey | Y (at water surface) | 1 |
| Demon Shark | X (underwater) | 1 |
| Great Demon Shark | Y (underwater) | 1 |
| Reverse Wind | Left Trigger + any movement | 1 |
| Wind Path | A (while jumping near enemy) | 1 |
| Wind Run | A + X | 1 |
| Flying Bird Flip | A (on wall) | 1 |
| Calm Water Run | A + X (while running on water) | 1 |
| Calm Water Break | Left Trigger + A (while running on water) | 1 |
Lunar Staff
The staff provides greater range than the dragon sword but combos build slowly, which basically means enemies take a bit longer to eliminate. The Heavenly Shadow ultimate is extremely strong and highly effective against some of the tougher enemies in the middle chapters (such as werewolves and snake demons). The added range helps keep strong enemies a bit out of reach.
During Chapter 1 - Sky City Tokyo, you will battle an enemy group to trigger a cut scene. A door opens revealing a statue. Approach the statue and you can acquire the Lunar Staff.
| COMBO | MOVES | LEVEL |
|---|---|---|
| Dragon’s Fang Spin | X, X, X, X | 1 |
| Dragon’s Talon Spin | X, X, X, Y | 2 |
| Gleaming Shadow | X, X, Y | 1 |
| Infinity Thrust | X, Forward + X, X | 1 |
| Yin-Yang Thrust | X, Forward + X, X, X | 2 |
| Amitabha Thrust | X, Forward + X, X, X, X | 3 |
| Absolute Darkness | X, Forward + X, Y, X | 2 |
| Izuna Drop (Throw) | X, Forward + X, Y, X, Y | 2 |
| Sun and Moon | X, Forward + X, Y, Y | 2 |
| Molten Rock | X, Y, X, X, X | 3 |
| Strange Soul | X, Y, Y, Y, Y | 3 |
| Bolted Gate | Forward + X, X | 1 |
| Charging Lion | Forward + X, X, X | 2 |
| Fierce Lion | Y | 1 |
| Bladed Spider | Y, Y, Y, Y, Y | 3 |
| Bladed Spider | Y, Forward + Y | 2 |
| Bladed Spider | Y, Y, Forward + Y | 3 |
| Bladed Spider | Y, Y, Y, Forward + Y | 3 |
| Remnant Blossoms | Hold Y | 1 |
| Eight Destructions | Hold Y with essence | 1 |
| Dance of Flame | Hold Y with maximum essence | 1 |
| Waning Moon | Forward + Y | 1 |
| First Wind | Forward + Y, Y, X | 2 |
| Izuna Drop (Throw) | Forward + Y, Y, X, Y | 2 |
| Moonlit Shadow | Forward + Y, Y, Y | 2 |
| Vanishing Mist | X, X (while running) | 1 |
| Twin Serpent Staff | Y (while running) | 1 |
| Destruction Spin | Circle + Y | 3 |
| Waning Evil | Circle + Hold Y | 2 |
| Hazy Shadow | Circle + Hold Y with essence | 2 |
| Heavenly Shadow | Circle + Hold Y with maximum essence | 2 |
| Izuna Drop (Throw) | Circle + Hold Y with maximum essence, Y | 2 |
| Mirror Reflection | X (while blocking) | 1 |
| Gate of Betrayal | X, X (while blocking) | 2 |
| Quivering Moon | Y (while blocking) | 2 |
| Furious Wind | Y, Y, Y, X (while blocking) | 2 |
| Izuna Drop (Throw) | Y, Y, Y, X, Y (while blocking) | 2 |
| Moon of the Soul | Y, Y, Y, Y (while blocking) | 2 |
| Slain Demon | Y (next to downed enemy) | 1 |
| First Wind | X (while jumping) | 1 |
| Wind of Dawn | X, X (while jumping) | 2 |
| Izuna Drop (Throw) | X, X, Y (while jumping) | 2 |
| Phantom Moon | Y (while jumping) | 1 |
| Flashing Current | X (while landing jump) | 2 |
| Guillotine Throw (Throw) | A + X (while jumping near enemy) | 1 |
| Single Horn | X (while wall running) | 1 |
| Stone of Sin | X, X (while wall running) | 2 |
| Sixteen Nights | Y (while wall running) | 1 |
| Single Horn | X (on wall) | 1 |
| Stone of Sin | X, X (on wall) | 2 |
| Sixteen Nights | Y (on wall) | 1 |
| Sixteen Nights | X or Y (during Flying Bird Flip) | 1 |
| Fallen Moon | X, Y (while running on water) | 1 |
| Raven Thrust | Y (while running on water) | 1 |
| Hazy Moon | X (at water surface) | 1 |
| Ivory Moon | Y (at water surface) | 1 |
| Crystal Thrust | X (underwater) | 1 |
| Lion’s Storm | Y (underwater) | 1 |
| Reverse Wind | Left Trigger + any movement | 1 |
| Wind Path | A (while jumping near enemy) | 1 |
| Wind Run | A + X | 1 |
| Flying Bird Flip | A (on wall) | 1 |
| Calm Water Run | A + X (while running on water) | 1 |
| Calm Water Break | Left Trigger + A (while running on water) | 1 |
Falcon’s Talons
Wield the Falcon’s Talons and you’ll resemble a familiar superhero. These claws are extremely quick but obviously have the closest range possible. Use the claws for building long combinations in close, many of which feature dash moves, which can get you in and out of a crowd at a moment’s notice.
During Chapter 2 - The Castle of the Dragon after you recover the Counter Attack technique, you’ll enter a building and battle a ninja group. Search the back end of the building to find an alcove containing the Falcon’s Talons.
| COMBO | MOVES | LEVEL |
|---|---|---|
| Lion’s Roar | X, X, X, X, X | 1 |
| Heavenly Wolf | X, X, X, Y, Y, Y, Y | 2 |
| Ravenous Wolf (Throw) | X, X, X, Hold Y (hold while hitting enemy) | 2 |
| Panther Tail Kick | X, X, X, Forward + X, X, X | 1 |
| Running Flame | X, X, Y, Y | 2 |
| Tiger’s Crushing Jaw | X, X, Forward + X | 1 |
| Crushing Vermilion Bird Strike | X, X, Forward + X, X, X, X, X, X | 3 |
| Izuna Drop (Throw) | X, X, Forward + X, X, X, X, X, Y | 3 |
| Wings of the Phantom Roc | X, X, Forward + X, X, Y, Y | 3 |
| Wings of the Vermilion Bird | X, X, Forward + X, Y, Y, Y, Y | 3 |
| Vermilion Bird Strike | X, X, Forward + Y, Y, Y | 2 |
| Flying Tiger’s Claw | X, Y, X | 1 |
| Crushing Vermilion Bird Strike | X, Y, X, X, X, X | 2 |
| Izuna Drop (Throw) | X, Y, X, X, X, Y | 2 |
| Piercing Wolf’s Fang | X, Y, Y, Y | 2 |
| White Tiger Flurry | Forward + X, X, X | 1 |
| White Tiger Gouge | Forward + X, X, X, Y | 1 |
| Bared Lion’s Fang (Throw) | Forward + X, X, X, Y (hold when hitting enemy) | 1 |
| Thunderous Lion’s Roar | Forward + X, X, X, X, X, X | 2 |
| White Tiger Gouge | Forward + X, X, X, X, Y | 2 |
| Thunderous Lion’s Roar (Throw) | Forward + X, X, X, X, Y (hold when hitting enemy) | 2 |
| Bear Strike | Y, Y | 1 |
| Charging Boar | Y, Y, Y | 2 |
| Furious Tiger Claw | Y, Y, Forward + Y | 1 |
| Furious Tiger Kick | Y, Y, Forward + Y, Y | 2 |
| Gouging Wolf Claw (Throw) | Y, Y, Forward + Y, Y (hold when hitting enemy) | 2 |
| King of Beasts | Hold Y | 1 |
| Claws of a Hundred Beasts | Hold Y with essence | 1 |
| Fury of the Divine Beasts | Hold Y with maximum essence | 1 |
| Thunderous Earth | Forward + Y | 1 |
| Cry of the Phoenix | Forward + Y, Y | 2 |
| Beast’s Claw Kick | X (while running) | 1 |
| Charging Tiger Claw | Y, Y (while running) | 1 |
| Charging Tiger Kick | Y, Y, Y (while running) | 2 |
| Gouging Wolf Claw (Throw) | Y, Y, Y (while running; hold when hitting enemy) | 2 |
| Ring of Nine Tails | Circle + Y | 2 |
| Black Tortoise of Water | X, X, X (while blocking) | 1 |
| Black Tortoise of Wind | X, X, X, X, X (while blocking) | 2 |
| Claw of the Phantom Roc | Y (while blocking) | 1 |
| Bared Lion’s Fang (Throw) | Y (while blocking; hold when hitting enemy) | 1 |
| Hunting Dog | Y (next to downed enemy) | 1 |
| Flying Tiger’s Claw | X (while jumping) | 1 |
| Crushing Vermilion Bird Strike | X, X, X, X (while jumping) | 2 |
| Izuna Drop (Throw) | X, X, X, Y (while jumping) | 2 |
| Three-Legged Bird | Y (while jumping) | 1 |
| Flying Swallow | Y (while jumping towards enemy) | 1 |
| Flame of the Chimera | Y, X, X (while jumping towards enemy) | 1 |
| Izuna Drop (Throw) | Y, X, Y (while jumping towards enemy) | 2 |
| Guillotine Throw (Throw) | A + X (while jumping near enemy) | 1 |
| Flying Swallow | X or Y (while wall running) | 1 |
| Flame of the Chimera | X, X, X (while wall running) | 1 |
| Izuna Drop (Throw) | X, X, Y (while wall running) | 2 |
| Azuna Dragon Kick | X or Y (on wall) | 1 |
| Swooping White Phoenix | X, X (on wall) | 2 |
| Descent of the Dragon | X (during Flying Bird Flip) | 1 |
| Falling Azure Dragon | Y (during Flying Bird Flip) | 1 |
| Moon of the Fox | Y (during Flying Bird Flip; hold when hitting enemy) | 1 |
| Swooping White Phoenix | Y, X or Y, Y (during Flying Bird Flip) | 2 |
| Submerged Tiger Claw | X, X (while running on water) | 1 |
| Submerged Crushing Jaw | X, Y (while running on water) | 1 |
| Surging Azure Dragon | X, Y, Y (while running on water) | 3 |
| Cry of the Phoenix | Y, Y (while running on water) | 1 |
| Water Tiger’s Crushing Jaw | X (at water surface) | 1 |
| Phantom Strike | X, X (at water surface) | 3 |
| Surging Azure Dragon | X, Y (at water surface) | 3 |
| Water Fox Kick | Y (at water surface) | 1 |
| Fangs of the Water Dragon | X (underwater) | 1 |
| Water Reptile Slash | Y (underwater) | 1 |
| Reverse Wind | Left Trigger + any movement | 1 |
| Wind Path | A (while jumping near enemy) | 1 |
| Wind Run | A + X | 1 |
| Flying Bird Flip | A (on wall) | 1 |
| Calm Water Run | A + X (while running on water) | 1 |
| Calm Water Break | Left Trigger + A (while running on water) | 1 |
Dragon’s Claw and Tiger’s Fang
Like the dragon sword, this dual katana Dragon’s Claw and Tiger’s Fang is a decent all-around weapon. It’s obviously more diverse than the dragon sword, useful against most enemies, and the speed provides the ability to maintain crowd control.
During Chapter 4 - A Captive Goddess, you will enter a building with a number of items, many of which are positioned in cases. Break the glass cases to recover the items. There are Incendiary Shuriken inside, a Test of Valor in the corner, and more importantly, the Dragon’s Claw and Tiger’s Fang.
Note that the Dragon’s Claw and Tiger’s Fang is one of two weapons that can be upgraded to a fourth level. You can’t purchase this upgrade at a Muramusa shop; this upgrade will occur during the missions. The weapon also receives a new name at this time.
| COMBO | MOVES | LEVEL |
|---|---|---|
| Falling Flowers | X, X, X, X, X | 1 |
| Blade of Nirvana | X, X, X, X, Y | 2 |
| Mahayana Blade | X, X, X, Y, Y | 1 |
| Blade of Dharma’s Way | X, X, Y, Y | 2 |
| Double Lightning Strike | X, X, Forward + X, X | 1 |
| Lightning Pierce | X, X, Forward + X, X, X | 2 |
| Penetrating Lightning | X, X, Forward + X, X, X, X | 3 |
| Bladed Wind | X, X, Forward + X, Y | 3 |
| King Slayer | X, X, Forward + Y | 2 |
| Emperor Slayer | X, X, Forward + Y, Y | 3 |
| Underworld Drop (Throw) | X, X, Forward + Y, Y, Y, Y | 4 |
| Blade of the Mind | X, X, Forward + Y, Y, Y, Y, Y | 4 |
| Falling Dragon | X, X, X, Forward + X | 1 |
| Double Zhong Kui Slash | X, Y, X | 1 |
| Mighty Zhong Kui | X, Y, X, X, X, X | 2 |
| Spinning Zhong Kui | X, Y, X, X, X, X, Y | 3 |
| Zhong Kui Izuna (Throw) | X, Y, X, X, X, Y | 2 |
| Zhong Kui Heavenly Sparrow | X, Y, X, X, X, Pause, Y | 2 |
| Dragon Slaying Sparrow | X, Y, X, X, X, Pause, Y (hold when hitting wall) | 2 |
| Falling Dragon Slayer | X, Y, X, X, X, Pause, Y (when hitting wall), X | 2 |
| Spinning Dragon Slayer | X, Y, X, X, X, Pause, Y (when hitting wall), Y | 2 |
| Great Dragon Slayer | X, Y, X, X, X, Pause, Y (when hitting wall), Y, Y | 3 |
| Bird and Dragon | X, Y, X, X, X, Pause, Y (when hitting wall), A | 2 |
| Falling Zhong Kui | X, Y, X, X, Y | 2 |
| Zhong Kui Whirlwind | X, Y, X, X, Y, Y | 3 |
| Fire Dragon Spinning Descent | X, Y, Y | 1 |
| Spinning Fire Dragon | X, Y, Y, Y | 3 |
| Purgatory Slash | X, Hold Y | 1 |
| Wind and Clouds | X, Hold Y, Y | 2 |
| Divine Blade | X, Hold Y, Y, Y | 3 |
| Underworld Drop (Throw) | X, Hold Y, Y, Y, Y, Y | 4 |
| Blade of the Mind | X, Hold Y, Y, Y, Y, Y, Y | 4 |
| Twin Continuous Slash | Forward + X, X | 1 |
| Twin Cross Cut | Forward + X, X, X | 2 |
| Flying Dragon | Forward + X, Y | 1 |
| Descending Dragon | Forward + X, Y, Y | 2 |
| Swooping Dragon Fang | Y, Y, Y, Y | 1 |
| Great Chasm | Y, Y, Forward + Y | 3 |
| Rolling Haze Slash | Hold Y | 1 |
| Path of the Demon Dragon | Hold Y with essence | 1 |
| Eight Heavenly Dragons | Hold Y with maximum essence | 1 |
| Rising Earth Blade | Forward + Y | 1 |
| Purgatory Slash | Forward + Hold Y | 1 |
| Silent Gale | X (while running) | 1 |
| Gale Cross Cut | X, X (while running) | 2 |
| Gale Rising Slash | Y (while running) | 1 |
| Gale Falling Slash | Y, Y (while running) | 2 |
| Rise to Heaven | Circle + Y | 2 |
| Sokaku’s Secret Blade | X (while blocking) | 1 |
| Sokaku’s Dissecting Slash | Y (while blocking) | 1 |
| Ground Roll | Y (next to downed enemy) | 1 |
| Double Zhong Kui Slash | X (while jumping) | 1 |
| Mighty Zhong Kui | X, X, X, X (while jumping) | 2 |
| Spinning Zhong Kui | X, X, X, X, Y (while jumping) | 3 |
| Zhong Kui Izuna (Throw) | X, X, X, Y (while jumping) | 2 |
| Spin Slash | Y (while jumping) | 1 |
| Whirlwind Slash | Y, Y (while jumping) | 3 |
| Flying Swallow | Y (while jumping towards enemy) | 1 |
| Guillotine Throw (Throw) | A + X (while jumping near enemy) | 1 |
| Divine Hawk Flying Sparrow | X or Y (while wall running) | 1 |
| Divine Hawk Twin Blades | X (on wall) | 1 |
| Descending Divine Hawk | Y (on wall) | 1 |
| Spinning Divine Hawk | Y, Y (on wall) | 3 |
| Divine Hawk Dancing Blades | X (during Flying Bird Flip) | 1 |
| Flying Bird Descent | Y (during Flying Bird Flip) | 1 |
| Flying Bird Spin | Y, Y (during Flying Bird Flip) | 3 |
| Flying Water | X, X, Y (while running on water) | 1 |
| Aqua Chasm | X, Y (while running on water) | 1 |
| Flying Hawk | Y (while running on water) | 1 |
| Aqua Chasm | X, Y (at water surface) | 1 |
| Heavenly Bay | Y (at water surface) | 1 |
| Root of the Lotus | X (underwater) | 1 |
| Water Dragon Blade | Y (underwater) | 1 |
| Reverse Wind | Left Trigger + any movement | 1 |
| Wind Path | A (while jumping near enemy) | 1 |
| Wind Run | A + X | 1 |
| Flying Bird Flip | A (on wall) | 1 |
| Calm Water Run | A + X (while running on water) | 1 |
| Calm Water Break | Left Trigger + A (while running on water) | 1 |
Kusari-gama
The Kusari-gama is a unique combination of fast, short-range attacks and slow, long-range swings (so be careful initiating combos with strong attacks up close because it takes time). It’s effective for dealing with large groups of small, slow moving enemies. For example, the scorpions and spiked creatures you’ll face in large numbers. Use the Kusari-gama for hit and run attacks against these enemies.
It can also be used against tougher enemies, but since it’s not as powerful and a bit slower than stronger weapons, you must be ready to start from a farther distance. The Demon Cutter is an excellent maneuver and often removes a limb, and the Great Sweep is powerful against tough enemies.
During Chapter 5 - The Aqua Capital right near the beginning of the level, search a path left of the first bridge. Follow the path around to a corpse and examine. You will recover the Kusari-gama.
| COMBO | MOVES | LEVEL |
|---|---|---|
| Face Strike | X, X, X, X, X | 1 |
| Great Sweep | X, X, X, X, Y | 2 |
| Ear Slicer | X, X, X, Y, Y, Y | 2 |
| Raging Star | X, X, X, Y, Y, Y, Y, Y | 3 |
| Serpent Swing | X, X, X, Y, Y, Forward + Y | 2 |
| Midnight Blade | X, X, X, Forward + X | 2 |
| Shrike Drop (Throw) | X, X, X, Forward + X (hold when hitting enemy) | 2 |
| Skull Shatterer | X, X, Y, Y | 1 |
| Flying Vine | X, X, Forward + Y | 2 |
| Demon Cutter (Throw) | X, X, Forward + Y (hold when hitting enemy) | 2 |
| Hunting Heavens | X, Y | 1 |
| Falling Snow | X, Y, Y, Y, X | 2 |
| Temple Bell Drop | X, Y, Y, Y, Y | 2 |
| One Hundred Flames | X, Y, Y, X, X | 2 |
| Flying Vine | X, Hold Y | 2 |
| Demon Cutter (Throw) | X, Hold Y (hold when hitting enemy) | 2 |
| Flying Vine | X, Forward + Y | 2 |
| Demon Cutter (Throw) | X, Forward + Y (hold when hitting enemy) | 2 |
| One Hundred Feet | Forward + X, X | 1 |
| Fuji Drop | Forward + X, X, X, X, X | 2 |
| Thunderous Flying Sparrow | Forward + X, X, X, Y | 2 |
| Spiral Attack | Y, Y | 1 |
| Great Reverse Spin | Y, Y, Y, Y, Y | 2 |
| Immense Tragedy | Y, Y, Y, Y, Y, Y | 3 |
| Storm of Six Flowers | Hold Y | 1 |
| Pounding Gate | Hold Y with essence | 1 |
| Dance of Nine Dragons | Hold Y with maximum essence | 1 |
| Sweeping Clouds | Forward + Y | 1 |
| Dancing Maple | Forward + Y, Y, Y, X | 2 |
| Giant Bell Drop | Forward + Y, Y, Y, Y | 2 |
| Flying Vine | Forward + Hold Y | 2 |
| Demon Cutter (Throw) | Forward + Hold Y (hold when hitting enemy) | 2 |
| Great Shears | X (while running) | 1 |
| Absence of Light | Y (while running) | 1 |
| Flowing Spin | Circle + Y | 1 |
| Raging Wind | Circle + Y, Y | 2 |
| Furious Whirlwind | Circle + Y, Y, Y | 3 |
| Midnight Blade | Circle + Y, Y, X | 3 |
| Shrike Drop (Throw) | Circle + Y, Y, X (hold when hitting enemy) | 3 |
| Flying Vine | Circle + Y, X | 2 |
| Demon Cutter (Throw) | Circle + Y, X (hold when hitting enemy) | 2 |
| Music of the Haze | X (while blocking) | 1 |
| Sweeping Willow | Y (while blocking) | 1 |
| Hunter’s Slash | Y (next to downed enemy) | 1 |
| Slicing Wind | X (while jumping) | 1 |
| One Hundred Flames | Y, X, X (while jumping) | 1 |
| Thunderous Light | Y, Y (while jumping) | 1 |
| Flowing Spin | X (while landing jump) | 1 |
| Guillotine Throw (Throw) | A + X (while jumping near enemy) | 1 |
| Flying Scythe | X or Y (while wall running) | 1 |
| Flowing Dragon | X (on wall) | 1 |
| Giant Serpent Drop | Y (on wall) | 1 |
| Flowing Dragon | X (during Flying Bird Flip) | 1 |
| Giant Serpent Drop | Y (during Flying Bird Flip) | 1 |
| Waterfall Breaker | X, X (while running on water) | 1 |
| Falling Thunder Flying Swallow | X, Y, Y (while running on water) | 1 |
| Shell Spiral | Y (while running on water) | 1 |
| Giant Toad Drop | X (at water surface) | 1 |
| Falling Thunder Flying Sparrow | Y, Y (at water surface) | 1 |
| Devastation Above | X (underwater) | 1 |
| Insane Agitation | Y (underwater) | 1 |
| Reverse Wind | Left Trigger + any movement | 1 |
| Wind Path | A (while jumping near enemy) | 1 |
| Wind Run | A + X | 1 |
| Flying Bird Flip | A (on wall) | 1 |
| Calm Water Run | A + X (while running on water) | 1 |
| Calm Water Break | Left Trigger + A (while running on water) | 1 |
Eclipse Scythe
What the Eclipse Scythe lacks in speed it more than makes up for in power. The scythe also possesses good range and is best used against enemies that aren’t tightly packed around Ryu. Many of the strong blows will dismember enemies and open them up for obliteration. The scythe is slow, which can leave you vulnerable to combo breaks. Since it’s powerful, particularly upgraded to its maximum level three, the scythe is arguably the best weapon to use against bosses.
At the end of Chapter 6 - The Lycanthropes’ Castle you will battle Volf, who’s currently using the Eclipse Scythe. Defeat Volf and you will automatically recover and wield the Eclipse Scythe.
| COMBO | MOVES | LEVEL |
|---|---|---|
| Piercing Moon | X, X, X, X, X | 1 |
| Shadow Banisher (Throw) | X, X, X, X, X (hold when hitting enemy) | 1 |
| Mist Slash | X, X, X, X, X, Y | 1 |
| Death’s Gate | X, X, X, Forward + X, X, X | 2 |
| Death’s Pillar | X, X, X, Forward + X, X, Y | 3 |
| River Styx Drop (Throw) | X, X, X, Forward + X, X, Y (hold when hitting enemy) | 3 |
| Demon Procession | X, X, X, X, Y, Y, Y | 2 |
| Death’s Chariot | X, X, X, Y | 2 |
| Corpse Sweep | X, X, Y | 1 |
| Demon’s Jaws | X, Y, Y | 1 |
| Round Haze | Forward + X, X, X | 1 |
| Reversed Tsunami | Forward + X, X, X, X, X | 3 |
| Reversed Waterfall | Forward + X, Y, Y, Y, Y, Y | 2 |
| Flying Heads | Y, Y | 1 |
| Cries of Ares | Y, Y, Y | 2 |
| Serpent’s Curse | Hold Y | 1 |
| Underworld Eruption | Hold Y with essence | 1 |
| Empire Destroyer | Hold Y with maximum essence | 1 |
| Soul Impale | Forward + Y | 1 |
| Shadow Banisher (Throw) | Forward + Y (hold when hitting enemy) | 1 |
| Hidden Clouds (Throw) | Y (during Shadow Banisher) | 2 |
| Death’s Gate | X, X (during Hidden Clouds) | 2 |
| Death’s Pillar | X, Y (during Hidden Clouds) | 3 |
| River Styx Drop (Throw) | X, Y (during Hidden Clouds; hold when hitting enemy) | 3 |
| Demon Strangler | Y, Y (during Hidden Clouds) | 2 |
| Hunted Chimera | Forward + Y, Y | 1 |
| Returning Wind | X (while running) | 1 |
| Ring of Insanity | Y (while running) | 1 |
| Graveyard Spin | Circle + Y | 2 |
| Massacre Sweep | Circle + Y with essence | 2 |
| Extermination Sweep | Circle + Y with maximum essence | 2 |
| Futile Resistance | X (while blocking) | 1 |
| Darkness of Hades | Y (while blocking) | 1 |
| Sacrificial Slice | Y (next to downed enemy) | 1 |
| Hidden in Darkness (Throw) | Y (next to downed enemy; hold when hitting enemy) | 1 |
| Immense Raven | X, X (while jumping) | 1 |
| Blood Rain | Y (while jumping) | 1 |
| Flying Sacrifice | Y (while jumping towards enemy) | 1 |
| Infinite Sacrifice (Throw) | Y (while jumping towards enemy; hold when hitting enemy) | 1 |
| Guillotine Throw (Throw) | A + X (while jumping near enemy) | 1 |
| Flying Sacrifice | X or Y (while wall running) | 1 |
| Infinite Sacrifice (Throw) | X or Y (while wall running; hold when hitting enemy) | 1 |
| Wind of Revenge | X or Y (on wall) | 1 |
| Entombed Lightning | X (during Flying Bird Flip) | 1 |
| Monstrous Raven | Y (during Flying Bird Flip) | 1 |
| Aqua Slash | X, X (while running on water) | 1 |
| Wave of Judgment | Y, Y (while running on water) | 1 |
| Lotus Strike | X (at water surface) | 1 |
| Wounds of Poseidon | Y (at water surface) | 1 |
| Aquatic Illusion | X (underwater) | 1 |
| Sea Serpent | Y (underwater) | 1 |
| Reverse Wind | Left Trigger + any movement | 1 |
| Wind Path | A (while jumping near enemy) | 1 |
| Wind Run | A + X | 1 |
| Flying Bird Flip | A (on wall) | 1 |
| Calm Water Run | A + X (while running on water) | 1 |
| Calm Water Break | Left Trigger + A (while running on water) | 1 |
Tonfa
The tonfa is similar to the talons: a fast, short-range weapon. In fact, the tonfa is brutally fast and able to keep opponents stunned during long combo strings. For example, use the tonfa against melee ninjas and against the gray demons. Fluttering Peacock is an excellent starter combination as it often results in dismemberment. Take off a limb and you’re ready for an obliteration.
During Chapter 7 - The Flying Fortress Daedalus, and after acquiring the Art of the Piercing Void ninpo, near a Test of Valor you will use a console to open a passage below. Drop down into the room and find two corpses. One carries Incendiary Shuriken; the other corpse carries the Tonfa.
| COMBO | MOVES | LEVEL |
|---|---|---|
| Great Edge | X, X, X, X, X | 1 |
| Ivory Flower | X, X, X, Y, X | 1 |
| Falling Petals Flowing Water | X, X, X, Y, X, X, X, X | 2 |
| Izuna Drop (Throw) | X, X, X, Y, X, X, X, Y | 2 |
| One Thousand Blossoms | X, X, Y, Y, Y | 3 |
| Fluttering Peacock | X, X, Forward + Y | 2 |
| Blooming Iris | X, X, Forward + X, X | 1 |
| Flower Garland Drop (Throw) | X, X, Forward + X, Y | 2 |
| Cypress Column | X, X, Forward + X, Y | 1 |
| Cradled Moon | X, Y | 1 |
| Crimson Edge | X, Hold Y, Y | 1 |
| Demons’ Staves | Forward + X | 1 |
| Demons’ Diamonds | Forward + X, X | 2 |
| Demon Tears Kick | Forward + X, X, X, X, X | 3 |
| Demon Devourer | Forward + X, Y, Y | 1 |
| Iron Wheel | Y, Y | 1 |
| Storm of the Four Winds | Y, Y, Y | 2 |
| Vermilion Fan | Hold Y | 1 |
| Spring Wind | Hold Y with essence | 1 |
| Uncontrollable Bloom | Hold Y with maximum essence | 1 |
| Fleeting Blossoms | Forward + Y, Y | 1 |
| Turning Wheel | X (while running) | 1 |
| Roaring Flames | Y (while running) | 1 |
| Overlapping Storms | Circle + Y | 2 |
| Heavenly Justice | A or Left Trigger + Move (during combo) | 1 |
| Justice of Heaven Kick | X (during Heavenly Justice) | 1 |
| Broken Lantern | Y (during Heavenly Justice) | 1 |
| First Storm | X (while blocking) | 1 |
| One Thousand Lotuses | Y, Y (while blocking) | 1 |
| Bloom of Revenge | Y (next to downed enemy) | 1 |
| Ivory Flower | X (while jumping) | 1 |
| Falling Petals Flowing Water | X, X, X, X (while jumping) | 2 |
| Izuna Drop (Throw) | X, X, X, Y (while jumping) | 2 |
| Oblivion Blossom | Y (while jumping) | 1 |
| Eight Leaves | X (while jumping forward) | 1 |
| Stone Breaker | Y, Y (while jumping towards enemy) | 1 |
| Guillotine Throw (Throw) | A + X (while jumping near enemy) | 1 |
| Stone Breaker | X, Y or Y, Y (while wall running) | 1 |
| Fluttering Crane | X or Y (on wall) | 1 |
| Demon Exorcism | X, X (on wall) | 1 |
| Demon Devourer | X, X, X (on wall) | 2 |
| Crimson Fang | X, Y (on wall) | 1 |
| Fleeting Blossoms | X, Y, Y | 2 |
| Fluttering Phoenix | X or Y (during Flying Bird Flip) | 1 |
| Demon Exorcism | X, X (during Flying Bird Flip) | 1 |
| Demon Devourer | X, X, X (during Flying Bird Flip) | 2 |
| Crimson Fang | X, Y (during Flying Bird Flip) | 1 |
| Fleeting Blossoms | X, Y, Y (during Flying Bird Flip) | 2 |
| Drowning Moon | X, Y (while running on water) | 1 |
| Floodgate Crush | Y, Y (while running on water) | 1 |
| Demon Thistle | X (at water surface) | 1 |
| Drowning Moon | Y (at water surface) | 1 |
| Crimson Lily | X (underwater) | 1 |
| Scale Scraper | Y (underwater) | |
| Reverse Wind | Left Trigger + any movement | 1 |
| Wind Path | A (while jumping near enemy) | 1 |
| Wind Run | A + X | 1 |
| Flying Bird Flip | A (on wall) | 1 |
| Calm Water Run | A + X (while running on water) | 1 |
| Calm Water Break | Left Trigger + A (while running on water) | 1 |
Vigoorian Flail
The Vigoorian flail is a balanced mix of speed, power, and range. It’s an impressive juggling weapon enabling long air combinations that wail on your opponent while keeping you relatively safe from harm. Consider using the flail against the chainsaw zombies as well as the snake demons.
During Chapter 9 - Heart of Darkness after you’ve defeated the giant worm you’ll enter an area with more worm enemies that emerge out of the water. There’s a crystal skull on the right side. A corpse in this area carries the Vigoorian Flail.
| COMBO | MOVES | LEVEL |
|---|---|---|
| Dragon and Phoenix | X, X, X, X, X, X | 1 |
| Dragon Slaughter | X, X, X, Forward + X, X, X, X, X, X | 2 |
| Furious Strike | X, X, X, Forward + X, X, X, X, X, Y, X, X, X, X | 3 |
| Izuna Drop (Throw) | X, X, X, Forward + X, X, X, X, X, Y, X, X, X, Y | 3 |
| Piercing Mountain | X, X, X, Forward + X, X, X, X, X, Y, Y, Y, Y, Y, Y | 3 |
| Opened Path | X, X, X, X, X, Y | 2 |
| Wandering Destruction | X, X, X, X, Y | 2 |
| Pale Light | X, X, X, Y | 2 |
| Fire Pit | X, X, Y | 1 |
| Foe Destroyer | X, X, Y, Y | 2 |
| Looming Fog | X, Y, X | 1 |
| Furious Strike | X, Y, X, X, X, X | 2 |
| Izuna Drop (Throw) | X, Y, X, X, X, Y | 2 |
| Grasping the Moon | X, Y, Y | 1 |
| Insane Raven | X, Y, Y, Y | 2 |
| Piercing Mountain | X, Y, Y, Y, Y, Y, Y | 3 |
| Flowing Waves | Forward + X, X | 1 |
| Insane Devil | Forward + X, X, X, X, X | 2 |
| Interrupted River | Forward + X, X, X, Y | 2 |
| Horn of the Chimera | Forward + X, X, Y | 1 |
| Flame Wheel | Y, Y | 1 |
| Shining Heavens | Y, Y, Y | 2 |
| Auspicious Crane | Hold Y | 1 |
| Golden Dragon | Hold Y with essence | 1 |
| Annihilating Golden Dragon | Y (press repeatedly during Golden Dragon) | 1 |
| Dancing Phoenix | Hold Y with maximum essence | 1 |
| Annihilating Dancing Phoenix | Y (press repeatedly during Golden Dragon) | 1 |
| Erupting Flame | Forward + Y | 1 |
| Rising Serpent | Forward + Y, Y | 3 |
| Deformation Kick | X (while running) | 1 |
| Scraping Heavens Kick | X, X (while running) | 2 |
| Heaven’s Surprise Kick | X, X, X (while running) | 3 |
| Storm Breaker | X, X, X, Y (while running) | 3 |
| Flying Monkey | Y (while running) | 1 |
| Blazing Inferno | Y, Y (while running) | 2 |
| Nine Heavens | Circle + Y | 2 |
| Warrior of Flight | X (while blocking) | 1 |
| Ring of Heaven Kick | Y (while blocking) | 1 |
| Slanted Heavens | Y, Y (while blocking) | 2 |
| Demon Chaser | Y (next to downed enemy) | 1 |
| Sweeping Strike | X (while jumping) | 1 |
| Dragon Emperor Kick | Y (while jumping) | 1 |
| Red-Hot Iron Brand | Y (while jumping towards enemy) | 1 |
| Insane Raven | Y, Y (while jumping towards enemy) | 2 |
| Piercing Mountain | Y, Y, Y, Y, Y (while jumping towards enemy) | 3 |
| Guillotine Throw (Throw) | A + X (while jumping near enemy) | 1 |
| Red-Hot Iron Brand | X or Y (while wall running) | 1 |
| Insane Raven | X, Y or Y, Y (while wall running) | 2 |
| Piercing Mountain | X, Y, Y, Y, Y or Y, Y, Y, Y, Y (while wall running) | 3 |
| Split Boulder Kick | X or Y (on wall) | 1 |
| Mountain Crane | X, Y or Y, Y (on wall) | 3 |
| Infernal Drop | X or Y (during Flying Bird Flip) | 1 |
| Mountain Crane | X, Y or Y, Y (during Flying Bird Flip) | 3 |
| Ancient Dragon Kick | X (while running on water) | 1 |
| Rising Phoenix | Y (while running on water) | 1 |
| Wandering Drum | X (at water surface) | 1 |
| Disturbed Heavens | Y (at water surface) | 1 |
| Flowing Rainwater | X (underwater) | 1 |
| Golden Lily | Y (underwater) | 1 |
| Reverse Wind | Left Trigger + any movement | 1 |
| Wind Path | A (while jumping near enemy) | 1 |
| Wind Run | A + X | 1 |
| Flying Bird Flip | A (on wall) | 1 |
| Calm Water Run | A + X (while running on water) | 1 |
| Calm Water Break | Left Trigger + A (while running on water) | 1 |
Fiend’s Bane Bow
You’ll gain the Fiend’s Bane Bow during Chapter 2 - The Castle of the Dragon. It will be required to shoot a glowing switch to open a pathway so you won’t be able to miss it. The Fiend’s Bane Bow is extremely useful over the course of the game. Not only will you use it against ranged enemies, like archers or aerial opponents, but there will be several opportunities to pick off approaching enemies from long-range before they reach your position.
Charge the Fiend’s Bane Bow for increased shot power, which can mean the difference between a wounding strike and a complete enemy one-hit explosion. You can also make quick shots with the bow and Ryu is a remarkably good shot (you can jump and fire a couple arrows before landing). You can combine this technique with standard melee combinations for added damage.
Your arrow supply is limited however; you can carry 30 arrows at a time. You can purchase more ammunition from Muramusa shops as well as find arrows from dead bodies.
Shuriken and Incendiary Shuriken
Ryu carries an unlimited supply of Shuriken and it’s not surprising why—they really don’t inflict a lot of damage! Use them for the occasional added damage but you won’t be able to rely on them alone for much power. If you’re out of arrows, you can use the Shuriken to take down aerial enemies but expect to fire many, many Shuriken in order to eliminate a decent number of adversaries. Use them in combination with your melee combos. A Shuriken may stutter an enemy long enough to follow up with a combination attack.
The Incendiary Shuriken are an entirely different story. Ryu can’t carry an unlimited amount; you are restricted to 30 at a time, just like the arrows. You can acquire more from Muramusa shops as well as in various places throughout the game, such as off dead bodies. An Incendiary Shuriken that finds its mark will likely dismember an enemy, which means you can finish off that foe with an obliteration. This becomes important later in the game when you’re facing rocket launcher-wielding enemies; fire an Incendiary Shuriken at them and you disable the rocket launcher.
The Art of the Inferno
Find The Art of the Inferno ninpo early in Chapter 1 - Sky City Tokyo. Just before you spot the first crystal skull, search the nearby chests first for the Furious Wind technique and second for the Art of the Inferno ninpo.
Art of the Inferno offers strong damage to enemies positioned in front of Ryu (added targets per upgrade). That limits its crowd control uses if you activate the ninpo haphazardly. Instead maneuver so enemies are in front and will be affected by the Inferno. With upgrades the Inferno can dish out strong damage to a pack of enemies in front of you, not just from the fiery projectiles but from the adjacent splash damage as well. If you need something dead, an upgraded Inferno is a good bet.
The Art of the Wind Blades
You’ll recover The Art of the Wind Blades ninpo near the beginning of Chapter 3 - Thunderclap of Catastrophe. After clearing the city street, search the alley on the left side and find a dead body carrying the Art of the Wind Blades ninpo.
Art of the Wind Blades fires damaging projectiles all around your current position. Therefore it’s best used as crowd control, not a means of inflicting big damage on a single enemy. At its initial power, Wind Blades isn’t extremely useful; however it becomes much more effective once maximized. Use the ninpo when you are completely surrounded by several enemies, particularly human enemies like ninjas. Once upgraded, the Art of the Wind Blades can dismember affected enemies in a single blast. You can now go for obliteration and used the released essence to power an ultimate and finish off the remainder of the group.
The Art of the Flame Phoenix
You will find The Art of the Flame Phoenix during Chapter 5 - The Aqua Capital. After recovering the Copper Key and using it to open a gate, examine a dead body inside to find the ninpo.
Activate Art of the Flame Phoenix and fiery phoenix encircle Ryu. This means you can attack enemies while the ninpo remains active. The phoenix knock enemies and temporarily stun them, which is good for keeping you away from damage. The ninpo basically acts as a rudimentary shield while inflicting moderate damage on nearby foes. Don’t expect to take down an enemy like when you use Inferno or Void, however.
The Art of the Piercing Void
You will recover The Art of the Piercing Void from Chapter 7 - The Flying Fortress Daedalus. You will reach a save point in a room with two doors and a console that opens a passage downward. Open one door to discover a Test of Valor; open the other door to find a chest containing the Art of the Piercing Void ninpo.
Fire the Art of the Piercing Void and you launch damaging projectiles in front of your current position. The projectiles inflict damage to enemies in front of your position as well as enemies behind them. Move Ryu around so the area’s current enemies are positioned in front and not around. Piercing Void is similar to Inferno. If you’re looking for big damage against several enemies, you can’t go wrong.
Items
Ryu uses two primary healing items, the Herbs of Spiritual Life and the Grains of Spiritual Life. The Herb restores about 30% health while the Grains restore approximately 90%. Use a Grains before resorting to the Herbs, unless you just need a slight boost because you know there’s a save point on the horizon.
The Talisman of Rebirth will completely restore Ryu upon death—think of it as a second chance. You can purchase one from Muramusa but it’s expensive, the same price as a level three weapon upgrade. There are a few means of acquiring one during the game. You can find one on a balcony in an alley in Chapter 5 - The Aqua Capital. Also, complete the Tests of Valor in Chapter 4 - A Captive Goddess and Chapter 9 - Heart of Darkness. You can only carry one and you should obviously save it for the game’s toughest boss battles.
An extremely rare power-up called the Spirit of the Devils will increase your Ki, meaning you will be able to cast more ninpo. Find one Spirit of the Devils in Chapter 5 - The Aqua Capital. Before you jump into the fountain, return to an alley on the right side of the street (if you’re facing the fountain at the intersection). There’s a dead body with a power-up. Locate the second in Chapter 11 - A Tempered Gravestone, you will recover Kureha’s Room Key from a gravesite and can return to unlock the corresponding room. Inside you’ll find a chest with a Spirit of the Devils.
Chapter 2: Walk-through
This section offers a complete walk-through of Ninja Gaiden II’s Path of the Warrior difficulty mode. If you’re playing on Path of the Acolyte, you’ll find many of the toughest encounters, including boss battles, easier and there will be slight differences with the walk-through strategies.
Here are some general tips to consider while moving through this challenging game.
- Chests and crates scattered throughout the game provide healing items, magic items, essence, or other power-ups. While some chest contents are fixed, other chest contents are determined by your current inventory. For instance, if you already have a full inventory of healing items, the chest may instead contain blue essence to heal current wounds or yellow essence to provide money. Some chest contents revealed in the walk-through may differ then depending on your inventory. Once you know the location of a chest and its contents, keep it closed until you need it the most!
- Weapons, ninpo, health bar and ki power-ups are all important but yellow essence may be the lifeblood of long-term success. Spend your yellow essence wisely. Focus first on upgrading the dragon sword to its maximum and then the staff to counter challenging enemies battled during the fourth and fifth chapters. Once you obtain the Eclipse Scythe, you’ll want to upgrade it to its maximum and use the weapon in boss battles. These are personal preferences—all the weapons are effective in the right hands. Perhaps another is your personal favorite. It’s entirely possible to upgrade all weapons to maximum before you near the end of the game.
- Use healing items carefully. They’re rare, you can’t hold very many of them, and they’re expensive to buy from the Muramusa shop. Wait until you’ve almost exhausted your current health bar before using a Grains of Spiritual Life. Use Grains before you use any of the Herb of Spiritual Life items. If you find a Lives of the Thousand Gods, which permanently boosts your health bar, save it until you have a low health bar because with the boost comes full health rejuvenation. You don’t have to use the Lives of the Thousand Gods as soon as you’ve picked it up. Save it for when you need to regain health.
- Finding a save point is often a reason to cheer and celebrate. Just because you’ve used it and passed it by doesn’t mean you can’t come back and use the save point again! There are many times when you can save your game then move into the next area and complete those battles then return to that same save point and save again. This can help alleviate the frustration in redoing some of the game’s tougher sections.
- The obliteration and ultimate techniques are your best friends. Use obliteration against a dismembered enemy for a quick kill. Charge ultimate techniques (with the aid of essence) for incredible combos that inflict big damage on a large number of present enemies. Use one with the other: complete an obliteration then use the released essence to charge the ultimate. Crowd control is vital in battles against large groups—knock down those enemy numbers fast with an obliteration and an ultimate.
Sky City Tokyo
The game opens with a group of Black Spider Ninjas capturing Sonia, who has been searching for Ryu Hayabusa. And precisely on cue, Ryu shows up. Although a ninja escapes with the shackled Sonia, Ryu makes quick work of the remaining foes. Defeat the present ninjas using your dragon sword. After the battle, open the door into the shop to trigger another cut scene.
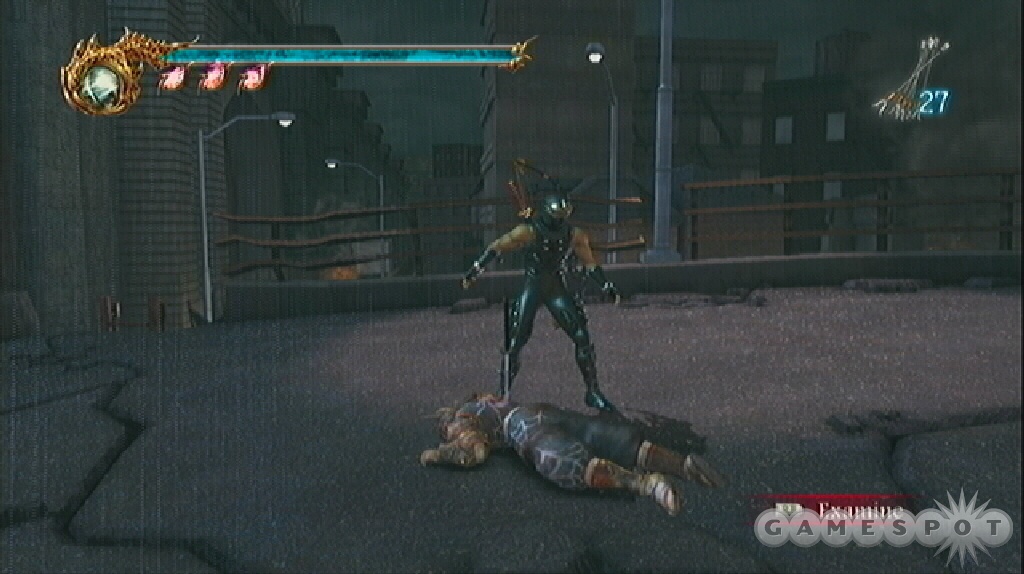
Walk around the left corner of the store and find a save point. Return to the right side of the store. Break open creates against the store to discover some yellow essence. A gang of ninjas approach from the stairs; battle the enemies in the area in front of the store. Return down the stairs to the door. Open the crate to the door’s left and recover the Reverse Wind technique. Open the door, which triggers another group of ninjas.
Proceed down the hallway and spot the crate in the back of the room. Open the crate, which likely contains blue essence to replenish your health. Turn right and spot the adjacent hallway. When you start moving down the hall, more ninjas arrive. Leap the gap ahead by running along the left wall. If you fall down, there’s a chest here that explains how to run along the wall, called the technique of Shadowless Footsteps. Climb the ladder to get out. Another gang of ninjas attacks on the other side of the gap.
Turn left and spot another crate: open it and recover the Furious Wind technique. Turn left into the large room and find another crate on the left side. Open the crate and recover the Art of the Inferno ninpo. Spot the glowing white object across the room. There’s the first crystal skull. It’s on a small balcony across a gap. Jump from the right side of this room to the ledge to the skull’s right side. Walk onto the balcony and grab the crystal skull.
Drop down to the path below and battle another horde of ninjas. Go inside the room and open the crate to recover red essence. Break open the adjacent containers for yellow essence. Ascend the staircase a couple flights and battle ninjas at the top. Open the crate here to find a Lives of the Thousands Gods. Use the item to permanently increase your maximum health.
Continue up the next staircase and open the crate for an Herb of Spiritual Life, which restores a small amount of health when used. Go through the door on the right, which triggers another group of ninjas. Cross the gap by using the Shadowless Footsteps technique: jump at the wall on the left side and run across to the opposite side.
Go up the short stairs and start to the right. A small group of ninjas approaches and attacks; defeat the group then continue forward. Jump to the pole that hangs over the gap then leap off of the pole to the other side. Examine the dead foe to discover the Obliteration technique. Defeat the ninjas here and find another dead foe around the corner: examine the body to recover the Flying Bird technique. Heal and save at the save point.
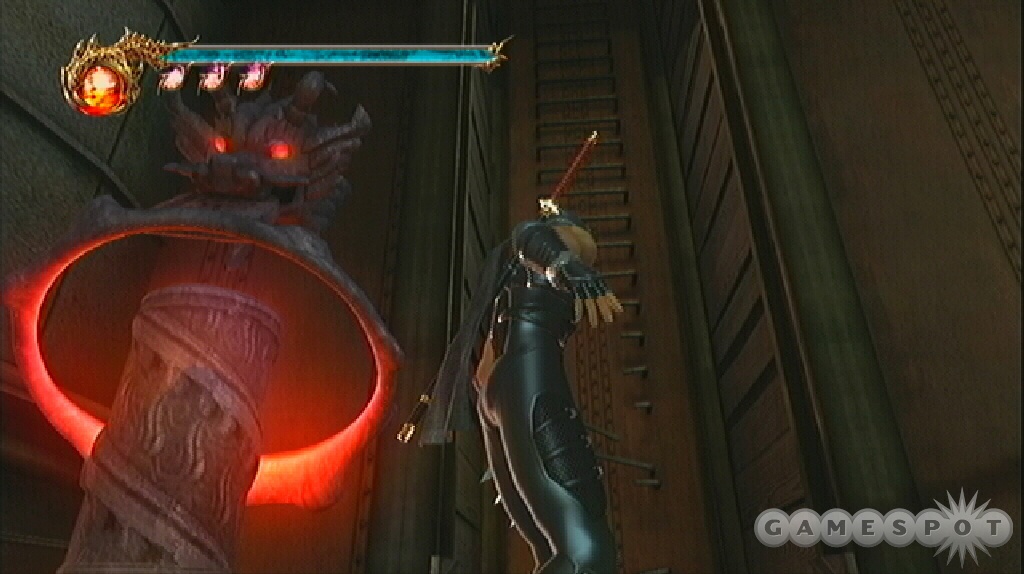
The ladder is broken so use the Flying Bird technique to reach the upper area where more enemies await. Cross the bridge and break the container for essence and back out to the courtyard and battle the ninjas that have arrived. Drop off the bridge to the right and battle ninjas in the water. Head to the left side of the water and look in the alcove on the left: there’s a chest here containing a Life of the Gods item.
Return through the water and under the bridge. Approach the boat and open the crate inside to recover an item. Return to the bridge and go up the stairs on the right. Cross the bridge and follow the walkway to the left. At the end, find the stairs on the right. Go down to trigger the ninjas then retreat and fight at the walkway. Do this to avoid the fiery arrows from the ninja around the corner.
Dash quickly along the next path and avoid the projectiles. Once you’ve passed the second tree trunk on the right, use that tree to get up to the ledge above. Use the Flying Bird Technique to jump to the trunk and bounce off to the upper ledge. Quickly get over to the middle catwalk and eliminate the archers. There’s a crystal skull on this same ledge; grab it after you have eliminated all of the ninjas.
Leap down and start down the catwalk. Just before another group of ninjas approach (defeat them first if you wish), discover a lower platform on the right side (you should be able to spot the top of the ladder). Jump down and open the crate for essence. Don’t head back up yet. Continue down this new path and find a crate at the end containing a Life of the Gods item. Eliminate the ninjas that ambush. Return to the ladder.
Jump across the gap using the pole and battle another ninja group. Leap across a couple more poles and follow the path to the top of the stairs and find the save point. Save and heal then return back down the stairs to the ladder.
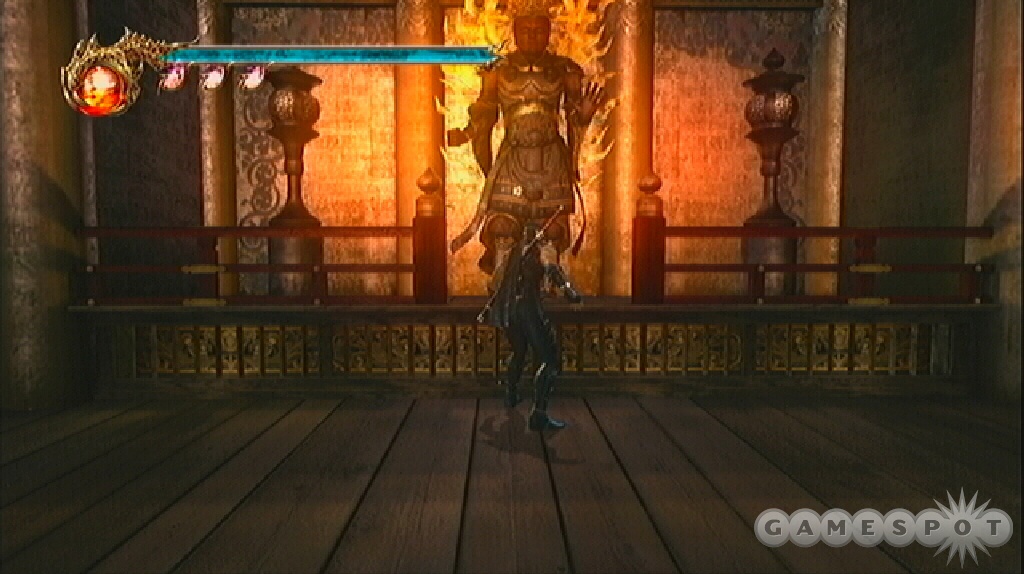
Ascend the ladder. Go right and find a crate and recover an item. Turn around and follow the catwalk to the corpse. Examine the corpse and recover the Flying Swallow technique. Continue around the corner to trigger the next enemy group. Eliminate all enemies to trigger the cut scene: a door opens revealing a statue. Approach the statue and take the Lunar Staff. Turn right at the statue and discover a save point. Look on the opposite side of the room for a crate containing essence.
Exit to the right and go down the stairs. Find a corpse at the bottom; examine the corpse and recover the Ultimate technique. Start across the bridge and eliminate a couple ninja groups. Go to the opposite side of the bridge and find another corpse: examine it to recover the Notebook: Obliteration Technique. Cross the courtyard to the entrance. Examine the dead foe to recover the Ultimate Guidance technique.
Look in the back right corner of the room. Attack the wall scroll to reveal a hidden room. Bust the containers inside for yellow essence and search the crate for an item.
Exit the building into the back courtyard. Yellow essence emerges from holes at the base of the wall; use the essence to help charge your Ultimate technique. Look in the building’s center room to find a crate with more essence. The room on the left is a trap: a couple ninjas break down the wall and attack. Defeat them then go into the narrow alley behind the broken wall. Defeat a couple more foes in the next courtyard then discover the Muramusa shop in the center.
Jump into the well to the right of the shop. Defeat the bats. Open the door and spot the corpse ahead. Examine the corpse and recover the Notebook: Shadowless Footsteps. Continue along the catwalks and defeat a couple ninjas near a crate on a lower platform.
Return up the ramp and use the Shadowless Footsteps technique to cross the gap to the far wall. Follow the catwalk all the way to the end to find another crate.
Turn around and find the opening in the railing on the left side. Drop down. Turn around and examine the dead foe to find the Notebook: Furious Wind. Start down the path but watch behind you; as soon as a ninja appears, break off your route and start to attack. Continue down the path to trigger the cut scene. After Ryu bursts through the window, eliminate the ninja group and heal and save your game at the save point. The pot in the opposite corner contains yellow essence.
Go through the door and battle a large group of ninjas. Break the pots near the elevators for yellow essence. Head down the hall opposite the elevators. Take the stairs down to find a crate.
Return to the stairs and ascend. A group of ninjas block the way. Break the pots near the elevators for yellow essence. Go back to the stairs and continue to the top. Open the crate here to recover the Cracked Card Key.
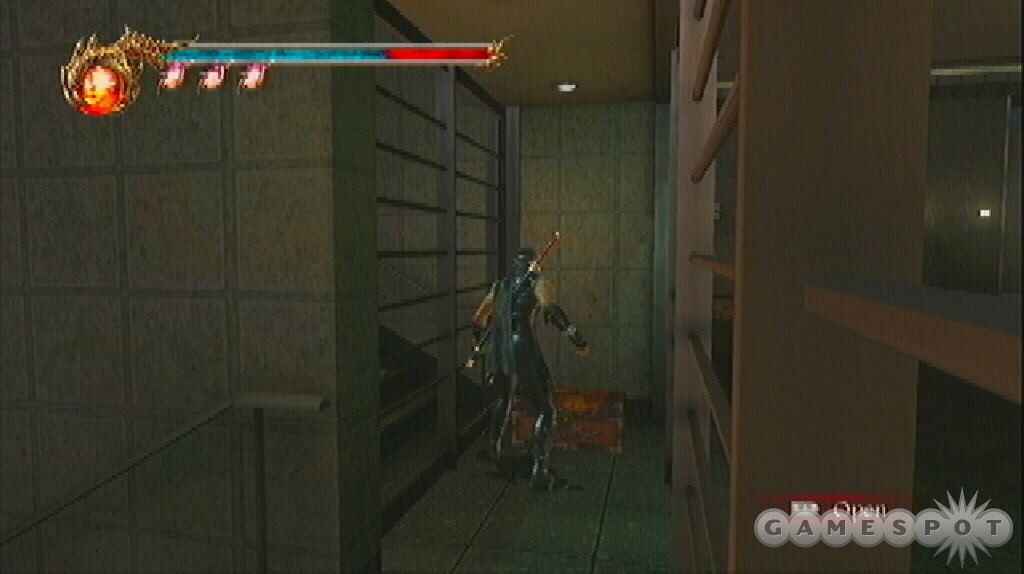
Return to the previous floor. Go to the right side of the elevators and find the locked door. Use the Cracked Card Key to unlock the door. Open and go through. Examine the dead body and recover the Notebook: Flying Bird. Climb the ladder on the left side of the room. Go through the corridor to the end then use the Flying Bird technique to reach the top.
Eliminate the ninjas that approach from the left side. Search the right for an item crate. Use the Muramusa shop to acquire any other desired gear. Proceed down the hall in the opposite direction and spot the save point near the stairs. Heal and save your game. Ascend the stairs and eliminate a group of ninjas at the top. Open the double doors.
Boss Battle: Shadow Ninja Rasetsu
A gigantic spider ninja named Shadow Ninja Rasetsu lands on the platform. Beware of Rasetsu’s ranged attack. Dodge it with quick Reverse Wind maneuvers to the side. You can use the dragon sword’s Flying Swallow to make quick attacks on Rasetsu’s head but it’s often blocked.
Use Reverse Wind to dodge Rasetsu’s close-range melee strikes and follow it up with a combination, such as Undefeatable Demon if you’ve already upgraded the dragon sword to its second level. Don’t forget your acquired Art of the Inferno ninpo if you’re close to the Rasetsu and need an extra punch. Keep on the move constantly so you aren’t forced to block Rasetsu but instead dodge him. Don’t neglect your ultimate technique, which you can charge after a dodge when Rasetsu is facing another direction and left vulnerable.
Once you’ve knocked Rasetsu down to around a quarter health, he’ll drop to the ground and leave himself open to an obliteration finisher.
The Castle of the Dragon
Proceed forward and locate the corpse. Examine the corpse to recover the Notebook: Flying Swallow. Continue to the right and battle the ninjas. Examine the headstone if you wish. Follow the path down and eliminate a couple more ninjas. Reach the bottom and take out the ninja dog just in front of the Muramusa shop.
Go to the opposite side and find a dead body. Examine it and recover the Notebook: Reverse Wind. There’s a pack of dogs around the left corner. Battle in this tight back corner and use the inferno ninpo if necessary. The dogs are a menace! Dodge frequently and use hit-and-dodge quick attack techniques. Follow the path among the buildings to find another dead foe: examine him to find an Herb of Spiritual Life. Descend the stairs to the water.
Turn left and spot the skull at the bottom of the water. You can grab the crystal skull but it’s better to run across the water to the archers at the far side. Eliminate the archers then retrieve the crystal skull. Return to the archers and go up the stairs. Follow the path to the top and find a corpse; examine the course and recover the Counter Attack technique.
Proceed up the stairs and go around the left. Lure the ninjas back around the corner so you avoid the archers. Defeat the ninjas then quickly attack the archers and eliminate them. At the end of the hall, go into the building on the right. Search the crate on the right for an item. Cross the room and approach another chest. Battle the ninjas that block the route and then open the chest for another item. Before you leave the area, turn right and spot an alcove on the right side of the room. Grab a new weapon, the Falcon’s Talons!
Exit the door and descend the stairs. Grab the item next to the corpse, which is a Notebook: Ultimate Guidance. Start out into the courtyard to trigger a huge battle. Eliminate the archers first then tackle the ninjas. The enemies keep coming; defeat them all to light the candles. Walk over to the candles and take to obtain the Rod of Trials, which grants access to the Tests of Valor. There seem to be reports of missing out on the Rod of Trials despite completing this section. Remain in the courtyard during the fight until it concludes. Tackle the archers first so you don’t leave the courtyard without enemies below.
Ascend the stairs across the courtyard (where the archers stood) and continue up. You’ll trigger a couple ninjas. Lure them back to avoid more archers. Defeat them and quickly move to the base of the towers where the archers stand. Use the Flying Bird technique to reach the top of the towers and eliminate each archer. One of the towers contains a chest with an item.
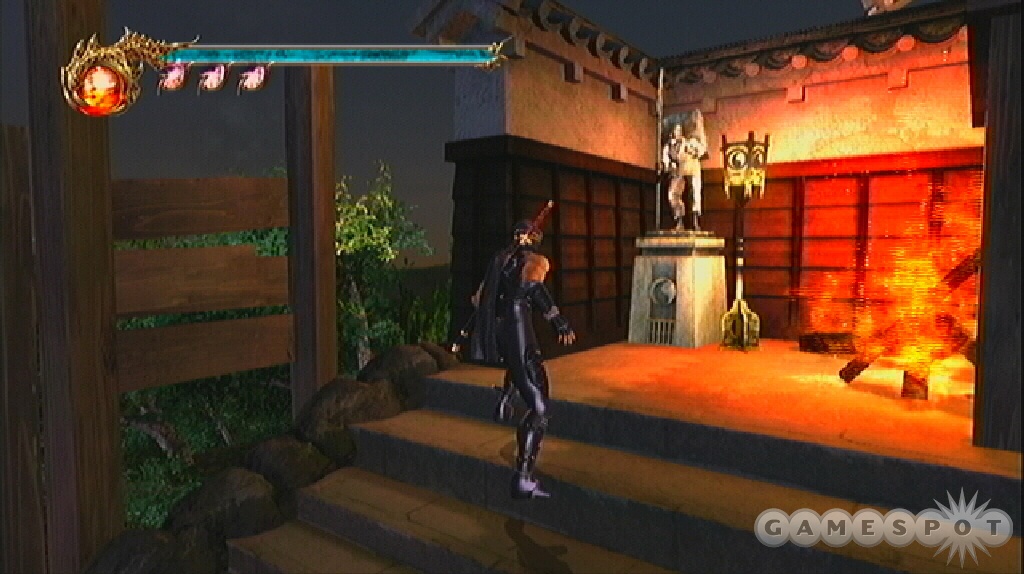
Continue up the path; there are another couple archer towers ahead. Trigger the ninjas and either charge the towers, using the Flying Bird technique to get to the top, or back off and battle the ninjas away from the archers. Resume course up the stairs and find a save point to save and heal.
Find a shop up the next set of stairs. Return down and go into the narrow tunnel on the save point’s left side. Eliminate ninjas inside. Use the Flying Bird technique to ascend at the end. You leap out into battle; defeat the ninjas outside and eliminate the archers before they inflict too much damage. Search the corpse at the top and recover the Notebook: Counter Attack.
Start up the walkway on the right side and defeat a couple ninjas groups as you make your way to the top area. Find the chest on the left side of the entrance; open it and gather some blue essence to replenish your health. Continue up the stairs and reach the top. Avoid the flaming projectiles and go to the far end of this level and search an alley on the left for a chest containing yellow essence.
Follow the stairs up and battle a couple more ninjas. When you reach the top, a large battle ensues. Engage the magic ninjas as quickly as possible then finish off the other enemies. Search the corpse in the corner for a Notebook: Ultimate Technique.
Climb up the planks and leap onto the rooftop. Drop down the hole in the roof and approach the archers and attack. Eliminate the remaining ninjas. Search the hallway for Fiend’s Bane Bow. It’s on the opposite side as the save point. Equip the bow and return to its original location. Shoot the glowing switch with the bow to open the path. Grab an arrow from the rack on the right side and ascend the staircase.
When you drop down into this area you encounter another Shadow Ninja Rasetsu. The battle is similar to the end boss battle in chapter one and the strategies remain the same…at least against him. Unfortunately there are a couple additional ninja enemies accompanying the Rasetsu. Make quick work of a ninja and charge an ultimate to help defeat the Rasetsu. Maintain mobile with dodge.
Open the exit door. Go to the right and find a chest in an alcove. Head in the opposite direction and start up the stairs to trigger a couple ninjas. Search the corpse under the stairs for an item. Continue to the top and battle a couple ninjas with archer support. Eliminate the archers and grab arrows if needed. During the battle you may break down the wall on the right side but if not, bust it down now. Find the save point inside the alcove and save and heal.
Ascend the staircase and search the corpse to recover the Unrivaled Soaring technique. Break open the wall on the right side. Use your bow to eliminate the archers to the left and right. Use your newly acquired technique of Unrivaled Soaring and use the wall to leap over to the balcony on the left side. Crush the ninjas that appear (attack the magic ninja first). Approach the glowing red object in the back of the room and acquire the Vermilion Jewel—the red jewel has a hole in it and appears to fit somewhere.
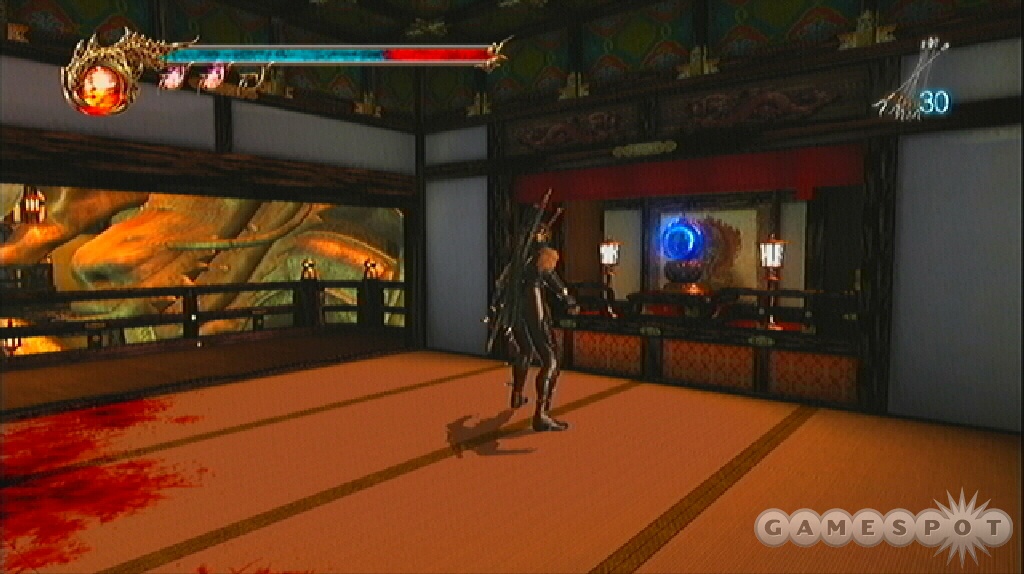
Break open the passage on the opposite wall. There’s a corpse that contains an item. If you step on the trapdoor you’re dropped on to the save point again. Continue into the next room and trigger a gang of ninjas and magic foes. At the end of the fight, cross the room to the blue object; it’s an Ultramarine Jewel, another jewel with a hole in it that appears to fit somewhere.
Wall jump over to the original platform—you can also just drop down to the middle of the room and retrace your steps back up to the platform. There are two objects on either side of the platform; use items to automatically insert the correct jewels. The dragon’s mouth opens—shoot the glow with your bow. Jump over to the platform and into the mouth. Heal and save at the point on the right side.
Search the opposite side of the alcove for a crate containing an item. Exit onto the rooftop and defeat a gang of magic ninjas. Go around the left side of the roof to the opening. Jump inside and rush the archers on the opposite side. Eliminate all the enemies in the room. Search the chest here for a Lives of the Thousand Gods item. Find the hole on this walkway (it’s to the right side of the crate).
Go left and find a save point to save and heal; search the opposite side for a shop. Return to the ladder, which leads back to the room you dropped from. Cross to the opposite side of the room and eliminate a couple ninjas. After ascending the stairs, battle another group. Once at the top of the stairs, go left and find a corpse. Search it for a Life of the Gods item. Go to the opposite side and open the door.
Boss Battle: Genshin
This battle is about brute force. You won’t need to use Art of the Inferno ninpo because it won’t affect Genshin. Also, don’t use aerial attacks (including Flying Swallow) because Genshin immediately counters and knocks you back down to the ground.
When Genshin attacks, dodge with Reverse Wind and follow up with your own combination. Also, if you’re blocking Genshin’s attacks and he breaks the block, immediately dodge and follow with a combination. Finishing one of your combinations isn’t always successful so it’s more effective to get in a couple hits then dodge out of the way and start over.
Thunderclap of Catastrophe
Go to the right and find a chest. There’s also a shop on this side of the street. Cross the street to trigger a bunch of demons. At the intersection, search the right alley to find a crate behind a cab. Eliminate the bats that attack. Cross the road to the opposite side. Find an entrance on the back right side of the alley. Search the dead body for the Art of the Wind Blades ninpo.
Continue around the left corner and battle ninjas. There are archers in the area so charge and defeat them. One is up the staircase; take him out as quickly as possible. Search the alley on the right side for a chest.
Ascend the staircase and battle the group of ninjas at the top. An archer squad is positioned on the other side. Get to them quickly and in the group of enemies, consider using ninpo to weaken your foes. Eliminate the group. There’s a crystal skull up the last flight of stairs. If you return to the hall, continue to the back end to find a save point. Save and heal.
Look for an alcove to the left of the save point. Use the Flying Bird technique to reach the top. Defeat a group of ninpo ninja that arrive as soon as you’ve reached the rooftop. Defeating the ninpo ninja triggers the arrival of flying demons. Take cover near the back wall and shoot the flying demons with your bow. Take time between shots to dodge the incoming fireballs. There’s a corpse on the far right corner of the rooftop to replenish your arrows. After killing the flying demons, a gang of archers appears on the far rooftop. Eliminate these enemies with your bow.
Go over underneath the pole. Look down and spot the platform below. Drop onto the platform and turn right. Run along the right wall and to the crate on the opposite side. Open the crate and grab the item inside. You can also drop to the bottom of this area, battle dogs, and find another crate with an item. Return up using the Flying Bird technique.
Jump and grab the pole. Shimmy over to the opposite side and drop down. Battle some remaining ninjas and archers. Drop down and find the save point in the back corner. Go left from the save point and locate a crate at the end of the path. Open it and recover an item.
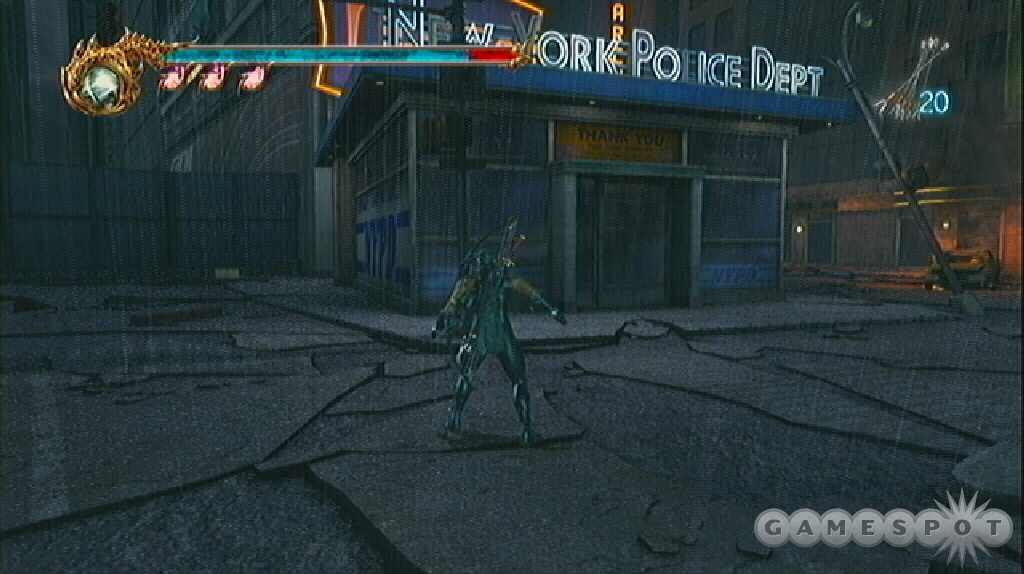
Leap through the gap in the railing to the road below. Eliminate a squad of ninjas. Search an alley on the right side to find a corpse. Examine it and pick up The Four Greater Fiends, Part 1. Search the alley left of the police station to find a crate containing an item.
Start down the long road to the left of the alley containing the corpse. Battle the horde of demons along the way. Continue and reach the cut scene: demon emerging from hole in the ground is never a good sign. Defeat the winged demon and his cohorts to clear the area. Drop into the hole. The Lunar Staff works well against these enemies.
Save your game at the save point and then start down the sewer path; it’s not long before demons and bats interrupt your progress. Exit to the right and search the corpse on the ground to find a Jewel of the Demon Seal. Ascend the ladder to the right. Run along the wall on the left to reach the chest on the opposite side.
Remain on this level and go around to the left. You’re over the save point now. Enter the opening on the left. Cross the walkway to the crate and open it. Start down the sewer tunnel and eliminate a trio of demons.
Drop down into the water and swim to the left and find the walkway. Engage the bats. Search the corpse for the Notebook: Unrivaled Soaring. Ascend the stairs and use wall runs to reach the upper level. Open the crate for an item. Drop into the hole and return to your previous location.
Run along the right wall and jump to the pole. Swing on the pole while on the right side so you jump to the next wall and run along to the next platform. Battle demons here—try to avoid getting knocked off or you’ll have to go to the underground area where the corpse was and retrace your steps back here.
Run along the left wall and battle more demons. Drop into the pit below and eliminate all of the demons to clear the level. There are arrows near the corpse. Move into the tunnel to trigger more demons. Find a corpse in the left alcove to learn the Invisible Path technique.
Time to put the technique to use! First, eliminate the archer using your bow. Then cross the chasm using the Invisible Path and grab the crystal skull at the end. Drop into the water below. Swim to the bottom and find a crate with a Life of the Gods item. Swim over to the walkway and use the Flying Bird technique to return to the top.
Proceed to the opposite alcove and locate the save point. Take the chance to heal and save. Use the Flying Bird technique to get up the path to the right of the save point. Defeat the demons. Run along the wall to the next platform. Grab the pole overhead. Stop in the middle and swing and jump to the middle platform and recover the item from the crate. Jump back to the pole and continue to the far platform. Run along the right wall and jump over to the next area.
A group of ninja appears. Quickly get to the back and eliminate the archers. After clearing the group, run along the wall using the Unrivaled Soaring technique to reach the upper platform and a shop. Go through the door on the left side of the shop. Walk through to trigger enemies. Retreat and battle the ninjas away from the new room to avoid the archer attacks. Defeat the archers using your bow.
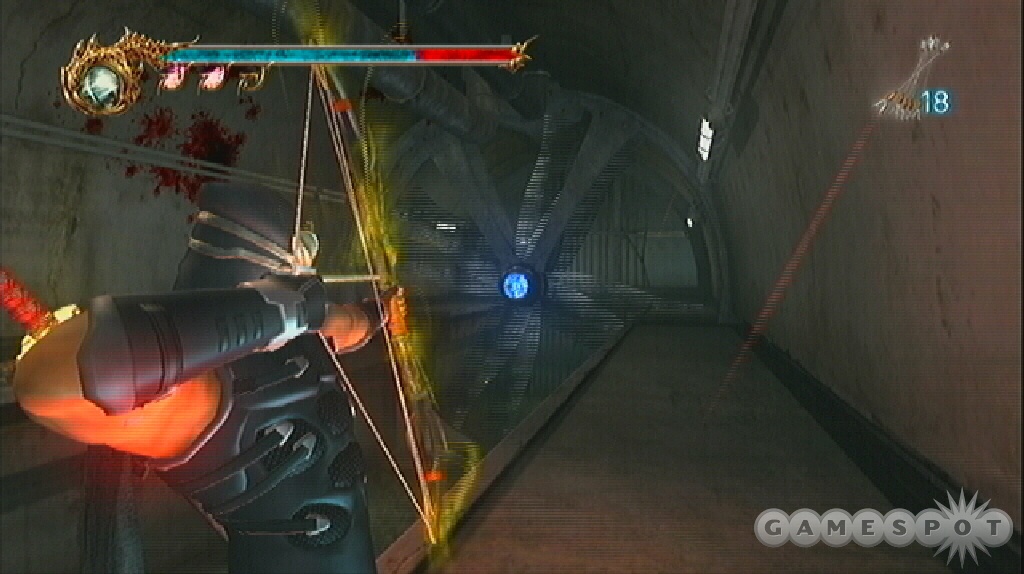
Use your bow to shoot the blue lights on each of the two giant fans. Doing so disables the fans. Drop into the middle of the room and eliminate the demons. Climb the ladder and search the corpse for Incendiary Shuriken.
Drop down and go through the disabled fan ahead. There are a couple archers in here; you can eliminate them beforehand using the bow or shuriken. Eliminate all ninjas then climb the ladder on the right. Find the corpse on the opposite side; examine it to find an item. Destroy the next fan by shooting the blue light. Stay on the upper level and cross through the disabled fan. On the left side there’s another crate.
Return to the first room and go through the other disabled fan. Battle a couple ninjas and archers in here. Destroy the next fan by shooting the blue light. Climb the ladder and leap to the opposite side. Run along the wall and jump to the pole. Swing and leap through the gap into the next room. You drop into the water below. Defeat some bats. Swim down and through the pipe. Emerge into a new section. Get out of the water and spot the save point to heal and save.
Use Flying Bird inside the alcove to the save point’s right and reach the top. Eliminate the archers at the top with bow or Shuriken. From your starting point, run along the wall and then leap to the next wall using Unrivaled Soaring to reach a platform containing a chest. Turn around and run along the left wall to the corridor ahead. Defeat the demons that appear.
Follow the corridor to the edge. Spot the save point in the distance. Jump down to the ground below and battle another horde of demons. Continue down and finally reach a corpse. Turn around and eliminate the archers with your bow. Search the corpse and recover the Notebook: Invisible Path. Face the area where the archers stood and use Invisible Path to reach the far platform.
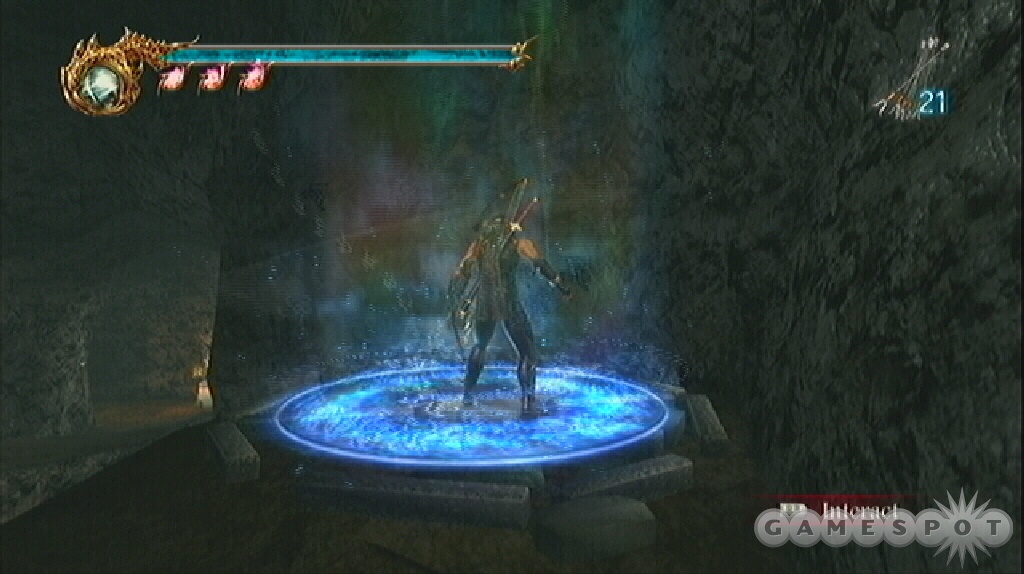
There’s a shop here. Start up the path on the right but back off when you trigger the enemies because there’s a small group of archers on the left side. Eliminate the ninjas and then the archers with your bow. Continue to the save point. If you grabbed the Rod of Trials from chapter two then run along the right wall on the opposite platform as the save point and reach the glowing stone disc.
Drop down into the subway tunnel. Make your way right toward the end of the tunnel. Quickly maneuver to the archers and eliminate them and then battle the ninjas. Clear the area then use the right side of the subway debris to reach the interior of the car (which you may have done to tackle the archers). You could also use the area below the car as cover. There’s also an archer that appears behind you.
Go through the car to the left and drop out the opposite side and battle a group of demons. This is a tough fight with a lot of demons in a tightly packed space. If you have upgraded Dragon Sword to level three, use Diving Flying Swallow repeatedly to defeat the group.
Boss Battle: Electrical Worm
The tunnel contains a gigantic electrical worm…or something. Whatever the thing is, it can be a major pain to beat. The tunnel length is your best ally. Your goal is to remain on the opposite side of the tunnel as the electrical worm as often as possible. If you try and remain in a corner, the worm will shock you as he goes by and you’ll be more vulnerable to his other attacks.
When the worm is on the opposite side, start charging the bow to its ultimate attack (level two charged shot) and when the worm turns to face you, fire the arrow into its face. As soon as it hits, quickly dash by the worm to the other side of the tunnel. Repeat the technique. Try to attack when the worm is at long-range so you have time to move to the other side as the worm wiggles in your direction.
If you need more arrows, search the end of the tunnels. When the worm moves through the tunnel, upside down, melee weapons can harm it if you want to attempt the attack.
The worm launches miniature versions, which track and attack your position. You can repel the assault with a burst of ninpo. If the small versions are just moving with the worm, you can use arrows to eliminate them. The essence dropped can help charge your bow faster. Ninpo can also be used to help dodge the worm’s electrical ball assault as you won’t suffer damage.
After taking some damage you will see the worm shake a bit and launch a blue face at you. It also tracks your position but it moves so slowly that you can easily dodge around it.
Upon suffering enough damage, the electrical worm gets turned over. Quickly maneuver to the worm and use your melee weapon to beat it to death.
A Captive Goddess
Start forward and spot the shop on the right side. Continue down the tunnel and defeat a couple ninja groups before reaching a large hole in the ground. Drop inside. Resume course down the tunnel. When you reach the subway car on the left side, expect more ninjas to appear. Eliminate them then search behind the subway car on the left to find a crate.
A large fight against demons and winged demons occurs at the end of the tunnel. Use Diving Flying Swallow if you have it to attack the horde. Target the winged demons quickly to avoid getting crushed by the red fireballs. Go up the exit staircase on the left side and find the save point.
Resume course up the staircase and battle the ninjas and magic ninjas at the top. Use the turnstile to the left of the entrance stairs to find a crate containing an item. Exit to the left and open the door into a small alcove containing another crate. Go through the exit turnstile and grab arrows from the corpse. Go around to the left and spot a crate at the end of the tunnel. Enemies attack on the way back to the stairs. Shoot the barrel with an arrow to cause an explosion.
Start up the stairs but it’s blocked. Shoot a charged arrow into the barrels to destroy the gate. Continue up the stairs and battle a couple more ninja. Exit onto the street and trigger a pack of ninja dogs. Lure the dogs back into the staircase so you’re aren’t so easily surrounded.
Exit onto the street and go right until a group of magic ninjas attack. Follow the alley to the right side of the Coin Laundry building. Defeat the ninjas. Turn left down the next alley and look to the right to spot a corpse. Grab the item from the corpse. Return to the alley.
Jump down and exit the alley. You’re back onto the main street. There’s a save point up to the left next to a ladder. Search the street across from the save point. You’ll trigger a squad of ninjas. Blow up the barrels at the end of the street to expose a crate. Return to the save point.
Climb the ladder next to the save point. At the top, search a corpse for a Jewel of the Demon Seal. Find an opening on the right side and go to the adjacent street. A group of demons and flying demons attacks. Use your Incendiary Shuriken to eliminate the flying demons while using combos against the other demons. There’s a corpse back by the railing entrance to replenish your Shuriken.
Go to the end of the street and open a crate containing an item. Find the opening on the right side; there’s a crystal skull on the opposite platform. Jump to the skull. Or you can also drop down, go to the base of the structure and use the Flying Bird technique to reach the very top. Climb down the ladder and drop next to the skull.
Drop to the street and follow it to a crate on the left side; open it for a Life of the Gods item. There’s also a shop here. Retrace your steps, which triggers a horde of demons. Go to the base of the building on the right and use the Flying Bird technique to reach the top.
Head down the street and pummel a horde of demons and winged demons. Examine the corpse at the end for arrows then climb the ladder to its left. Leap over to the save point to save and heal.
Proceed to the left and trigger flying demons. Eliminate them with Incendiary Shuriken. Open the crate at the end of the path for an item. Head back the other way and trigger more flying demons; eliminate them with Incendiary Shuriken then save your game one more time before reaching the end of the bridge.
Boss Battle: Giant Troll
Attack the Giant Troll’s hands or, ideally, feet. Avoid remaining at long-range or you’ll suffer from the troll’s breath attack or projectile attack (the troll can pick up and throw a car!). Use Reverse Wind to maneuver to the troll’s feet and perform your combos and dodge away as necessary to avoid getting grabbed (which can happen if you’re near the hands). The troll is rather slow so it’s possible to charge an ultimate strike to inflict greater damage. Just remain at the feet or behind him.
After the cut scene, demons and flying demons attack. Clear the flying demons with Incendiary Shuriken then tackle the other demons with your melee attacks. Go through the doorway and replenish arrows if needed. Defeat the group of ninjas and enter the next room. Approach the save point. Destroy the glass with an attack and heal and save your game.
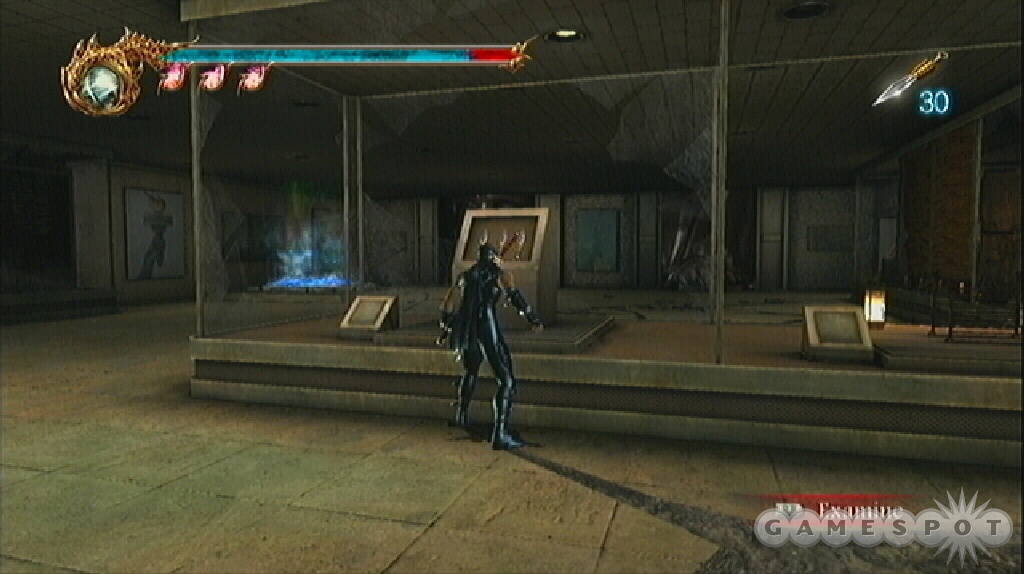
Cross the roof and trigger the ninjas and magic ninjas. Eliminate them. Search the cases for more items. You can replenish your Incendiary Shuriken, pick up The Vigoor Mythology, and acquire the Dragon’s Claw and Tiger’s Fang weapons. There’s a Test of Valor in the corner if you recovered the Rod of Trials.
Exit through the door in the back corner. Eliminate the ninjas and archers blocking the narrow hallway. Head into the larger room and trigger a horde of ninja and magic ninja. Target the magic users first! Don’t hesitate to use Incendiary Shuriken because you can return and resupply in the previous room.
Ascend the stairs and use Unrivaled Soaring to reach the far platform; there’s a corpse here containing an item. Go left from the stairs and run along the right wall to clear the gap. Defeat the demon that appears. Drop down into the next area, which triggers another demon horde. Find a crate on the right side and recover an item.
Cross to the opposite side and ascend the stairs. At the top, battle demons and flying demons. Use the Incendiary Shuriken against the flying demons. You can also retreat back to the previous area and battle the demons here, as the flying demons don’t seem to maneuver down to attack from this position. Continue up the stairs to the base of the statue. Battle another horde of demons as you move around the left side of the statue. Finish off any remaining flying demons and demons and enter the passage on the left side of the statue.
Crush the ninjas and archers here. Search the opposite alcove for a chest containing a Lives of the Thousand Gods. Ascend the staircase and reach a save point. Jump left from the save point to the rafters—look down and to the right to spot a crystal skull. Jump over to it and grab your ninth crystal skull. Drop down to the bottom floor.
Go to the room’s center and use the Flying Bird technique to ascend the center chamber. Defeat the ninja at the top, including an archer on the staircase. Leap from the railing on the staircase to the rafters. Jump over to the crate and recover an item.
Ascend the stairs to the top. Walk out onto the balcony to trigger the flying demons. Remain inside and use the bow to target the flying demons through the doorway. Eliminate as many as you can before you have to get onto the balcony to finish off the rest. Search the crate on the right side for a Life of the Gods. Resume up the stairs and use the shop at the top. Find a dead body to the shop’s left and grab an item.
Start up the steps near the dead body. When you can’t go up any more, look left for the gap. Use the Flying Bird technique to jump through the gap and up to the top. Defeat a group of ninja. Search a dead body for The Four Greater Fiends, Part 2. Go up the stairs to trigger the cut scene.
Boss Battle: Alexei
Alexei has a dangerous mix of ranged attacks and grab attacks—so he’s formidable at long and close range! You have nothing to counter the ranged attacks—don’t bother with the bow—so you must get close. But going "toe-to-toe" can leave you repeatedly thrown.
Be prepared to dodge! Watch Alexei’s moves. When he jumps up off the ground, immediately dodge and avoid his incoming grab maneuver. After the dodge, attack with a combination. Don’t get greedy, though. It’s often better to get in a few hits then dodge away to avoid a counter. Flying Swallow and its upgrades can be effective because you remain elusive and avoid Alexei’s close-range grabs.
The Aqua Capital
Move forward and battle ninja, archers, and magic ninja. Target the casters first. Look on the dock on the right side for a shop then continue up the staircase to the bridge. As you face the bridge, a gang of werewolves attacks. Eliminate the foes then go along the path to the left of the bridge. Follow it around to a dead body and examine it: recover the Kusari-gama weapon.
Descend more stairs to the dock. Spot the boat across the water. Run across the water and grab the crystal skull off of the boat. Return across the water. Go to the right side of the dock and find a crate containing essence. Retrace your steps back to the bridge. Cross the bridge and battle werewolves on the opposite side. Bust the crates and barrels in the market for essence. The Lunar Staff, especially upgraded to maximum, is an effective weapon against the powerful werewolves.
At the end of the market, turn left and heal and save at the save point. Go through the door to the save point’s left side. Lure the werewolves into the tight hall and obliterate them with an ultimate. Back outside, grab the crystal skull off of the dining table on the right side.
Cross the bridge on the right to trigger more werewolves. Continue to the right across another bridge and find the narrow alley on the back left corner. Use Flying Bird to reach the top. Battle a couple ninja here and search the corpse for a Talisman of Rebirth. Drop down and search the left side of this alley to find a crate.
Exit this area across the bridge and continue straight to trigger another werewolf battle. Continue forward across the street and over another bridge into a small alley. There’s a dead body here; search it and recover a Spirit of the Devils. Return across the bridge and go right. Snake demons emerge from the fountain. Eliminate them. Jump into the water and dive down to the crate. Open it and recover the Gatling Spear Gun.
Equip the new underwater weapon. Swim through the tunnel to the crate’s left side. Turn left in the new area and destroy the mines using the Gatling Spear Gun. Swim past where the mines were and stay to the left side. Run across the top of the water; it’s easier than swimming and you can avoid the water demons attacking from underneath the water. Get onto the boat and use melee attacks to clear the groups of snake demons.
Return to the main route and run on top of the water under the bridge. Follow the path all the way around to the left side. If there are any demons left, just let them follow you to the destination. Jump onto the boat and eliminate any remaining enemies. Hop through the window and use the save point.
Climb the stairs and open the door. Battle a group of demons and winged demons. Lure them through the door and battle in the tighter room to avoid aerial projectiles from the winged foes. If you have any arrows or Incendiary Shuriken, use them through the door. Go down the stairs to the right and find a Muramusa shop. Enter the building nearby; it’s on the right side of the road if you’re facing the shop.
Open the chest on the right side and recover the Bridge Gate Key. Interact with the desk and recover Hinomaru’s Notebook. Exit and go to the opposite side of the street to the gate. Approach the gate and use item to automatically use the Bridge Gate Key.
Cross the bridge to trigger werewolves. This is a tough fight against strong enemies. You can lure the werewolves back into the building with the save point. The werewolves don’t navigate the stairs well giving you a chance to eliminate with a bow. You could also lure them back to the Bridge Gate Key room. Once you’ve lured the enemies inside use ninpo, particularly The Art of Blades, when surrounded.
Go through the open gate and across the bridge. Search the left alcove for arrows. Start down the right path and battle the werewolves that surround you. Continue to the chest and open it to recover an item. Turn right and spot the glowing lights. Shoot each light with an arrow to lower the bridge.
Leap onto the crates on the left and jump to the pole. Shimmy across to the other side. Search the chest for a Life of the Gods. Jump into the water and go toward the large body. Snake demons approach. Stay at the top of the water and use the staff and quick attacks when the demons are around you.
Swim or walk on the water toward the two waterwheels. Destroy the mines between the water wheels using the Gatling Spear Gun. Swim or run between the wheels and to the left platform.
Jump to the spokes of the closest wheel. Ride to the top then swing and leap off onto the upper platform. Leap to the gear cog and go into the room. Jump to the left platform and jump to the rotating bar in the middle of the room. Shimmy to the other side and drop to the crate. Open it and grab the Lives of a Thousand Gods. If you fall at any point, use the ladder to get back up.
Exit the room outside and approach the steps to trigger werewolves. Battle the werewolves and continue to the save point at the top of the steps. Heal and save your game.
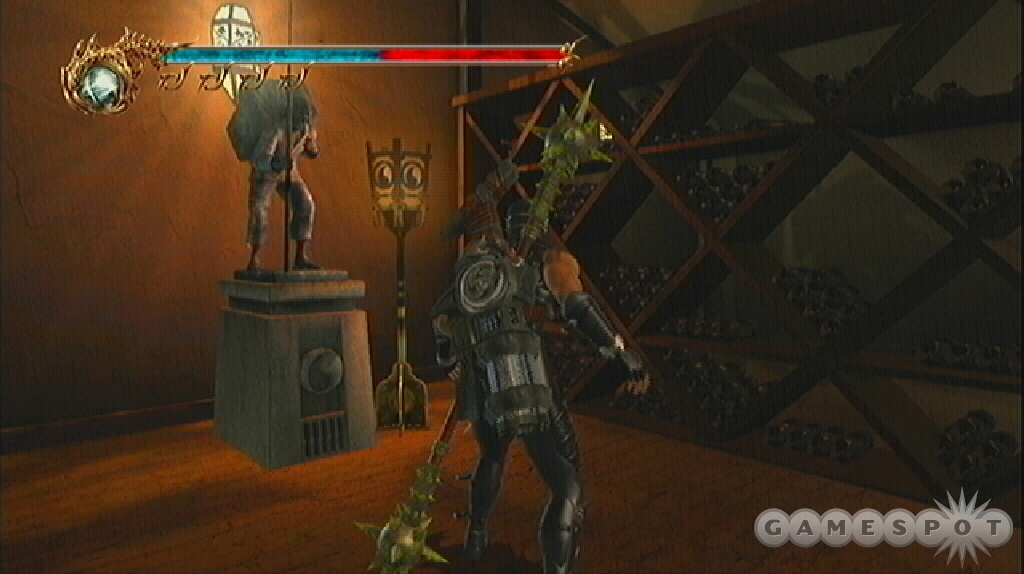
Go through the next entryway and battle the snake demon horde. Clearing the horde opens the next route. Walk to the intersection and defeat the demons. Explore the room on the right side of the intersection for a crate and item. Check the room on the left side for a Muramusa shop. Stock up on arrows for the boss battle ahead!
Continue forward into the room with giant barrels. Kill more demons here. Turn right at the end of the hall and continue straight. Move toward the gate and battle a small group of demons before turning right toward the staircase. Eliminate another group at the top. Search the left side of the next room for a chest containing the Copper Key. Retrace your steps to the gate and open it. Examine the corpse inside for The Art of the Flame Phoenix ninpo.
Go down the hall and take the first right. Battle a small group of demons. In the top room, check the chest on the left for an item. Stand on the circular flooring on the back of the room—interact to receive a clue. Jump up and perform an attack to break the floor and drop to the water below. Take the opportunity to save your game at the save point.
Proceed down the hall past the save point and engage snake and winged demons—retreat and battle on the valor platform to avoid the winged demons. Continue into the next chamber. Jump into the middle of the water and find the hole. Swim down and cross the long body of water to the stairs at the far end. Climb the stairs and open the chest. Repel the ghostly fish that attack. This is a good time to gain some health as the fish aren’t too difficult to kill and tend to drop blue essence.
Turn around and face the water. Before venturing into the structure on the right side, run along the water to the left side of the structure. There’s a chest on the left side; it’s resting on a small formation. Open it and gain the Skull Key. This will trigger the boss battle.
Boss Battle: White Dragon
A full complement of arrows makes this boss battle fairly easy. Just remain on the initial platform and shoot the white dragon’s head with fully charged arrows. You can basically withstand most of the white dragon’s bombardment but if you’re under assault, launching a ninpo will make you invulnerable. Use jump dodging to the side to help avoid attacks. It doesn’t take many charged arrows to the head to take the dragon down and you should be able to remain on the platform for the entire duration of the fight.
Should you get in the water or not have enough arrows, run on top of the water, jump and attack the dragon and retreat and repeat. The staff is a good weapon here. There are ghostly fish around; repel them with the staff and collect the essence to regain health.
Once the dragon has suffered about three-quarters damage, it drops its head. Jump out toward the dragon and finish it off with obliteration or just a series of combinations.
The Lycanthropes’ Castle
Turn left and run on water over to the circular column formation. Get inside and swim to the bottom to find a crate containing an item. Turn right and run along the water to another circular column formation. Do the same thing: get inside and swim to the bottom to find a crate. Turn right and swim to the end of the area to find another crate at the bottom. This one contains a Life of the Gods.
Return to the start location. Swim forward and to the right. Spot the platform between the columns. Stand on it and use Flying Bird to reach the top.
Cross the roof toward the left side so you’re just over the shop’s right side. Drop into a small hole and find a chest. Jump over to the shop and replenish supplies as needed.
Locate the gap to the shop’s right and leap to the columns. Cross the rooftop to the left and jump over the next set of column tops to the far ledge. Go to the left and open a crate to recover an item. Head the other way, run along the wall over the gap, and defeat a group of snake demons. Search the left side for a crate.
Leap over to the top of the next structure. Defeat the ghostly fish. Jump over to the top of the columns. Get over to the crate on the left side for an item. Continue across to the far building—there’s a save point inside to heal and save.
Go through the narrow tunnel and defeat a couple of water demon groups. Search the dead body on the right side for a Jewel of the Demon Seal. Continue to the locked door. You’ll use the Skull Key.
Go over the giant skull mound to trigger the scorpion attack. Individually these scorpions aren’t too tough but they’re dangerous in huge numbers—which is exactly what’s happening now. Choose a fast weapon like the Kusari-gama and use hit and run techniques to defeat them. Don’t get surrounded or stick close to the scorpions for long. Clear out all the scorpions to trigger a boss fight.
Boss Battle: Skeleton Monster
Quickly dodge to get to the skeleton monster’s feet and perform combination attacks. Continue to strike the leg until the monster falls down. Now attack the creature’s chest! The thing in the monster’s chest looks like a vulnerable point. As the monster gets back up, quickly dodge away to avoid a likely grab attack. The skeleton monster also likes to chow down on bones. Dodge the creature’s attacks until it goes to eat then quickly dodge to the feet and start the attack. Once it’s knocked down, go for the chest. It also seems as if the talons inflict heavy damage against the monster. If you’re having trouble against the skeleton monster, switch weapons to the talons and give them a shot.
Defeat the beast, which opens the new route out of the chamber. Perform the Flying Bird technique to get up. Follow the ledge at the top and wall run across the gap. Defeat some snake demons and search the crate for an item. Continue along the ledge and wall run over the gap. Defeat more snake demons.
Enter the narrow tunnel and eliminate a lot of scorpions. Use hit and run techniques (can even use plain ole Shuriken, though it takes awhile). Engage snake demons at the end and search a crate on the left for an item.
Continue up and find more scorpions. When you reach the gap, jump to the doorway ahead. Battle more scorpions in the tight tunnel using a fast weapon. At the gap, kill any scorpions that cross via the ceiling and use standard Shuriken to eliminate any remaining on the other side.
Cross using a wall run on the right wall. More scorpions crowd the tunnel. Continue to clear them and reach the end. You come to a dead end. You must use Flying Bird to reach the top. Leap onto the wall and ascend to the top. Save your game up ahead.
Head up the staircase and find a shop on the left side. Climb the ladder on the nearby tower and open a crate at the top to recover an item. Return to the staircase, which triggers a cut scene. Defeat a couple werewolves down the steps then go through the open door next to the save point.
Proceed down the stairs and face off against a couple more werewolves. Get to the bottom. Open the next doorway and battle a larger group of werewolves. In the next room, go up the stairs on the right side. Battle a squad of snake demons. As you continue up the stairs, recover more arrows from the corpse near the cannons. Shoot the flying demons that attack. Replenish your arrow supply.
Approach this castle entrance. Go up the stairs toward the main entrance and battle snake demons. Continue around the far right side to find a save point; a group of werewolves guard the area. Look on this right side at the bottom of the stairs to find another Test of Valor. In the opposite corner of the save point (other side of the entrance) there’s a chest.
Climb the ladder next to the save point. Grab arrows from the dead body. In the back corner, use Flying Bird to get higher. Ready the bow at the top and defeat the flying demons. You can drop down to the previous floor where the arrows are and battle there so you aren’t exposed to every flying demon at once.
Leap up to the rooftop on the right and battle a couple groups of werewolves. Keep moving until you trigger a brief cut scene. Move along the ledge to the flagpoles. Jump to the middle pole and shimmy out to its middle. Face the circular window. Swing and jump twice to break into the window. Defeat the demons inside. Search the chest at the back for the Bronze Key.
Exit via the room’s opposite door and defeat some werewolves. Check the corpse outside for Inukoma’s notebook. Open the door ahead with the key and drop into the storage room. Crush the werewolves inside. Exit to the left. Bust the barrels in the back left corner to reveal a chest containing a Life of the Gods. Go through the door and turn right to find a save point.
Open the next door and prepare for battle—a large group of werewolves approach from the far staircase. Save your game again after the battle. Go up the main staircase and search the left end for a chest containing an item. Back on the first floor, go through the door closest to the entrance. Kill the werewolves in the dining room. Exit via the door on the back right corner and battle another werewolf group. Cross the sitting room to the next door; open it and engage a group of demons. It may be wiser to lure them back into the dining hall to split the group up.
In the room lined with statues, find the glowing object on the right side and interact. Snag the Cast Iron Key. Exit through the door. Ascend the main staircase and go right. Use the Cast Iron Key on the door. Ascend the stairs and save your game. Battle ninjas up the stairs and in the next library room—once inside, go to the far left corner and attack the bookcases on the left side to reveal the fifteenth crystal skull.
Search the dead body in the room and recover The Four Greater Fiends, Part 3. Walk into the fireplace and use Flying Bird to reach the top. Engage the demons here and ninjas in the next room. Find the fireplace in the back left corner and use Flying Bird to get up. Save your game.
Swing across the flagpoles to the balcony ahead. Continue across and left. Drop down below the flagpoles and climb the ladder. Open the chests to the right of the shop; gain items or get attacked by ghost fish. Use the shop.
Return across the flagpoles and go to the staircase on the right. Go to the door and try to open it—it’s locked. Battle the werewolves that appear behind you. Defeat them all then interact with the glowing object left behind to gain the Golden Key. Use it to open the door and trigger a cut scene.
Werewolves surround you. Defeat them. Interact with the throne to open a passage. Drop inside and crush the snake demons that approach. Search the chest on the left for an item. Move down the tunnel and find the save point on the right.
Exit the door at the end of the tunnel. Move toward the right side to trigger demons. Lure them back into the tunnel so you can save after the battle. Resume course right and down steps and face more snake demons. Gather arrows at the dead body and reach the bridge. You’re trapped with flying demons overhead. Jump and shoot arrows; keep moving to avoid fireballs. Get more arrows from the corpse. Open the far door into the arena.
Boss Battle: Volf
If Volf charges immediately, quickly dash to the right and avoid the blow. Volf wields a gigantic scythe—looks like a great weapon, wouldn’t it be great if you could get it? You’ll have to defeat Volf first. After the initial dodge, the remainder of the battle plays out in similar fashion. Dodge Volf’s charges and follow with strong attack combinations.
If you are using the dragon sword and have it maximized, use Divine Flying Swallow to remain elusive but still connect with attacks. You may spot Volf get stunned and drop to the ground; that’s an invitation to follow up with more combinations with your preferred weapon. Otherwise, dodge before Volf counters.
After the battle you automatically recover the Eclipse Scythe and must face another dangers. Werewolves watching the carnage from the stands decide to avenge Volf—they charge from the stands and attack. If you’re going for one of the weapon achievements (beat the game using only one weapon type) then switch back to that weapon before you kill a werewolf!
The remainder of this battle is against a gang of werewolves; you’ve fought them before but now in heavier numbers. Don’t hesitate to utilize ninpo to help clear the horde. Pound the werewolves with the scythe or switch to one of the weapons you have upgraded to maximum.
The Flying Fortress Daedalus
Equip your bow and use charged arrows to destroy turrets: two ahead, two to the left, and two to the right (watch for respawn). Take cover behind the shields but don’t expect them to last long. You can fire through the narrow holes. Grab more arrows from the crate on the right side. Walk toward the hanger to trigger a cut scene.
A squad of mechs appears. You can block their gunfire but its best to get to them quickly and use the dragon sword’s Divine Swallow to keep moving and attacking. Don’t keep still. Move and attack and get away from the mech once it’s destroyed—it explodes causing damage. You can also block to avoid damage. Gather any dropped blue essence for health. Use the shop in the back of the hanger. Exit through the door.
Go to the right and eliminate the ninjas. Search the end of the hall for a chest. Go to the opposite side of this chamber to find a save point. Expect to engage some ninjas along the way.
Open the door near the save point and engage a group of ninjas. Look in the left corner of the new room for a chest containing an item; there’s another on the right side. Open the door on the right and battle ninjas.
Follow the catwalk all the way around to the far left end. There’s a chest here containing a Life of the Gods. Go through the door on the right of the catwalk. There’s a group of mechs here. Lure them to the doorway and use hit and run techniques or ninpo to crush them. You could also lure them outside then enter the room and avoid them. Enter the chamber and use the console in the back right corner to activate the elevator.
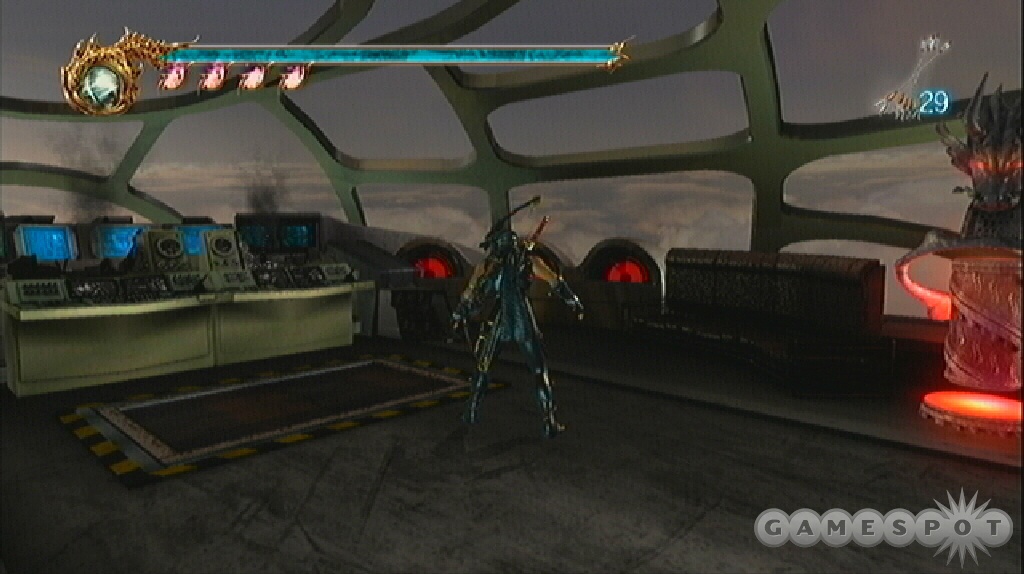
Battle a group of ninjas and another melee mech at the bottom. Use a lot of Divine Swallow to keep on the move or a couple ninpo attacks when you’re surrounded. Cross the hanger to the far door and enter the control room. Defeat the ninjas. Break apart the console on the left side to reveal a crystal skull. Save your game and heal. Attack the center console to help bring down the ship.
Return to the previous room and find two melee mechs here. Defeat the mechs and exit the far door. Battle a group of ninjas. Search the left corner for a chest containing a Life of the Gods. Find a door on the opposite side of the room. Defeat a couple ninjas inside and move toward the red laser field ahead.
Go through the last door on the right. Clear the tunnel of ninjas and enter the far door. Battle more ninjas. Search the chests on the left for an item and arrows. Destroy all of the consoles. Use your bow to destroy the white generators surrounding the structure inside the room. Replenish arrows as needed. The door opens when you’re through. Return through the tunnel and eliminate a couple rocket launcher-wielding ninjas. Go past the now-lowered red laser field.
Go through the door ahead. Follow it around the left corner defeating more ninjas and rocket launcher ninjas. Enter the door on the left side before the first corner and find a save point and shop.
Return to the tunnel and go to its end and the last door on the left. Search a corpse across the room for Yogenta’s Notebook. Enter the elevator and defeat ninjas at the bottom. Obliterate the consoles then ascend the ladder. Open a couple crates at the top to find a Lives of the Thousand Gods. Enter the next room and clear out the ninjas. Save your game in the back corner.
There are two doors in this room: one contains a chest with the Art of the Piercing Void ninpo and the other contains a Test of Valor.
Use the console in the room to open a passage. Drop down. Open the crate for arrows. Examine the dead bodies in the room to recover Incendiary Shuriken as well as a new weapon, the Tonfa. Search the left side of the room for another item crate.
Open the door and defeat the ninjas. Start down the hall but look to the right and find the seventeenth crystal skull underneath some debris. Defeat the two melee mechs (lure them back into the tighter hallway) then use the shop outside. Activate the console to lower the lift.
Defeat a trio of mechs at the bottom. There’s a crate in the corner that replenishes arrows. Open the unlocked door. Use your bow to eliminate the turrets (stick close to the side of the doorway for cover). Grab more arrows. Descend the ladder onto the wing. Cross to the opposite side, up the ladder, and into the door. Save your game.
Go into the next room; search the corpse on the left for a Devil Way Mushroom. Eliminate the ninjas in the hall, including a couple rocket launcher ninjas at the far end. Enter the door back into familiar territory. Eliminate all ninjas inside. Go through the hall on the right side to trigger a cut scene.
Defeat ninjas in the next area. Search a crate on the left for an item. Defeat more enemies before triggering another cut scene as you move to the right side of the end room. Traverse the long hall back to the previous room; combat the ninjas inside the room before exiting to the right. Battle through the next hall and at the end search the left side for a crate.
Use the shop in the next area. Open the door on the right and use the bow to eliminate the turrets. Cross the wing and heal and save your game at the save point ahead. Open the door to trigger the boss battle.
Boss Battle: Genshin
This second battle against Genshin is basically the same as the first—at least fighting Genshin. But he’s brought some allies with him. It’s those incendiary tossing ninjas. You can use ninpo to remove the ninjas and allow you to concentrate on the battle against Genshin.
This battle is about brute force. You won’t need to use ninpo against Genshin himself but save it for when you’re having problems against the ninja allies. Don’t bother with aerial attacks (including Flying Swallow and its upgrades) against Genshin because he’ll immediately counter and knock you back down to the ground.
When Genshin attacks, dodge with Reverse Wind and follow up with your own combination. Also, if you’re blocking Genshin’s attacks and he breaks the block, immediately dodge and follow with a combination. Finishing one of your combinations isn’t always successful so it’s more effective to get in a couple hits then dodge out of the way and start over.
Defeating Genshin triggers a cut scene and immediately moves into the next boss battle. You may have heard the announcements while on the flying fortress. Prepare for battle against the armadillo!
Boss Battle: Armadillo
This is an armored armadillo so don’t waste attacks on its back—focus your attack on the armadillo’s head! Dodge the initial fire breathing attack and hit the armadillo’s head with a fully charged arrow or an Incendiary Shuriken.
The armadillo has a couple long-range attacks, including a roll and a meteor shower. Avoid the roll by dodge or running to the side and staying out of the roll’s path. You can use dodges to avoid the bulk of the meteor attacks. When the armadillo rolls by, wait for it to turn around then attack its head again with a charged arrow or Incendiary Shuriken.
You can also attack the armadillo’s head with melee attacks but that means getting close and leaving yourself vulnerable to the armadillo’s bite grab. If you are near the head, consider the dragon sword’s upgraded Flying Swallow attack to remain as mobile as possible.
As the armadillo suffers major damage, it begins to glow and increases the ferocity of its attacks. Continue the same strategy—targeting the head—and wait until it falls to the ground. Finish off the armadillo with an attack to its head. As soon as the armadillo’s health has been extinguished, immediately hold down block. The armadillo has one more trick up its sleeve—it explodes upon death. If you fail to block you will be killed and must battle the armadillo again. Alternatively, you can activate ninpo and remain invulnerable during the explosion.
Submit, or Die!
Walk forward and use the shop. A crate on the left side contains arrows. The path ahead contains rocket launcher-wielding ninjas. Except this time they fire about eight rockets at a time! Use your bow to engage from long-range. Eliminate all of the ninjas and head around the left corner.
There are more rocket launcher ninjas at the end of the street. Be patient with the bow and eliminate them from long-range. Use the barrels but save some if you can for a tougher battle ahead. Retreat to the start location and replenish your arrows at the crate. You can also lure the ninjas to this location so you’re closer to the arrows and cover supplied by the right side.
Advance forward and trigger the arrival of a gang of melee mechs. Retreat and try to separate the group to make them easier to battle. It’s much easier to just deal with one. Plus you may regenerate health before having to deal with them. Furthermore, there are additional rocket launcher ninjas at the back end that will fire down the street making the battle tougher.
If surrounded by the melee mechs, use ninpo to take them down. Don’t forget to jump away once the melee mech dies to avoid the explosive damage. A few more arrive after you’ve eliminated some of them; expect a long drawn out battle.
Go to the end of the street and turn right; there’s a chest on the right corner that contains an item. Additional rocket launcher ninjas spawn down the street. Take cover at the corner and use your bow to eliminate them. There are explosive barrels to aid in the task. Return to the arrow crate to replenish supplies as needed. Go into the structure on the right to find a much needed save point.
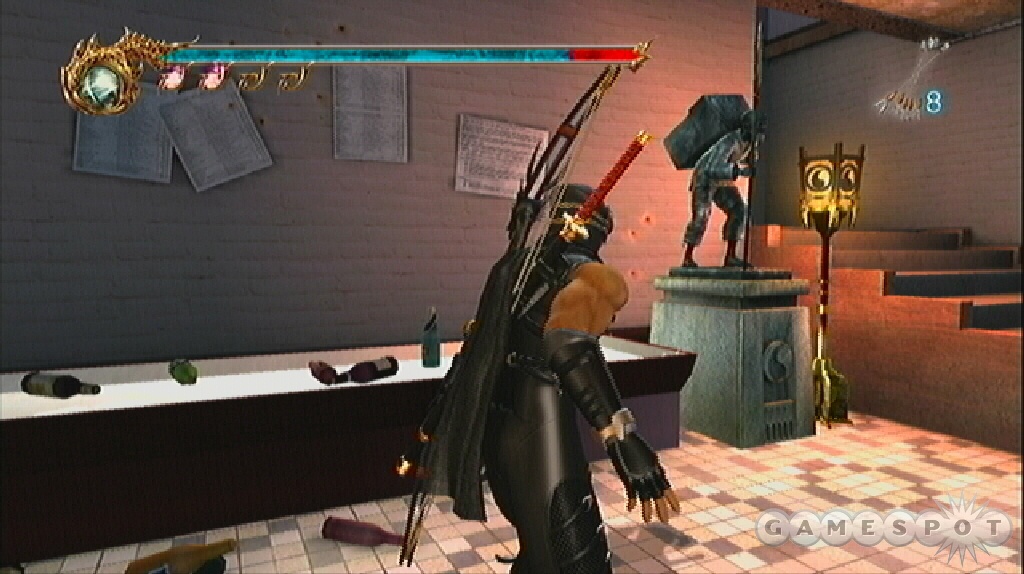
Exit through the other passage and trigger a pack of dogs. Clear them out. Search the left corner for an item crate. Exit through the doorway ahead. A squad of ninjas appears—you can keep moving and run inside a building on the left side and take cover in there. To get to the upper floor use the stairs inside the building or there’s a place to Flying Bird near the entrance. It’s in the left corner close to the entrance. Attack the rocker launcher ninjas camped on the balcony—you can use a bow from inside the building and attack through the broken glass. At the bottom of the building, there’s a shop.
Exit the area and watch the cut scene revealing the footsteps in the snow. Cross the snow on the footsteps to avoid mines (don’t step on the circular objects on the street either!). Collect arrows from the crate. The windows in the building across the street feature rocket launcher ninjas. Stick close to the left wall behind the arrow crate and fire from there. These ninjas respawn so check a window even after you’ve cleared it. You can also shoot the rockets so you may need to shoot a couple times to eliminate one of the ninjas.
Jump over the sandbags and cross the snow at the footprints. Check the corpse for a Devil Way Mushroom. Around the next right corner shoot a couple turrets with charged arrows. Jump to the crystal skull in the corner to get it. Don’t walk through the snow or suffer mine explosions. Check the turret platform on the right side for a dead body holding a Devil Way Mushroom.
Open the gate and save your game at the save point ahead. Enter the door and battle the incendiary ninja inside. Spam Divine Swallow with the dragon sword to eliminate them. Exit through a small door to the left of the entrance (facing the entrance). Ascend the staircase and use wall runs to cover the gaps.
Leap to the bar on the left. Go left and swing to a dead body with a Life of the Gods. Return to the pole and cross to the opposite side (right from where you started). Hop through a window onto a balcony. Cross into the adjacent section and search a corpse for the Bell Key. Return to the previous room and use it on the door.
Exit at the bottom. Open the door on the right. Hop through. Move through the narrow tunnel and slice and dice the bats. Exit at the far end and go all the way down the left tunnel to find a crate on the right side. Return to the previous tunnel and approach the train, which triggers the arrival of a ninja horde. Defeat them, which unlocks the train door. Open it and search the crate for an item. Go down the hall and search a room on the left for the twentieth crystal skull. Go into the back of this room and examine the corpse to find the Dignitary’s ID Card.
Leave the train and go right. Ascend the stairs and open the door at the top, which uses the ID Card. Save your game at the save point ahead. Go up the stairs to the top. Open the door and trigger a battle with a Giant Troll again. This time some melee mechs join the party.
Employ a similar strategy as before. Attack the Giant Troll’s hands or, ideally, feet. Avoid remaining at long-range or you’ll suffer from the troll’s breath attack. Use Reverse Wind to maneuver to the troll’s feet and perform your combos and dodge away as necessary to avoid getting grabbed (which can happen if you’re near the hands). The troll is rather slow so it’s possible to charge an ultimate strike to inflict greater damage. Just remain at the feet or behind him. The Art of the Inferno ninpo works against the Giant Troll.
The melee mech robots are certainly a problem. Utilize a maximum Art of the Wind Blades ninpo to damage the mechs and leave them vulnerable to an obliteration. You can also just focus your attacks on the Troll and finish off the mechs after the fight against the big beast. Note that the mechs explode upon death so try to jump away to avoid damage.
Go through the opening and into the hole. Take the book on the ground: it’s The Rule of the King of Darkness. Eliminate the ninjas in the tunnel. Look in a cell to find a corpse with Incendiary Shuriken. Another cell further down the hall contains a corpse with a Life of the Gods. Open the cell at the end of the tunnel; it’s on the right side. Toss an Incendiary Shuriken at the glowing light on the wall to break it apart. Jump through the hole.
Drop toward the water to trigger the demons. Stay on the ledge and engage. Go over to the left and find a crate next to the gate. Open it and recover a Lives of a Thousand Gods. Head down the tunnel and defeat some ghost fish. Ascend the stairs at the end and proceed into the tunnel. Use Flying Bird to reach the top and toss an Incendiary Shuriken at the crack.
Ascend the staircase and exit onto the balcony. Go through the adjacent hall to trigger an incendiary ninja horde. Continue through the hall and you’ll reach the opposite side of the walkway (the route was blocked). There’s a shop here and a ladder to climb. You can exit the door on the first floor to discover a Test of Valor.
Climb the ladder next to the shop. At the top, go over to the side and leap onto the lowest rotating gear. Battle a few ninjas that arrive. Leap onto the next lowest gear and a third gear, which triggers more enemies. Jump onto the rotating gear ahead and ride it up to the poles. Jump to the pole and swing to the next set of gears.
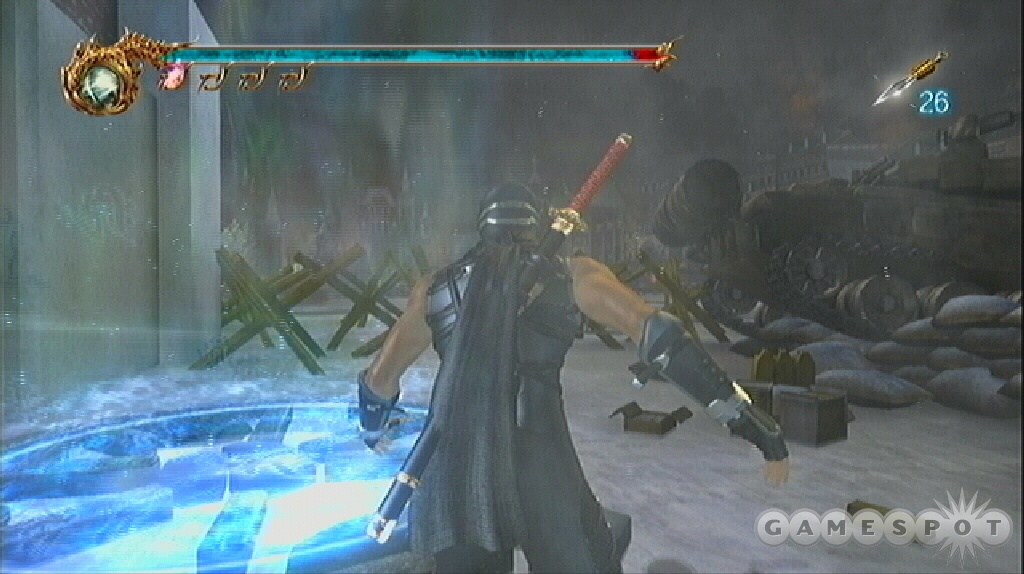
Hop over to the rotating gear and trigger enemies. Defeat them then jump to the next rotating gear. Be careful because if you fall in between the two gears you’ll be crushed. It’s possible to jump out while you’re being smashed, though. Cross to the opposite gear.
Leap to the spokes and ride the wheel to the top. Swing and jump to the crystal skull on the gear ahead of you. Jump to the platform on the left and search a dead body for Izo’s Notebook; there’s a second book adjacent to the corpse to find Koshimaru’s Notebook. Jump to the next couple set of gears. Hop to the rotating pole and ride it to the opposite side. Hop to the gear and then to the next horizontal gear. Open the crate for an item.
Continue to the next gear, which has ninjas. Head up a few more gears and across another set of dangerous vertical gears (don’t get smashed in the middle) and jump over to the save point. Go up the ramp to the top of this clocktower and trigger the boss battle cut scene.
Boss Battle: Zedonius
Don’t allow Zedonius to employ his long-range attacks. If you are attacked from the fireballs, use Reverse Wind and dodge the assault quickly. Instead get close to Zedonius and equip the fully upgraded Eclipse Scythe. Watch for Zedonius to use his stomp—listen for his yell—and perform a dodge before he reaches the ground. Follow up the dodge with a combination attack using the scythe.
Zedonius has a demon escort, which he summons a few moments into the battle. It’s certainly possible to eliminate Zedonius before he’s able to get the demons into battle.
Heart of Darkness
Make your way through the dark path and battle the ninjas. When you reach the clearing, take your bow and eliminate the rocket launcher ninja on the right side. He’s adjacent to the shop. Carefully get into the water and use the Gatling Spear Gun to eliminate all of the mines. Wait for them to respawn and continue to shoot them until they stop appearing. Exit the water and access the shop. Buy items as needed—especially Incendiary Shuriken for use in the next section.
Carefully move along the water left of the shop. Stop and destroy mines and continue. They will respawn so keep shooting until they’re gone. Find a path in the back corner and see it winds through to a structure at the end. Kill the rocket launcher ninja next to the save point.
Go through the building and recover arrows from the corpse. There rocket launcher ninjas across the water—kill them and others spawn. Move forward and they fire; dodge the rockets and use charged arrows to eliminate the threat. Defeating the first group triggers a second. If you don’t want to battle from long-range—it’s very difficult because there is little cover against the continuous bombardment—then cross the water toward the boat dock on the left side and get onto the village platforms from there.
But here’s a tip to clear this part. If you have Incendiary Shuriken, just run along the water in front of the village and go back and forth. You will be fast enough to avoid rockets. As you get close to an enemy, just toss an Incendiary Shuriken. The explosion disables the rocket launcher. Keep doing it until all of the spawns are harmed then go up into the village and mop up. If you suffer damage during these maneuvers, run back to the start location and you should receive health regeneration.
Leap onto the platforms behind the dock and find a chest containing an item as well as a nearby corpse with another item. Continue through the village. To get there, run along the left wall to cover the gap. Search a chest on the right side for essence. Move left and down the steps clearing out any rocket launcher ninjas here. Search a chest for arrows and another out on the dock for a Devil Way Mushroom. Another building to the left contains a chest with health; search behind up some stairs for a chest with a Life of the Gods.
Killing all of the ninjas opens the gate at the far end of the water—and here comes the gigantic mechanized hostiles. Defeat them with ninpo or use the Kusari-gama’s strong attack up close. Jump away when the hostile is defeated to avoid the explosion damage. Eliminate all of them and the gate lowers completely.
Return to the boat dock and go left to a gate. Open the gate and walk to a chest. Recover the Jade Mask. Return to the lake and defeat more water robots. Cross through the gate that opened when you killed the first group. Examine the yellow circle in the back and you will use the Jade Mask.
Dive down and swim through the newly opened passage. Exit and search the left side for a chest. Jump and swing from branch to branch over the water. Defeat some ninjas in the tunnel and find the rope overhead. Start across but when the rocket launcher ninjas appear either drop or return and use Incendiary Shuriken or arrows to eliminate. If you drop in the water, use the Gatling Spear Gun to clear the mines. After falling, head back to the area start location.
On the other side, crush a group of ninjas before saving at the save point. There’s an alcove to the left just before the save point; a hidden chest in here contains an item. Defeat any remaining ninjas and save before moving into the next area.
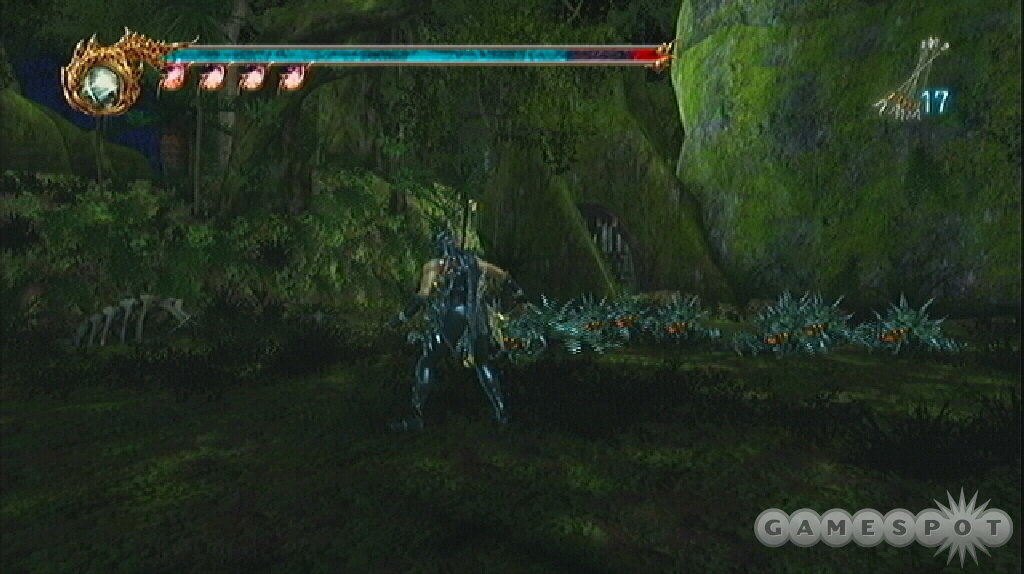
This looks like a battle area! Go to the middle and trigger a horde of spiked creatures. They’re small but like the scorpions from earlier, these creatures are deadly in groups. Keep them away using the Kusari-gama. Avoid getting too close or one may jump and latch on. Hit and run techniques to stay away from the groups; if there’s a bunch of essence around, use an ultimate attack. After the fight, use a charged attack to break the boulder.
Proceed through the tunnel and battle what seems like an endless stream of spiked creatures. Use the Kusari-gama in hit and run tactics to kill everything in your path.
Eventually you’ll come to a series of rooms on either side of the main tunnel. Search these rooms for eggs containing blue, red, or yellow essence. Some of the rooms also drop in spiked creatures. Continue down the tunnel until you hear the rumble: you’ve disturbed a giant worm.
Boss Battle: Giant Worm
There are a couple ways to tackle this beast. Get into an alcove and you can see the Giant Worm maneuver quickly through the tunnels. You can remain in an alcove while planning your attack. If you have arrows, you can actually just sit inside the alcove, charge an arrow, and fire when the worm moves past. You will inflict damage, though it will take many shots in order to eliminate the beast. But you are remaining in the safety of the alcove so if you have enough arrows, it’s possible to complete the battle without putting yourself at risk.
Alternatively you can stay in the alcove or go into the tunnel and charge an ultimate with your favorite weapon, such as the dual katana or Lunar Staff. Charge and wait for the worm to arrive then unleash the attack to stop the worm. You will have to face the worm’s incoming direction if you plan to stand out in the tunnel. Attack the worm’s head once it has been stopped. Note that if you miss the original attack you will be dragged along the tunnel and suffer huge damage. If you survive, explore the alcoves and break open any eggs you have left behind to recover essence (hopefully health).
Take note that if you die during the battle with the Giant Worm, you must restart from the last save point. That means battling all of those spiked creatures a second time.
Go through the rest of the tunnel and drop down. You reach a save point. Continue to the clearing; walk inside to trigger worms. Look on the right side of the area to locate a crystal skull, the twenty-fourth in the game. Battle the worms or just run through the area and back into the jungle. Don’t miss the corpse on the ground; it has a new weapon, the Vigoorian Flail.
At the water spot the gigantic eels. Drop in but don’t swim under water. Switch to the Gatling Spear Gun and shoot the eels while remaining slightly above water. You should be able to clear everything out without much harm. Search the right side lake bottom for a chest. On the opposite side, look for a dead body with a Devil Way Mushroom. Look inside the tree left of the corpse to find a chest and its Jewel of the Devil contents. Continue across to the save game point adjacent to the Test of Valor. There’s also a shop on the opposite side.
Approach the wall between the save point and shop and examine the wall. Turn around and battle the chainsaw zombies! These are slow enemies but fire a long-range weapon as well as have a close-range chainsaw attack. Keep close but quick. Dodge swiftly and use fast attack maneuvers. The Vigoorian Flail works well. They’re also slow enough where you can use a bow from long-range; a charged shot can disable the zombie rocket. Check back in the lake and kill the gigantic eels using the same method as before: get into the water and don’t swim down while firing the Gatling Spear Gun.
Return to the stone wall and open it. Drop into the water. Check the left path for a chest. Return to the water, swim down, and continue through the tunnel. Exit out the other side and trigger a cut scene. Battle a horde of the chainsaw zombie creatures. Dive into the water and swim to the bottom. There’s a crystal skull here. Continue up the rocky incline and face off against more zombies. Walk to the circular platform and prepare to fight.
Boss Battle: Two Giant Flying Demons
You have plenty of room to maneuver on this circular arena—which is a good thing because you must battle and defeat two giant flying demons. Equip the bow. There’s a corpse in the back right corner of the arena to replenish your arrows. Expect to exhaust your ammunition at least one time so recall the location of the corpse so you can get there quickly and resume the battle.
Use charged arrow shots to shoot the giant flying demons in the head. Your adversaries have a couple attacks, including two different long-range fireballs. One is slow moving and the other is a bit faster with more projectiles. Dodge these by moving away and to the side. The explosive radius is big so get as far away as possible. The giant flying demons also have a sweeping laser attack as well as a devastating close-range fire attack. Don’t allow one to hover above you; instead move away and look to shoot at long-range. The demons leave themselves vulnerable while they shoot the long-range fireball but you must get off the shot and dodge quickly to avoid the blast.
Using charged arrows is the way to go because they inflict big damage. It’s actually possible to just hop around and shoot standard arrows. You will make successful hits but the damage is low. This is a slow strategy but could work but it’s definitely easier to go for higher damage blows. It’s hard to target the main bosses if you’re shooting randomly…this is because there are escorts in the form of smaller flying demons.
If you can get rid of the smaller flying demons, you can concentrate on their larger counterparts. But it’s also possible to ignore them and just target the bigger beasts. Take aim, charge an arrow to the maximum, fire, and then dodge and get to safety before taking aim again.
Because there are two of them, it’s important to make an attempt to fire on the same giant flying demon so you can get rid of one as quickly as possible. Battling just one is much easier! You can use ninpo, such as Inferno or Void, to aid in the battle. Use if you get stuck close to one of the demons and need both the protection of the ninpo as well as its damaging effects against the boss.
The Temple of Sacrifice
Move forward and use the shop on the left side. Battle the red demons that arrive as you work your way up the incline. When you reach the crevice, run along the left wall to reach the opposite side. Engage against winged demons on the other side. Retreat and use your bow to take them down as they approach. With any luck they might also fall into the gap and you can run along the wall past them.
Another gang of red demons protects the path beyond. Destroy them. Look on the right side of the path for a chest containing an item. Before running across the walls at the next gap, drop down and grab a Life of the Gods from the chest. Use Unrivaled Soaring to run along the walls on the left side into the circular arena ahead. Prepare for a tough battle against red and winged demons. Use ninpo to whittle down the numbers or use a continuous dose of Divine Swallow with your dragon sword.
Search the corpse inside the arena to recover Denji’s Notebook. Proceed up the next path and save your game at the save point. Continue to the large open area and spot two enemies far in the distance: it’s a couple Shadow Ninja Rasetsus. Shoot them with charged arrows as they approach then take out the scythe and destroy them. Block their attack and unleash a counter combo. Save after the fight if your health is good. Expect to face a couple more before moving on.
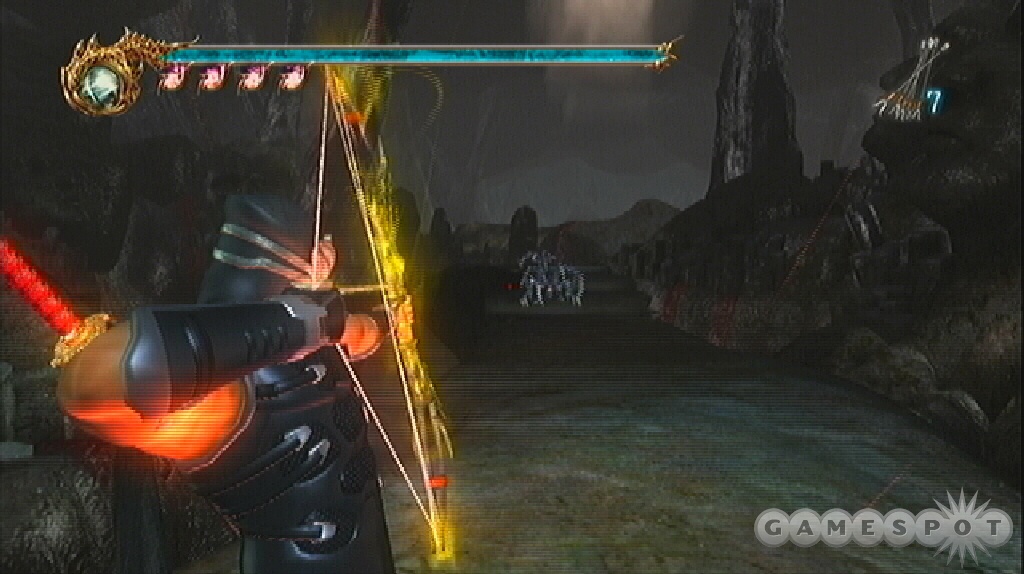
Examine the dead body along the way to find a Devil Way Mushroom. Another corpse up ahead has an item. Go into the next passage to find another save point. Approach the next corner to trigger spiked creatures and some worms out in the green lake. Use the Kusari-gama with hit and run tactics against the spiked creatures. Keep backing up and eliminate them all. Run across the pool and search a body on the right side for Incendiary Shuriken.
Use the Incendiary Shuriken to kill the worms and any remaining spiked creatures. Return to the corpse when you need more ammo. You must clear the pool to gain passage into the next section. Go to the column in the back left and open it. You can now use Flying Bird to reach the top.
Walk to the gap. If you drop down, there’s a chest but a bunch of spiked creatures protects it. Use Flying Bird to get back up. Use the Invisible Wall technique to run along the left wall, jump to the right, and reach the far platform.
Move into the next area and face another pool with worms. You must defeat them all once again—use the Shuriken though it’s probably better to just attack with the scythe. Kill all of the worms and go to the back corner and open the column to move it. Drop in the hole just beyond and save your game.
Go forward to the cut scene. Go down the stairs and just avoid the flying demons. At the bottom look left and find the twenty-seventh crystal skull around the corner; the right side contains a chest with an item. Run over to the circular disc on the ground and battle red demons. Stand on the circular switch and use a strong attack while jumping to activate it. A cage lowers along with some red demons.
Exit to the right. Walk to the very edge of the next area to trigger chainsaw zombies in the area below. Don’t drop down. Instead use your bow to shoot them from up here—there’s a corpse with arrows nearby to replenish your ammunition. When you finally drop down, there’s likely a few more to finish off either with the bow or your favorite melee weapon. Watch behind you as well—as you move on, a couple may spawn in the previous area.
Follow the path and avoid the flying demons. There’s a shop on the left. Cross the bridge to the right and spot chainsaw zombies surround the save point. Buy arrows at the shop and use them against the zombies to clear the area from long-range. Save your game and notice the Test of Valor nearby.
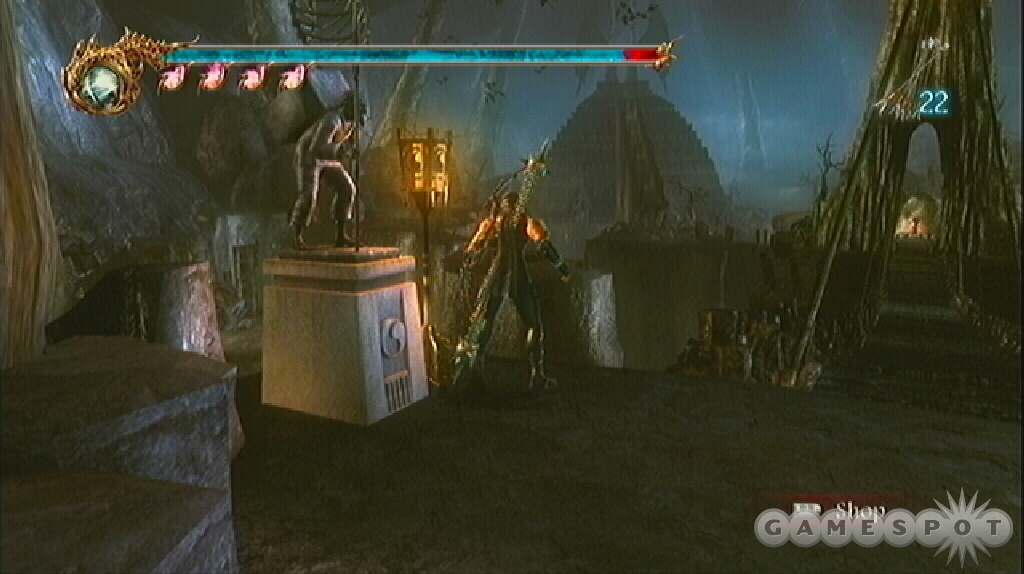
Exit through the path left of the save point and find another ground switch. Stand on the switch and then jump and strong attack to activate the switch. Defeat the red demons and search the corpse on the cage for an item.
Drop down and battle some chainsaw zombies. Open a chest at the end for an item. Grab arrows from the corpse along the way. Defeat some flying demons and continue toward the red demons. There’s another chest at the end. Go around the left corner and trigger the cut scene. Go over to the switch and activate it with a jumping strong attack.
Boss Battle: Giant Flying Demon
The bad news is you must battle another giant flying demon—the good news is that there’s only one of them this time. Once again charged arrows are the way to go. It’s much easier to take aim, charge an arrow to its maximum, and fire at the giant flying demon since there’s only one to deal with. Plus there’s no escort, which makes the battle even more manageable.
Dodge the long-range fireball attacks and avoid allowing the giant flying demon to get close and use the most devastating attack, the close-range fire breath. Keep shooting until the beast goes down. Note that if you die during this fight you must resume at the last save point. It’s actually possible to just run from that save point to this battle and ignore the enemies in between.
After the battle, check the corpse behind to find an item. Open the chest and recover the Bone Relief. Go to the glowing green area between the stairs and use the Bone Relief, which opens the passage.
A gigantic amount of ninjas in this tunnel! There are so many ninjas in this stairwell that you can expect your console to slow to a crawl. You use a few Art of Wind Blades ninpo (preferably upgraded to maximum) when the crowd gets particularly dense around your position. Continue up the stairs and fight what seems like a never-ending stream of ninjas. Utilize ninpo when heavily surrounded; otherwise focus on ultimate combinations. At the top there’s a chest with red essence that will replenish ninpo so don’t hesitate to use it during the crazy fight up this staircase.
Continue through the passage and open the door. Drop inside and find a shop and save point. Open the door to trigger a demon horde. Battle them inside the room with your staff. Go to the bottom of the next area and search the chests for items and essence. Look on the right side of the staircase for an item to interact with: it’s The Prayer of the Necromantale. Proceed into the next area to trigger the boss.
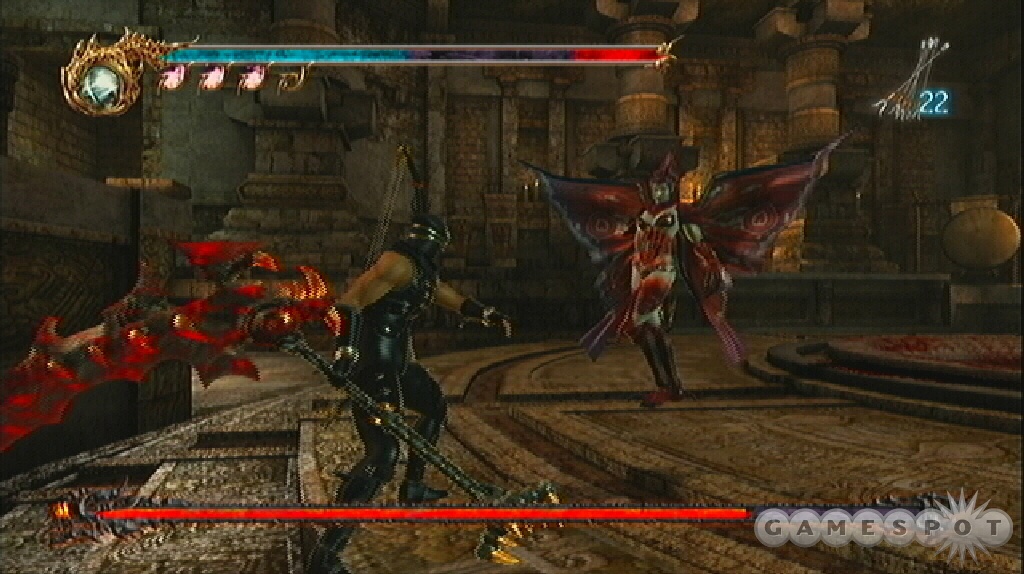
Boss Battle: Elizébet
Elizébet certainly makes an impressive entrance! Watch for her Flying Swallow like attack. She dashes at you and strikes. Dodge the attack and follow with an attack combination. Remaining close to Elizébet can be a challenge because her most powerful attacks are close-range melee maneuvers, such as her tail stab.
An ideal weapon choice is a fully upgraded Eclipse Scythe. Although it’s a slower weapon it inflicts high damage, which is important against bosses like Elizébet. Block or dodge the swoop attacks and counter with a combination. Another attack to watch for is Elizébet’s health steal move. While she’s hovering in the air, she’ll make a beating heart appear near her location. If you’re close by, she’ll steal your health and rejuvenate her own. This is about the worst possible situation. Avoid this by dodging away and remain at long-range. You can also use a Flying Swallow to knock her down or activate ninpo to remain invulnerable during the steal.
A Tempered Gravestone
At the beginning of the level you gain an enhanced weapon: the true dragon sword. This is essentially a dragon sword upgraded to level four, which provides additional moves. Proceed down the staircase on the left and battle the various ninja types. Beware of the archers in the rear. You can jump off the side and avoid them. Proceed down the ramp and battle groups of incendiary ninjas as well as more archers and normal ninjas (though much tougher in this mission).
Continue slowly so you fight small battles at a time. Retreat as needed to fight away from the archers so you only have to worry about the other ninjas. Follow the path around a left corner and spot a shop and save point in the distance. Lure any remaining ninjas in this area to a safe spot and eliminate them. There are a couple guard towers in sight of the save area. Move down and use Flying Bird between them to get to the top and take out the archers.
Move down the hill and trigger more ninjas. Expect to be shot at from archers in the distance. Retreat and battle the ninjas away from projectiles. You’ll trigger another group before reaching the bottom. The bottom courtyard contains a large ninja group with magic ninja support. Blast them with a couple ninpo or retreat and battle away from the large group.
You can search the building ahead to trigger a small ninja group inside. Locate the path to the right of the main building and spot some archers down the hall. You should be able to spot another ninja group in the distance. Use arrows to eliminate the archers and start down the walkway. Clear any ninjas that remain before gathering arrows from the dead body here and using the save point found on the left side.
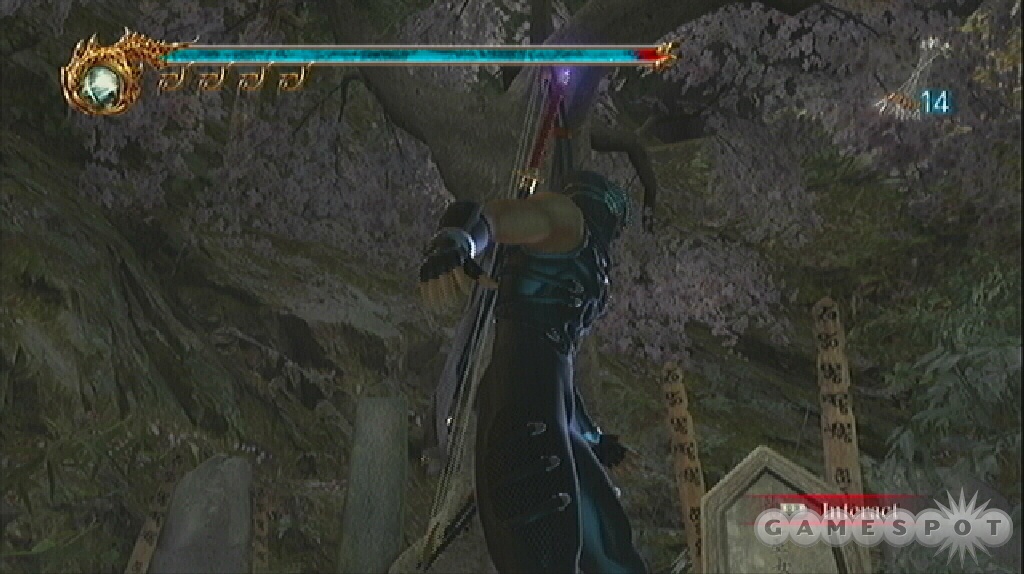
Open the door at the bottom and battle more ninja. Cross the area to the next door. Open it and trigger a pack of dogs. Walk carefully into the next area and watch out for archers to the left and right. Eliminate them before ascending the staircase on the right side—it’s just after the entrance door in the right corner. Go up a flight of stairs and find the Jizo Statue Head on the ground.
Continue up and walk over to the gravestone highlighted in the cut scene. Interact with the gravestone and find Kureha’s Room Key. Retrace your steps back over all the ninja corpses. Save your game again and cross over through the building. Hop out and go to the building on the left. This door was previous locked. Open the door to use Kureha’s Room Key. Enter the building. There are three chests inside: Windmill Shuriken, Spirit of the Devils, and yellow essence.
Return to the save point on the other side of the structure. Return toward the area you just cleared. When you reach the wide courtyard, a horde of ninja appear including a trio of the Shadow Ninja Rasetsus. You’re locked into the area. Use the Eclipse Scythe against the Rasetsus and make liberal use of ninpo, either wind blades or inferno to weaken the group.
The door ahead is now unlocked. Open it and find the shop inside. There’s also a chest in here containing an item. Ascend the ladder and search the corpse at the top to recover the History of the Castle of the Dragon. Drop out of the window and battle the ninja group. Use ninpo because there’s a chest on the left that contains red essence.
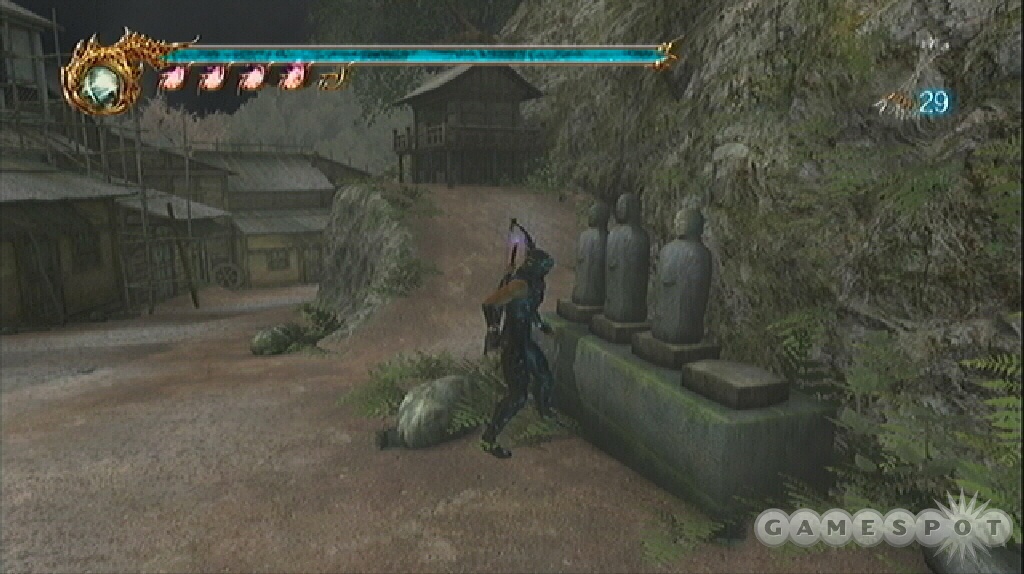
Continue up the hill and battle more ninja. Go around the back left side of the structures to find a corpse with an item. Approach the three statues across from the skull location. Use the statues and you automatically use the Jizo Statue Head. Open the exposed chest for an item. Head through the open passage; battle a group of ninjas on the other side. There’s a save point up ahead.
Cross the bridge and defeat a couple ninja groups, including magic users. Jump into the water and swim through the underwater passage. Exit the other side and defeat several ninja groups. Beware of the archers in the distance. Break open the door of the small shack on the right and find the twenty-ninth crystal skull. Maneuver up the hill and engage several ninja groups in route to a cave. Proceed through and battle ninjas on the opposite side. Jump up to the save point and heal and save. Down the next tunnel check the right side for an item chest and the left for a Test of Valor.
Return to the save point and jump up the steps on the opposite side. Go onto the walkway and around the left corner. Engage a group of incendiary ninja before entering the building in the back left corner. Check the corpse inside the room for Hachijuro’s Notebook. Drop into the hole and battle more ninja. Continue around the corner and fight more ninja on your way to a corpse in the back corner that contains a Devil Way Mushroom.
Enter the next room and battle a few ninja groups. Search a dead body in the next room for an item. Continue down steps to trigger another ninja group. Grab arrows from the dead body as you pass. Exit ahead and spot the rope on the right side. Before going there, check the left side for a well. Drop into the well and engage ninja. Search the corpse here for a Life of the Gods. Go to the end of the tunnel and drop out onto the ground. Search the opposite side for a small entryway. Check inside to find the last crystal skull. If you have collected all thirty crystal skulls, then congratulations on the achievement! You also receive a gamerpic.
Exit and find the small alcove on the right and use Flying Bird to get up. Leap up onto the steps to the top. Climb over the tree trunk and follow the route back to where you dropped out into the area; you’ll have to run along the right wall to get there. Return to the bottom of the well and use Flying Bird to reach the top.
Move over to the rope and use it to shimmy across to the far side where you can save your game. Maneuver through the thick brush and defeat some ninjas. Watch for archers at the end of a corner. Use charged arrows from long-range to clear most of them out. Follow the path to trigger another couple ninja groups; both of these contain incendiary ninja.
Keep the battle going until you trigger a cut scene—a rescue! At the scene’s conclusion, you receive a new item: the Muramusa’s Omusubi, which completes restores health and heals all lasting damage. Take the opportunity to save your game at the save point.
Proceed up the hill and battle a couple ninja groups. Beware of archer support and eliminate them as soon as possible. You reach a small clearing containing a shop. Go along the path right of the shop; continue along until find a corpse holding an item. Return to the shop and head down the left path.
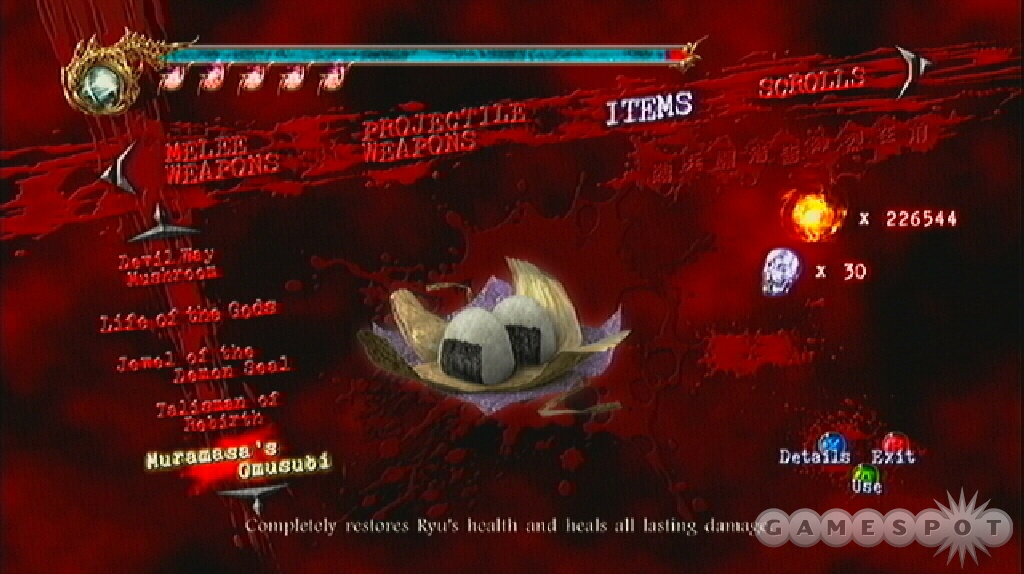
Slide off the edge and reach a clearing with dogs and archers (somewhat hidden among the dying trees). Wait for the dogs to surround and use Art of Blades ninpo a couple times to clear them out. Finish off any remaining canines and archers. Look for a corpse in the middle and recover Koshimaru’s Notebook.
Follow the path toward the next large clearing. Approach the clearing to trigger a large group of ninjas and incendiary ninjas. Lure the groups back into the path and battle there using Divine Swallow to remain elusive. Once in the clearing search the right side for an item chest. There’s also a corpse nearby that contains a Life of the Gods. Search the clearing’s center for a Devil Way Mushroom on a dead body. Go to the opposite wall and find another dead body with another Devil Way Mushroom. Proceed into the next pathway under the far arch to trigger the next battle.
Boss Battle: Genshin
This battle against Genshin is similar to those before it. You won’t have to worry about any allies this time—it’s just a one-on-one fight against Genshin. This battle is about brute force. Don’t really bother with ninpo because it’s not effective. Also, don’t use aerial attacks (including Flying Swallow) because Genshin immediately counters and knocks you back down to the ground.
When Genshin attacks, dodge with Reverse Wind and follow up with your own combination. Also, if you’re blocking Genshin’s attacks and he breaks the block, immediately dodge and follow with a combination. Finishing one of your combinations isn’t always successful so it’s more effective to get in a couple hits then dodge out of the way and start over. Try not to remain adjacent to Genshin or you may get stuck in his devastating spinning tornado pile driver maneuver. A fully upgraded Eclipse Scythe inflicts big damage and likely the weapon of choice. The newly acquired true dragon sword is a good choice as well. The Fortuitous Phoenix combo (two quick attacks, four strong attacks) is a solid move after dodging Genshin.
Quickening Devastation
Approach the Muramusa shop ahead and stock up on health, arrows, and weapon upgrades. Start down the path to trigger the winged demons. Remain near the shop and use charged arrows to eliminate the approaching demons. Replenish arrows as needed. Repeat the tactic until all of them are eliminated. If you grabbed the Windmill Shuriken from the previous level, charge them completely and fire at the winged demon.
Quickly move past the meteors from the armadillo. Search the corpse on the path for a Devil Way Mushroom then save your game at the save point ahead. Proceed forward into the clearing to trigger the armadillo twins.
Boss Battle: Two Armadillo
This battle is similar to the first encounter with the armadillo…except of course there are now two of them! Your target is once again the armadillo head; although you can inflict some damage against the feet, the head is the most vulnerable spot. The powerful Eclipse Scythe inflicts big damage but a faster weapon like the true dragon sword or dual katana will also prove effective, especially using Flying Swallow and its upgrades near the armadillo head.
You can also use charged arrows to hit the head from long-range but this proves more difficult while there’s a second armadillo worry about. Incendiary Shuriken to the head is also a quicker option. Focus your attacks on a single armadillo target (which becomes easier once you have inflicted heavy damage to one, since it will begin to glow with lava fire). Remove one completely from the battlefield before going after the other. Don’t knock them both down to moderate health or you’ll have to deal with two fiery armadillo.
Dodge the armadillo roll by moving to the side of the arena. Another damaging attack is the armadillo bite, which can happen if you’re sticking close to the head without inflicting damage. Consider hit and run attacks on the head to avoid getting bit. One of the toughest elements of the battle is visibility. The bright orange aura is easily blinding and it can cause you to lose track of where you’re at on the battlefield.
The armadillo death remains the same: explosive damage. Be prepared to block as soon as you’ve killed one armadillo. If the other is currently attacking, you may want to launch ninpo instead for temporary invulnerability.
Return back to the save point and save your game. Exit through the far passage to trigger a cut scene. Look for a chest on the left side and recover the item. Continue forward and trigger the demons. Avoid dropping into the lava, which inflicts a small amount of damage for every moment you’re standing inside. However, if you drop down on the left side there’s an item chest inside the lava. Grab the item and get out.
Proceed down the path and find a dead body containing Incendiary Shuriken. Slide down into the next clearing. Start along the path—you should be able to see the save point in the distance. You’ll spot enemies spawn in the distance—fierce dogs. Destroy them with a couple ninpo bursts and weapon combos on their weakened hides.
Moving further down triggers winged demons. You should retreat back near the start of the clearing and use the bow to fire charged arrows from long-range or charged Windmill Shuriken. If any of the demons get close, wipe them out with a melee weapon. Walk toward the save point and check the right side for a red essence chest. Save your game.
Proceed forward and trigger winged demons and dragons. Target the winged demons with arrows if possible; though expect the dragons to approach quickly. Drop down into the lava area and run toward the middle platform to trigger the boss battle.
Boss Battle: Zedonius
Zedonius is similar to the original encounter, although you have a couple extra enemies this time. You will also encounter red demons in the area as well as perhaps the biggest danger: lava. Avoid dropping into the lava or you will suffer damage until you get back onto the platform. Health is precious so focus your attacks on Zedonius and remain away from the edge and out of the lava.
Don’t allow Zedonius to employ his long-range attacks. If you are attacked from the fireballs, use Reverse Wind and dodge the assault quickly. Instead get close to Zedonius and equip the fully upgraded Eclipse Scythe. Watch for Zedonius to use his stomp—listen for his yell—and perform a dodge before he reaches the ground. Follow up the dodge with a combination attack using the scythe. You can clear out the red demons using ninpo if they’re posing a problem.
Examine the item on the ground and recover the Heart of Malevolent Flame. Search the corpse behind your start location to recover arrows. Mines clutter the lava in front of you. Jump and shoot the mines using the bow. Replenish arrows as needed. With the mines cleared, run over the lava and into the tunnel. Take the opportunity to save your game at the save point.
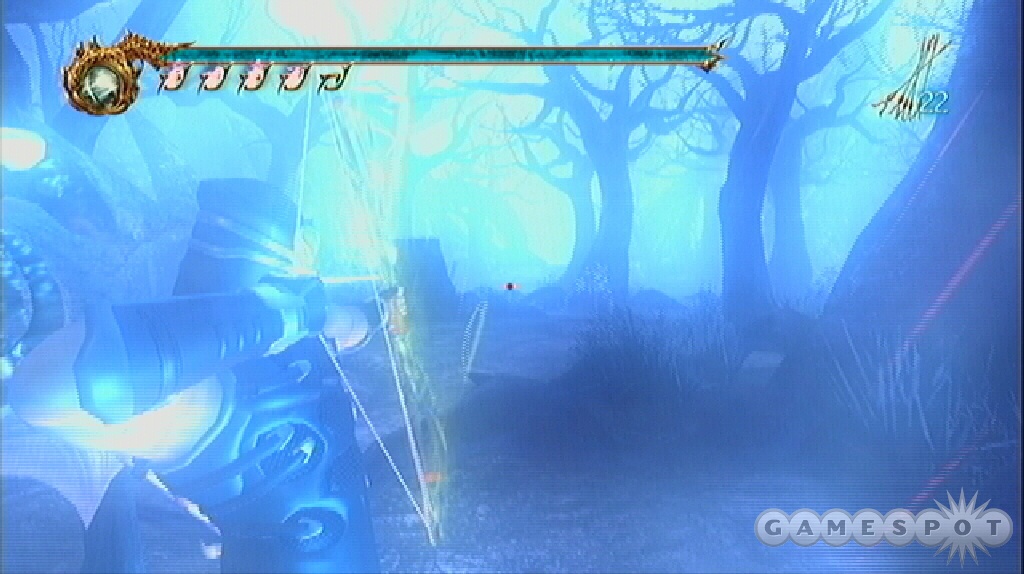
Find a chest on the left side of the path. Exit the cavern and use the shop to replenish health supplies. Move left into the foggy forest and battle several two-headed demons. If you’re very patient you can remain near the shop and use a bow and charged arrows to eliminate them. Just retreat and repeat. Search the left side of the forest path to find a dead body containing an Herb of Spiritual Life. Further down on the left side, locate an item chest. Move through the opening at the end and trigger a boss battle.
Boss Battle: Volf
As soon as the second battle against Volf begins, consider charging an ultimate and using it to automatically engage Volf’s centaur escorts and Volf himself. If there’s not time then be prepared to dodge Volf and unleash a counter combination.
Consider using the Eclipse Scythe, which offers heavy damage potential against these tough bosses. If you were able to connect on an ultimate then you can finish off centaur with a ninpo, ideally close enough to Volf to inflict some additional damage. Dodge Volf’s charge attack and follow with a strong combination. Try to avoid moving in front of the centaur escorts where they can grab with the spears and perform a throw attack.
The Underworld Abyss
Walk forward and examine the item to recover the Heart of Bestial Storm. Visit the shop on the left side and restock your supplies. Ascend the staircase and trigger the cut scene at the top. After the scene, defeat a group of two-headed demons. Open the door at the far end and battle another group of two-headed demons. Move to the next door and trigger a cut scene.
The next hallway contains chainsaw zombies. Retreat back to the end of the previous hall and use charged arrows to knock off the zombie guns and then obliterate the remains. Open the next door and battle several golden winged demons. Launch some Incendiary Shuriken at each one to weaken the enemies before going in for the obliteration. Find a corpse at the far end of the hall for an item.
If you have collected all thirty crystal skulls you’ll find a unique item here: a giant crystal skull. Approach the giant crystal skull, which causes spires to block the entrance. A pack of centaur approaches from the sides of the cavern. Remain mobile to avoid the centaur spear attack and keep attacking. Grab the giant crystal skull after the battle.
Proceed down the hallway on the right and open the door at the end. Battle some scorpions using the Kusari-gama. You must clear them all to open the exit. Search a chest here for an item then find the save point on the left side. There are two more chests to open, though one contains ghost fish. Take the opportunity to save your game.
Exit and return to the giant crystal skull location; this triggers a group of ninja. After the battle, return to the previous chamber and save your game again. Go to the opposite hallway and enter the door.
There are huge eggs in this room. Breaking the egg releases enemies. Break one at a time starting at the one on the left side. Defeat the enemies inside before moving on to the next. If you’re patient you can return and save your game after each one. After defeating the first couple on the left, follow to the right and find a corpse with an item in the back corner. On the left corner there’s another corpse with a Devil Way Mushroom; the egg here contains a Rasetsu. Bash it to pieces with a fully upgraded scythe.
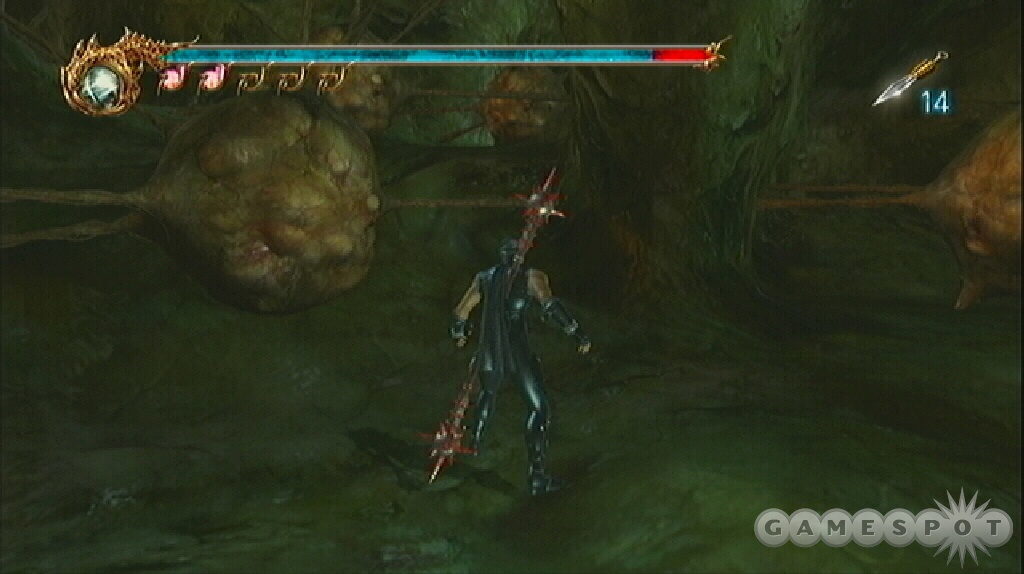
So the path you want to take is start on the left, take a right, and then continue around to the left. At the end, slide into the next section and find more eggs. The one behind you contains ninja if you want to kill more. Press through the eggs ahead and open one at a time. The third egg contains a Rasetsu. Slide down into the next section.
Break open more eggs. You’ll discover another Rasetsu in the middle of the bunch and another at the very end. At the fork in the tunnel, go down the right side and discover a save point. There’s also a dead body in here to replenish arrows.
Go through the other tunnel and trigger flying demons when you approach the edge. Stay inside the tunnel and shoot so you can retreat around the corner to avoid fireballs. Be patient and eliminate each one. Return to the save point and save as well as gather more arrows as needed. Some might be hung up on the bottom of the area so move out and around the side to find them. Search in a couple chests along the left side for items. Follow the left side all the way around to find a corpse with another item. Jump into the middle of the area to trigger the boss battle.
Boss Battle: Alexei
This battle against Alexei is similar to the previous one; although now you have added health and upgraded weaponry! Alexei employs a bunch of long-range lightning attacks so it’s good to get to closer range. If Alexei starts using his tornado spin, jump and dodge away until its conclusion. Alexei has a tendency to grab after you complete a combination so it’s best to use the Eclipse Scythe to score some combination strikes then dash away before the counter.
Alexei has a dangerous mix of ranged attacks and grab attacks—so he’s formidable at long and close range! You have nothing to counter the ranged attacks—don’t bother with the bow—so you must get close. But going "toe-to-toe" can leave you repeatedly thrown.
Be prepared to dodge! Watch Alexei’s moves. When he jumps up off the ground, immediately dodge and avoid his incoming grab maneuver. After the dodge, attack with a combination. Don’t get greedy, though. It’s often better to get in a few hits then dodge away to avoid a counter. Flying Swallow and its upgrades can be effective because you remain elusive and avoid Alexei’s close-range grabs.
Poisoned Blood
Walk forward and examine the item to recover the Heart of Azure Lightning. Go forward to the door and open it. Move inside the next tunnel and trigger two-headed demons. Remain at a distance and use the bow to weaken the enemies. Search the dead body on the right for a Devil Way Mushroom. Open the door into the next area.
Visit the shop on the left side. Go through the next door to trigger a pack of centaurs. Avoid standing in front of them and use fast dodge and aerial moves to attack or blast a couple ninpo. If you need arrows there’s a dead body in the middle. Just beyond that dead body is another containing a Devil Way Mushroom. Proceed through the next door and save your game.
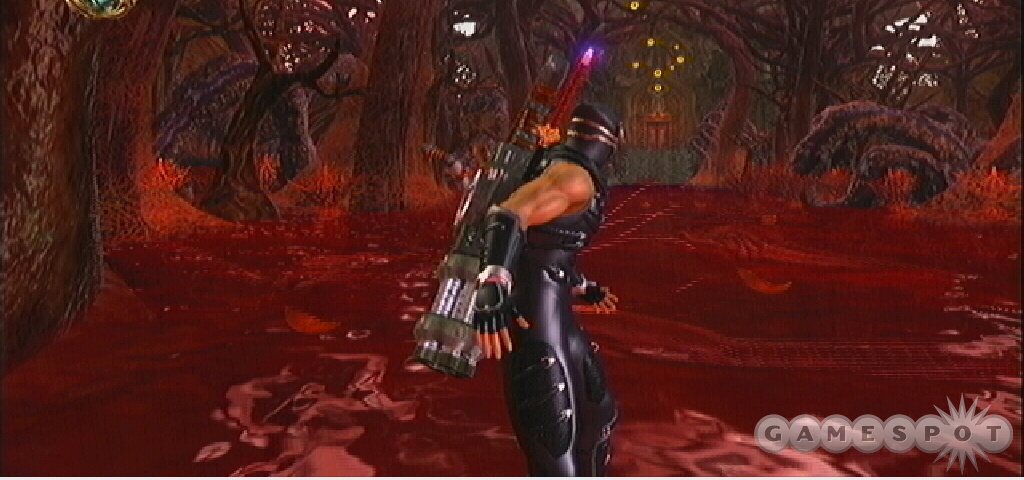
Enter the next area and find a gigantic blood pool. Equip the Gatling Spear Gun and move forward to trigger the gigantic eels. Eliminate the eels using the Gatling Spear Gun. You’ll face several spawns; you can recover red essence after the battle, so don’t hesitate to use a couple ninpo to help quicken the destruction process. You can also just run across the water to the opposite door. After clearing out the pool, cross to the far door and grab a health item on the right and red essence from a crate on the left. If you are satisfied with your health level, return to the save game point and save again.
Cross the blood pool and open the door at the opposite end. Move forward into the chamber to trigger the cut scene.
Boss Battle: Genshin
Genshin still feels like he can take down the mighty Ryu…and Genshin is using the same abilities as ever. You’ve completed this battle several times before and you’ll employ the same tactics as before.
You won’t have to worry about any allies this time—it’s just a one-on-one fight against Genshin. This battle is about brute force. Don’t really bother with ninpo because it’s not effective. Also, don’t use aerial attacks (including Flying Swallow) because Genshin immediately counters and knocks you back down to the ground.
When Genshin attacks, dodge with Reverse Wind and follow up with your own combination. Also, if you’re blocking Genshin’s attacks and he breaks the block, immediately dodge and follow with a combination. Finishing one of your combinations isn’t always successful so it’s more effective to get in a couple hits then dodge out of the way and start over. Try not to remain adjacent to Genshin or you may get stuck in his devastating spinning tornado pile driver maneuver. A fully upgraded Eclipse Scythe inflicts big damage and likely the weapon of choice. The newly acquired true dragon sword is a good choice as well. The Fortuitous Phoenix combo (two quick attacks, four strong attacks) is a solid move after dodging Genshin.
Complete this battle and achieve victory against Genshin and you receive an enhanced Dragon’s Claw and Tiger’s Fang. The weapon is now called The Blade of the Archfiend. It’s essentially a level four Dragon’s Claw and Tiger’s Fang so check out the techniques for a few additional combinations. After the fight with Genshin you encounter another familiar adversary.
Boss Battle: Elizébet
You’ve battled her before and the tactics essentially remain the same. If you’re going for one of the weapon achievements (beat the game using only one weapon type) then switch your weapon because you are automatically using the Blade of the Archfiend. Watch for her Flying Swallow like attack. She dashes at you and strikes. Dodge the attack and follow with an attack combination. Remaining close to Elizébet can be a challenge because her most powerful attacks are close-range melee maneuvers, such as her tail stab.
An ideal weapon choice is a fully upgraded Eclipse Scythe. Although it’s a slower weapon it inflicts high damage, which is important against bosses like Elizébet. The newly acquired Blade of the Archfiend is also useful; try a quick attack followed by strong attacks for an effective combination.
Block or dodge the swoop attacks and counter with a combination. Another attack to watch for is Elizébet’s health steal move. While she’s hovering in the air, she’ll make a beating heart appear near her location. If you’re close by, she’ll steal your health and rejuvenate her own. This is about the worst possible situation. Avoid this by dodging away and remain at long-range. You can also use a Flying Swallow to knock her down or activate ninpo to remain invulnerable during the steal.
Walk over and grab the Heart of Crimson Blood. Walk into the portal at the far end of the room. Open the chest behind you for an item. Use the shop on the left side to purchase healing items. Find a save point on the opposite side. Proceed to the large door on the other end of the hall. You automatically use items to unlock the passage.
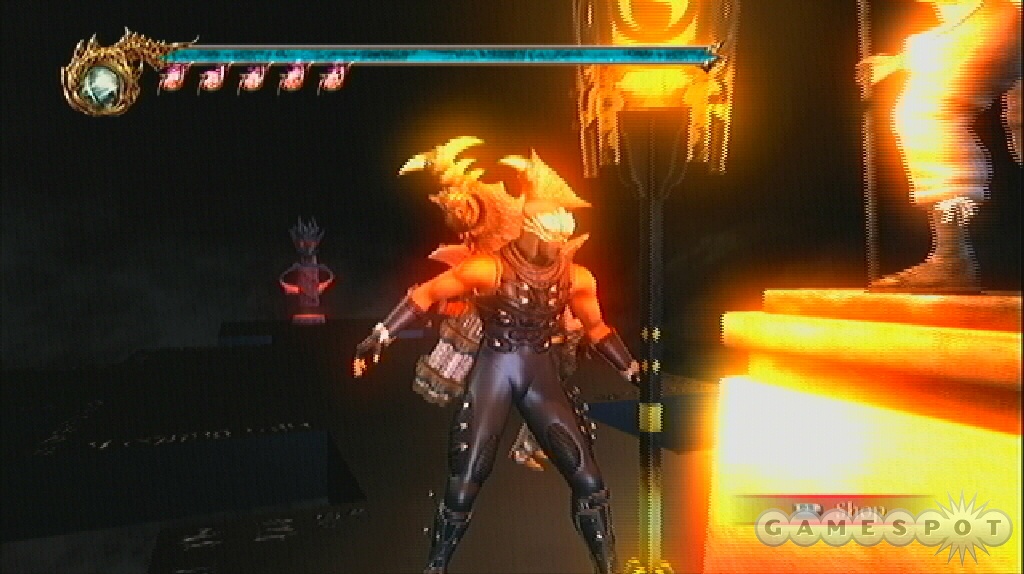
Maneuver through the next tunnel and engage demons and winged demons. Proceed through to the end of the tunnel to trigger a cut scene and then more battles against demons. Open the door at the end of the passage to trigger the boss battle.
Boss Battle: Dagra Dai
Dagra Dai will likely immediately spawn demons to assist in his battle. When Dagra Dai remains airborne, remain at long-range. Run and dodge to avoid his principle attacks, which include lightning and purple tentacles exploding from the ground. Ignore the demons for the most part. If you eliminate them, Dagra Dai will just summon more.
You must defeat Dagra Dai and still face off against a couple more boss encounters…all of this without the use of a Muramusa shop. Obviously it’s important to conserve as much health items as possible for the battles ahead. However if you must use health items, use the Herbs and the Grains before using a Talisman of Rebirth or Muramusa’s unique healing item, the Omusubi.
The weapon of choice is typically the maximum power Eclipse Scythe as it inflicts the most damage when it connects on its powerful combinations. Avoid Dagra Dai when he’s airborne and wait for him to drop. Dash around and begin unleashing strong combos. Be prepared to dash away before Dagra Dai can counter with a grab.
Dagra’s death becomes the sacrifice needed to awaken the Archfiend…not good news. Run along the water to the walkway. Open the chest for essence or an item. Proceed up the twisted walkway to the cut scene.
Boss Battle: Archfiend, Part 1
This battle against the archfiend’s first form is the most pattern-oriented fight in the entire game. First of all, equip the bow because you won’t really need melee weapons for this fight, at least to damage the archfiend. Search the right side of the arena to find a corpse with arrows when you need to replenish your ammunition.
To defeat this archfiend you must charge an arrow to its maximum and shoot the archfiend in the head. The archfiend immediately coughs up blood. Avoid damage by dodging and jumping to the side. As soon as the blood stops falling charge another arrow to maximum and shoot the glowing blue orb in the archfiend’s chest. If the orb isn’t glowing then you won’t damage the archfien