Pikmin 2 Walkthrough
Captain Olimar is back, and this time he and his army of pikmin are collecting treasure in order to get Hocotate freight out of debt. This walkthrough includes general strategies, a walkthrough, a full listing of treasures, and much more!
Design by Marty Smith
Captain Olimar has returned safely to Hocotate! In his previous adventure, Olimar crash landed on a mysterious planet and, with the help of the indigenous pikmin, was able to reassemble his damaged spacecraft and return home. But Hocotate Freight’s President has some bad news for the returning captain: the company is in massive debt!
To help Hocotate Freight escape its debt, the President asks Olimar and young worker Louie to revisit the pikmin-populated planet and comb the land for its plentiful treasures. This game guide will help you guide Olimar and Louie through every area--above and underground--and collect every treasure to meet and surpass the pokos required to pay back Hocotate freight’s debt!
This GameSpot game guide for Pikmin 2 includes:
- Pikmin Strategies: This section covers the five types of pikmin and tips on utilizing each throughout the game.
- Combat Tips: Look here for combat tips against specific creatures in Pikmin 2.
- Walk-through: This section offers a complete walk-through for Pikmin 2. It reveals all treasure locations, covers underground areas, offers specific battle tips against creatures and bosses, and includes the challenging fourth area, Wistful Wind.
- Battle Mode Tips: This section provides tips on Pikmin 2’s two-player battle mode.
- Treasures: This chart reveals all treasures, their location, and poko value.
- Items: Look here for all equipment items in the game, location, and their upgrade function.
- Piklopedia: This section reveals Pikmin 2’s entire Piklopedia, which increases the treasure value for each creature.
- Secrets: Check this section for how to unlock each new area and a handful of other Pikmin 2 secrets and how to get to them.
Table of Contents
Pikmin StrategiesCombat Tips
Walk-through
Cave of Emergence
Awakening Wood
Hole of Beasts
White Flower Garden
Perplexing Pool
Glutton's Kitchen
Citadel of Spiders
Awakening Wood, Part 2
Bulblax Kingdom
Snagret Hole
Perplexing Pool, Part 2
Shower Room
Submerged Castle
Valley of Repose, Part 2
Frontier Cavern
Subterranean Complex
Wistful Wind
Cavern of Chaos
Hole of Heroes
Dream Den
Treasures
Items
Piklopedia
Secrets
Chapter 1 - Pikmin Strategies
This section covers the five types of pikmin, their uses, and tips on utilizing each throughout the game.
Red Pikmin
The red pikmin are the first pikmin you’ll encounter in the game. You’ll find them in the Valley of Repose not far from your landing site (Louie encounters them after he’s separated from Olimar).
- Red pikmin are resistant to fire damage.
- Utilize red pikmin to disable the flame traps encountered underground. Red pikmin won’t start on fire from the trap as other pikmin would.
- Use red pikmin against fiery blowhogs. These creatures spout fire from their snout. Other pikmin will be set on fire and have to be whistled back and saved.
- The red pikmin are the best choice against the fiery bulblax--unless there’s water nearby to put out the fiery bulblax’s fire. Toss the red pikmin rapidly onto the fiery bulblax’s back and stay away from its mouth.
- Attack the fiery dweevil with red pikmin and you won’t have to worry about them suffering from the fiery dweevil’s flame attack.
Yellow Pikmin
You will first rescue yellow pikmin at the Perplexing Pool. They’re characterized by their big ears, which apparently helps them fly higher on a toss.
- Yellow pikmin are resistant to electricity damage.
- Use yellow pikmin to disable electricity traps scattered throughout the underground caves. Electricity traps are the most damaging because you instantly lose any pikmin that bumps into the bolts (in other traps you can rescue them from despair with a whistle).
- Combat the anode beetles with yellow pikmin to avoid the creature’s electricity damage. To defeat the beetle, toss the yellow pikmin onto the beetle’s back. This flips the beetle over--which makes him vulnerable. Swarm your yellow pikmin around the beetle to finish the creature off.
- Attack the anode dweevil with yellow pikmin. This anode dweevil inflicts electricity damage so use only your electricity-resistant yellow pikmin against the creature.
- Use the yellow pikmin to disable the electric fences that block certain passages above ground.
- Yellow pikmin can be thrown higher than other pikmin types. Thus they are the only pikmin that can reach certain treasures. If there’s a treasure out of reach, try yellow pikmin!
- Since they can be tossed so high, use yellow pikmin against the aerial creatures (blowhogs, snitchbugs, etc). Once the creature is forced to the ground, swarm it with all pikmin.
Blue Pikmin
You’ll find blue pikmin in the Awakening Wood but you’ll need yellow pikmin to reach them (an electric fence traps them inside).
- Blue pikmin are resistant to water damage. Essentially, blue pikmin can swim!
- If there’s something in a pond, such as a wall to tear down or a treasure to recover, use your blue pikmin.
- Use blue pikmin against the watery blowhog, which sprays water from its snout. Other pikmin drown (though can be rescued).
- Combat the caustic dweevil with blue pikmin. This dweevil attacks with water so your blue pikmin will be resistant to that damage.
- Obviously blue pikmin are your best choice against creatures currently wading in shallow water.
- Use blue pikmin to destroy the rocks at the bottom of some lakes. Destroying the rock drains the lake allowing other pikmin type to cross!
White Pikmin
You won’t find white pikmin above ground. Instead, search for ivory candypop buds within the underground caves. Sacrifice one of your other pikmin types by tossing it into the ivory candypop bud. You can trade five with each ivory candypop bud.
- White pikmin are resistant to poison damage.
- Utilize white pikmin to disable the poison traps found underground.
- Command your white pikmin against the walls protected by poison traps found above ground.
- Attack the munge dweevil with your white pikmin to counter the munge dweevil’s poison attack.
- Not only are white pikmin resistant to poison but they’re also poisonous! If a creature eats a white pikmin, it will likely perish instantly. You’ll lose a pikmin but at a fair price, depending on the type of creature certainly.
- White pikmin are excellent diggers. They can dig up buried treasures. Other pikmin can’t perform this task.
Purple Pikmin
Like white pikmin, you’ll first discover the rare purple pikmin underground. Sacrifice one of your other pikmin types by tossing it into the violet candypop bud. You can trade five with each violet bud.
- Purple pikmin are the strongest pikmin in the game. Each purple pikmin can carry the weight of 10 other pikmin.
- Purple pikmin are also strong attackers. Toss purple pikmin onto a creature’s back for a strong attack. Avoid swarming purple pikmin around a creature’s mouth--purple pikmin are just too valuable to risk in that fashion. They’re much stronger tossed on the back.
- The weight of purple pikmin can even temporarily stun creatures.
- Purple pikmin are extremely slow unless flowered. Allow them to mature before you pluck them. Otherwise, find some nectar quickly and allow your purple pikmin to soak up.
Chapter 2 - Combat Tips
This section offers combat tips to implement above and below ground using pikmin as well as your two pilots, Olimar and Louie. You’ll find specific tips on battling specific types of creatures.
- Small bulborbs, shearwigs, and sheargrubs: Use your pikmin in a swarm attack. Utilize your "C-stick" to guide your pikmin toward and around the enemy creature. To minimize your pikmin losses, attempt to battle small bulborbs and sheargrubs in small numbers. A group of pikmin can eliminate one small bulborb very quickly but if you attempt to fight three at once, you risk losing pikmin to the small, hungry creature.
- Fiery and watery blowhogs: Combat these with the corresponding pikmin for an easy fight. Otherwise you’ll have to rescue pikmin from fire and water damage. Also, it’s also possible to combat both with your captains. Retreat when the blowhog "bucks" to avoid taking some damage. While the blowhog sprays, punch wildly to inflict damage.
- Puffy and withering blowhog: Toss yellow pikmin (which fly higher) against these aerial units. Once the yellow pikmin knock the creature to the ground, swarm with all other pikmin to eliminate the blowhog as fast as possible. Note that the vicious wind from these aerial blowhogs can blow flowers right off of your mature pikmin.
- Cannon larvae: These bugs launch rocks from their wide mouth. These rocks inflict heavy damage to pikmin and even your captains. But the rocks also inflict damage against other enemies! You can use a captain as a decoy and have cannon larvae inadvertently launch rocks at other enemies and even other cannon larvae. When you do attack one, use pikmin only from the side to avoid getting rolled over. You can also use your captains. Punch while the cannon fires and retreat during its "buck" maneuver.
- Snitchbugs and dirigibugs: Both of these are aerial units. The snitchbug steals pikmin (which it throws into the ground) or captains (which it throws to the ground inflicting damage). The dirigibug is lifted by balloons and drops bombs. Use yellow pikmin to reach these aerial enemies. When they fall to the ground, swarm with other pikmin. Against the captain-stealing snitchbug, you can use a captain as a decoy and lure it to your other pikmin. When it swoops by, whistle to your other pikmin and start tossing at the snitchbug to knock it down.
- Large bulborbs: Fortunately most are sleeping. To attack them, use your purple pikmin and sneak up behind the sleeping bulborb. Toss your purple pikmin quickly onto the large bulborb’s back. Avoid standing in front as the creature can eat several pikmin at once.
- Dweevils: The spider-like dweevils come in four types: fiery (colored red), anode (colored yellow), caustic (colored blue), and munge (colored white). Use red pikmin against fiery; yellow pikmin against anode; blue pikmin against caustic; and white pikmin against munge. You can also use your captains if you have obtained the various resistances.
- Crawmads: These crawfish-like creatures hide in the holes and wait for you to get close with a captain or pikmin. The crawmad is invulnerable while in its hole. Lure it out by moving a captain close (but don’t get hit). When the crawmad attempts to return to its hole, swarm it with your pikmin.
- Wollywog: These hopping frog-like beasts can smash your pikmin underneath its slimy body. When attacking the wollywog, whistle your pikmin back quickly before they fall underneath. The best method is to use purple pikmin and toss them on the wollywog’s back before it leaps. Purple pikmin can eliminate the wollywog quickly; just be careful because the purple pikmin are incredibly valuable.
- Gatling groink: The gatling groink resembles a tank. It’s huge and fires a projectile from its "front-mounted" cannon. Attack the groink from behind or the side. Toss purple pikmin onto its back.
- Creeping chrysanthemum: This living plant can gobble up pikmin quickly. Toss pikmin onto its head; attempting to surround the chrysanthemum causes the plant to bump the surrounding pikmin to the ground.
- Beetles: Use yellow pikmin against the anode beetles (they shoot electricity). Toss yellow pikmin on the anode beetles back to flip it over. Now it’s vulnerable: swarm it with yellow pikmin! Other beetles can also be flipped over and offer nectar or even treasure.
- General Combat Tips: Note that your captains are pretty good fighters and many times you might want to keep your pikmin back and only place your captains’ in harms way. In tough underground sublevels, it’s wiser to save your pikmin for future battles then lose them in a reckless battle. Hit and run is usually the best tactic with captains. Get some punches in then retreat as many creatures have some sort of retaliatory movement that can injure your captains.
Chapter 3 - Walk-through
This section provides a walk-through of Pikmin 2’s storyline. Pikmin 2 is somewhat non-linear in the respect that you often have several tasks you can complete at any given time and you can complete them in any order. However, other times you lack a particular type of Pikmin to reach certain areas and must complete other sections of the game to move on. This guide provides a proven solution through to meet the 10,000 pokos debt mark and beyond.
Valley of Repose
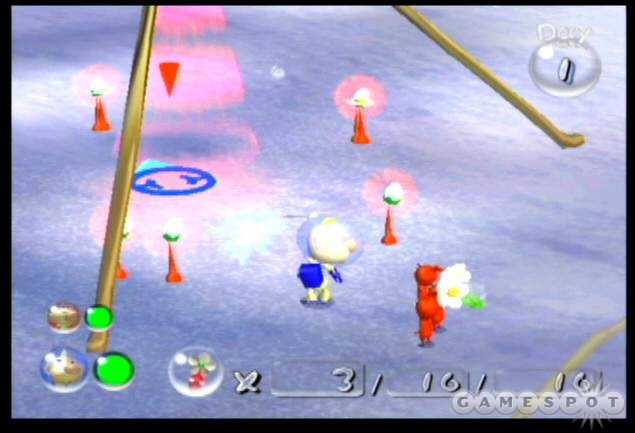
Your first destination is the Valley of Repose. Olimar and Louie end up split apart after a rocky landy. This first section offers a quick tutorial of using your two captains, finding and commanding pikmin, and some combat techniques. When you gain control of Olimar, whistle in the pikmin. Toss the pikmin at the bulborb; they’ll automatically attack until the creature perishes.
Switch control to Louie and navigate him toward the landing spot. On the way you’ll discover the red onion that houses the red pikmin. Pluck the pikmin or wait until it flowers. Create more pikmin by using your first pikmin to attack the flowers and secure their pellets. The pikmin will return the pellets to the onion, which creates more pikmin seeds. Wait until they flower or pluck them now.
Gather Louie’s group of pikmin and continue toward the landing site. You’ll encounter a paper bag blocking the passage between you and the landing site. Toss all pikmin onto the bag. Switch to Olimar and toss his pikmin on the bag also. Once 15 red pikmin are on the bag, it deflates and allows passage through. If you wish, gather the bulborb’s body with pikmin; they’ll return it to the onion and create more pikmin.
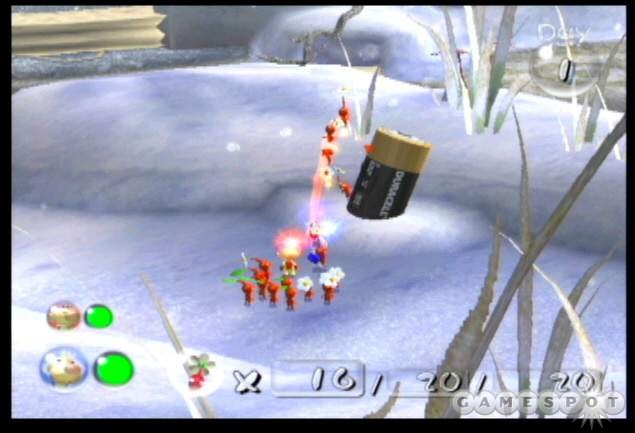
Gather all red pikmin and approach the battery--your first treasure. It lies on the path between the landing spot and the red pikmin onion. The red pikmin will dig out the battery (Courage Reactor) and carry it to your ship. Returning the battery to the ship concludes the first day. After the daily report, return to the Valley of Repose to continue exploration.
At the beginning of the new day, extract your red pikmin from the onion and begin collecting pellets from the nearby posies to create additional red pikmin. There are more posies near Louie’s former landing area. Pluck your pikmin when desired, though it’s best to wait until they’ve flowered.
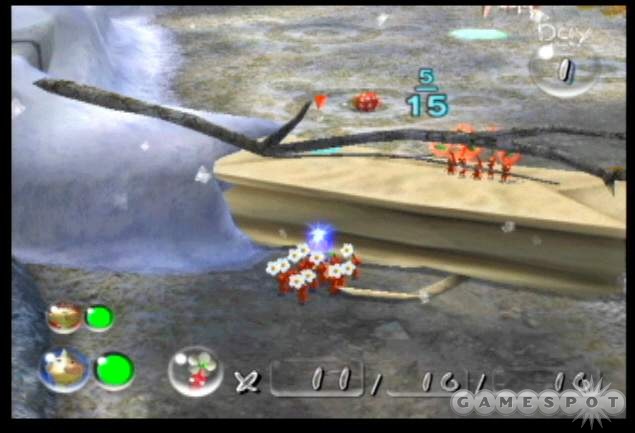
You’ll need at least 35 red pikmin to continue. Once you have 35, exit the landing area and find a second brown paper bag obstructing the passage. Toss 35 red pikmin onto the bag to open the route. Use your pikmin (or even the captains) to defeat the bulborb beyond.
There’s a second, much larger, bulborb also sleeping in the area. Maneuver behind the sleeping bulborb and toss red pikmin onto its back. Allow the pikmin to return any pellets or bodies to the onion for more pikmin (you should be nearing 70 by now).

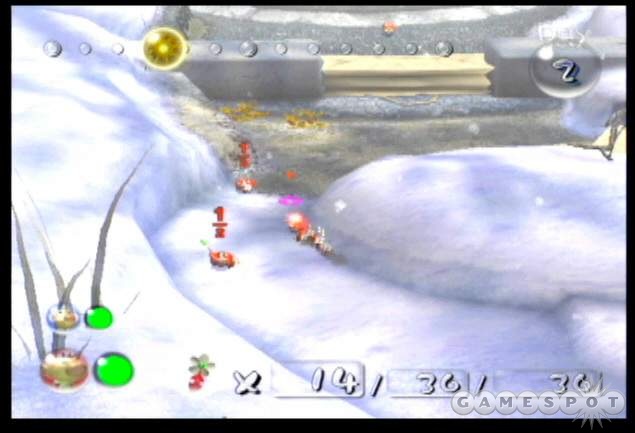
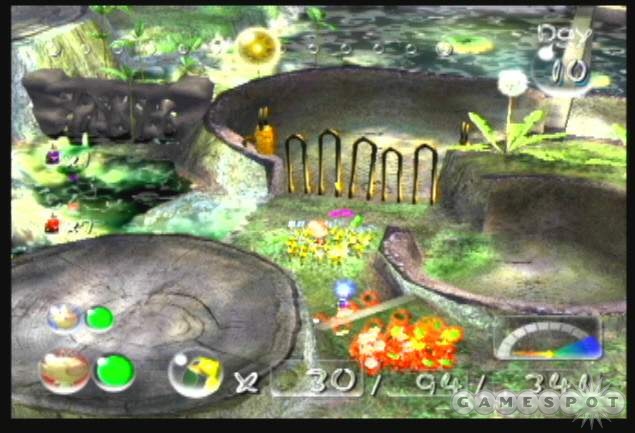
In the circular area near the sleeping red bulborb is the next piece of treasure. Gather the crushed can (Utter Scrap) with your pikmin and return it to the ship. Return to the circular area and command your pikmin to break down the wall. Beyond you’ll find the first underground cavern entrance. Assemble your pikmin and proceed!
Cave of Emergence
Pikmin Needed: Red
Sublevel 1: Kill the bulborbs using either tossed or swarming pikmin and pick up the bottle cap (Quenching Emblem) and orange (Citrus Lump). Take the bulborbs back as well. Descend to the next level.
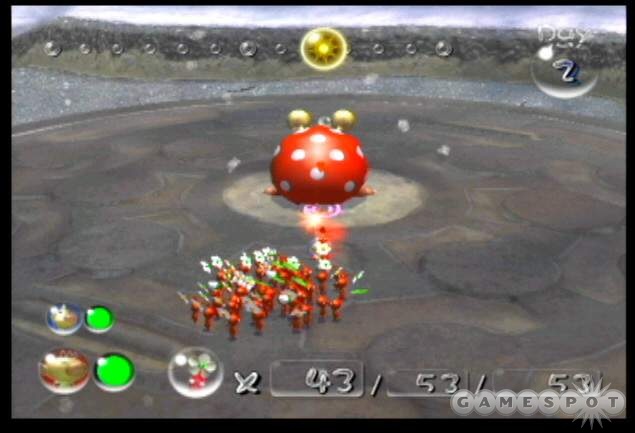
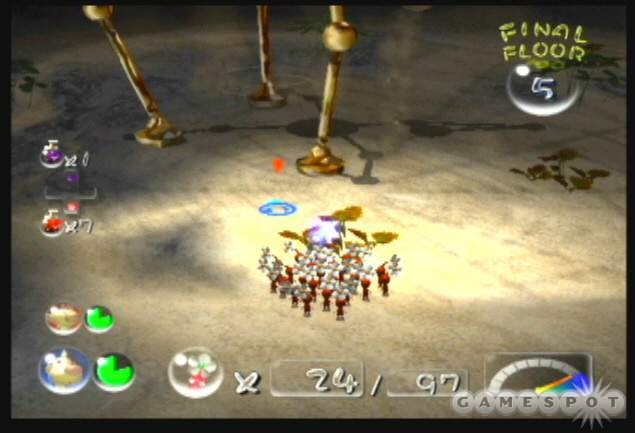
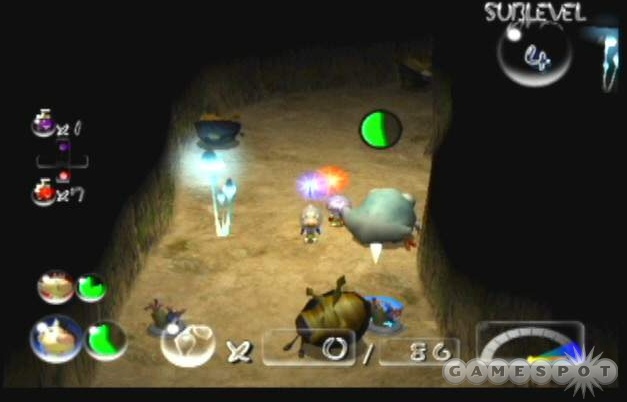
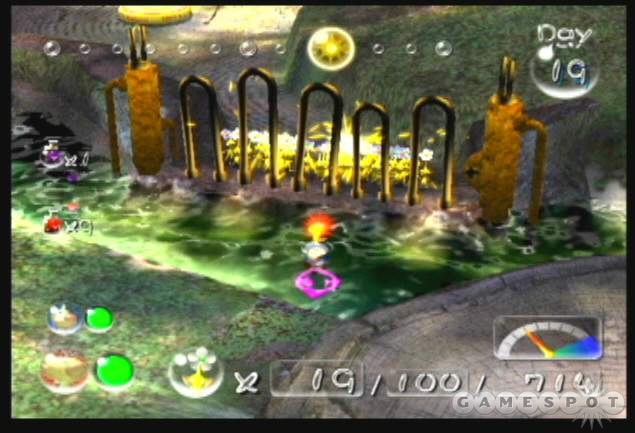
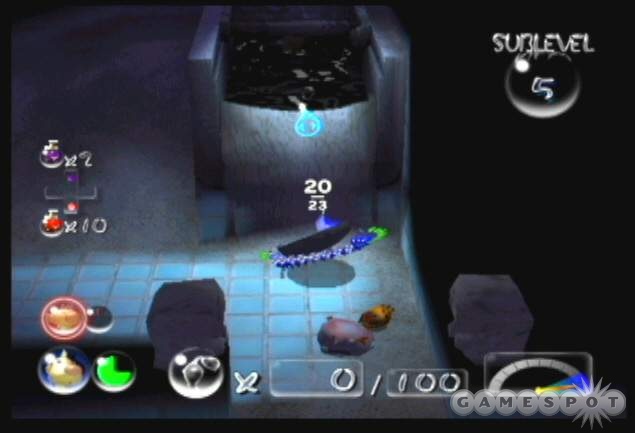
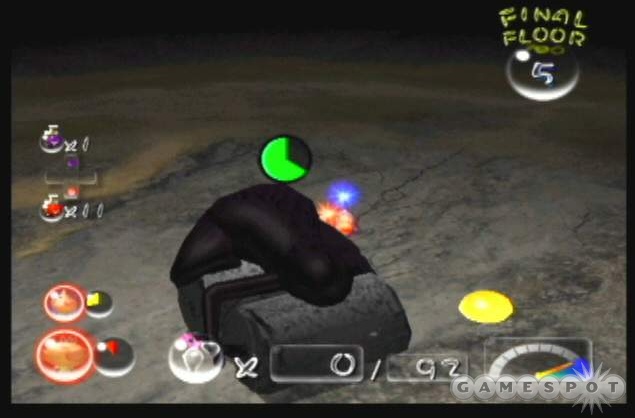
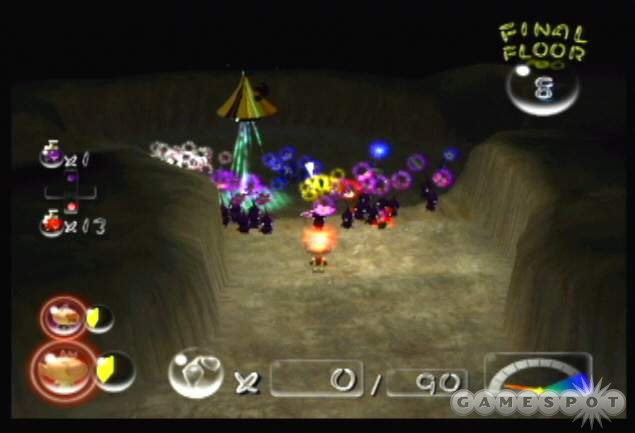
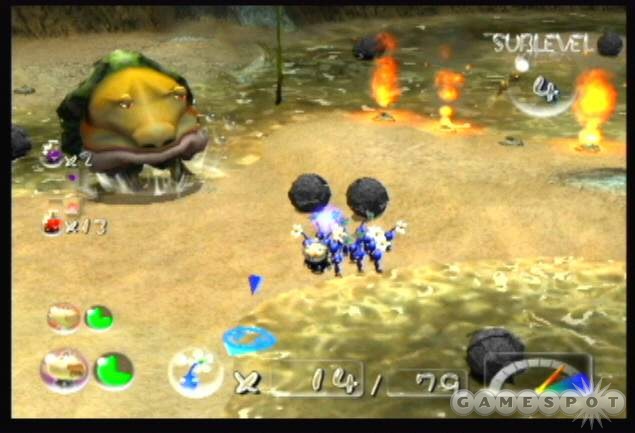
Sublevel 2: Eliminate the bulborbs. Move through the cavern to the purple candypop buds. Toss in five red pikmin into each flower to retrieve purple pikmin. Wait for them to flower so they’re stronger and much faster. Return with your purple pikmin to the globe. Since it requires 101 pikmin to lift, you’ll need the purple pikmin (as strong as 10 pikmin each) to lift the globe (Spherical Atlas) and take it to the research pod. After gaining the globe treasure, proceed to the geyser and exit.
Completing the Cave of Emergence ends the day and opens the route to the next area, the Awakening Wood. Land in the new area to continue the storyline (other tasks in the Valley of Repose require other pikmin types).
Awakening Wood
Continue to build your red pikmin force early on if you wish. You’ll encounter several bulborbs (and a sleeping red bulborb) and other burrowing creatures throughout your landing zone. Explore the edges to locate some nectar eggs, which turn any non-flower pikmin into flowered pikmin.

Explore the ridges around the landing spot to find the strawberry. Throw some red pikmin up to the strawberry (Sunseed Berry) to retrieve the treasure. Locate the stone entrance away from the landing spot. Here you’ll discover the burgeoning spiderwort. These plants produce berries that can be transformed into useful sprays. The orange berry produces ultra-spicy spray (which enhances your pikmin) and the purple berry produces ultra-bitter spray (which weakens enemies). Gather some of the orange berries. Each 10 you gather creates one spray.
Bust down the wall beyond. Note the burrowed creature ahead. When it emerges, surround it with your pikmin and toss your purples on its back quickly. At the fork in the path, beware of the chrysanthemum on the left side side; this burly beast emerges from the ground and can make a quick snack of your pikmin. Toss pikmin onto its body and surround it when it has fallen over. Keep your purples away from its front. Follow the path to the left and toward a new cave entrance.
Hole of Beasts
Pikmin Needed: Red, Purple (recommended)
Sublevel 1: Swarm the sheargrubs that emerge from the ground. Locate the controller pad (Stone of Glory) in a corner and return it to the research pod. Continue to the next level.
Sublevel 2: Use the purple candypop buds to create additional purple pikmin from your reds. Crack open the nectar eggs to blossom your new purple pikmin.

Sublevel 3: You’ll encounter your first fire traps here. Disable these fire traps with your red pikmin (they’re immune to fire). Should any purple pikmin get too close and burst into flame, whistle them close to provide aid. Locate the domino (Strife Monolith) and floppy disk (Cosmic Archive) before proceeding deeper.
Sublevel 4: Deal with more fire traps using your reds. Defeat the sleeping red bulborb by tossing purples onto its back. The beast ingested a treasure. Return the game machine (Dream Architect) to the research pod. Locate the playing card (Luck Wafer) as well as a possible purple candypop bud. Create additional purple pikmin using reds. Continue down!
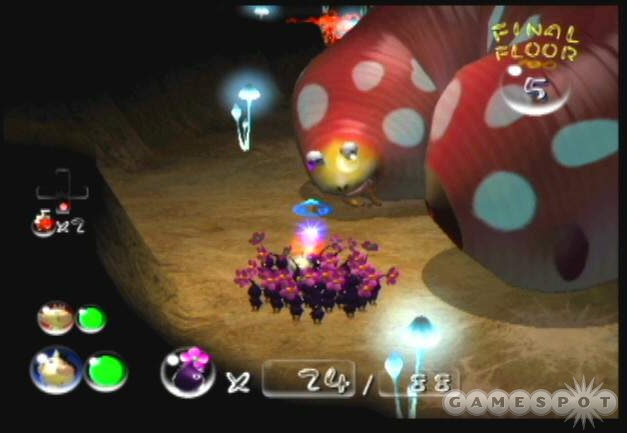
Sublevel 5: Locate the, currently sleeping, empress bulblax. Wake her up and face her. Toss purples onto the empress’ face. When she begins to shake, whistle your pikmin back to you. After the empress shakes, she rolls around and will smash any tossed off pikmin. Recover the device left behind (Prototype Dectector) before returning to the surface.
Return through the stone entrance and to the paper bag blocking the right path. Toss your pikmin onto the bag to deflate the obstruction. Defeat the burrowed enemy on the other side before descending into another cave entrance.
White Flower Garden
Pikmin Needed: Red, Purple (recommended)
Sublevel 1: Watch out for emerging sheargrubs. Pick up the shoe polish (Alien Billboard) and return it to the pod. Descend to the next level.
Sublevel 2: Use red pikmin against the blowhog (it blows fire!). Locate the jewel (Petrified Heart) and the bottle cap (Drought Ender) and return both to the pod. Go down.
Sublevel 3: Find the white candypop buds and trade some red pikmin for new white pikmin. The treasure here is buried. Use your new treasure gauge and walk until the meter registers its highest reading. Move the white pikmin here and they’ll start to dig up the treasure. Other pikmin can assist as the treasure rises. Return the tape (Superstick Textile) to the pod before descending again.
Sublevel 4: The red mist is poison. Use your white pikmin, which are immune to poison, to disable the poison traps. Gather the lip balm (Survival Ointment) and mushroom (Toxic Toadstool) and return them the pod. Continue down.
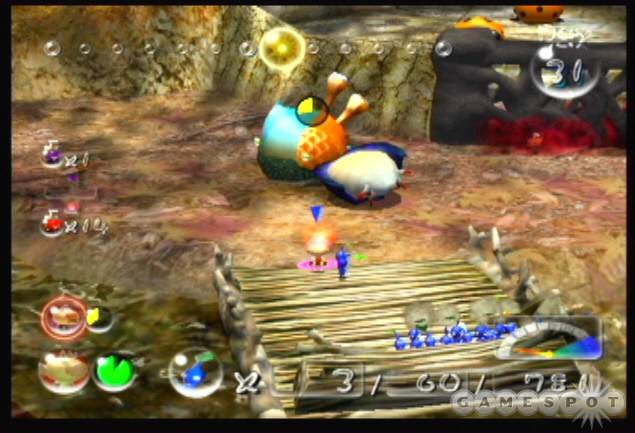
Sublevel 5: Encounter the burrowing snagret boss in the wide chamber. The snagret can snag your pikmin with its beak. Note how the snagret rises from the ground. Occasionally it rises slowly. This is your cue to attack. If it rises quickly, retreat immediately until it burrows again. When it rises slowly, toss your purple pikmin onto its head. Whistle your pikmin back after they’ve been shook off. Gather the glove (Five-Man Napsack) before exiting.
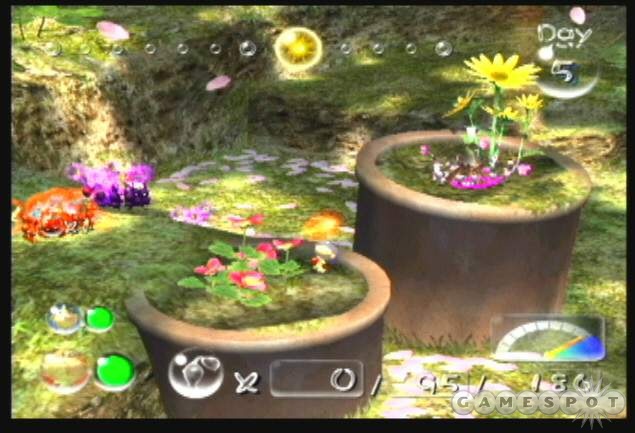
You’re back at the landing spot in the Awakening Wood. Take your new white pikmin and find the two potted plants on the edge of the landing site. Your treasure gauge should be pinging. Move up the ramp behind the pots and stand on the shorter pot while facing the taller pot. Launch your white pikmin into the taller pot. They’ll dig up another treasure (Pilgrim Bulb) and return it to the ship.
Return through the stone entrance and over the deflated paper bag. Just beyond one of the caves you explored is a wall protected by poison mist. Use your new white pikmin to break down the door and disable the poison.
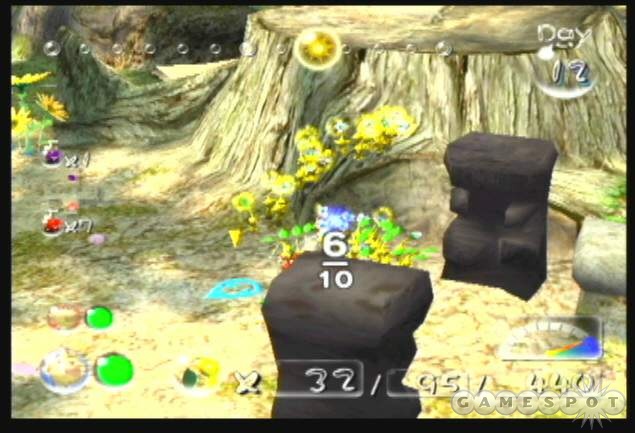
Approach the two stone blocks. The trick here is to use proper distribution of weight to get your captains up the blocks. Throw all of your pikmin but one up onto the ledge avoiding the blocks. Stand on the block with your captain and one pikmin. Toss the lone pikmin onto the other block. It will raise the block your captain is on providing access to the higher ledge.
Locate the dice on the ridge to the left. Throw up your pikmin to gather the dice (Chance Totem) and return it to the ship. You should be nearing or eclipsing 30% debt recovered at this point. If you continue around you’ll also find a purple berry spiderwort. Grab some berries for your new spray mixture.
Return to the paths behind the landing spot and proceed to another wall protected by poison (it’s around to the left). Use the white pikmin to disable the poison and crush the wall. Defeat another chrysanthemum and pick up the globe (Geographic Projection). Return it to the ship. At the end of the day, you’ll now have access to another area: the Perplexing Pool. Proceed there next!
Perplexing Pool
Gather your pikmin and make your way out of the landing zone toward the grassy landscape ahead. You spot a yellow onion and yellow pikmin in the distance. Take out some red and white pikmin; you’ll need them both to get to those yellows. As you explore ahead, watch out for the wollywog (the frog-like creature). When you attack, whistle your pikmin back before they’ve fallen underneath the wollywog’s damaging leap attack. Search around the stump for some nectar and find burrowed enemies near the edge of the landing spot.
Follow the water around to the right and find another set of rock platforms. Once again you must utilize weight to get your captain up onto the ledge. Toss your pikmin, except one, onto the ledge. Stand on the platform and toss the lone pikmin onto the other stone to elevate to the ledge. Beware of the swooping creature that will steal some pikmin. Launch your own at its body to send it to the ground where you can attack in force.
Approach the fiery bulblax at the stump. Use your red pikmin to defeat the beast. Sneak up behind as the beast sleeps and then toss your red pikmin onto its back. Navigate your white pikmin to the poisonous wall and break it down. Whistle to the yellows to gather them. Use them to pick up pellets from nearby posies to bolster your yellow pikmin ranks.
From the stone elevator platforms, continue forward toward the log. You’ll spot these logs throughout these areas. Use a handful of pikmin on the log and they’ll extend a bridge over the water. These provide helpful shortcuts or even access to new locations. Keep an eye on the bridges; sometimes burrowing beasts nibble on the bridges and return them to their previous state. There might also be the mold-like growth infecting spiderwort plants here. Attack the web-like area to return the plants to their natural state.
Look on a high stump on the right side for some treasure. You’ll need the excellent leaping ability of the yellow pikmin to reach it. Toss your yellow pikmin (at least 10) up onto the stump and retrieve the can opener (Impediment Scourge) so it can be taken back to the ship.
From this same position, move toward the water to the left of the spiderwort plants (if facing the landing site) and spot another treasure on a high precipice. Command just your yellow pikmin (at least 15) and find a ramp on the left side of this area. Use the "C-stick" to keep your yellow pikmin against the wall so they don’t accidentally fall into the water. Navigate around the narrow path to the right so you’re just under the treasure. Toss the high-jumping yellow pikmin up to the treasure. They’ll return the pickle can top (Gherkin Gate) to the ship.
Approach the far right edge toward the river and spot an electric fence blocking a path on the right side. Use your yellow pikmin to disable the lower the electric fence. Maneuver through and spot the entrance to a new cave.
Glutton’s Kitchen
Pikmin Needed: Yellow, Purple (recommended)
Sublevel 1: There are groups of small bulbears scattered throughout this level. Attempt to fight these creatures one at a time to minimize the risk of pikmin losses. Locate the crayon (Master’s Instrument), which might require tossing to, and return it to the pod. Proceed to the next sublevel.
Sublevel 2: Beware of breadbugs stealing treasures. If they take one into their home, you must kill the breadbug to recover the treasure. Locate and return the cap (Massive Lid) and cookie (Imperative Cookie) to the pod. If either is up high, you’ll need those yellow pikmin to reach it. Descend to the next level.
Sublevel 3: This level contains electrical traps and beetles that require the expertise of your yellow pikmin. To defeat the beetles, toss your yellow pikmin onto the creature to flip it over and then swarm it. Once again watch for breadbug’s hauling treasure around. Locate the Harmonic Synthesizer and Director of Destiny and return them to the pod. Also beware of the blowhog hovering around the area. Its burst of wind can blow the flowers right off your mature pikmin. Avoid it or defeat it by tossing pikmin onto its body. You’ll knock it to the ground where the blowhog can be swarmed. Enter the next sublevel.
Sublevel 4: The large bulbear is the biggest danger here. Use some ultra-bitter if you have it or toss pikmin onto its back while keeping your main force out of the vicinity of the beast’s mouth. The bulbear ingested some treasure. Return the cap (Happiness Emblem) to the pod. Attack the smaller bulbears one at a time if possible. There are also breadbugs lurking about so check to see if they’re dragging treasure around. If you can’t find treasure, kill the breadbugs. Return the mug (Invigorator) and candy (White Goodness) to the pod. If any treasure lies up high, use the yellow pikmin to retrieve it. Proceed down.
Sublevel 5: This sublevel contains cannon creatures that launch rocks. Note that these rocks not only smash pikmin but the rocks also eliminate enemy creatures too. Keep your pikmin in a safe location (away from the possible line of fire from launched rocks). Use your captain to explore the area and use the launched rocks to defeat the sublevels other creatures. Just stand between the cannon and the other creature; wait for a rock to launch; and then move out of the way to watch the rock collide with the creature. Search the level’s alcove for a possible purple candypop bud and create some purple pikmin using your yellow pikmin (or red if you brought some). Defeat the cannon creatures by moving some pikmin close to the creature’s area. Use the "C-stick" to get the pikmin as close as possible and the launched rocks roll over them. Launch the pikmin at the creature to defeat the cannon beast. Return the triangular cap (Boom Cone) and antenna (Sulking Antenna) to the pod. Continue down to the next level.
Sublevel 6: Breadbugs are on the loose and snagging the cavern’s final treasures! If the breadbugs drag treasures to their home, you’ll have to eliminate the creatures. Work quickly by gathering your yellow pikmin (to navigate the electrical traps and beetles easier) and pick up the treasures before the breadbugs can grab them. Recover the donut (Sweet Dreamer), slice of meat (Meat of Champions), and egg (Hideous Victual). The final treasure may be inside the big breadbug. Eliminate it and gather the Dream Material, which enhances your captains with anti-electricity suits. Exit the cavern and return to the Perplexing Pool.
There’s another cave entrance near your landing spot. From the landing site, approach the river ahead toward the left side. Locate the cave within a decayed stump. Enter the Citadel of Spiders.
Citadel of Spiders
Pikmin Needed: Red, Yellow, White, Purple (recommended)
Sublevel 1: Beware of burrowed grubs as you explore. Recover the tomato (Love Nugget) and return it to the research pod. Continue down to the next sublevel.
Sublevel 2: Destroy the fire traps with red pikmin. Defeat the red fire dweevils with red pikmin only. These creatures can also carry around treasure and dead bodies. Beware of the wollywog leap attack if you engage the creatures. Whistle your pikmin back before they’re tossed off and smashed under the leap. Return the cap (Creative Inspiration), duck head (Paradoxical Enigma), which must be dug up by any pikmin type, and finally the lipstick (Lip Service) to the pod before continuing down.
Sublevel 3: Patrol the room with yellow pikmin to disable electric traps and beetles. Search alcoves for a possible candypop bud that creates more red or yellow pikmin. Return the nuts (Patience Tester) to the pod. Another treasure might be buried requiring whites to excavate. Carry the shell (Memorial Shell) to the pod. Continue down!
Sublevel 4: Disable flame traps with your red pikmin. When you spot the crawfish-like creature, keep your pikmin away from it. Detach your captain and approach the crawfish to lure it out of its hole. As it returns, gather your nearby pikmin and swarm it; the crawfish won’t attack on its return trip. Repeat until it has been defeated. Return the matches (Flame of Tomorrow), candy (King of Sweets), and locket (Time Capsule) to the pod. If there are any candypop buds on the level, take advantage and create rare pikmin.
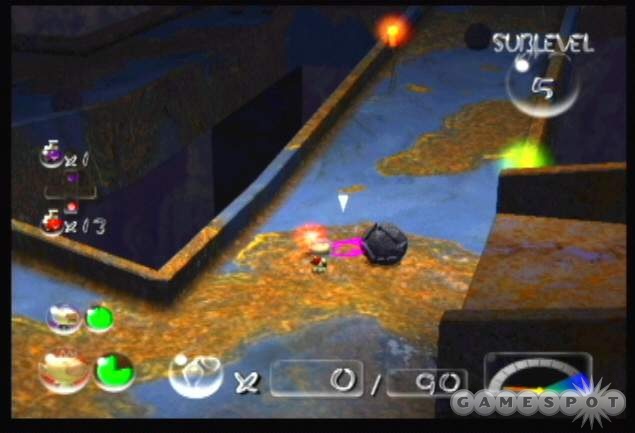
Sublevel 5: Approach the large chamber to trigger the appearance of the long legs. Avoid the long legs while it walks around. After a few steps it rests and dips its "body" toward the floor. When it does, toss some pikmin (preferably purple onto the enemy). Once the long legs shakes off the attack, whistle your pikmin back and retreat. Wait for the long legs to step around and repeat your assault. Gather the treasure, The Key, after defeating the boss. Before leaving, use white pikmin to dig up the jewel (Regal Diamond). If you have trouble locating the treasure, follow your gauge. Exit via the geyser.
You’re back in the Perplexing Pool but you need new pikmin to proceed. At the conclusion of the day, return to the Awakening Wood so you can hunt down blue pikmin!
Awakening Wood, Part 2
Spend time bolstering your pikmin force if you wish; there are plenty of posies and enemies around to add to your red and yellow ranks. Assemble a group of yellow pikmin and move through the stone entrance. Look at the top of a stump on the right side to spot a treasure. It was too high before but now you have the high-leap ability of yellow pikmin to retrieve it. Toss up at least six yellow pikmin to retrieve the medicine (Healing Cask).
Continue across the paper bag and through the path on the right. Spot the electrical fence ahead. Toss the yellow pikmin onto the ledge (they’ll likely battle the burrowed creature so toss quickly and toward the beast if it emerges). With your captain only, maneuver around to the right side of the ledge to find shallow water. Pikmin (except blue) can’t move through this water but your captain can. Regroup with your yellow pikmin on the other side. Disable the electric fence with your yellow pikmin. Move inside to meet the blue pikmin.
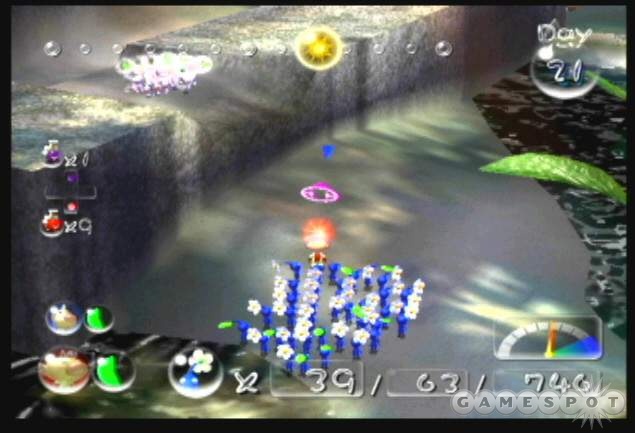
Keep the yellow pikmin out of the water. Whistle the blue pikmin and gather any nearby bodies and posey pellets to create additional blue pikmin. You can also defeat the tadpole creatures for additional seeds. Use your new blue pikmin to carry the paint tube (Decorative Goo) back to the ship.
Assemble a squad of blue (heavy numbers), white, and purple pikmin and proceed from the landing spot across a bridge. Send both captains cause you’ll need their teamwork. Go left toward water and a wollywog. Lure the wollywog out of the shallow water and defeat it (using captains or pikmin carefully). Navigate the blue pikmin only through the water and to the log. Use the pikmin on the log to extend the bridge. Battle the second wollywog. Use white pikmin to disable the nearby poison traps and extend the next bridge.
There’s treasure nearby: a shuttlecock up high. To get it you’ll need your blue pikmin and both captains. Place one captain and blue pikmin onto the stone platform underneath the shuttlecock. Send your second captain and blues to the other platform. Launch blues onto the other stone platform to lower it--which raises the other platform with your captain and blue squad. Launch the blue pikmin up to the shuttlecock (at least 15) and send it back to the ship.
Another task you can do is use your new blue pikmin to wade in the small pool near your landing area. Use the blue pikmin to crush a rock in the pool to drain it and then bust down the wall on the other side to create another path.
Assemble a squad of yellow pikmin and return through the stone entrance and up the stone weight platforms. In this area you’ll find a narrow ramp pathway to an electrical fence. Guide your yellow pikmin through the narrow path to the fence. Disable the electrical fence. You now have access to a new cave. Send one captain for pikmin reinforcements before entering.
Bulblax Kingdom
Pikmin Needed: Red, Yellow, Purple and White (recommended)
Sublevel 1: Combat the smaller bulborbs one at a time if possible. Sneak up on the sleeping bulborb and toss purple pikmin on its back for a quick kill. Gather the jewel (Crystal Clover) from its body. Enter the next sublevel.
Sublevel 2: Use red pikmin to dispatch the fire traps and fiery spiders. The treasure might be up high so use yellow pikmin to reach it. Return the jewel (Tear Stone) to the pod. Resume course down.
Sublevel 3: Beware of the floating blowhogs--they’ll blow those flowers off your mature pikmin. Defeat them by tossing pikmin onto the blowhog then swarm the creature when it falls. Find nectar to replenish your pikmin. Find the white candypop bud and create some white pikmin. Use them to dig up the shell (Olimarnite Shell). If you have trouble locating it, move around until the treasure gauge pings to its max. Enter the next level.
Sublevel 4: Use yellow pikmin to disable electric traps and beetles. Create purple pikmin from the candypop bud. Be careful around the wollywog. Use captains if you have trouble defeating the leaping creature. Locate and recover the crystal (Crystal King) and token (Unknown Merit). Enter the next sublevel.
Sublevel 5: Navigate the cavern carefully: bombs drop from above in some locations. Run away fast if a bomb drops near you. Defeat the bulborbs one-on-one if possible and use your purple pikmin to surprise the sleeping bulborb from behind. Use your whites to dig up the treasure. Find it using the gauge. Return the pinecone (Anxious Sprout) to the pod. Proceed down.
Sublevel 6: Use the purple candypop bud to create additional purple pikmin. Disable fire traps with red pikmin. There are more bulborbs here including a sleeping bulborb. Combat the small ones in one-on-one situations and attack the sleeping bulborb from behind with a gang of purple pikmin. Retrieve the jewel (Eternal Emerald Eye) and skull (Colossal Fossil) and return both to the pod. Move down into the final floor.

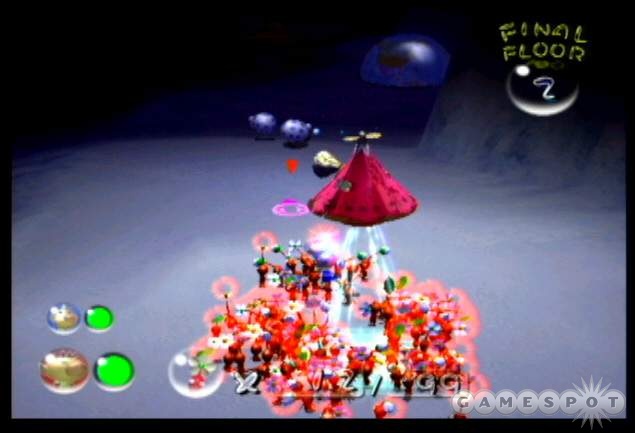
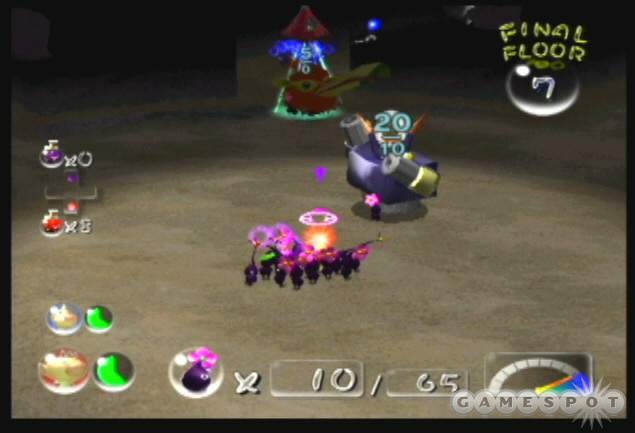
Sublevel 7: Disable fire traps with red pikmin. Ready your purple pikmin and slowly move into the chamber. Look carefully at the ground and spot the eyes. There’s the boss, emperor bulblax. As soon as he begins to rise, launch purple pikmin in the direction of the emperor’s eyes. Keep tossing! The purple pikmin make short work of the beast. Return the robot (Forged Courage) to the pod. Continue through the emperor’s chamber. You spot more fire traps and a pool of water. Go around to the side of the room and toss your red pikmin onto the upper ledge. Walk your captain through the water and up the steps (through the fire--he’s protected by the Forged Courage now) to the treasure. Regroup your red pikmin and recover the totem (Gyroid Bust) and complete the level.
Assemble a group of pikmin (yellow, blue, purple, white) and proceed to the area where you recovered the shuttlecock. Go through the stone entrance and left across the bridges. When you spot the wall on the right, hug the right side. That way you don’t trigger the snagret from the ground. Break down the wall and enter the new cave.
Snagret Hole
Pikmin Needed: Blue, Yellow, White, Purple (recommended)
Sublevel 1: Eliminate sheargrubs and then the sleeping bulborb. If you bulborb is facing you then lure it awake with a captain and run away. It’ll turn around and return to its slumber. With its back turned now toss your purple pikmin onto the bulborb. Recover the marble (Crystallized Telekinesis) from the creature’s body. Find and recover the feather (Leviathan Feather) before proceed into the next sublevel.
Sublevel 2: Move carefully when attacking sheargrubs and the burrowed creature so you minimize losses. Also beware of moving over flowers as they could be a creeping chrysanthemum. The most difficult part of this sublevel is crossing the wooden bridges. It’s tough to get your pikmin group across without dropping them in the water. Instead, toss your pikmin over the rock barrier to the side of the wooden bridges. Take your captain and wade through the water and whistle to your pikmin group. Use the "C-stick" to guide your pikmin around the edge of the rock barrier and toward the other side of the bridges. They’ll be able to get over the rock barrier here via a wooden ramp. On the other side you’ll find the strawberry (Combustion Berry) and sushi (Taste Sensation). Enter the next level.
Sublevel 3: This sublevel includes two snagrets, the same bird-like creature you fought as a boss enemy in a previous cave. Eliminate both in the same fashion. Wait until the snagret emerges slowly and toss your purple pikmin onto its beak. It won’t eat them during the attack; the snagret will just shake them off. Whistle your pikmin back and retreat. Trigger the snagret again and wait for it to emerge slowly before attacking again. One of the snagret ingested the sausage (Meat Satchel). Make some white and purple pikmin using the candypop buds.

Sublevel 4: Attach the blowhogs and cannons with your captains, though you may suffer some damage. Attack the bulborbs in small groups. Use yellow pikmin to eliminate the electricity traps. Recover the magnet (Heavy-Duty Magnetizer), cherry (Cupid’s Grenade), and marble (Crystallized Telepathy). Descend to the next level.
Sublevel 5: A creature disrupts your treasure gauge. Eliminate it and your gauge returns to normal. You can spot him by watching for the purple aura around the creature. It’s easy to eliminate; just toss your pikmin onto the pest. Grab the whistle (Emperor Whistle) recovered from its corpse. Tread carefully around the bulborbs and eliminate them in small groups. Explore everywhere so additional bulborb drop where you’ll recover the marble (Crystallized Clairvoyance). Utilize the nectar eggs before descending to the next level.
Sublevel 6: Use white pikmin to disable the poison traps. Use the candypop buds for additional pikmin or to exchange for blue pikmin. There are more snagrets on this level. Eliminate both in the same fashion as before. Wait until the snagret emerges slowly and toss your purple pikmin onto its beak. It won’t eat them during the attack; the snagret will just shake them off. Whistle your pikmin back and retreat. Trigger the snagret again and wait for it to emerge slowly before attacking again. There’s also another bug messing with your treasure gauge. The presence of water here requires some blue pikmin. Use the blue candypop buds to exchange yellow for blue if necessary. Eliminate bulborbs and recover the lens (Stupendous Lens), candy from a snagret (Triple Sugar Threat), four-leaf clover from the alcoves (Science Project), and lid (Salivatrix). Continue down to the final floor.
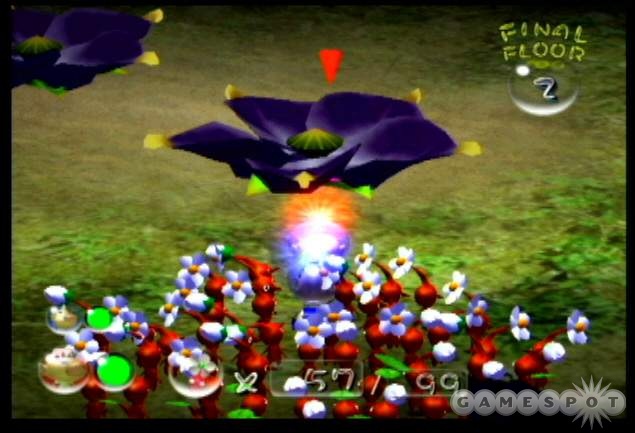
Sublevel 7: Use the nectar to mature your pikmin. Use the candypop bud to create more red, yellow, or blue pikmin. Enter the chamber and face the pileated snagret. This one actually moves but the tactics remain the same. Trigger its emergence. When it emerges slowly, toss your purple pikmin onto its beak. If it emerges quickly, retreat and wait for it to sink again. Repeat until the snagret is defeated. Recover the robot (Justice Alloy) before exiting the cave.
You’ve completed the Awakening Wood area. Time to take your blue pikmin back to the Perplexing Pool and use them where needed.
Perplexing Pool, Part 2
Assemble a group of yellow and blue pikmin and move toward the river’s edge. Note that you’ll have to combat a series of creatures on the way. Beware of sheargrubs and the wollywog in the river specifically. Use your captains against the wollywog if you have trouble using pikmin. If you do use pikmin, use blue since you’re so close to the water.
With the river clear, move your blue pikmin across the river and extend the log bridge. Cross the bridge with your yellow pikmin and through them over the gap in the wall toward the treasure object. Use your whistle and "C-stick" to guide the yellow pikmin toward the electric fence. Just move your captain through the water and hug the wall so the pikmin follow. Disable the electric fence. Send the blue pikmin in to recover the object while you toss the yellow pikmin back over the wall. Rescue them over the bridge. The blue pikmin will take the can top (Optical Illustration) to the ship.
Assemble a group of blue pikmin and exit the landing spot. Go around the right side toward the lake. Eliminate the creature in the middle of the lake by throwing blue pikmin onto its tail. Stay away from the creature’s mouth. Eliminate the creature to recover the float (Aquatic Mine).
Reassemble your blue pikmin and cross the lake. Go along the narrow path on the left and extend the log bridge toward the electric fence. Guide the yellow pikmin over the narrow path carefully (use the "C-stick" to keep them out of the water) and start to disable the fence. Once the fence is down, take the blue pikmin inside and break the rock in the pool. This drains all water from the pool and lake allowing any type of pikmin to cross. It also reveals a cave entrance.
Before going into the cave, take a group of pikmin that includes whites to the drained lake. Eliminate the wollywog with captains and move the white pikmin around until you locate the buried treasure (follow your gauge) at the back edge of the lake. The white pikmin will dig up the shell (Fortified Delicacy) and return it to the ship.
Use blue pikmin to destroy the wall on the left end of the river. Move the blue pikmin through and eliminate the wollywog using your captain or pikmin. Your treasure gauge will reveal a buried treasure on the small island of land. You just need to get whites over. Take your other captain and assemble a group of white pikmin. Go behind the landing spot and you’ll find a short wall overlooking that island below. Toss the white pikmin onto the short wall. Now with your other captain, already at the island, whistle the white pikmin down. Move them onto the buried treasure and the white pikmin will dig up the onion (Onion Replica) and use blue pikmin to return the treasure to the ship.
Take a group of blue pikmin and destroy a wall on the right edge of the river. Beware of the wollywog that possibly lurks nearby. Two crawfish creatures lurk on the other side of the wall. Lure them out of the holes (but keep your pikmin away). When the crawfish return to the hole, swarm with your pikmin. Continue toward the stone platforms. Eliminate the blowhog here by tossing your pikmin onto it.
There are four stone platforms here. Once again you must move them using weight. The trick is using your two captains effectively. Here’s the solution:
- First, throw up 20 to 30 blue pikmin onto the high ledge near the fourth stone platform (farthest on the left). You need at least 20 but a few extra in case doesn’t hurt.
- Angle your toss so the pikmin land on the ledge. It can be challenging to get them there but it is possible.
- Place one captain on the block farthest to the right (away from the ledge).
- Using your other captain, toss pikmin onto the block second from the left. This raises the block with the solo captain.
- Switch to that captain and move him to the next block.
- Switch captains again and toss pikmin onto the left most block. This lowers a nearby blocking allowing the other captain to move again. Move him.
- Switch back and toss pikmin onto the right most block. This raises the other captain’s block.
- Move him again to the block just under the ledge.
- Switch again and throw pikmin onto the block second from the right.
- This raises the other captains block and he can now get onto the ledge.
- Take the pikmin over to the treasure. You’ll need at least 20 to carry it.
- Allow the blue pikmin to return the nut (Massage Girdle) to the ship.
Assemble a group of every pikmin type (a full 100) and cross the drained lake. Move to the cave entrance opened earlier by your blue pikmin.
Shower Room
Pikmin Needed: Red, Yellow, Blue, White, Purple (recommended)
Sublevel 1: Use yellow pikmin to disable electricity traps. Beware of the wollywog’s hopping around (take them down with your captains if you have trouble). Use your captains or blue pikmin on the blowhogs (that shoot water now). Take the treasure (Merciless Extractor) to the pod.
Sublevel 2: Disable poison traps with your white pikmin. Toss your pikmin onto the top of the jellyfish to eliminate them. Attack the small bulborbs carefully and in small groups. Sneak up on the sleeping bulborb and use your purple pikmin to slam the bulborb on its back. Recover the battery (Durable Energy Cell) and soap (Sud Generator).
Sublevel 3: Terminate jellyfish with quickly tossed pikmin onto its top. Kill the blue creatures (dumples) with captain as they are pretty adept at eating pikmin. Eliminate the crawfish as you’ve done previously. Lure it out of its hole with your captain then swarm it with pikmin when it tries to return. Recover the compact (Mirrored Stage), shell (Scrumptious Shell), and can top (Vorpal Platter). One could be underwater, which will require blue pikmin to recover.
Sublevel 4: Navigate the narrow drainage system. Use the candypop buds to create more yellow, blue, or red pikmin. If you’re low on blue, create more as you’ll need them in the next sublevel. Mature your pikmin with nectar. Search one of the narrow drains for the leaf (Arboreal Frippery). Utilize your treasure gauge if you have trouble finding it.
Sublevel 5: Disable fire traps with red pikmin. Swarm the small bulborbs in singles if possible. Eliminate hovering blowhogs by tossing pikmin onto its back and swarming the beast when it drops. Use red pikmin or captains against the fiery blowhogs. Beware of the wollywog hopping around. Use captains or pikmin carefully; whistle them back before he drops from a hop. Create additional purple pikmin with the candypop bud if available. Recover the bottle cap (Pondering Emblem), sardines (Endless Repository), and pan (Broken Food Master). The pan might be underwater inside a drain. Toss your blue pikmin (at least 20) over the ledge into the drain and they’ll recover the treasure.
Sublevel 6: Beware of the poisonous beetle that emerges from the ground. Whistle your pikmin close if they get poisoned. Navigate very carefully because there are bombs on this level. If you spot a bomb, retreat fast. Recover the rubber duck (Rubber Ugly), bottle cap (Abstract Masterpiece), and teeth (Behemoth Jaw). Continue down to the final floor.
Sublevel 7: Time to face off against the bloyster. This creature resembles the beast in the lake near the landing spot on Perplexing Pool. Its weak spot is the tail; the danger spot is its mouth! Since the creature has a way of always facing you (making it hard to attack the tail), it’s best to split up your captains. One captain serves as the attacker and the other serves as the distraction. One captain controls a group of pikmin while the other stands in front of the creature. The creature will turn to whichever captain you control. So switch to the captain without pikmin to turn the creature toward him and away from your other captain. That other captain with the pikmin can now attack the tail. Keep switching captains to force the creature to adjust positions. Recover the speaker (Amplified Amplifier) and conclude the cave.
Assemble a group of 100 blue pikmin and proceed through the passage to the right side of the river. This is where you retrieved the nut earlier. There’s another cave entrance here but it’s submerged in water so only blue pikmin can access its entrance.
Submerged Castle
Pikmin Needed: Blue
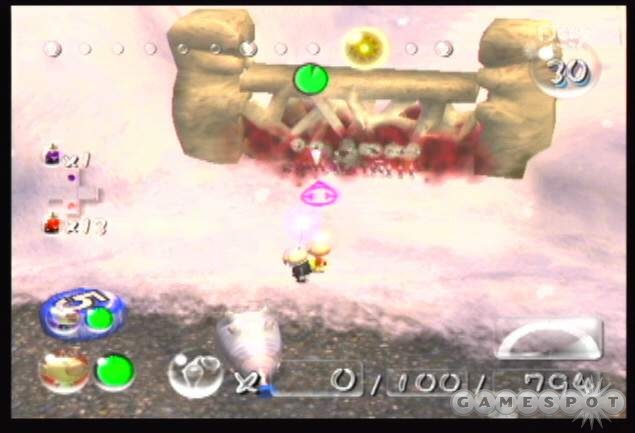
Sublevel 1: Eliminate the fiery blowhogs with your captain or pikmin--just be ready to whistle them close to put out the flame. Recover the pastry (Pastry Wheel) and return it to the pod. Avoid fire traps or if you need to destroy them, use your blue pikmin but whistle them back quickly if they’re set aflame. The flaming bulblax should be lured to water--to put out his fire--then attacked with blue pikmin as it walks away. Pick up the cookie the bulblax ingested (Bug Bait) and return it to the pod. Finally, recover the candy (Diet Doomer) before completing the level. Another danger to worry about on this level and others in the Submerged Castle is the appearance of the boss. You won’t fight him until the final floor but he’ll make an appearance on other levels. He’s invincible until you reach the final floor so don’t fight him. He’ll roll around the level and squish any pikmin in his path. Stay away from him. Hide your pikmin in corners or alcoves. Keep a captain close and use the "C-stick" to move your pikmin close to the wall if the boss gets close.
Sublevel 2: Kill the large bulbmin with your captains. Whistle and you’ll gain control of the small bulbmin. These are like multi-purpose pikmin--they’re invulnerable to fire, electricity, poison, and water. Recover the donut (Chocolate Cushion), cookie (Comfort Cookie), and candy (Confection Hoop). Avoid the boss if he appears by sticking your pikmin in corners or alcoves and protect them with a captain’s orders.
Sublevel 3: Gain additional small bulbmin from their larger counterpart (by eliminating it) and use them to disable the electricity traps and to battle the beetles. Eliminate the hovering blowhog or avoid it. Watch out for the wollywog, which your captains can battle or use your pikmin carefully. There’s a white candypop bud here, which can be used to trade blue for white pikmin. You may need them to dig up a treasure. Return the cookie (Compelling Cookie), lid (Activity Arouser), and cushion (Succulent Mattress). Avoid the boss if he appears by sticking your pikmin in corners or alcoves and protect them with a captain’s orders.
Sublevel 4: Look out for the bomb dropping bug hovering around on its balloons. Defeat it by popping the balloons with pikmin. Be ready to retreat fast to avoid any dropped bombs. Disable poison traps with bulbmin or white pikmin. Recover the battery (Proton AA), ham (Drone Supplies), and candy (Pale Passion). Avoid the boss if he appears by sticking your pikmin in corners or alcoves and protect them with a captain’s orders.
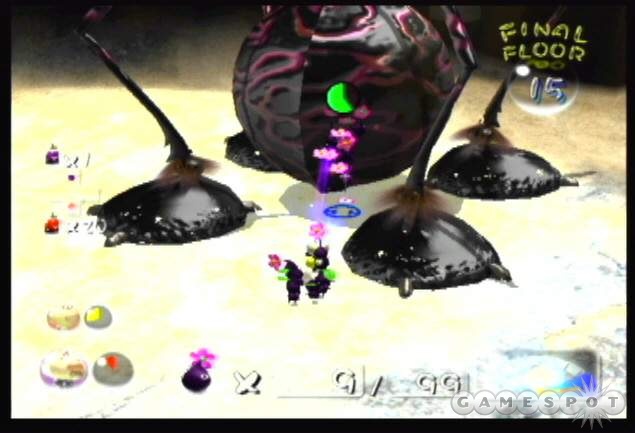
Sublevel 5: Time to get some revenge on that rolling menace! Trade blue pikmin for purple pikmin using the candypop buds here. Use the eggs to mature them with nectar. Enter the chamber to face the water wraith. Don’t go for the egg in the chamber’s center--that’s a trap. Walk close to trigger the wraith’s arrival. Move to its side and toss purple pikmin on its back. It will turn purple and become vulnerable. Continue to pound it with purple pikmin. If it escapes, get out of its way and attack from the side once again. Continue to toss purple pikmin on its back until the wraith gets thrown off its rollers. As it runs around the chamber, just hit it with purple pikmin to finish the pest off. Grab the megaphone (Professional Noisemaker) before exiting the level.
By now you should have recovered over 10,000 pokos to pay off the debt and complete the game. Watch the end cut scene, which reveals Olimar’s successful trip home. Except for one thing…he left Louie behind. You can choose to continue the game to search for more treasure. Instead of Louie, the President goes with you. A new area opens up--Wistful Wind--and you still have tasks to complete in the Valley of Repose.
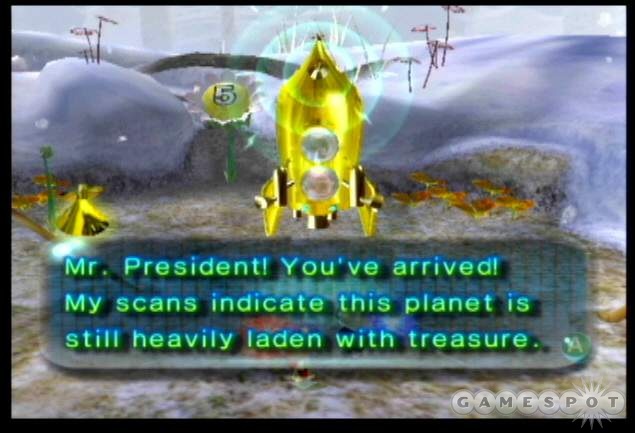
Valley of Repose, Part 2
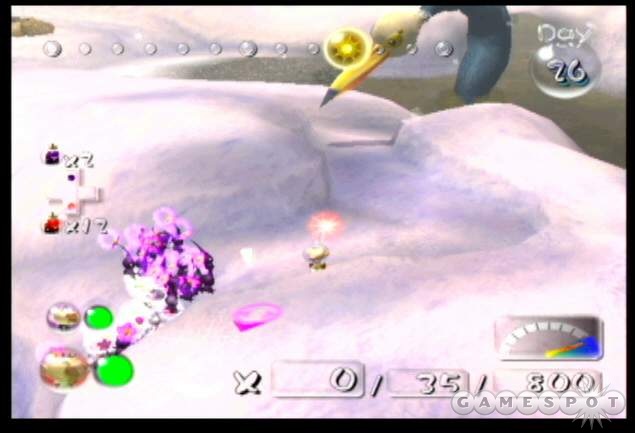
Assemble a group of blue pikmin and move to the right side of the Cave of Emergence. Go through the pool and break down the nearby wall. In the next pool, use the blue pikmin to break the rock. Doing so drains the lake so other pikmin can cross. Send some white pikmin across the first drained lake into the snowy bank. Look for your treasure gauge to reveal the location of a buried treasure. Recover the seed (Spiny Alien Treat) and bring it to the ship.
Take a group of white pikmin to the circular area where the sleeping bulborb hangs out. Note a narrow path through the snow on the right. Toss the white pikmin onto the path. Move to the other side of the path (through the drained lake) alone with your captain and find the same path on the other side. You can walk up it and rendezvous with your white pikmin. Avoid the snagret. You should be able to move the white pikmin to some buried treasure while avoiding the snagret. Recover the ring (Pink Menace) and take it to the ship.
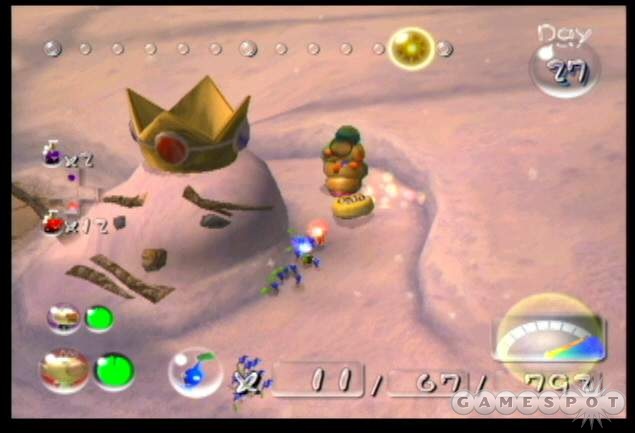
Command a group of blue pikmin and cross the drained lake. Spot the log bridge overhead. Continue to the left and up the snow bank. Defeat the cannon. You can do so with your captains or get close so you can fire your pikmin onto its back. Just stay away from its mouth. Use captains to defeat the fiery blowhogs and tackle a second cannon nearby. Extend the log bridge. Usher other pikmin across the bridge safely. Look for a path on the right side. It leads up near a crown. Beware of another cannon here. Avoid its rock projectiles and eliminate it with pikmin or your captains. Toss yellow pikmin up to the crown (at least 30). Carry the crown (Unspeakable Wonder) back to the ship. Be sure the path is clear from here back to the ship. Eliminate any enemies (like the bulborbs near the landing spot) so your pikmin make it safely.
From the crown, hug the snow bank and follow it around to the left side. Spot a bear figurine up along a snowy path above you. If you have trouble finding it, just go forward from the circular clearing where the sleeping bulborb rests. Take a group of yellow pikmin along the snow bank until you can toss them up onto the path. Once the yellow pikmin land on the path, they’ll move toward the figurine (Fossilized Ursidae)
Take a group of pikmin to the pool in the back corner of the Valley of Repose. It’s just beyond the Fossilized Ursidae and Unspeakable Wonder treasures. Take out the dumples in the water (using captains if you don’t want to risk pikmin). There’s a fiery bulblax at the back of the clearing and he’s ingested some treasure. Lure the creature into the water with a captain. This extinguishes the fire. When he’s in the water, toss blue pikmin on its back. Eliminate the creature and recover the watch (Temporal Mechanism) and return it to the ship.
Assemble a mixed group of pikmin of all colors and proceed to the area just beyond where you recovered the crown. There’s a log here; use pikmin on the log to extend a ramp toward the cave entrance. Avoid or eliminate the hovering blowhog around here or suffer the loss of pikmin maturity. Enter the cave!
Frontier Cavern
Pikmin Needed: Red, Blue, Yellow, White, Purple (recommended)
Sublevel 1: The bushes can conceal enemies so tread carefully and eliminate the small bulborbs in one-on-one situations with swarming pikmin. Sneak up on sleeping snow bulborbs and bash them with tossed purple pikmin. Find and dig up the ornament (Essential Furnishing) and jewel (Essence of Rage) with white pikmin. Descend to the next level.
Sublevel 2: Keep your pikmin safe and patrol with your captain only. There are cannons on the level and you can use them to eliminate the other enemies (bulborbs) by guiding the rocks to enemy targets. Once done, take out the cannons with captains or pikmin attacking from the side. Recover the stocking (Icon of Progress) and the present (Joy Receptacle). Continue down into the next level.
Sublevel 3: The bulbear wandering the level poses the greatest danger. Be ready with tossed pikmin to fire onto its back and attack. It’s even more effective if you can attack the creature from behind--or just use some ultra-bitter spray. Attempt to battle the bulbear away from smaller counterparts. Disable electricity traps with yellow pikmin and poison traps with white pikmin. Gather the bell (Danger Chime), ring (Gemstar Husband), and candle (Fleeting Art Form). You may need to dig one of these treasures up. Find a possible white candypop bud to trade for white pikmin. Guide them using the treasure gauge. You may also gain some bulbmin here to add to your group. Finally, upgrade pikmin with nectar found in some of the level’s corners.
Sublevel 4: Beware of the flying bugs that grab your pikmin and captains. Pikmins grabbed are thrown into the dirt (whistle them back out) and captains thrown are injured significantly. Toss yellow pikmin at the flyers to eliminate them. Or you can just avoid them. Watch the flyers move and note the pattern. Eliminate the beetles with yellow pikmin. Trade some pikmin for purple using the candypop flower. Find the marble (Omniscient Sphere) and star (Innocence Lost)

Sublevel 5: Gain some purple and white pikmin using the candypop buds. Fight the blue spiders with blue pikmin or captains. The burly mamutas smash your pikmin into the ground but they end up flowered. Allow some pikmin to mature by allowing them to get hit! Then when you’re done, toss your purple pikmin onto the mamutas back. Defeat them all and recover the glove (Brute Knuckles) which increases your captains’ punch power with a special rocket glove attack (hit punch three times).
Sublevel 6: Eliminate the fire traps with red pikmin. Keep your pikmin safe and use your captain to guide cannon rocks to enemy targets. With just cannons left, eliminate them with your captains’ new punch combo or toss pikmin from the side. Use blue pikmin (with bulbmin if necessary) to grab the chess pieces (Worthless Statue and Priceless Statue) because of the level’s water pools. Descend deeper!
Sublevel 7: Eliminate the sleeping bulborbs from behind using purple pikmin on their backs. Navigate carefully to avoid the dropping rocks (which can hurt enemies also). Tackle the smaller bulborbs in little groups to minimize losses. Find and recover the ornament (Spouse Alert) and yo-yo (Flame Tiller). One might be buried. Use the white candypop bud to create white pikmin and search for the item using your treasure gauge.
Sublevel 8: This cave features another battle against the empress bulblax. She’s a bit more difficult this time because of the presence of her larvae. Her larvae stream from the empress’ location and through the narrow tunnels of the level. The larvae are easily defeated by captains (one punch will do) but can gobble up pikmin quick. There are two routes to the empress. Taking the long route puts your pikmin in larvae danger. Instead, find a ledge at the start location and toss your purple pikmin onto the ledge. Walk your captains through the tunnels and to the other side to rendezvous with your purple pikmin. Now you can mount the attack. Defeat her the same way as before. Launch purple pikmin onto her nose and whistle them back when she starts to shake. If she shakes them off, your purple pikmin will be in danger of her roll attack and the larvae. It’s wise to eliminate the bulk of the larvae with your captain so you don’t have to deal with them as heavily during the battle. After eliminating the empress again, recover the shoe (Repugnant Appendage) and return it to the pod. Escape the cave.
Assemble a mixed group of pikmin (red, yellow, white, purple) and cross the bridge over the drained lake. Locate the poisoned wall in the back. Use your white pikmin to disable the poison trap and then break down the wall. Find the cave entrance in the clearing beyond.
Subterranean Complex
Pikmin Needed: Red, Yellow, White, Purple (recommended)
Sublevel 1: Disable poison traps with white pikmin. Swarm the small bulborbs in small groups to minimize losses. Use your purple pikmin against the larger snowy bulborbs. Sneak up on the sleeping giants and toss purple pikmin on their back. Beware of the aerial grabbers. Steer clear or lure them close and toss yellow pikmin at them. Locate the tape (Exhausted Superstick) and telephone dial (Nouveau Table) and return them to the pod. One might be buried so use your gauge to find and white pikmin to dig up.
Sublevel 2: Scout around with your captain and trigger all of the bombs. Beware of the aerial grabbers. Steer clear until you can use your yellow pikmin to pop those balloons then swarm the bug when it falls. Watch out for falling bombs; get ready to move your force quickly. Secure the bulb (Network Mainbrain) and nut (Spirit Flogger).
Sublevel 3: Disable the fire traps with red pikmin. Use a captain to make the cannons should each other. Finish them off with pikmin tossed from the side (or captains can punch carefully). Locate and recover the spring (Coiled Launcher), gear (Omega Flywheel), and bolt (Superstrong Stabilizer). One might be recovered from inside a cannon bug. Use the white candypop bud if present to trade for white pikmin. Descend to the next level.
Sublevel 4: Trade for white pikmin using the three white candypop buds. Before moving on, gather nectar from the eggs to mature your pikmin.
Sublevel 5: Send a captain out to detonate all of the bombs--just punch the bombs and run. When you explore with pikmin, beware of dropped bombs. Be ready to move them away quickly. Gather the nut (Adamantine Girdle) and clock (Mystical Disc). Continue down to the next level.
Sublevel 6: Use yellow pikmin against the aerial enemies and beetles. Disable poison traps white white pikmin. Combat the spiders with your captains or their corresponding pikmin color. Find and recover the dial (Space Wave Receiver), bolt (Repair Juggernaut), and fuse (Vacuum Processor). Be careful around the edges; tossing a pikmin off the side sends your ally to its death.
Sublevel 7: There are two large, tank-like creatures here called groinks. One stands on a platform and likely holds a treasure. Strike these enemies from behind to avoid their projectile. After killing the one on the platform, return him to your pod because he regenerates. Avoid the bombs and collect the fuse (Indomitable CPU), tape (Furious Adhesive), lid (Thirst Activator).
Sublevel 8: Time to reinforce your pikmin squad. Use the two normal candypop buds to increase your red, yellow, or blue pikmin. Trade other pikmin for purple using the three purple candypop buds. Mature your pikmin with nectar before moving on. This is an excellent place to get purple pikmin. Repeat the Subterranean Complex as desired for more purple pikmin.
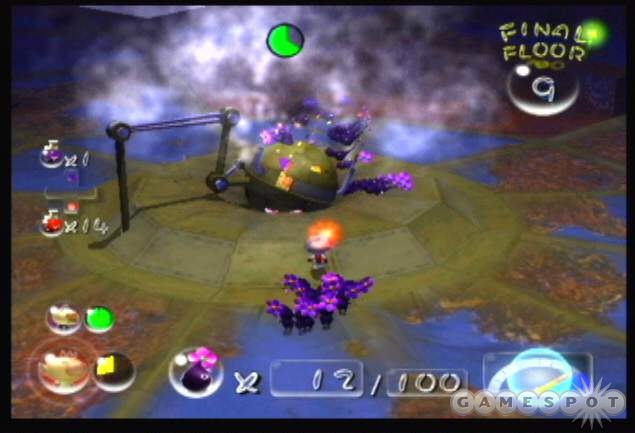
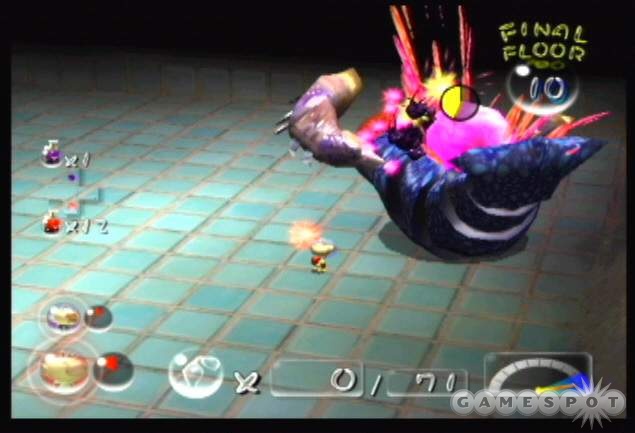
Sublevel 9: A mammoth mechanical spider hides in the chamber’s center. Approach and toss purple pikmin on its head. As it rises, whistle your pikmin back. Take cover behind the small walls along the chamber’s edge. Or just keep running. The spider uses a laser targeting system to fire its explosive projectiles. After it completes a volley, return and attack. When it starts to shake pikmin off, whistle them back and retreat again. After defeating the spider, secure the light bulb (Stellar Orb) and return to the surface.
If you’ve followed the walkthrough to this point you’ve completed all three initial areas and have surpassed 10,000 pokos. The only place left is the challenging fourth area: Wistful Wind. If you skipped around the walkthrough, find any object you haven’t collected and read that section of the walkthrough for hints on how to collect the object or complete the section.
Wistful Wind

The first treasure item is just outside the landing zone…but you’ll need 100 pikmin to grab it. There’s a dumbbell (Doomsday Apparatus) in the foliage outside the landing zone and it bears a weight of 1,000. Since you can only create 100 pikmin at a time, you’ll need 100 purple pikmin (which carry 10 weight each) to pick it up and return it to the ship. Gather additional purple pikmin by returning to previous caves with purple candypop buds. The Subterranean Complex on the Valley of Repose contains three buds near its bottom floor.
Assemble a group of blue, yellow, white, and purple pikmin and exit the landing zone to the left. Battle the groink wandering around. Attack the groink from the side with purple pikmin. Continue up the path to the left and toward three small enemies. Eliminate them with captains or swarm with your pikmin. Use nectar eggs behind your position to mature your pikmin. Take your blue pikmin into the water and defeat the enemies inside. Battle a second groink on the other side with blue pikmin and return it to the ship (it regenerates otherwise). Extend the log bridge using remaining blue pikmin. After extending the bridge, cross with white pikmin and use them to destroy the wall and the poison traps. Kill the sleeping bulborbs inside with purple pikmin. Recover the seed (Seed of Greed) from one of the bulborbs and return it to the ship.
Search near this location for another treasure. Dig up the mushroom (Anti-hiccup Fungus) and return it to the ship. Continue beyond this area to a second wall with poison traps. Use your white pikmin to destroy the wall. Eliminate the blowhog. Destroy the chrysanthemums inside by tossing pikmin onto their heads. Recover the acorn (Armored Nut) from one of the chrysanthemums and return the treasure to the ship.
Assemble a group of blue, yellow, and purple pikmin and exit your landing zone to the right. Eliminate the crawfish by luring it away from its hole. When it returns, swarm it with pikmin. Break down the wall in the pod using blue pikmin. On the other side of the wall, break the rock in the pond to drain the pool. Eliminate the fiery blowhogs with captain or blue pikmin if you’re quick to aid any pikmin on fire. Move in your other pikmin and use the yellow pikmin to disable the electric fence. Eliminate the cannon bug beyond the fence using captains or purple pikmin attacking from the side (don’t get run over by a rock!). Pick up the pine cone (Conifer Spire) just beyond and return it to the ship.
Gather up an entire group of assorted pikmin (all types) and exit your landing zone to the right. Before going to the crawfish and pool ahead (or where they were), turn left and drop down. Find the cave entrance back toward the landing spot. It’s the Cavern of Chaos.
Cavern of Chaos
Pikmin Needed: Red, Yellow, Blue, White, Purple (recommended)
Sublevel 1: Beware of the bombs and the bomb droppers. Disable the electricity traps with yellow pikmin and use them against the balloons as well. Get the cupcake (Enamel Buster) and marble (Mirth Sphere) to complete the level. Continue down to the next sublevel.
Sublevel 2: Fiery bulblaxes! Attack the creature with red pikmin. Strike it and inflict some damage but whistle them back before the creature shakes off your allies. Run away and take cover until the creature resumes its slumber. Repeat until destroyed! Recover the two rings (Gemstar Wife and Frosty Bauble) and the jewel (Essence of Despair).
Sublevel 3: Watch out for the falling rocks! Also, be careful around flowers. If the flower blinks then it’s a chrysanthemum. Dig up the treasure with white pikmin. Recover the potato (Child of the Earth) and green pepper (Infernal Vegetable) before diving into the next sublevel.
Sublevel 4: Eliminate the creature (spot its eyes poking through the sand) by luring it to the bombs. The beast will eat the bomb. While it digests the explosive, attack with your pikmin. Use blue pikmin because of the nearby water. Whistle your pikmin back then repeat the process. There are two creatures; one holds a treasure. Get the claw (Mysterious Remains) and the container (Milk Tub) before enter the next sublevel.
Sublevel 5: This sublevel contains white and purple candypop buds to trade in pikmin for the rarer breeds. You’ll also find another flower to gain more red, blue, or yellow pikmin (yellow or blue is the best choice). Flip over the bug by tossing pikmin on it to soak up some nectar.
Sublevel 6: Electricity traps and plenty of water so you’ll need yellow and blue pikmin to navigate the level. Be careful when battling the wollywogs, dumples, and beetles. Find and recover the pearl (Princess Pearl) and mushroom (Growshroom).
Sublevel 7: You’ll encounter aerial blowhogs everywhere. Toss high flying yellow pikmin to knock down the blowhogs. Disable the poison traps with white pikmin. Gather the cookie (Impenetrable Cookie) and 9-volt battery (Fuel Reservoir) to complete the sublevel.
Sublevel 8: Tons of small bulborbs littered throughout the level. Use captains to eliminate or swarm the bulborbs in small numbers. You’ll also encounter two groinks here. Use bitter-spray to counter the tough beast or even battle with your captains. Attack quickly if you use pikmin up close and launch purple pikmin onto the groinks’ backs. Get the can (Fruit Guard) before leaving the level.
Sublevel 9: Disable the poison traps with white pikmin. Aerial enemies populate the level. Lure the "captain grabbers" close then knock them down with yellow pikmin. Also use yellow pikmin against the bomb droppers. Get the cat head (Wiggle Noggin), and bottle nipple (Maternal Sculpture) before going to the final floor.
Sublevel 10: You’ve reached the boss creature in the Cavern of Chaos. Avoid the beast as it rolls around. Lure it into hitting a wall. This flips the creature over, which exposes its vulnerable spot. Toss purple pikmin onto the vulnerable area and repeat the assault until it dies. Recover the doll head (Silencer) before returning to the surface.
The second cave in the Wistful Wind can be found just beyond where you picked up the pine cone. Cross the narrow bridge and find the cave on the far side. Drop off the bridge and enter the Hole of Heroes. You’ll need an assorted group of pikmin--all types--to likely survive the tough battles within.
Hole of Heroes
Pikmin Needed: Red, Yellow, Blue, White, Purple (recommended)
Sublevel 1: This is a small sublevel but it’s cramped with enemies: sheargrubs, burrowed bugs, chrysanthemums, bulborbs, etc. Traverse carefully and battle enemies in small groups to minimize losses. Return the nut (Corpulent Nut) to the pod and continue down to the next level.
Sublevel 2: Several aerial foes to contend with on this sublevel. Beware of the bomb droppers and snatcher bugs. Toss yellow pikmin high to reach them. There’s also the bug that messes up your treasure gauge and distracts your pikmin. Eliminate it on sight with tossed pikmin. Defeat beetles with yellow pikmin. The treasure could be buried so find with your treasure gauge and dig the jewel (Essence of True Love) up with white pikmin.
Sublevel 3: Hope you weren’t attached to mature pikmin because this level contains several blowhogs. Watch out for dropped bombs, which can be especially devastating if you’ve been blown down by a blowhog. Get your pikmin out of the way quickly! Recover the marble (Love Sphere).
Sublevel 4: There’s a sink hole in the chamber’s center--there’s also a snagret there. The sink hole poses a problem because it’s tough to get away from the menacing bird. Eliminate it as you have previously. Trigger its arrival; if it emerges slowly, toss pikmin onto its beak. If the snagret comes up quickly, retreat. Move into the alcoves to get as far away as possible. Pick up the talisman (Lustrous Element) and carry it to the pod.
Sublevel 5: The mamutas can mature pikmin when they smash into the ground. Utilize the nectar eggs to mature pikmin then gain more pikmin by using the candypop bud. You need some blues for the next level so if you’re short, get blues!
Sublevel 6: This sublevel is filled with water so you need blue pikmin; note that there are candypop buds here if you need to trade for blue pikmin. Beware of the wollywogs and dumples lurking around. Lure the crawfish from its hole then attack when it tries to return. Find and recover the peanut butter (Nutrient Silo) to complete the level.
Sublevel 7: Find the cannon bugs and bloyster in the middle. Keep your pikmin back as you use a captain to make the cannon bugs hit each other. To defeat the bloyster you’ll need to use both captains. Distract it by selecting one captain with no pikmin. When it moves toward that captain, switch to the other with purple pikmin and attack the bloyster’s tail. When it turns toward the new captain, switch again and distract. Repeat until the creature is destroyed. Recover the ring (Joyless Jewel) and return it to the pod.
Sublevel 8: On this sublevel you can acquire bulbmin and use candypop buds to create more pikmin. Reinforce your army and continue down.
Sublevel 9: There are bulborbs all over the place! Sneak up on sleeping ones but there’s also one that’s awake. Trap that mobile one near a ledge if possible (if he’s inside a recess while you’re on a ledge) so you can just punch it with your captain. Note that it regenerates also so you’ll have to return it to the pod unless you want to deal with it again. Use red pikmin on the fiery bulborb to uncover the can opener (Dimensional Slicer).
Sublevel 10: Spot the eyes poking out of the ground--that’s your enemy! Toss purples on its head but whistle them back before the creature squashes them. Take out these boss creatures one at a time. Watch out for poison traps and disable with white pikmin. Recover the block (Treasured Gyro Block) from one of the boss creatures and continue down.
Sublevel 11: You come face-to-rear with the empress again! You start near her rear-end where her larvae emerge from. Run to other side--with all your pikmin--and break the wall leading to the exit. While your pikmin work, use captains to eliminate any larvae that follow. You need an area to hide in; when the empress rolls, rocks fall from the ceiling. Attack her face with pikmin. Whistle pikmin back before the empress rolls and retreat to the alcove. Get block (Favorite Gyro Block) from her carcass.
Sublevel 12: Flip over the gold bug, just toss pikmin onto it, to gain the block (Lost Gyro Block) and return it to the pod. Utilize the candypop bud for more pikmin. Flip over other bugs to gain nectar.
[pikmin-059 "Take cover to avoid the armed spider’s projectiles." %>
Sublevel 13: There’s an armed spider in the sublevel’s center chamber. Use blue pikmin to attack because the spider rests in the center of a pool. After the initial bombardment, retreat behind the short walls at the chamber’s edge to avoid the spider’s laser and subsequent projectiles. After its barrage, resume the attack. Pick up the block from its body (Memorable Gyro Block).
Sublevel 14: Battle another mechanical spider! Stay away from the creature’s walk and strike when the spider rests and lowers its body. You may need to use blue pikmin if the beast begins near water. Get the block (Fond Gyro Block) and return it to the pod.
Sublevel 15: Eliminate the jellyfish first then go to the chamber’s center. Time to battle the raging long legs! It’s similar to the previous spider battles but slower and bigger. Stay away from its walk and hit the spider’s body with purple pikmin. Recover the device (Remembered Old Buddy) and conclude the cave.
The entrance to the last cave, the Dream Den, is found near where you recovered the seed and mushroom treasures. It’s the toughest cave in the game and there are no reinforcements on the way down. You must use all pikmin very carefully and have enough to defeat the toughest boss in the game on the den’s final floor.
Dream Den
Pikmin Needed: Red, Yellow, Blue, White, Purple (recommended)
Sublevel 1: Disable the poison traps with white pikmin. Bombard the jellyfish with tossed pikmin. Watch your route (especially when recovering treasure or gathering bodies) because there are a bunch of bulborbs around. Lure the crawfish from its hole to defeat it. Find and recover the food (Disguised Delicacy) before continuing down.
Sublevel 2: Combat the bulborbs in small groups. It’s very important to minimize every single loss in the Dream Den. There’s a tank-like groink on a tower. To make matters worse, the creature regenerates after being killed and he holds a treasure item. Eliminate him with tossed purple and yellow pikmin. Return the pencil (Implement of Toil) and pencil sharpener (Manual Honer) to the pod. Descend to the next sublevel.
Sublevel 3: A bulblax drops when you wander around the level with your pikmin (the treasure guage reveals where he drops from). Be ready for him! Use the bomb droppers to kill smaller bulblax or use your captains. Disable electricity traps with yellow pikmin and poison traps with white. Beware of dropping bombs, especially near exit. Pick up the spinner (Glee Spinner).
Sublevel 4: This level contains many cannon bugs and beetles. Eliminate the beetles with yellow pikmin. Disable poison traps with white pikmin. You can take out cannons with captains and even make some shoot each other. Be careful not to toss your pikmin over the side. Locate and return the coin (mirrored Element) before moving on.
Sublevel 5: Lots of things for red pikmin to accomplish here. Disable fire traps, eliminate the fiery blowhogs, and combat the fiery bulblax holding an item. Watch out for the hovering blowhog as well! Use your yellow pikmin to knock it down then swarm the creature. Collect the apple (Insect Condo) to complete the level and move onward.
Sublevel 6: There’s a sink hole in the level’s center. Move around it carefully because you’ll be pulled toward the center making it a bit harder to navigate your pikmin around. Eliminate the cannons with captains or pikmin from the side (best to make some shoot each other given the quantity on the level). Bombard the jellyfish to recover the trinket (Future Orb). Explore thoroughly; nectar could drop in alcoves so you can mature some pikmin.
Sublevel 7: Plenty of aerial enemies inhabit this sublevel. Bombard the blowhogs with your pikmin; one of the bigger blowhogs holds the jewel (Essence of Desire). Toss yellow pikmin to eliminate bomb droppers and the captain stealing bugs. Continue to the next sublevel.
Sublevel 8: A full collection of traps here. Disable the fire, poison, and electric contraptions with corresponding pikmin. You’ll also encounter assorted spider types here. Eliminate with captains or necessary pikmin. A bug here messes up treasure gauge and can distract your pikmin. Eliminate on sight with tossed pikmin. Return the doll (Extreme Perspirator) and pumpkin (Possessed Squash) to the pod.
Sublevel 9: Hit the beetle with pikmin to create some nectar. Take geyser up if you’re struggling through the Dream Den or continue down for more treasure.
Sublevel 10: Lots of water on this level that also contains many enemies. Battle the fiery blowhogs with captains or red pikmin, combat dumples and wollywogs carefully so you don’t lose many pikmin, and crush the groink from the side or behind and return it to the ship (it regenerates). Recover the treasure from the jellyfish; you’ll need at least 15 blues to get it through water. Return the block (Talisman of Life) to the pod.
Sublevel 11: Disable traps with appropriate pikmin. Avoid the aerial stealer bugs. Crush the fiery blowhogs with captains or red pikmin. Note that the level contains a breadbug that could steal treasure into its hole. If the gauge goes off over the breadbug’s hole, you’ll have to kill the creature to get the treasure. Recover the tile (Boss Stone) and lid (Yellow Taste Tyrant).
Sublevel 12: Disable the plentiful poison traps with white pikmin. Careful around the wollywogs; pound the top with purple pikmin. There’s a bug present that disrupts the treasure gauge and distracts your pikmin. Sneak up on sleeping bulborbs and toss purples on its back. Navigate carefully and watch for falling rocks. Locate the treasures; one could be inside a bulborb and the other buried requiring white pikmin. Get the can (Stringent Container) and ring (Universal Com).
Sublevel 13: This sublevel contains many sleeping bulborbs and one holds a treasure. Use your treasure gauge to find the bulborb holding the treasure. Sneak up on it and toss purple pikmin on its back. Traverse the level carefully to not disturb bulborbs that aren’t holding the treasure. Recover the bottle cap (Hypnotic Platter) and return it to the pod. Continue down to the final floor.

Sublevel 14: It’s time to rescue Louie! You’re about to face off against the titan dweevil. It has four methods of attack: each method corresponds to a particular pikmin type. It can spew fire, it can launch water, it can disperse electric shock, and it can inflict poison damage. If you’ve managed to keep your pikmin relatively safe up to this point then you can use each pikmin type against the corresponding weapon. Use blue pikmin against the monster pump, which launches water around the arena; use yellow pikmin against the shock therapist, which disperses electricity around the area; use red pikmin to attack the flare cannon; and use white pikmin to attack the comedy bomb, which creates poisonous mist. Always be ready to retreat to the arena’s edge to avoid attacks. If you’re hit by water, utilize your whistle to rescue any drowning pikmin. After the battle collect the following treasures: Monster Pump, Shock Therapist, Flare Cannon, Comedy Bomb, and Louie himself otherwise known as the King of Bugs.
Chapter 4 - Battle Mode Tips
This section offers a collection of tips on Pikmin 2’s two-player battle mode.
- Pikmin 2’s two-player battle mode could be called "Capture the Marble" as the objective is to retrieve your opponent’s marble and return it to your onion. You can also capture four yellow marbles to meet the same win requirement. Note that if your enemy moves your marble halfway to their home, you can’t move it back! It will have to be defended at the new position.
- Maps contain neutral enemies that will attack you or your foe (such as bulborbs or wollywogs). Sometimes a yellow marble can be found inside an enemy. Most of the time you’ll likely want to stay away from battling too many neutral enemies but they can be returned to the onion. But if you struggle against a neutral enemy, your real foe could capitalize by wiping out your remaining forces and attacking your captain. If you lose your captain, you also lose the game.
- Neutral enemies pose the biggest problem when you’re trying to haul something back to the onion. A hungry bulborb could eat your pikmin carrier rather easily. Utilize your captain to distract the neutral enemies and allow your haulin’ pikmin to get home.
- Gain a pikmin advantage on your opponent by producing more at each opportunity. Use the posies near your start location to generate more pikmin and combat easy to defeat creatures and return their corpse to your onion for more pikmin. Obviously it can be a double-edge sword if you attack the wrong neutral enemy and suffer losses.
- Grab a cherry to receive a bonus power-up. It’s the power-up roulette! It spins in the corner; the symbol it rests on resembles a particular power-up. The chart below reveals each power-up’s graphic and its use.
| POWER-UP | PICTURE |
| Supercharge all pikmin! Enhances your pikmin with the spicy spray. | Pool of ultra-spicy spray. |
| Bury enemy pikmin! Sinks your enemy’s pikmin into the ground; he’ll have to pluck them back out. | Pool of ultra-bitter spray. |
| Volatile dweevil drops on opponent. The resulting explosion can devastate an enemy that doesn’t get away fast enough. | A volatile dweevil. |
| Blowhog drops on opponent. This is a fiery or watery blowhog variety. | A fiery and watery blowhog. |
| Blowhog drops on opponent. This is an aerial blowhog which can blow away mature pikmin. | An aerial blowhog. |
| Swooping snitchbug drops on opponent. Annoying pest that steals pikmin and tosses them into ground. | A swooping snitchbug. |
| Recover stolen marble. Get one back! | A marble. |
| Boulders drop on opponent. Smash your enemy into the ground with falling rocks. | A boulder. |
| All pikmin bloom. Mature your pikmin quickly with this power-up. | A flower. |
| Increase pikmin by 5. | A sprout and +5. |
| Increase pikmin by 10. | A sprout and +10. |
| Vanish from opponent’s view. | Light blue pikmin symbol. |
Chapter 5 - Treasures
The following chart lists all treasures to find in Pikmin 2, their location, and corresponding value in pokos. You can also discover all treasure locations by following the walkthrough in this game guide.
| NAME | LOCATION | POKOS VALUE |
| Abstract Masterpiece | Perplexing Pool: Shower Room, Sublevel 6 | 30 |
| Activity Arouser | Perplexing Pool: Submerged Castle, Sublevel 3 | 100 |
| Adamantine Girdle | Valley of Repose: Subterranean Complex, Sublevel 5 | 70 |
| Air Brake | Awakening Wood | 100 |
| Alien Billboard | Awakening Wood: White Flower Garden, Sublevel 1 | 80 |
| Amplified Amplifier | Perplexing Pool: Shower Room, Sublevel 7 | 100 |
| Anti-hiccup Fungus | Wistful Wind | 30 |
| Anxious Sprout | Awakening Wood: Bulblax Kingdom, Sublevel 5 | 50 |
| Aquatic Mine | Perplexing Pool | 80 |
| Arboreal Flippery | Perplexing Pool: Shower Room, Sublevel 4 | 10 |
| Armored Nut | Wistful Wind | 60 |
| Behemoth Jaw | Perplexing Pool: Shower Room, Sublevel 6 | 100 |
| Boom Cone | Perplexing Pool: Glutton’s Kitchen, Sublevel 5 | 100 |
| Boss Stone | Wistful Wind: Dream Den, Sublevel 11 | 110 |
| Broken Food Master | Perplexing Pool: Shower Room, Sublevel 5 | 90 |
| Brute Knuckles | Valley of Repose: Frontier Cavern, Sublevel 5 | 100 |
| Bug Bait | Perplexing Pool: Submerged Castle, Sublevel 1 | 15 |
| Chance Totem | Awakening Wood | 100 |
| Child of the Earth | Wistful Wind: Cavern of Chaos, Sublevel 3 | 40 |
| Chocolate Cushion | Perplexing Pool: Submerged Castle, Sublevel 2 | 40 |
| Citrus Lump | Valley of Repose: Cave of Emergence, Sublevel 1 | 180 |
| Coiled Launcher | Valley of Repose: Subterranean Complex, Sublevel 3 | 70 |
| Colossal Fossil | Awakening Wood: Bulblax Kingdom, Sublevel 6 | 140 |
| Combustion Berry | Awakening Wood: Snagret Hole, Sublevel 2 | 190 |
| Comedy Bomb | Wistful Wind: Dream Den, Sublevel 14 | 1,000 |
| Comfort Cookie | Perplexing Pool: Submerged Castle, Sublevel 2 | 10 |
| Compelling Cookie | Perplexing Pool: Submerged Castle, Sublevel 3 | 10 |
| Confection Hoop | Perplexing Pool: Submerged Castle, Sublevel 2 | 60 |
| Conifer Spire | Wistful Wind | 15 |
| Corpulent Nut | Wistful Wind: Hole of Heroes, Sublevel 1 | 80 |
| Cosmic Archive | Awakening Wood: Hole of Beasts, Sublevel 3 | 230 |
| Courage Reactor | Valley of Repose | 280 |
| Creative Inspiration | Perplexing Pool: Citadel of Spiders, Sublevel 2 | 100 |
| Crystal Clover | Awakening Wood: Bulblax Kingdom, Sublevel 1 | 150 |
| Crystal King | Awakening Wood: Bulblax Kingdom, Sublevel 4 | 110 |
| Crystallized Clairvoyance | Awakening Wood: Snagret Hole, Sublevel 5 | 120 |
| Crystallized Telekinesis | Awakening Wood: Snagret Hole, Sublevel 1 | 120 |
| Crystallized Telepathy | Awakening Wood: Snagret Hole, Sublevel 4 | 120 |
| Cupid’s Grenade | Awakening Wood: Snagret Hole, Sublevel 4 | 20 |
| Danger Chime | Valley of Repose: Frontier Cavern, Sublevel 3 | 120 |
| Decorative Goo | Awakening Wood | 80 |
| Diet Doomer | Perplexing Pool: Submerged Castle, Sublevel 1 | 25 |
| Dimensional Slicer | Wistful Wind: Hole of Heroes, Sublevel 9 | 100 |
| Director of Destiny | Perplexing Pool: Glutton’s Kitchen, Sublevel 3 | 100 |
| Disguised Delicacy | Wistful Wind: Dream Den, Sublevel 1 | 40 |
| Doomsday Apparatus | Wistful Wind | 3,000 |
| Dream Architect | Awakening Wood: Hole of Beasts, Sublevel 4 | 280 |
| Dream Material | Perplexing Pool: Glutton’s Kitchen, Sublevel 6 | 100 |
| Drone Supplies | Perplexing Pool: Submerged Castle, Sublevel 4 | 130 |
| Drought Ender | Awakening Wood: White Flower Garden, Sublevel 2 | 100 |
| Durable Energy Cell | Perplexing Pool: Shower Room, Sublevel 2 | 160 |
| Emperor Whistle | Awakening Wood: Snagret Hole, Sublevel 5 | 75 |
| Enamel Buster | Wistful Wind: Cavern of Chaos, Sublevel 1 | 60 |
| Endless Repository | Perplexing Pool: Shower Room, Sublevel 5 | 130 |
| Essence of Desire | Wistful Wind: Dream Den, Sublevel 7 | 90 |
| Essence of Despair | Wistful Wind: Cavern of Chaos, Sublevel 2 | 80 |
| Essence of Rage | Valley of Repose: Frontier Cavern, Sublevel 1 | 70 |
| Essence of True Love | Wistful Wind: Hole of Heroes, Sublevel 2 | 60 |
| Essential Furnishing | Valley of Repose: Frontier Cavern, Sublevel 1 | 100 |
| Eternal Emerald Eye | Awakening Wood: Bulblax Kingdom, Sublevel 6 | 150 |
| Exhausted Superstick | Valley of Repose: Subterranean Complex, Sublevel 1 | 50 |
| Extreme Perspirator | Wistful Wind: Dream Den, Sublevel 8 | 150 |
| Favorite Gyro Block | Wistful Wind: Hole of Heroes, Sublevel 11 | 80 |
| Five-Man Napsack | Awakening Wood: White Flower Garden, Sublevel 5 | 100 |
| Flame of Tomorrow | Perplexing Pool: Citadel of Spiders, Sublevel 4 | 10 |
| Flame Tiller | Valley of Repose: Frontier Cavern, Sublevel 7 | 120 |
| Flare Cannon | Wistful Wind: Dream Den, Sublevel 14 | 1,000 |
| Fleeting Art Form | Valley of Repose: Frontier Cavern, Sublevel 3 | 75 |
| Fond Gyro Block | Wistful Wind: Hole of Heroes, Sublevel 14 | 80 |
| Forged Courage | Awakening Wood: Bulblax Kingdom, Sublevel 7 | 100 |
| Fortified Delicacy | Perplexing Pool | 60 |
| Fossilized Ursidae | Valley of Repose | 160 |
| Frosty Bauble | Wistful Wind: Cavern of Chaos, Sublevel 2 | 100 |
| Fruit Guard | Wistful Wind: Cavern of Chaos, Sublevel 8 | 130 |
| Fuel Reservoir | Wistful Wind: Cavern of Chaos, Sublevel 7 | 120 |
| Furious Adhesive | Valley of Repose: Subterranean Complex, Sublevel 7 | 60 |
| Future Orb | Wistful Wind: Dream Den, Sublevel 6 | 200 |
| Gemstar Husband | Valley of Repose: Frontier Cavern, Sublevel 3 | 100 |
| Gemstar Wife | Wistful Wind: Cavern of Chaos, Sublevel 2 | 100 |
| Geographic Projection | Awakening Wood | 200 |
| Gherkin Gate | Perplexing Pool | 100 |
| Glee Spinner | Wistful Wind: Dream Den, Sublevel 3 | 140 |
| Growshroom | Wistful Wind: Cavern of Chaos, Sublevel 6 | 50 |
| Gyroid Bust | Awakening Wood: Bulblax Kingdom, Sublevel 7 | 250 |
| Happiness Emblem | Perplexing Pool: Glutton’s Kitchen, Sublevel 4 | 100 |
| Harmonic Synthesizer | Perplexing Pool: Glutton’s Kitchen, Sublevel 3 | 120 |
| Healing Cask | Awakening Wood | 60 |
| Heavy-Duty Magnetizer | Awakening Wood: Snagret Hole, Sublevel 4 | 150 |
| Hideous Victual | Perplexing Pool: Glutton’s Kitchen, Sublevel 6 | 100 |
| Hypnotic Platter | Wistful Wind: Dream Den, Sublevel 13 | 100 |
| Icon of Progress | Valley of Repose: Frontier Cavern, Sublevel 2 | 85 |
| Impediment Scourge | Perplexing Pool | 50 |
| Impenetrable Cookie | Wistful Wind: Cavern of Chaos, Sublevel 7 | 25 |
| Imperative Cookie | Perplexing Pool: Glutton’s Kitchen, Sublevel 2 | 25 |
| Implement of Toil | Wistful Wind: Dream Den, Sublevel 2 | 55 |
| Indomitable CPU | Valley of Repose: Subterranean Complex, Sublevel 7 | 100 |
| Infernal Vegetable | Wistful Wind: Cavern of Chaos, Sublevel 3 | 30 |
| Innocence Lost | Valley of Repose: Frontier Cavern, Sublevel 4 | 100 |
| Insect Condo | Wistful Wind: Dream Den, Sublevel 5 | 40 |
| Invigorator | Perplexing Pool: Glutton’s Kitchen, Sublevel 4 | 130 |
| Joy Receptacle | Valley of Repose: Frontier Cavern, Sublevel 2 | 60 |
| Joyless Jewel | Wistful Wind: Hole of Heroes, Sublevel 7 | 100 |
| Justice Alloy | Awakening Wood: Snagret Hole, Sublevel 7 | 100 |
| King of Bugs | Wistful Wind: Dream Den, Sublevel 14 | 10 |
| King of Sweets | Perplexing Pool: Citadel of Spiders, Sublevel 4 | 15 |
| Leviathan Feather | Awakening Wood: Snagret Hole, Sublevel 1 | 10 |
| Lip Service | Perplexing Pool: Citadel of Spiders, Sublevel 2 | 50 |
| Lost Gyro Block | Wistful Wind: Hole of Heroes, Sublevel 12 | 80 |
| Love Nugget | Perplexing Pool: Citadel of Spiders, Sublevel 1 | 40 |
| Love Sphere | Wistful Wind: Hole of Heroes, Sublevel 3 | 85 |
| Luck Wafer | Awakening Wood: Hole of Beasts, Sublevel 4 | 140 |
| Lustrous Element | Wistful Wind: Hole of Heroes, Sublevel 4 | 1,000 |
| Manual Honer | Wistful Wind: Dream Den, Sublevel 2 | 130 |
| Massage Girdle | Perplexing Pool | 100 |
| Massive Lid | Perplexing Pool: Glutton’s Kitchen, Sublevel 2 | 100 |
| Master’s Instrument | Perplexing Pool: Glutton’s Kitchen, Sublevel 1 | 30 |
| Maternal Sculpture | Wistful Wind: Cavern of Chaos, Sublevel 9 | 55 |
| Meat of Champions | Perplexing Pool: Glutton’s Kitchen, Sublevel 6 | 35 |
| Meat Satchel | Awakening Wood: Snagret Hole, Sublevel 3 | 40 |
| Memorable Gyro Block | Wistful Wind: Hole of Heroes, Sublevel 13 | 80 |
| Memorial Shell | Perplexing Pool: Citadel of Spiders, Sublevel 3 | 100 |
| Merciless Extractor | Perplexing Pool: Shower Room, Sublevel 1 | 90 |
| Milk Tub | Wistful Wind: Cavern of Chaos, Sublevel 4 | 60 |
| Mirrored Element | Wistful Wind: Dream Den, Sublevel 4 | 300 |
| Mirrored Stage | Perplexing Pool: Shower Room, Sublevel 3 | 140 |
| Mirth Sphere | Wistful Wind: Cavern of Chaos, Sublevel 1 | 85 |
| Monster Pump | Wistful Wind: Dream Den, Sublevel 14 | 1,000 |
| Mysterious Remains | Wistful Wind: Cavern of Chaos, Sublevel 4 | 150 |
| Mystical Disc | Valley of Repose: Subterranean Complex, Sublevel 5 | 75 |
| Network Mainbrain | Valley of Repose: Subterranean Complex, Sublevel 2 | 100 |
| Nouveau Table | Valley of Repose: Subterranean Complex, Sublevel 1 | 100 |
| Nutrient Silo | Wistful Wind: Hole of Heroes, Sublevel 5 | 130 |
| Olimarnite Shell | Awakening Wood: Bulblax Kingdom, Sublevel 3 | 40 |
| Omega Flywheel | Valley of Repose: Subterranean Complex, Sublevel 3 | 60 |
| Omniscient Sphere | Valley of Repose: Frontier Cavern, Sublevel 4 | 85 |
| Onion Replica | Perplexing Pool | 30 |
| Optical Illustration | Perplexing Pool | 140 |
| Pale Passion | Perplexing Pool: Submerged Castle, Sublevel 4 | 25 |
| Paradoxical Enigma | Perplexing Pool: Citadel of Spiders, Sublevel 2 | 80 |
| Pastry Wheel | Perplexing Pool: Submerged Castle, Sublevel 1 | 35 |
| Patience Tester | Perplexing Pool: Citadel of Spiders, Sublevel 3 | 130 |
| Petrified Heart | Awakening Wood: White Flower Garden, Sublevel 2 | 100 |
| Pilgrim Bulb | Awakening Wood | 55 |
| Pink Menace | Valley of Repose | 100 |
| Pondering Emblem | Perplexing Pool: Shower Room, Sublevel 5 | 100 |
| Possessed Squash | Wistful Wind: Dream Den, Sublevel 8 | 180 |
| Priceless Statue | Valley of Repose: Frontier Cavern, Sublevel 6 | 80 |
| Princess Pearl | Wistful Wind: Cavern of Chaos, Sublevel 6 | 100 |
| Professional Noisemaker | Perplexing Pool: Submerged Castle, Sublevel 5 | 100 |
| Proton AA | Perplexing Pool: Submerged Castle, Sublevel 4 | 90 |
| Prototype Detector | Awakening Wood: Hole of Beasts, Sublevel 5 | 200 |
| Quenching Emblem | Valley of Repose: Cave of Emergence, Sublevel 1 | 100 |
| Regal Diamond | Perplexing Pool: Citadel of Spiders, Sublevel 5 | 100 |
| Remembered Old Buddy | Wistful Wind: Hole of Heroes, Sublevel 15 | 250 |
| Repair Juggernaut | Valley of Repose: Subterranean Complex, Sublevel 6 | 85 |
| Repugnant Appendage | Valley of Repose: Frontier Cavern, Sublevel 8 | 100 |
| Rubber Ugly | Perplexing Pool: Shower Room, Sublevel 6 | 90 |
| Salivatrix | Awakening Wood: Snagret Hole, Sublevel 6 | 30 |
| Science Project | Awakening Wood: Snagret Hole, Sublevel 6 | 20 |
| Scrumptious Shell | Perplexing Pool: Shower Room, Sublevel 3 | 60 |
| Seed of Greed | Wistful Wind | 70 |
| Shock Therapist | Wistful Wind: Dream Den, Sublevel 14 | 1,000 |
| Silencer | Wistful Wind: Cavern of Chaos, Sublevel 10 | 670 |
| Space Wave Receiver | Valley of Repose: Subterranean Complex, Sublevel 6 | 80 |
| Spherical Atlas | Valley of Repose: Cave of Emergence, Sublevel 2 | 200 |
| Spiny Alien Treat | Valley of Repose | 50 |
| Spirit Flogger | Valley of Repose: Subterranean Complex, Sublevel 2 | 70 |
| Spouse Alert | Valley of Repose: Frontier Cavern, Sublevel 7 | 120 |
| Stellar Orb | Valley of Repose: Subterranean Complex, Sublevel 9 | 100 |
| Stone of Glory | Awakening Wood: Hole of Beasts, Sublevel 1 | 100 |
| Strife Monolith | Awakening Wood: Hole of Beasts, Sublevel 3 | 150 |
| Stringent Container | Wistful Wind: Dream Den, Sublevel 12 | 130 |
| Stupendous Lens | Awakening Wood: Snagret Hole, Sublevel 6 | 120 |
| Succulent Mattress | Perplexing Pool: Submerged Castle, Sublevel 3 | 50 |
| Sud Generator | Perplexing Pool: Shower Room, Sublevel 2 | 60 |
| Sulking Antenna | Perplexing Pool: Glutton’s Kitchen, Sublevel 5 | 150 |
| Sunseed Berry | Awakening Wood | 170 |
| Superstick Textile | Awakening Wood: White Flower Garden, Sublevel 3 | 80 |
| Superstrong Stabilizer | Valley of Repose: Subterranean Complex, Sublevel 3 | 60 |
| Survival Ointment | Awakening Wood: White Flower Garden, Sublevel 4 | 90 |
| Sweet Dreamer | Perplexing Pool: Glutton’s Kitchen, Sublevel 6 | 40 |
| Talisman of Life | Wistful Wind: Dream Den, Sublevel 10 | 90 |
| Taste Sensation | Awakening Wood: Snagret Hole, Sublevel 2 | 40 |
| Tear Stone | Awakening Wood: Bulblax Kingdom, Sublevel 2 | 150 |
| Temporal Mechanism | Valley of Repose | 110 |
| The Key | Perplexing Pool: Citadel of Spiders, Sublevel 5 | 100 |
| Thirst Activator | Valley of Repose: Subterranean Complex, Sublevel 7 | 300 |
| Time Capsule | Perplexing Pool: Citadel of Spiders, Sublevel 4 | 70 |
| Toxic Toadstool | Awakening Wood: White Flower Garden, Sublevel 4 | 30 |
| Treasured Gyro Block | Wistful Wind: Hole of Heroes, Sublevel 10 | 80 |
| Triple Sugar Threat | Awakening Wood: Snagret Hole, Sublevel 6 | 60 |
| Universal Com | Wistful Wind: Dream Den, Sublevel 12 | 100 |
| Unknown Merit | Awakening Wood: Bulblax Kingdom, Sublevel 4 | 100 |
| Unspeakable Wonder | Valley of Repose | 120 |
| Utter Scrap | Valley of Repose | 170 |
| Vacuum Processor | Valley of Repose: Subterranean Complex, Sublevel 6 | 100 |
| Vorpal Platter | Perplexing Pool: Shower Room, Sublevel 3 | 60 |
| White Goodness | Perplexing Pool: Glutton’s Kitchen, Sublevel 4 | 60 |
| Wiggle Noggin | Wistful Wind: Cavern of Chaos, Sublevel 9 | 85 |
| Worthless Statue | Valley of Repose: Frontier Cavern, Sublevel 6 | 80 |
| Yellow Taste Tyrant | Wistful Wind: Dream Den, Sublevel 11 | 100 |
Chapter 6 - Items
The following treasures not only add to your pokos total but they also offer various upgrades, such as making your captains invulnerable to fire or unlocking the game’s challenge mode.
| ITEM | LOCATION | FUNCTION |
| Amplified Amplifier | Perplexing Pool: Shower Room, Sublevel 7 | Increases range of whistle. |
| Brute Knuckles | Valley of Repose: Frontier Cavern, Sublevel 5 | Gives a punch combo attack to captains. Hit punch three times. |
| Dream Material | Perplexing Pool: Glutton’s Kitchen, Sublevel 6 | Enhances captains with anti-electricity suits. |
| Five-Man Napsack | Awakening Wood: White Flower Garden, Sublevel 5 | Allows your captain to take a nap and pikmin return him to your base. |
| Forged Courage | Awakening Wood: Bulblax Kingdom, Sublevel 7 | Protects captains against fire damage. |
| Geographic Projection | Awakening Wood | Opens the route into the Perplexing Pool. |
| Justice Alloy | Awakening Wood: Snagret Hole, Sublevel 7 | Provides extra durability to captains. |
| Professional Noisemaker | Perplexing Pool: Submerged Castle, Sublevel 5 | Blowing whistle will pluck pikmin. |
| Prototype Detector | Awakening Wood: Hole of Beasts, Sublevel 5 | A gauge to detect present and nearby treasures. |
| Repugnant Appendage | Valley of Repose: Frontier Cavern, Sublevel 8 | Increases foot speed of captains. Also can’t be blown back by blowhogs. |
| Spherical Atlas | Valley of Repose: Cave of Emergence, Sublevel 2 | Opens the route into the Awakening Wood |
| Stellar Orb | Valley of Repose: Subterranean Complex, Sublevel 9 | Brightens underground areas. |
| The Key | Perplexing Pool: Citadel of Spiders, Sublevel 5 | Unlocks challenge mode. |
Chapter 7 - Piklopedia
The following chart reveals Pikmin 2’s entire Piklopedia and each creature’s corresponding treasure value.
| NUMBER | CREATURE | TREASURE VALUE |
| 1 | Red Bulborb | 7 |
| 2 | Hairy Bulborb | 7 |
| 3 | Orange Bulborb | 7 |
| 4 | Dwarf Red Bulborb | 2 |
| 5 | Snow Bulborb | 2 |
| 6 | Dwarf Orange Bulborb | 2 |
| 7 | Spotty Bulbear | 10 |
| 8 | Dwarf Bulbear | 2 |
| 9 | Bulborb Larvae | N/A |
| 10 | Fiery Bulblax | 10 |
| 11 | Water Dumple | 3 |
| 12 | Bulbmin | 3 |
| 13 | Fiery Blowhog | 4 |
| 14 | Watery Blowhog | 4 |
| 15 | Armored Cannon Beetle Larvae | 4 |
| 16 | Decorated Cannon Beetle | 4 |
| 17 | Puffy Blowhog | N/A |
| 18 | Withering Blowhog | N/A |
| 19 | Gatling Groink | 7 |
| 20 | Iridescent Flint Beetle | N/A |
| 21 | Iridescent Glint Beetle | N/A |
| 22 | Doodlebug | N/A |
| 23 | Female Sheargrub | 1 |
| 24 | Male Sheargrub | 2 |
| 25 | Shearwig | 2 |
| 26 | Cloaking Burrow-Nit | 3 |
| 27 | Ravenous Whiskerpillar | 1 |
| 28 | Anode Beetle | 3 |
| 29 | Mitite | 1 |
| 30 | Hermit Crawmad | 3 |
| 31 | Swooping Snitchbug | 4 |
| 32 | Bumbling Snitchbug | 4 |
| 33 | Careening Dirigibug | 4 |
| 34 | Antenna Beetle | 5 |
| 35 | Lesser Spotted Jellyfloat | N/A |
| 36 | Greater Spotted Jellyfloat | N/A |
| 37 | Fiery Dweevil | 2 |
| 38 | Anode Dweevil | 2 |
| 39 | Caustic Dweevil | 2 |
| 40 | Munge Dweevil | 2 |
| 41 | Volatile Dweevil | 0 |
| 42 | Toady Bloyster | 10 |
| 43 | Yellow Wollywog | 5 |
| 44 | Wollywog | 7 |
| 45 | Wogpole | 1 |
| 46 | Lapis Lazuli Candypop Bud | N/A |
| 47 | Crimson Candypop Bud | N/A |
| 48 | Golden Candypop Bud | N/A |
| 49 | Violet Candypop Bud | N/A |
| 50 | Ivory Candypop Bud | N/A |
| 51 | Queen Candypop Bud | N/A |
| 52 | Creeping Chrysanthemum | 7 |
| 53 | Skitter Leaf | 1 |
| 54 | Unmarked Spectralids | 1 |
| 55 | Honeywisp | N/A |
| 56 | Mamuta | 3 |
| 57 | Breadbug | 3 |
| 58 | Pellet Posey | N/A |
| 59 | Common Glowcap | N/A |
| 60 | Clover | N/A |
| 61 | Figwort | N/A |
| 62 | Dandelion | N/A |
| 63 | Seeding Dandelion | N/A |
| 64 | Horsetail | N/A |
| 65 | Foxtail | N/A |
| 66 | Glowstem | N/A |
| 67 | Margaret | N/A |
| 68 | Fiddlehead | N/A |
| 69 | Shoot | N/A |
| 70 | Empress Bulblax | 15 |
| 71 | Burrowing Snagret | 10 |
| 72 | Beady Long Legs | N/A |
| 73 | Emperor Bulblax | 15 |
| 74 | Giant Breadbug | 10 |
| 75 | Pileated Snagret | 15 |
| 76 | Man-at-Legs | N/A |
| 77 | Ranging Bloyster | 15 |
| 78 | Waterwraith | N/A |
| 79 | Segmented Crawbster | 15 |
| 80 | Raging Long Legs | N/A |
| 81 | Titan Dweevil | N/A |
Chapter 8 - Secrets
This section reveals how to unlock each area in the game as well as several other Pikmin 2 secrets.
Unlock the Awakening Wood area: Recover the Spherical Atlas from the Cave of Emergence in the Valley of Repose.
Unlock the Perplexing Pool area: Recover the Geographic Projection from the White Flower Garden in the Awakening Wood.
Unlock the Wistful Wind area: Recover 10,000 pokos worth of treasure and creatures.
Unlock Challenge Mode: Recover The Key from the Citadel of Spiders in the Perplexing Pool area.
Play as The President: Continue the game after collecting 10,000 pokos.
Louie’s Dark Secret: Complete challenge mode with perfect completion to unlock this cinematic.
Title Screen Fun: Use the "L" and "R" buttons to make the pikmin run around. Hit the "Y" button to place a beetle on the screen and use the "C-Stick" to control it. Press the "X" button to unleash a bulborb and use the "Z" button to make him eat pikmin.
Pikmin Sing: Create a group with 20 of each pikmin type and go on the move. Your pikmin now sing a little tune from the original Japanese Pikmin game.
Got a news tip or want to contact us directly? Email news@gamespot.com
Join the conversation