Tales of Symphonia Walkthrough
Lloyd and Colette have a long journey ahead of them to save the world of Sylvarant. Our Tales of Symphonia guide includes a full walkthrough, combat tips, and a listing of side quests to help you along the way.
Design by Marty Smith
It’s been a tough couple of years for Gamecube owners who are also RPG fans. Besides games like Skies of Arcadia and Phantasy Star Online, both ports of older Dreamcast games, or Zelda: The Wind Waker, which is debatably more an adventure game than an RPG, very few role-playing games of any stripe, let alone traditional party-based RPGs, have appeared on the Gamecube...until now. With the launch of Tales of Symphonia, a brand-new title in Namco’s well-established Tales series, RPG gamers finally have a game that justifies their Gamecube purchase.
In Tales, you take on the role of Lloyd Irving, a self-taught swordsman who attends school in a small village where nothing much seems to happen. Fate intervenes, however, as it is wont to do, and Lloyd and his friends are swept up into an adventure that will take them across the entire world...and beyond. Although the game moves along quickly, you can expect to spend at least 40 or 50 hours exploring the game world and experiencing the many twists and turns in the game’s plot.
GameSpot’s unofficial guide to Tales of Symphonia features a complete walk-through for the entire game, along with a host of other features, such as: a rundown of Compound Unison Attacks; a list of all of the recipes in the game and where to find them; hints on achieving that elusive 100-hit combo; and suggested AI settings for each of your nine party members. There’s also a chapter detailing some of the numerous optional side quests that you’ll encounter as you play. You’ve got more than one world to save, and hopefully this guide will bring you a successful journey.
Table of Contents
CharactersCombat Tips
Walk-through
The Martel Temple
Iselia Forest
Dirk's House
Triet: The Desert Oasis
Desian Prison
Triet Ruins
Isoold: The Small Fishing Port
Palmacosta: The Port City
Hakonesia Peak
Palmacosta Ranch
Thoda Island
The Water Temple
Asgard: The City of Ruins
Luin: City of Hope
Balacruf Mausoleum
Hima and Asgard Ranch
Tower of Mana
Tower of Salvation
Tethe'alla
Meltokio: The Imperial City
Sybak
Meltokio Sewers
Gaoracchia Forest
Mizuho: The Mystical Village
Ozette: The Quiescent Village
Toize Valley Mine
Temple of Lightning
Tethe'alla Base
Dragon's Nest
Temple of Earth
Flanoir
Temple of Ice
Altamira: The Seaside Paradise
The Otherworldly Gate
Remote Island Human Ranch
Temple of Darkness
Iselia Human Ranch
Ymir Forest
Heimdall: The Hidden Elven Village
Latheon Gorge
Tower of Salvation
Welgaia: The Holy City
Tower of Salvation (again)
Torent Forest
Derris-Kharlan
Vinheim
Afterwards...
Characters
During your time spent playing Tales of Symphonia, you’ll come across nine different playable characters. This chapter will give you a brief overview of each character’s strengths and weaknesses, along with a list of desirable AI settings.
Under each character’s listing, we’ll also have a short list of Compound EX Skills that are unique to that character. Each character has 20 or so Compound EX Skills, some of which are useful, some of which aren’t. We’re going to list the most useful ones; you’ll probably stumble across the others as you play. In addition, at the end of this chapter, there is a listing of common Compound EX Skills, which are available for multiple characters.
There are also lists of titles for each character. You will obtain a number of titles automatically throughout the game; for example, each character automatically gains a title upon reaching level 20, level 40, or level 100, as well as for completing the Advanced Tier of the Meltokio Colosseum, or for mastering all of the cooking recipes and then speaking to the Wonder Chef in Altamire. Those included in our lists are the out-of-the-way titles that you may not obtain unless you know how to get them.
Lloyd
Lloyd is the centerpiece of the story, and the character that you’ll likely be controlling throughout the entire game. Although he’s something of an outsider in his village, and doesn’t remember much of his past, he has a loving surrogate father and a group of friends that he cares deeply for.
Since Lloyd is going to be under your manual control most of the time, he’ll likely become the team’s primary melee damage dealer. With his self-taught twin-blade fighting style, Lloyd strikes for less damage per strike than some of the stronger characters, but can attack much more quickly. He should always be in the thick of things, charging into battle and getting the attention of the enemies, so that they don’t focus on your weaker party members instead. Since he’ll be under your direct control, it’s easy to chew through TP with your Techs; for this reason, you’ll want to place a premium on TP-increasing titles and items. Late in the game, you can use an item like the Faerie Ring to reduce Lloyd’s TP consumption by 50%, which will save you from having to constantly use restorative items on him.
AI & Techs
You shouldn’t have to worry about Lloyd’s AI settings, as he is the best character to use for manual control throughout the game. So far as Techs go, well, you’ll have more Techs at your disposal as Lloyd than will any other character, save perhaps Genis. Lloyd’s Sword Rain skills are especially prized, mostly due to their ability to easily build up combos, but you’ll also gain Techs that deal massive amount of damage with fewer strikes, such as Twin Tiger Blade.
Compound EX Skills
Compound EX Skills go into effect when you combine two or more EX Skills that have a symbiotic relationship. Not all EX Skill combinations will result in a Compound EX Skill, but there are enough that you’ll stumble across them as you equip new EX Gems and activate new skills.
Sky Attack: Ability Plus + Sky Combo. You can use some of your Techs in midair.
Self Cure: Immunity + Tough + Vitality. You will automatically heal Status Effects a short time after you receive them.
Counter: Guard Plus + Follow Up. You can return fire by pressing A after an enemy hits you while you’re guarding.
Titles
Combo Newbie: Get a 10-hit combo.
Comboist: Get a 30-hit combo.
Combo Expert: Get a 60-hit combo.
Combo Master: Get a 100-hit combo.
Tetra Slash: Perform a Tetra Slash. (Three normal attacks followed by a Tech.)
Berserker: Fight 256 times on Hard or Mania battle difficulties.
Tactical Leader: Win the Advanced mode at the Colosseum while Lloyd is in the party.
Colette
Although Colette is the Chosen One, which in any other movie or video game would make her superpowered and the leader of the group, here it merely means that she gets angel wings and can cast a few spells that other party members don’t have access to. Personally, we never used her unless we had to for storyline purposes; her angel spells have a difficult time actually hitting their targets, and the Techs that go along with her chakram weapons are likewise unimpressive.
AI & Techs
Colette isn’t a melee fighter, so you won’t want to have her rushing up to enemies. She’s more profitably used as a supplemental magic caster, with Angel Feathers, Holy Song, and Judgement being her stock and trade. As such, you’ll probably want to set her to Skills/Magic in the movement settings, so that she can mix in some of her close-range weapon skills, but won’t use normal attacks.
Compound EX Skills
Compound EX Skills go into effect when you combine two or more EX Skills that have a symbiotic relationship. Not all EX Skill combinations will result in a Compound EX Skill, but there are enough that you’ll stumble across them as you equip new EX Gems and activate new skills.
Item Getter: Sharp-Eyed + Lucky + Magical + Stat Boost. Item Rover and Item Thief are always successful.
Resilience: Angel Song + Resurrect + Magical. You cannot be staggered while casting Angel Techs.
Angel’s Tear: Angel Song + Resurrect + Stat Boost + Eternal. Colette will automatically revive herself after she’s killed, but only once per battle.
Exp Plus A: Taunt + Eternal + Personal + Angel Song. Increases experience for the entire party.
S. Guard: Angel Song + Lucky + Eternal + Immunity. Immunizes Colette from physical ailments.
Item Finder: Tough + Sharp-Eyed. Items are found more often after battles.
Titles
Most of Colette’s best titles are obtained automatically.
Dog Lover: Name all 30 dogs in both Tethe’alla and Sylverant. (Speak to the dog while Colette is the on-screen character.)
Turbo Waitress: Obtained in the school cafeteria in Palmacosta.
Little Pickpocket: Use Item Thief and/or Item Rover 400 times total.
Raine
Besides Lloyd, Raine will likely be your most-used character, although not for her offensive capabilities. Raine is a healer, and that’s what you’ll be using her for, as she can sit back far away from your enemies and repeatedly heal your entire party. She does possess a few offensive and buffing spells, so she’s not completely useless against weaker enemies or when your party hasn’t taken much damage.
For most people, it will be better to have Raine as a Tech than a Strike. A Strike Raine is able to help out an individual party member quite a bit, but only a Tech Raine will be able to heal multiple party members at the same time. Late in the game, the inability to cast Revitalize, which heals all party members for 70% of their maximum HP, is a serious blow to the efficacy of a Strike-oriented Raine.
AI & Techs
You’ll want to keep Raine in the rear of the party, so Attack Same / At Once or Heal / Hold Position is a decent AI setup. Depending on the difficulty of the boss, you may want to disable Raine’s non-healing Techs and have her continually pump out Nurse and Revitalize spells over and over again. If you need one of her buffing spells, you can command her manually.
Compound EX Skills
Compound EX Skills go into effect when you combine two or more EX Skills that have a symbiotic relationship. Not all EX Skill combinations will result in a Compound EX Skill, but there are enough that you’ll stumble across them as you equip new EX Gems and activate new skills.
Magic Boost: Magical + Tough. Your spells will occasionally be more effective.
Mag. Status: Immunity + E. Guard. Prevents magical status ailments.
Phys. Status: Immunity + Eternal. Prevents physical status ailments.
Auto Aid: Item Pro + Guard Plus. You will occasionally automatically cast First Aid when you receive damage.
Lucky Magic: Neutralizer + Happiness. Spells will occasionally be cast for free.
Quick Spell: Neutralizer + Happiness + Spell Save. Spells will occasionally be cast without any casting time.
Blood Spirit: Guard Plus + E. Guard + Magical. You regain TP when you’re hit. (Although Raine shouldn’t be getting hit, if you know what you’re doing.)
Concentrate: Speed Cast + Item Pro + Spell Save + Happiness. You can’t be stunned while casting a spell.
Titles
As with Colette, most of Raine’s best titles are obtained automatically.
Monster Collector: Fight every monster in the game, then speak to the NPCs at the Nova Caravan. This requires more than one play-through of the game.
Item Keeper: Use the same item five times or more during the same battle.
Crimson Rose: Create a team with four women and complete a battle.
Kratos / Zelos
Kratos and Zelos, although two different characters, play almost identically; they use the same equipment, have the same Techs, for the most part, and move the same way on the battlefield. These guys are your jacks-of-all-trades, and are able to deal melee damage, cast offensive spells, and heal party members. Generalization does make them less effective than the specialists on your team when it comes to any specific action, but their flexibility makes them great party members nonetheless.
AI & Techs
For the most part, you’re going to want to use K & Z as melee attackers. They aren’t as powerful as Presea or Regal, and they don’t have as many useful combat Techs as do those characters, but they’re an extra body, which is always helpful. If you want to let them use their spells as they see fit, leave everything as the default Attack Freely / Use Skills Freely / Move Freely settings. When they see the need for a healing spell, or want to cast an offensive spell, they’ll drop back and do so. If you want to let Raine handle the healing, don’t forget to disable their healing spells.
Compound EX Skills
Compound EX Skills go into effect when you combine two or more EX Skills that have a symbiotic relationship. Not all EX Skill combinations will result in a Compound EX Skill, but there are enough that you’ll stumble across them as you equip new EX Gems and activate new skills.
Combo Force: Taunt + Slasher. Attacks made during a combo will be more powerful.
Chivalry: Slasher + Strong. Your stats increase based on the number of women in the current combat party.
Concentrate: Speed Cast + Super Chain + Spell Charge. You can’t be stunned while casting a spell.
Super Blast: Slasher + Super Chain + Eternal. You can link Techs to the final hit of your Slasher-extended normal attack combo.
Zelos Titles
Gigolo: Equip the Personal EX Skill, talk to every female NPC (including kids, gross) in both worlds, then speak to Sebastian in Meltokio.
Casanova: Fight in a party with three women.
Gilgamesh: Equip Excalibur, Golden Helm, Golden Armor, and either Hyper Gauntlet or Blue Shield, then fight in a battle.
Loudmouth: Obtained when Zelos speaks 50 times in a single battle. This is obviously only obtainable during an extremely long boss fight, such as against Abyssion or Sword Dancer.
Kratos Titles
Kratos has fewer titles than any other character, thanks to his long period away from the party. Most are obtained automatically.
Self Control: Finish a battle without using any Techs.
Tetra Slash: Perform a Tetra Slash. (Three normal attacks followed by a Tech.)
Presea
This quiet girl, who appears to be around nine years old, will actually wind up being the strongest member of your team in terms of pure physical power. When she brings her axe into battle, enemies take notice, as the scientific experiments that were performed on her many years ago have left her with super strength, even if they did stunt her personality a bit.
Presea is a bit single-minded, and isn’t capable of doing much other than hitting a single opponent, but what she does, she does very well. She packs a wallop with her axes, and will get a nice amount of HP along the way, making her a fine sidekick for Lloyd when you have to take on an enemy with many physical attacks.
AI & Techs
You’ll want Presea to be up with Lloyd during any given fight, as she can match him for HP and pure offensive power, if not for number of hits. A good AI setup is Attack Same or Scatter / Use Skills Freely / Frontlines. All of her elemental Techs are based on Earth, so you won’t have to fiddle with them too much, as there are relatively few Earth-strong enemies in the game (outside of the Temple of Earth, obviously).
Compound EX Skills
Compound EX Skills go into effect when you combine two or more EX Skills that have a symbiotic relationship. Not all EX Skill combinations will result in a Compound EX Skill, but there are enough that you’ll stumble across them as you equip new EX Gems and activate new skills.
Glory: Guard Plus + Endure + Revive + Vitality. You will often avoid staggering when you’re hit with a physical attack.
Self Cure: Immunity + Tough + Vitality. You will automatically heal Status Effects a short time after you receive them.
G. Breaker: Savior + P. Charge. You can break through an enemy’s defenses when you use the P. Charge EX Skill. This is useful when you need to break down a monster’s defense to keep a combo going.
EXP Plus ST: Personal + Endure + Revive. You will occasionally gain extra experience at the end of battle based on your HP.
Titles
Empty Soul: Obtained when you complete the Devil’s Arms side quest. This gives Presea a decent boost to all of her stats.
Associate: Form a party with Presea, Sheena, Regal, and Zelos.
Lone Girl: Form a party with Presea and three male characters.
Sheena
You’ll have to fight Sheena a couple of times before you actually get her to join your party. When she does join up with you, you’ll have to judge her combat skills for yourself before judging whether or not you actually want her in your party. She’s not as effective a warrior as, say, Lloyd or Presea, and her Techs revolve around applying negative statuses to your enemies, rather than just dealing a bunch of damage to them. She also has very odd attack rhythms, which can make it difficult to use her manually - best to keep her on full-auto and let her do her own thing.
What supposedly makes Sheena powerful is her ability to summon spirits during battle after she’s formed a pact with them. Unfortunately, this ability is generally useless, since she can’t summon anything unless she’s in Over Limit mode, which can only be obtained by letting her get hit over and over again by an enemy. Since you’ll usually be controlling Lloyd, who will generally be the center of your enemy’s attention, Sheena will take a hit here and there, but will rarely get the kind of concentrated pounding needed to launch her into Over Limit mode. Even when she does enter OL mode, her summoning of a spirit can still be disrupted by an enemy attack. It’s not uncommon to get through Tales of Symphonia and only see Sheena summon a spirit once or twice during your entire journey.
You’d also think that the limitations placed on your summoning would mean that they’re incredibly powerful, but this generally isn’t the case. They can deal some nice damage, and can give your team some nice stat bonuses for the duration of a battle, but aren’t more powerful than, say, one of Genis’ level three spells.
AI & Techs
Sheena has low defense and HP for a pure melee character, so you may want to set her up as Scatter / Use Skills Freely / Move Freely. This will let her choose her own target and move as she sees fit, which will keep her out of harms way and prevent her from charging through a thicket of enemies to help Lloyd fight his target. So far as Techs go, anything is fair game, and all of Sheena’s abilities have some use. If you let her use what she wishes, she may not always pick what’s appropriate for any given situation, but she’ll usually throw enough status effects onto an enemy to make the fight easier for everyone else.
Compound EX Skills
Compound EX Skills go into effect when you combine two or more EX Skills that have a symbiotic relationship. Not all EX Skill combinations will result in a Compound EX Skill, but there are enough that you’ll stumble across them as you equip new EX Gems and activate new skills.
Spirit Healer: Spirit + Guard Plus. You regain more TP than normal at the end of battle.
Hard Hit: Prolong + Dash. Normal attacks cause the enemy to stagger for a longer period of time.
Blood Spirit: Guard Plus + Speed Cast + Prolong. You regain TP when you’re hit.
E. Plus: Speed Cast + Eternal + E. Guard. Your elemental damage is increased.
Self Cure: Immunity + Tough + Vitality. You will automatically heal Status Effects a short time after you receive them.
Titles
Master Summoner: After you make a pact with Origin, head to Exire and make a pact with Maxwell, the secret summon spirit.
Treasure Hunter: Open every treasure chest in the game, then use Sheena to speak to a sleeping Katz in Katz Village.
Indecisive: Cancel an escape attempt three times in one battle.
Genis
Like his sister Raine, Genis is more comfortable standing well away from the front lines of battle, as he can cast powerful offensive spells so long as he’s not interrupted by an enemy’s attack. Also like his sister, he deviates between obtaining single-target spells as a Strike character and wide-area spells that can hit all enemies as a Technical character. The situation isn’t as cut and dried as it is with Raine, though; the single-strike spells often hit more often than the area spells do, and are a better bet when used against bosses, but the area-of-effect spells let you demolish many enemies at once. Choosing between the two is up to you, but keep in mind that you can’t use Raine and Genis’ powerful Prism Stars Unison Attack unless both of them are Technical characters.
AI & Techs
As with Raine, you’ll want to keep Genis well away from enemies. As such, Attack Same or Scatter / At Once / Hold Position is usually a good setup for him. As far as Techs go, you’ll have to be careful to prune Genis’ list based on the situation; if you’re going up against a bunch of fire monsters, for instance, you should deactivate all of his fire-based spells ahead of time.
Compound EX Skills
Compound EX Skills go into effect when you combine two or more EX Skills that have a symbiotic relationship. Not all EX Skill combinations will result in a Compound EX Skill, but there are enough that you’ll stumble across them as you equip new EX Gems and activate new skills.
Magic Boost: Magical + Tough. Your spells will occasionally be more effective.
Mag. Status: Immunity + E. Guard. Prevents magical status ailments.
Phys. Status: Immunity + Eternal. Prevents physical status ailments.
Blood Spirit: Guard Plus + E. Guard + Magical. You regain TP when you’re hit.
Concentrate: Speed Cast + Rhythm + Spell Save + Spell Charge. You can’t be stunned while casting a spell.
Self Cure: Immunity + Magical + E. Guard. You will automatically heal Status Effects a short time after you receive them.
Spell Defense: Spell Charge + Guard Plus + Spell Save. You don’t stagger if you take elemental damage while casting a spell.
Titles
Item Collector: After finding one of every item in the game, speak to Koton at Hakonesia Peak to obtain this title. This will require multiple play-throughs, most likely.
Figurine Collector: After making every figurine in the game (288!), speak to Harley in Asgard to get this title. Again, you can bet on this taking more than one play-through.
Mana Master: After Heimdall is destroyed, return to town and watch the scene where Genis learns the Meteor Storm spell.
Regal
This enigmatic man travels along with your party, his arms bound in shackles that he refuses to let anyone remove. Like Presea, he’s primarily intended to be another frontlines fighter, although he is capable of obtaining a couple of healing spells. There isn’t a huge difference between Technical and Strike fighting modes for Regal.
AI & Techs
Regal is the third-best melee fighter in the game, after Lloyd and Presea. You’ll likely want him on Attack Same or Scatter / Use Skills Freely / Frontlines. If you have Raine in your party, you’ll probably want to disable his healing Techs; you can always have him cast them manually if it’s required.
Compound EX Skills
Compound EX Skills go into effect when you combine two or more EX Skills that have a symbiotic relationship. Not all EX Skill combinations will result in a Compound EX Skill, but there are enough that you’ll stumble across them as you equip new EX Gems and activate new skills.
Sky Attack: Ability Plus + Sky Combo. You can use some of your Techs in midair.
Self Cure: Immunity + Tough + Vitality. You will automatically heal Status Effects a short time after you receive them.
Counter: Guard Plus + Follow Up. You can return fire by pressing A after an enemy hits you while you’re guarding.
Titles
Testosterone: Fight in a party with four male characters.
Way of the Jungle: Fight against an enemy at least eight levels beneath your own.
Potion King: Use potions on Regal five times or more during battle.
Common Compound EX Skills
Many of the Compound EX Skills are available for multiple party members. These aren’t all going to be available for every member of your party, but they should be available to any party member who might find them useful.
Phys. Status: Immunity + Eternal. Prevents physical status effects.
Lucky Unison: Taunt + Personal. Unison gauge may remain full after using a Unison Attack.
EX Attack: Strong + Tough or Dash. You deal more damage to guarding enemies.
EX Defend: Dodge + Vitality. You will sometimes avoid staggering when you get hit.
Over Limit: Eternal + Personal. Increases the length of Over Limit mode.
Critical Up: Strong + Personal. Increases chances that you’ll land a critical hit.
Spirit Up: Spirit + Eternal. Will occasionally increase your maximum TP at the end of a battle.
Life Up: Vitality + Eternal. Will occasionally increase your maximum HP at the end of a battle.
Exp. Plus: Taunt + Eternal + Personal. Occasionally gain more experience at the end of a battle.
Combat Tips
Combat in Tales of Symphonia is a fast-paced affair, and is much different than the stately turn-based combat of most console RPGs. Ninety percent of the battles that you’re involved in will be finished within 20 seconds. Most of the combat basics are explained in the manual or in the game’s short tutorial, or are easily figured out via some simple battling, but there are a few advanced techniques that you can make use of.
Setting Party AI
Although there are four different members of your combat party, you will only be able to control one of them at a time. Unless you have three friends and three extra Gamecube controllers, this means that you’ll have to set your party’s AI so that they do roughly what you want them to when in battle. You can do this by opening up the Strategy option in the main menu.
The first option here dictates how the character will choose targets to attack. In most situations, you’ll want to pick Attack Same, which will force your AI teammates to attack and cast spells on the same enemy that Lloyd is attacking. This will let you kill off enemies much more quickly than Lloyd could by himself, but can also result in enemies penetrating your lines and assaulting your spellcasters. If you want to avoid this, choose Scatter, which forces each of your other party members to choose a different target. You may want to set another melee character to Scatter, while you have any rearguard magic users on Attack Same; this will hopefully keep the enemies busy while not greatly reducing your fighting effectiveness. The other settings here aren’t very useful in the majority of situations, but you may have to switch over to them in mid-battle when you notice that your normal tactics aren’t working.
The second option determines how a character will use his or her Techs. Most characters are fine on the default setting of Use Skills Freely, which will let them mix in normal attacks with their Techs. They will deplete their TP all the way to zero on this setting, which can be a concern early in the game, but won’t matter much later on, as your TP reserves start to grow considerably. Raine and Genis, who should never be hitting an enemy with a weapon under any circumstance, can easily be switched over to At Once, which will force them to use magic all of the time. This is also a decent choice for Colette.
The last setting determines how a character moves in battle. Most of your characters can be set to Frontlines, which will encourage them to get up close to enemies and start attacking. For Raine and Genis, though, you’ll probably want to select Hold Position, which will prevent them from moving. If they run out of TP while on a default movement setting, they will attempt to run up to the enemy and attack, which they’re terrible at. You want to keep them behind your frontlines at all costs, so don’t hesitate to tell them to stay put.
Unison Attacks
Unison Attacks let you combine the powers of all four of your party members for one massive strike on an enemy. When activated, your party members will each unleash one of the Tech attacks, for free, on the target. Since they all hit simultaneously, they will also combine to boost your Combo total. See the Combo section below for more info on that.
You won’t be able to use Unison Attacks at the beginning of the game; you’ll need to wait until your party’s passage through the Ossa Trail, which occurs a couple of hours into the game. After this point, a Unison meter will be added to your battle menu; when you hit enemies with physical attacks or spells, it will go up slightly. When it fill, you can press the Z button to activate your Unison Attack, which will drain your meter. You have to be able to hit the enemy with a normal physical attack to start a Unison Attack, so if you hit Z when Lloyd or whichever character you’re controlling is too far away, you won’t accomplish anything, and your Unison meter will still drain out.
After the first strike hits your target, a new set of icons will appear in the lower right corner of the screen, with each of the face buttons on your controller showing next to the face of one of the characters in your party. When you press the button next to Lloyd’s face (usually A), he’ll perform whatever Tech you have bound to the default analog stick position. If you press the analog stick up, down, left or right, you can perform whatever Tech you have bound to any of those stick positions, as well, but you can only perform one Tech per character per Unison Attack, and you have to input them quickly, or the UA will cease prematurely.
Unison Attacks have an obvious utility, since you don’t have to pay to perform the Techs, and since the enemy can’t counterattack while the UA is ongoing. A single UA will generally finish off any normal enemy. For the harder bosses, though, you will often use a UA, then hit them enough to recharge your Unison meter, allowing you to get off multiple UAs in one fight.
In addition to the obvious benefits of Unison Attacks, there are also some hidden bonuses that you can take advantage of. When two characters use specific Techs in the same Unison Attack, those characters can sometimes add on a special attack after the UA is completed. A very basic example of this is Cross Thrust, which you can perform as soon as you unlock the Unison Attack ability. If you have Kratos and Lloyd in the party, and they each perform a Sonic Thrust Tech during a Unison Attack, then after the UA is completed, they’ll pair up to deal a Cross Thrust attack on the enemy.

These Compound Unison Attacks add on even more damage to a regular UA, but there are a few restrictions. You can only do one Compound Unison Attack per UA; you can’t have two pairs of characters both attempting to do a Compound attack during the same UA. This is a minor hassle, though, as Raine and Genis’ Prism Stars attack is much better than the other Compound UAs, and will usually be the only one you need to do to polish off a monster.
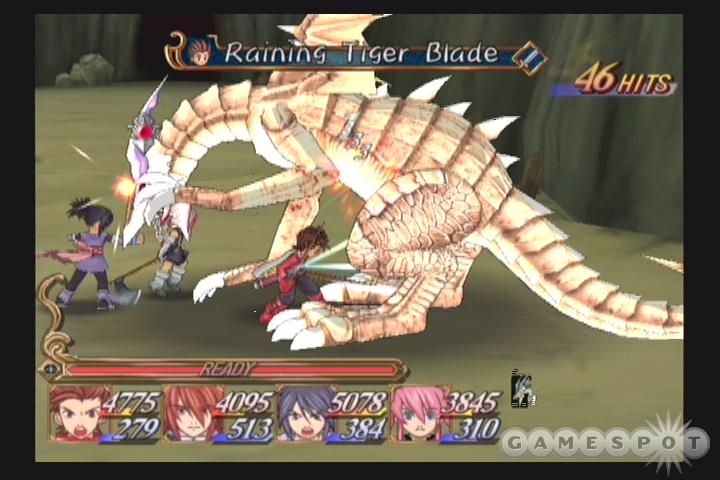
Lloyd, being the central character in the story, has many Compound Unison Attacks with other characters. Since many of these CUA’s require him to input any one of a group of Techs, we’ve abbreviated the listing somewhat. For example, "Any Tiger Tech" would refer to Tiger Blade, Tiger Rage, Heavy Tiger Blade, or Twin Tiger Blade. The exceptions to these lists are Lloyd’s late-game Techs that blend two of his previous Techs together. For instance, Raining Tiger Blade, which combines the Sword Rain and Tiger Blade Techs, would not fall into the "Any Tiger Tech" category.
In most cases, these also have to be matched up according to the level of the Tech. For example, with Cross Thrust, which combines a Thrust Tech performed by Lloyd with a Thrust Tech performed by Kratos or Zelos, each Thrust Tech has to be the exact same level. This means that each character can perform a Sonic Thrust, a Hurricane Thrust, or a Super Sonic Thrust, so long as both characters perform the same Tech. If Lloyd does a Sonic Thrust, and Kratos does a Super Sonic Thrust, then the Compound UA will not go off. Character Compound Unison Attacks and Guard Key
Lloyd’s Compound Unison Attacks
Note that, since Kratos and Zelos also possess the various Thrust Techs, they can stand in for Lloyd in any of his CUA’s that call for one of those. Cross Thrust: (Any Thrust Tech) + Lloyd, Kratos or Zelos (Any Thrust Tech)
Pow Blade: (Any Tiger Tech) + Colette (Any Hammer Tech)
Power Thrust: (Any Thrust Tech) + Sheena (Any Power Seal)
Mirage Thrust: (Any Thrust Tech) + Sheena (Any Mirage Seal)
Dark Serpent: (Any Thrust Tech) + Sheena (Any Serpent Seal)
Lightning Tiger Blade: (Any Tiger Tech) + Genis, Zelos, or Kratos (Any Lightning Tech except Lightning Blade)
Thunder Tiger Blade: (Any Tiger Tech, including Demonic Tiger Blade) + Zelos or Kratos (Any Lightning Blade Tech)
Photon Tempest: (Any Tempest Tech) + Raine (Photon)
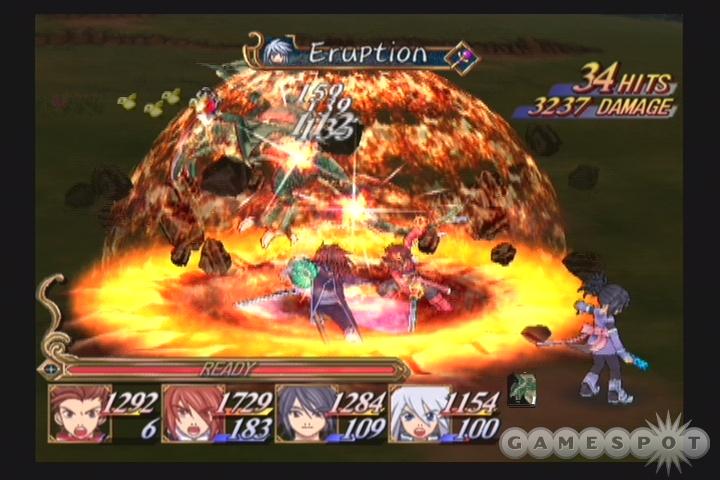
Fiery Beast: (Any Beast Tech) + Genis, Zelos, or Kratos (Eruption, Flame Lance, or Explosion)
Stardust Rain: (Sword Rain: Alpha or Sonic Sword Rain) + Colette (Hammer Rain)
Compound Unison Attacks For Other Characters
Pow Spear: Colette (Any Hammer Tech) + Zelos or Kratos (Any Spear Tech)
Pow Devestation: Colette (Any Hammer Tech) + Presea (Any Devestation Tech)
Photon Blast: Colette (Ring Whirlwind, Ring Cyclone, Whirlwind Rush) + Photon
Plasma Blade: Raine (Photon) + Zelos or Kratos (Lightning Blade or Super Lightning Blade)
Arch Wind: Presea (Any Punishment Tech) + Kratos or Zelos (Hell Pyre)
Mjollnir: Lightning Punishment: Presea (Any Punishment Tech) + Genis, Kratos, or Zelos (Any Lightning Tech except for Lightning Blade or Super Lightning Blade)
Prism Stars: Raine (Ray) + Genis (Explosion, Tidal Wave, Cyclone, Indignation, or Ground Dasher)
This last CUA, Prism Stars, is generally the most useful one to perform. It does a heck of a lot of damage, hits 30 times, and you’ll almost always have both Raine and Genis in your party during a boss fight.
Use That Guard Key!
If you’re playing on Normal battle difficulty, then you’ll notice that you won’t have to manually guard in the late game as much as you do early on. When your reservoir of health hits the one or two thousand mark, it generally becomes easier to just rush into battle and attack like a madman; you’ll get hit, but you’ll be able to take it, and you’ll be able to keep your thumb on the attack button all the while. The game does tend to reward this kind of button-mashing; if you want to force yourself to play with a bit more skill, try never playing with Raine or Genis, or turning the combat difficulty up to Hard.
Even though guarding becomes less critical as the game moves on, the guard button itself still retains a couple of good uses that aren’t readily apparent. First, it acts as a shortcut to your Guardian Tech, which will reduce the amount of damage you take from any source for a short while. (Every character has some kind of shield Tech, with different names; the same shortcut works for every character, if you switch control with Lloyd.) To activate this shortcut, have your character guard with the X button, then tap down on your analog stick. Voila, instant magical barrier. This saves you from having to take up one of your precious shortcut slots for this Tech.
Secondly, if you tap X after your character gets knocked into the air, he or she will right themselves and land on their feet. This can be difficult to get used to in the early game, but later on, you’ll encounter more and more enemies that will knock you back or use spells that propel you upwards. If you don’t right yourself with the X button, you’ll land on your back, and will have to spend three or four seconds getting on your feet before you can move again. After a while, righting yourself becomes second nature, and it will save you a lot of time in the more hectic fights.
Combos
Combos occur when you repeatedly strike an enemy without delay, so that they perpetually remain in a staggered state until they die or until the combo ends. You can string together combos with a single character, if you wish, but getting really outrageous combo totals will require you to synchonize your Lloyd attacks with those of your other characters, and pick the targets that you wish to combo on. You won’t be able to pull off a 200-hit combo on a bumblebee, for instance, as they’ll die well before you get even a small number of hits in. You’ll need to face off against something big and, if you want to emphasize the weapons part of the combo equation, you’ll probably want to equip your party with the least effective weapons possible, so that they deal less damage. Less damage = enemy sticking around longer = greater potential for a high combo number.
There are three reasons to seek out high combo totals. The first reason is that the game will multiply the amount of experience you get at the end of a battle based on how high of a combo you reached during that battle. Most of the bonuses are fairly small, on the order of an extra ten percent or so for 20 or 30 hits during a battle, but these do add up over the course of a game. The second reason is that Lloyd will gain new titles when you manage to pull off 10, 30, 60, and 100-hit combos during a battle, some of which are quite good. The 60-hit title "Combo Expert" gives you a nice bonus to Lloyd’s HP and Strength, along with smaller bonuses to his TP and Accuracy. The third bonus is that the game keeps track of your "high score," so to speak, so you can always see just how high a combo you’ve gotten and continually strive to break your mark. In other words, it’s fun.
The core of any combo will be Lloyd and his Techs. In order to get a huge combo, you’re going to need to know which Techs of Lloyd’s hit the most. In general, anything with a Sword Rain in the title is going to be your best bet, as these let you stab over and over again, with each strike doing fairly small damage.
The basic start to a combo is a Tetra Slash attack. A Tetra Slash is easily accomplishable by letting Lloyd hit an enemy with his three basic strikes (or four if you have the proper Ex Skill), and then immediately following that up with a Tech. What isn’t immediately clear when you play the game is that you can continue to build up a combo by hitting another Tech immediately after the first one finishes, so long as the second Tech is of a higher level than the first. (You can check these levels in the Tech menu). For example, if you have a Strike-class Lloyd, you can do a three-hit combo, followed by the level 1 Sword Rain for five more hits, followed by level 3 Raining Tiger Blade for 11 hits, for a 19 hit total, without having any other characters involved. Tech Lloyds can go even further: a three hit combo followed by Sword Rain (level 1), then Sword Rain: Alpha (level 2), then Sword Rain: Beta (level 3) goes for 28 hits total.
You may be curious as to why we didn’t list Sonic Sword Rain (level 2) as the middle part of the above combo for Strike-class Lloyds. The reason is simple: the Sonic Thrust that’s appended to the end of the Tech will usually push enemies far enough away from Lloyd that the Raining Tiger Blade doesn’t hit, unless the enemy has already been backed up against a wall. If you can’t immediately start up your next Tech and have it hit the target, then the combo will cease. (Unless another character in your party is hitting the target, which is unlikely, since you just knocked it halfway across the battlefield!) You can try to put another level 2 Tech, such as Heavy Tiger Blade, into a Strike-class combo, but you won’t get as many hits as a Technical Lloyd will.
After practicing Lloyd combos, you can start adding in other characters to the combo. Since you need to continually be hitting the target in order to keep the combo going, you’ll likely want to have other characters that use Techs that can hit repeatedly. Genis is the best character for this, with multiple Techs that can hit 10 or 12 times apiece. Tidal Wave is the best Tech for use in combos, as it hits 12 times and doesn’t move the enemy very much. If you can command your other character to use his or her Tech just as Lloyd is finishing up with one of his own personal combos, they should be able to keep the combo alive long enough for Lloyd to start right again with his three basic attacks. Genis is a bit more difficult to use in this situation, since his spells require casting time; try using the Cast Delay button (left trigger) to time them more precisely.
Of course, using multiple characters and getting them to do what you want, when you want, requires a lot of practice in issuing orders from the in-battle menu. You will need to work on this before you can consistently time your combos so that they don’t prematurely break up. Of course, there’s still an element of luck involved; at any time during a combo, you may push an enemy into Over Limit mode, which prevents them from staggering and thus ends your combo. Once you’re comfortable with using multiple characters in a combo, though, you can attempt to use a Unison Attack for a coup de grace.
At the end of a Tech, Lloyd can segue seamlessly into a Unison Attack, without breaking up his combo, by hitting the Z key. If he’s within range, and you have a full Unison meter, you’ll start a new Unison Attack. If you’ve properly set up your Unison Attack bindings, you can easily add another 50 or 60 hits on to the end of a combo with a good UA.
The easiest way to perform a high-hit UA is to have Lloyd, Genis, and Raine in your party, along with another character with a high-hit Tech, such as Colette (Stardust Cross) or Presea (Eternal Damnation or Infinite Destruction). You’ll want to get your combo meter as high as you can before you hit the UA button, but when you do, you’ll be able to unleash four more Techs, all free of charge, and all of which should hit automatically. Lloyd should go for his highest-hit Sword Rain (either Sword Rain: Beta or Raining Tiger Blade), your other melee character should use his or her own high-hit Tech, Raine should use Ray (which only hits twice, if you’re lucky), and Genis should use either Cyclone or Tidal Wave. Altogether, you should get at least 30 hits out of this.
As we mentioned earlier, though, Genis and Raine have a special Unison Attack that goes off when they both use specific spells together. Both Cyclone and Tidal Wave react with Raine’s Ray Tech to instigate a Prism Stars attack, which hits the target 30 times. So, if you add together the hits from the normal Unison Attack with the Prism Stars, you should have at least 60 hits to run with, not including the hits from Lloyd and the other party members from before the Unison Attack went off.
What’s more, almost every character in the game can activate the Lucky Unison effect as a Compound EX Skill by equipping the Taunt (level 1) and Personal (level 2) EX Skills. With L. Unison active on one of your battle participants, there’s a chance that the Unison gauge will remain full after you use it, letting you immediately start another Unison Attack, which itself may hit 60 times or more, which would obviously make for a huge combo. If you want to try this out, you should pick the party member with the highest Luck score to enable the skill.
Walk-through
The Village of Oracles: Iselia
Your journey begins in the Village of Oracles. After the opening voiceover, you’ll find yourself looking at Lloyd, the primary character of the story, as he earns an eraser in the face for falling asleep in class. Pretty harsh, but just you wait; there’s some worse examples of corporal punishment to come.
The classroom here is intended to give you a bit of a backstory, so pay attention to the dialogue. Or don’t; it’s up to you. Pretty standard stuff, really: chosen one, journey to save the world, vile enemies, etc. Your friends Colette (the chosen one) and Genis (which we’d bet makes for some awkward name-calling from the other kids) are in the same class as you.
After your teacher Raine leaves the classroom, you can talk to the other schoolchildren if you wish. One thing you might want to do at this point, if you didn’t at the main menu, is drop the text delay down to zero in the config menu, which you can reach by hitting the Y button, then going to System. If you leave this as is, you’ll have to wait until the text fills the chat window before you can skip past it. If you’re a quick reader, you’ll want to make the text appear instantly so that you can get through conversations that much faster.
After you’ve talked to your classmates, you should leave the classroom through the door on the left side of the room. Tell Genis that you’re going, and he’ll come along, as will Colette. When you leave the house, you’ll receive word from Colette’s father that the town has been attacked by Desians (the previously mentioned "vile enemies"), and that they’ve pushed through to the chapel, where Colette was due to receive word from the Oracle about starting your quest. After this little scene is over, you’ll be free to roam around the village. The notable stops here are Colette’s house, one screen to the right of the school, where Frank will heal you up if you ask him, and the shop, one screen below the school, where you can buy Boots for everyone, and equip them in the accessory slot. You’ll also note the save point next to the school itself; hit this and save your game.
Now, before you can leave the town through the north exit, you’ll have to engage in two battles. The battle basics are covered in the appropriate chapter of this guide, but all you really need to know at this point is that your green A button is attack, your red B button sends out a special attack, and your grey X button puts up a guard. For now, battles are essentially exercises in button-mashing, but they’ll get a bit more complicated as time goes on.
Since you have access to easy healing at Colette’s house, and a difficult fight coming up, you should probably spend a little time getting your party members a couple of levels of experience. Ideally, before you head north to the Chapel, you’ll have Lloyd at level 4 and Colette at level 3. When you reach these levels, return to the village for a heal, and perhaps to buy one more Life Bottle, before heading north to the Temple.
The Martel Temple
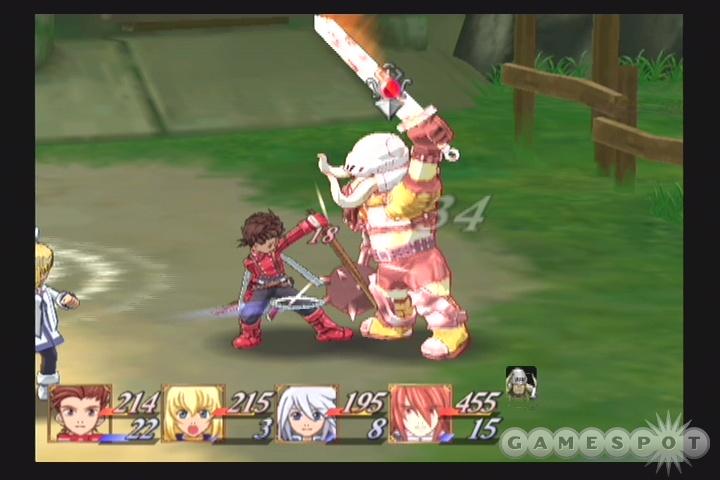
Boss Fight: Botta
When you reach the Temple, a series of events will occur that culminate in you taking on what appear to be Desians, including one of their bigwigs, a man named Botta. He’s impossible to defeat the first time you face him, so just keep your guard up when he attacks and the battle will end in ten or fifteen seconds, after which a mysterious stranger intervenes. The second time you take Botta on, you’ll be able to push Botta back to the edge of the screen and defeat him with ease, so long as you keep your guard up when he attacks.
Shortly after you defeat the Desians, you’ll wind up inside the temple proper, with your new teammate along for the ride. Kratos has a useful healing spell which he’ll cast as needed, so you can afford to be a bit more reckless in your combat strategy. If you haven’t already, you should try to get Lloyd’s "Combo Newbie" title by getting a ten-hit combo in one of the fights here. It shouldn’t be too difficult to do now that you have another combat character to back you up. When you obtain the title, switch Lloyd over to it with the status menu and he’ll gain extra Strength at each level-up.
Two of the paths inside the Temple are sealed, so you’ll need to take the rightmost path until you reach a set of stairs leading down. The upper platform in the next room consists of a fairly easy puzzle: kill the rock monsters, which turn into rocks, which you can drop through the holes in the platform to create walkways below. You’ll need to drop one rock in the left-middle hole (in addition to the one that Colette drops by accident) and two each into the upper-middle and right-middle holes if you want to access everything down below. Before you do all this, though, take the left set of stairs on the platform back to the upper level, where you’ll be able to reach a few treasure chests that were blocked off by the fallen rock.
When you get the treasure chests, both on the upper floor and the lower, make your way up to the Sorcerer’s Ring and take that as well. You can use it to break the seal on the upper floor, which unlocks a warp leading to the uppermost chamber of the temple, where Colette gets some kind of mandate from heaven. Her first task is to travel to the south and pray at the Seal of Fire. Don’t forget to save your receipts on your trip though; it’s all a write-off if you spin it the right way.
After everyone’s left the temple, and your scene with Raine is completed, you and Genis will have to return to town on your own. Battles that were easy with three or four people can be tough with only two, so it’s best if you just avoid any monsters on your way back to town. When you reach Iselia again, you’ll want to check out the classroom first, to get a new title for Genis, then head over to Colette’s house to hear about her journey. From there, head to Genis’ house and learn a bit about cooking before leaving the town through the southern exit.
Iselia Forest
The Forest is just to the east of Iselia’s southern exit, and is simply laid out. You shouldn’t have any trouble maneuvering through the paths, but keep an eye open for treasure chests as you proceed. You’ll eventually come to the entrance to the ominously named Human Ranch of the Desians, where Genis stops in to talk to a friend of his named Marble. Her friend Jacks and Cat’s Eye apparently couldn’t make it.... At any rate, you’ll eventually have to make your way above the camp in order to get an eye on what’s going on with Marble. You’ll find a rocky outcropping near the main gate that you can jump onto.
After Lloyd gets into a fight with the guards, he and Genis will escape back to the Forest entrace. Unfortunately, that’ll signal Genis’ exit, so now Lloyd will have to make it through the forest on his own. The upper half of the forest map, beyond the Human Ranch, is full of treasure, so be sure to scout around thoroughly to find everything before proceeding up to Dirk’s House.
Dirk’s House
There isn’t much in the way of action at Dirk’s House. Lloyd and his adoptive father get into an argument involving Desians, Colette comes to talk to Lloyd, and so on. There’s a few minutes of backstory to get through, so listen to the conversations until you find yourself warped back to Iselia, where you should go to Colette’s house and speak to her father. Shortly thereafter, Desians will attack the village, and won’t be content to merely pass through this time.
You have three screens of enemies to cover here, so start with the Desians to the south of Colette’s house, then proceed back to the school building and kill the enemies that are threatening the militia member there. After you kill off those two groups, head back to Colette’s house and get Frank to heal you before proceeding south to the town square. Don’t forget that Genis was de-equipped when he left your party earlier, so you’ll have to go back to the equip screen and make sure he has all of his equipment in the proper place.
It would seem that the Desians are rather annoyed at Lloyd’s intrusion onto their turf, and have decided to punish the entire village for his malfeasance. When you show up, though, they’re more than happy to get specific with the whippings, and sic a rather large monster on you.
Boss Fight: Marble
There isn’t much to worry about from this foe, if you use Apple Gels when necessary and keep your guard up at the appropriate times. For most of the fight, the monster will only use a couple of arm-sweeps, which are easily blocked. Later on, though, it will start bringing in overhead slams and a powerful Tech attack into the mix, so you’ll want to analyze its changing attack patterns and keep both of your characters above 150 HP or so, lest you get caught by the Tech attack and die.On The Road Again After the boss fight, Lloyd and Genis will be banished from the village for provoking the Desian attack. You won’t be able to do much else inside the village, so leave through the southern gate and head south towards the desert where Colette and her guardians supposedly went. You’ll notice Nova’s Caravan near the forest to the south; you can get free heals from the NPC within, so you might want to spend some time fighting the enemies here and gain a level or so for each of your characters.
While you’re wandering around the map, you’ll likely hit a little cutscene wherein Lloyd will pick up a package from his father, detailing how to use EX Gems. Since Genis has an EX Gem of his own, now, the EX Skill option from the main menu will now be available for you to use. There isn’t much you can do there just yet, as both characters only have one Exsphere, and they’re both automatically set to what is currently the "best" setting for the characters. If you scout around, though, you can pick up another EX Gem in the forests to the northwest of the House of Salvation, which itself is a few screens to the south of Nova’s Caravan. The Exsphere is in a treasure chest that’s mostly obscured by the forest, but you should be able to spot it when you get near it.
If you walk far to the the northwest of the House, on the other hand, you’ll come across what looks like a save spot in another forest there that triggers a skit-like scene between Genis and Lloyd. There are quite a few of these scene points on the overworld map; tracking them down will let you boost your relationship points with each of your party members. Your relationships are mostly just for fun, and will sometimes determine which characters you encounter during cutscenes, but there is one important plot twist late in the game that is directly influenced by your relationship with two of the other characters.
There isn’t much of importance in the House of Salvation, but you should speak to the man outside to obtain the Long Range View for the Iselia region, and you can sleep inside if you’re willing to pay for the priveledge. When you’re done looking around, head south into the desert and make a beeline for the town of Triet.
Triet: The Desert Oasis
Upon arriving in Triet, you’ll learn that the Desians have sent out search parties in an attempt to track down Lloyd. The first thing you’ll want to do here is check out the area to the left of where you start out - you’ll find some info on customizing equipment, as well as a couple of shops that will sell upgraded weapons and armor for your team. If you have the gald, get the Knight’s Saber for Lloyd and the Fine Star for Genis; these will be big improvements over your starting weaponry. Any remaining gald can be used to purchase new armor.
After you’ve upgraded your equipment, you can hit the Inn near the wanted poster of Lloyd to heal up and save your game. If you walk up the stairs inside the Inn and look around at the end of the upper level, you’ll meet the Wonder Chef for the first time; he’ll teach you how to cook Cabbage Rolls. There are a bunch of other people to talk to in Triet - of particular note is the cat-woman near the Expedition Team who will offer to sell you EX Gems in exchange for Grade. You probably don’t need a new one at the moment, so you’re best off saving your Grade until later, or, indeed, saving it until the end of the game, when it will come in quite handy.
When you’re ready to get moving with the story, head north and talk to the fortune teller. She’ll say that Colette has wandered off to another oasis...somewhere. Not very helpful, and you have to pay 100 gald for the privelege of hearing it, but it’s necessary. When you’ve got the info, you can head back to the southern part of Triet and attempt to leave. The Desians will be waiting for you, however, and Lloyd will be captured and sent off to a prison elsewhere in the desert.
Desian Prison
When Lloyd wakes up, you’ll have to use your Sorcerer’s Ring to scare off the guard. It’s a good thing for Lloyd that he’s in one of those special prisons where the prisoners can let themselves out of their cells, because if that wasn’t the case, you’d be in something of a dead-end, storywise. Anyway, bust out of your cell, save your game, and get your equipment back from the guard post.
After a fight, you’ll find yourself in another puzzle room. After your Sorcerer’s Ring gets upgraded to deal electricity damage, you can use it to shock the guard robots while they’re on top of the two electrical plates on either end of the room to unlock the door. It’s tricky to get the timing right, so you can expect to be in here for a few minutes, but the robots aren’t difficult to take on if you happen to run into one of them, so no worries. When you do bypass the puzzle, head to the left (you can’t go through the northern door until later in the game) and kill the guards in the passageway to get a Memory Gem, then run through the door to the north to find a vending machine and a treasure chest.
When you’re done poking around that room, head back to the corridor with the guards and proceed to the east, where you can use the Memory Gem to unlock another save point. There’s another puzzle in this room which, again, isn’t too difficult to figure out. The Gamecube icon in the middle of the room has three colored dots to the north, east, and south, along with a rotating lock on the outer edge that’s triggered by the three electrical poles on the western side of the room. One pole will rotate the lock halfway around, the second will rotate it one-quarter circle, and the last will rotate it one-eighths of a circle. The blue lock leads back the way you came, so what you want to do is unlock the red lock first, head south to pick up some treasure, then return and unlock the green lock, which will lead you to the second fight with Botta.
Boss Fight: Botta
Botta’s shed his formidable battle armor that he used on you before, but he’s just as deadly as his previous incarnation, thanks in no small measure to his two Desian lackeys. You should probably focus on taking out the henchmen first, and let your teammates keep Botta busy until you can deal with him. The main attack that you have to watch out for comes when he plunges his sword into the ground; this will send out waves of energy that will deal massive amounts of damage to you if you don’t have your guard up.
After you defeat Botta and his goons, you’ll wind up on the road back to Triet. After the events in the Inn, during which Raine will officially join your party, get everybody equipped as best you can and head out for the Triet Ruins. If you wish to explore a bit, there are a couple of scenes hidden on grassy outcroppings in the desert for you to discover. You might also want to put Raine in the party and get her working on learning Techs; all she has at the outset is First Aid, so she’ll need to get into the party and start using it in order to learn new ones. You should set up a shortcut to her First Aid Tech for the character that you normally control, then use the shortcut whenever you take any damage at all so that Raine will use her Tech over and over again. Repetition breeds new abilities, after all. You can also encourage her to use her Tech more often by setting her Skills setting in the Strat menu to "At Once."
Triet Ruins
Inside the ruins, you can head left to find a treasure chest covered by rocks; use the Sorcerer Ring to clear it out and open it up for the treasure. The chest on the other side of this path is actually a Fake, which is somewhat like a Mimic from D&D; it doesn’t appear to be susceptible to physical damage, and you probably won’t have enough magical power to kill it yet, so leave it alone for now. You’ll be coming back this way later in the game; you can kill it then.
The central chamber of the ruins has another easily-solved puzzle. All you need to do here is run around and find the three unlit torches, then light them up with the Sorcerer Ring. After you do that, you should have access to all of the treasure chests in the room, although some will require you to drop blocks into place before you can reach them. The two you definitely don’t want to miss are the Stiletto and the Mumei; make sure Kratos and Lloyd have these equipped before you take the warp spot up to the inner chamber.
Boss Fight: Ktugach
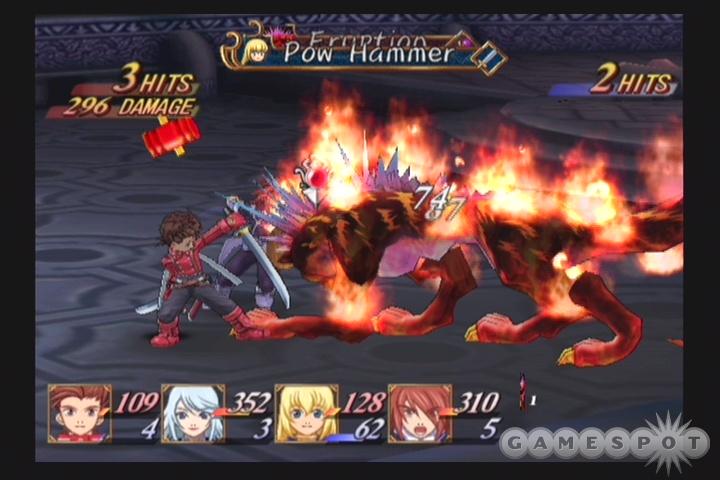
This is the first really difficult boss fight, so do your best to make sure that your characters are healed up. You’ll need to have Colette in your party before you can start the boss fight, so put her in, and use a TP-restoring item on one of your characters with healing, such as Raine if you’re using her. You can make this battle a bit easier on yourself by disabling all of Genis’ spells except for Aqua Edge, as the fire beasts is pretty obviously going to be weak to that kind of magic. You certainly want to disable his fire-based spells, as these will have no effect.
After the fight starts, you’ll definitely want to take out the Chlings before you take on the firedog itself. You’ll take a pounding no matter what you do, so try to get the Chlings done as quickly as possible before killing off Ktugach. This guy has two main attacks that you’ll need to look for. The first is a ranged attack where quills shoot out of his forehead; this is easily seen and guarded against, but it will often hit the AI characters behind you for massive amounts of damage. There isn’t much that can be done about that except to use healing items when appropriate. The second and more dangerous attack is a magical effect that will set off an eruption centered on Ktugach, which will usually hit everyone nearby for a couple hundred damage. If you spot him casting a spell, you might want to put a little distance between you and he.
After Ktugach disentegrates, Colette will earn her wings, so to speak. Well, not even "so to speak"; we mean that quite literally, in that she gets angel wings. You’ll have to spend the night at the ruins so that she can undergo her transformation, but she’ll have the ability to use the powerful Angel Feathers ability in battle henceforth. After that’s done, head back to Triet to get Raine a new title, then proceed east to the Ossa Trail to meet a new enemy, known at this point only as Clumsy Assassin, who’s dispatched even before her introductory cutscene is over. She’ll wait until you cross the mountains to make another attack, this time with a Wind Guardian by her side.
Boss Fight: Clumsy Assassin
The Assassin can deal out plenty of damage, and can heal her pet, but she has less HP than does the Guardian, so focus on taking her out first. You’ll want to keep your guard up as often as possible, as she can easily hit you for 100 damage or more with each hit. Still, you should have over 1,000 HP for Lloyd by this point, so you shouldn’t have too much of a problem dealing with her.
After the fight, exit to the world map; Kratos will instruct you on the finer points of Unison Attacks. After you get that unlocked, you can return to the Trail and head back underneath the mountain through the path the Assassin unlocked. There are four treasure chests here, along with a particularly deadly skeleton. You can try to take it on if you like, but it has 8,888 HP, and an ATK rating of 700, so...you’ll die. You don’t actually get a game over if it defeats you, though; but everyone in your party is reduced to one HP, which makes any future fights somewhat tricky. Don’t worry, he’ll remain here for quite some time, so you can come back to him later.
At any rate, when you escape from the Trail, you’ll spot Isoold nearby. This fishing port looks like an ideal place to track down a ship with which to cross the ocean. Before you head in, though, you can scout the area for a Long Range pedestal and another scene marker. If you run across a wooden bridge, though, don’t cross it; the monsters on the other side are probably a bit too tough for you at this point.
Isoold: The Small Fishing Port
There are only a couple of events of concern in Isoold. First, you’ll need to talk to Alya, a girl who’s living in the house to the left of the Katz Exploration Team stand. Second, you’ll find the Wonder Cook in the house with the Katz explorer on top of it; he’ll teach you how to make Rice Balls. After you talk to both of these characters, you can hit the next screen to the right and convince Max to take you out on his boat. There aren’t any shops to speak of in Isoold, so you won’t be able to upgrade your weapons here. After an uneventful trip on the boat, you’ll find yourself in...
Palmacosta: The Port City
The first thing you’ll want to do in Palmacosta is hit the customization shop. Lloyd’s Masamune weapon is a particularly worthy upgrade, as it’ll increase your attack ratings by 75 if you go from the Mumei to it. If you don’t have the Rapier required for the upgrade, you can buy one at the weapon shop a few feet away, and the White Silver ingredient can also be purchased from the customizer, but you’ll need to expend some of your precious Grade to do so.
After you walk south into the city proper, you’ll be treated to a little vignette during which Colette’s clumsiness will almost get you into another fight. To avoid any unnecessary bloodshed, you’re going to have to pick up a new Palma Potion from the item shop to the east of where the incident occurs and return it to the goons, who will rather blithely let you overhear what they’re planning to do with the heirloom of one Governor-General Dorr. (If you don’t have enough gald for the potion, you’ll have to walk to the school building and play at waitressing until you get one from the Chef.)
The people of Palmacosta apparently subscribe to the Great Man theory of history, so you’re going to hear a lot of glowing character recommendations for this Dorr as you wander the city. Unfortunately, he’s not quite as bright as everyone seems to think; if you visit his house on the screen to the right, you’ll discover that the artifact he gave to the goons was the Book of Regeneration, which, although you’ve never heard of it up until now, is apparently Very Important and will need to be retrieved, like any good macguffin. So, you’ll need to track it down by following the goons to Hakonesia Peak.
Things To Do, People To See
Before you leave Palmacosta, though, there are a couple of other tasks to be done. First, if you didn’t already, visit the school and get Genis involved in an intellectual rumble with the goody-goodies therein. All you need to do to win the contest is walk upstairs, have Genis answer three practice questions correctly in the first classroom, then walk into the second classroom and watch the cutscene. (The answers to the practice questions are: Guardian; the Acceleration Constant of Gravity; and I Don’t Know.) He’ll earn a new title for his efforts.
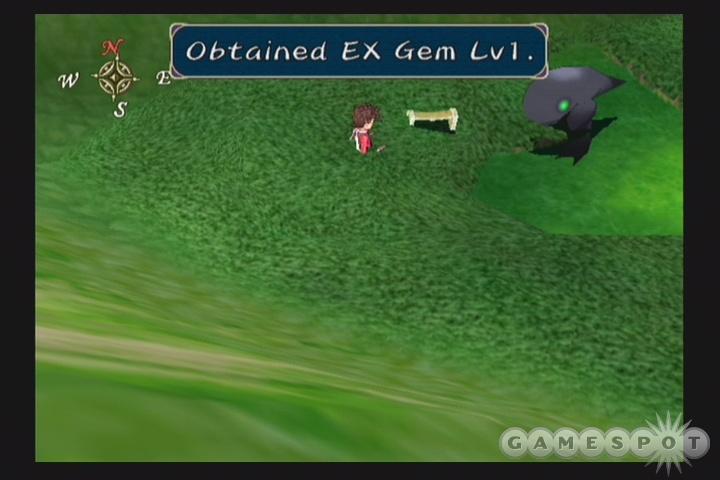
Elsewhere in the school, you can examine the ballstand on the first floor to get an interview with Wonder Chef one more time, or go back to the cafeteria to try your hand at waitressing if you didn’t do so before. You can get as much gald as you like by waitressing over and over, but you’ll need to be pretty good at memory games, and you should have plenty of gald already from fighting anyway. When you’re done there, head into the church and speak to the head priest. After all of this is done, you can wander around and check out the rest of the city (it’s not very big), or head out into the wilderness and start tracking down those goons. There are a few locations of interest along the way. First is the second Nova’s Caravan location, where you’ll get the first bit of information about the summonable creatures in the game. Secondly, if you sweep along the coastline to the south of Palmacosta, you should find a chest containing an EX Gem Lvl 2. Make sure you actually equip it when you pick it up.
Head northeast from Palmacosta along the trail and you’ll eventually come to another House of Salvation, so rest up and save your game, then proceed straight north and you’ll come to Hakonesia Peak.
Hakonesia Peak

After speaking with the pilgrims on the first screen here, head inside the building to speak to Koton (of the Hill People), who managed to buy the Book of Regeneration off of the goons. He won’t let you have it unless you bring him a statue from the House of Salvation to the south. There are bigger things to worry about at the moment, though, as you’ll soon learn that Desians are attacking Palmacosta! You’ll have to race back down the trail until you return to the port town, wherein a bit of drama will play out without much interaction from you.
When you regain control of your party, you can speak to the priestess near the town’s exit to be warped right back to Hakonesia. If you try to head up through the pass, however, one of Dorr’s guards will ask you to meet them at the human ranch nearby. If you follow the trail that leads southeast from the House of Salvation, then curve around the mountains to the north when the trail ends, you should be right at the ranch.
Stopping In At The Ranch
As soon as you arrive at the Ranch, Nick, Dorr’s man-at-arms, will reveal to you that Dorr has actually been working with the Desians to lead you into a trap. You can choose to either head back to Palmacosta and confront Dorr, or infiltrate the Ranch right away. Heading back to Dorr will get you a pretty nifty item, so you might want to do that now. You’ll have to confront him eventually, either way, so it’s best to get it over with.
Back at Palmacosta, head down into the basement of the municipal building to witness a wee bit of a plot twist. You’ll find yourself face to face with a Desian monster. If you want an easier time in this fight, you might want to fight around in the field to get your Unison gauge full before resting at the inn, then head down to the basement to trigger the events leading up to it.
Boss Fight - Kilia
Kilia has double the HP of any boss you’ve seen thus far, and she can dish out an appreciably larger amount of physical damage, as well. If you have your Unison attack built up all the way, unleash it at the beginning of the fight, then charge it back up with normal attacks; you may be able to fill it up again before the fight is over. You’ll need to constantly be guarding, though, as Kilia can attack for a hundred damage or so with each strike, and she’ll usually attack with three or four arms simultaneously. You’ll want Raine in your party here, if only for the constant healing. Just keep the pressure on Kilia and she’ll eventually be killed. She drops the very handy Heal Bracelet, which will give you back 10% of your maximum HP every time you kill an enemy in battle; you’ll probably want to use this on Lloyd.
Now, before heading back to the Ranch, talk to the priestess by the exit and offer to take her partway to Hakonesia; you’ll wind up at the House of Salvation, where the head priest will have returned. Talk to him to learn about the statue that you need - seems it’s all the way out on Thoda Island. We’ll get to that in a second, but first you’ll want to heal up, save your game, and get to the Ranch to rescue Chocolat.
Palmacosta Ranch
Now that you’re ready to enter the ranch, take the left branch of the path and enter the code at the machine. If you forgot the code, check your Items to get a reminder. Inside the Ranch, you’ll have to fight your way through the usual assortment of guards and robots, but luckily for you, the layout isn’t terrifically complicated. There’s actually only one exit from the first room here; in it, you’ll find a pedestal that will let you change your Sorcerer’s Ring into a radar device. You’ll want to be tapping it constantly as you move throughout the Ranch, because it will highlight hidden items and trigger switches.
Speaking of which, you can hit the radar as soon as you get it to reveal a Warp, but avoid it for now and head one screen to the right instead. There are plenty of radar triggers here, so keep the radar activated and check anything that gives off a small sparky animation. You should find a new shield for Kratos, as well as a couple of walkways, one of which will lead to the east. The Refresher here will completely heal you up, for free, so if you want to earn some levels, you can reset the enemies in this room by walking in and out, healing up after every go-round. One of the enemy groups in here drops a Purple Card, so grab it; if you didn’t get the Memory Gem, you’ll want to return to the first room you entered and clear it out again.
When you have the purple card, and have extended all of the walkways in the easternmost room, return to the Sorcerer Ring pedestal, hit your radar, and take the warp up. After saving your game, head west to get the Blue Card, then return to the east and activate your radar again to spot the hidden blocks in the room there. If you drop one into the set of slots nearby, you’ll be able to pick up a very handy EX Gem Lv2; elsewhere in the room is the Red Card. You can also find a Mage Cloak for Genis if you move the other blocks around. Before you leave the room, disconnect all of the bridges; if you do, you’ll notice that a staircase will appear in the center of the room. You’ll be able to access it shortly.
This Probably Causes Cancer
Now that you have all of the key cards, return to the Warp near the save point and use it. This will lead to a little maze of warp paths, with some hidden items along the way.
Room 1: Use the yellow Warp to the left. Hidden Item: Melange Gel.
Room 2: Use the yellow Warp to the north. Hidden Item: Ambush.
Room 3: Use the green Warp to the north. Hidden Item: Apple Gel.
Room 4: You’ll have to exit the way you came in, but if you deactivated the paths earlier, you’ll be able to grab a Panacea Bottle first. Head back to Room 2
Room 2: Use the red Warp to the left.
Room 5: Head south and use the yellow Warp. Use the radar to find a Life Bottle, then return to Room 5 with the same warp you entered on. Hidden Item: Ambush.
Room 5: Head north and use the yellow Warp.
Room 6: Head left and use another yellow Warp. Hidden Item: Orange Gel.
Room 7: Use the northern yellow Warp. Hidden Item: Ambush.
Room 8: Use the left red Warp. Hidden Item: Ambush.
After all that warping, you’ll now finally be able to rescue Chocolat from her captors. She’ll show you the warp that leads to the control room, but before you take it, you’ll want to check around for an unlockable save point and use it.
Boss Fight: Magnius
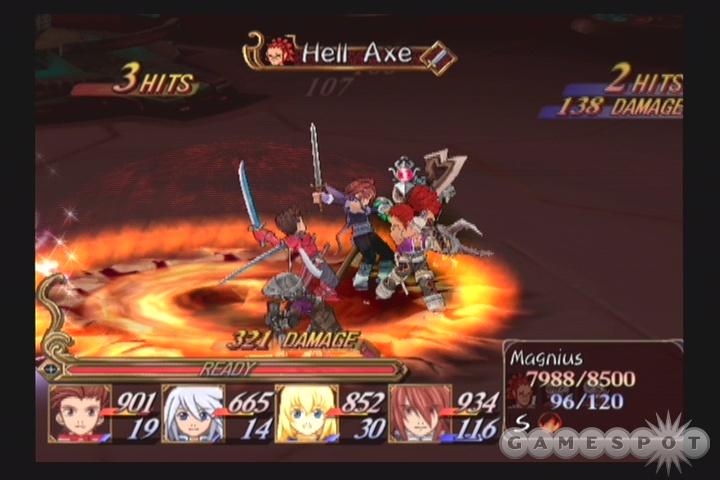
Magnius is tough, so you’ll want to concentrate on taking out his helpers before you turn your attention to him. Raine or Kratos will be doing a lot of healing during this battle, especially during the early portions, where Magnius will strike you in the back while you’re concentrating on his goons, so don’t hesitate to use Orange Gels as needed. By the same token, if you get in trouble HP-wise, whip out an Apple Gel for a quick boost - it never hurts to have an Apple Gel and a healing spell hit you at the same time.
Magnius himself will use his massive sword to great effect, along with the Beast Tech to knock you back. His special attack is a Flame Lance that will hit anyone standing in front of him for a huge amount of damage. If you have a Unison attack at the ready, whip it out and get your 20-combo or higher in. Magnius only has 8,500 HP, so a minute or so of concentrated thwacking is all you need to take him out.
After everyone’s dead, and the Ranch has been destroyed, you can head back to Palmacosta to let Cacao know about her daughter’s re-kidnapping by the Desians. She seems rather nonplussed about it all, but asks that you rescue her daughter nonetheless. Before you can do that, though, you’ll have to go to Thoda Island and get the Spiritua Statue from the geyser there. You can find the Thoda Island Dock to the southeast of the Ranch.
Thoda Island
Your first task here is to get the Statue from the geyser. After you walk up to the edge of the little pool, Genis will freeze it, which will let Lloyd hop across the ice floes to get the Statue. This isn’t difficult - just follow Genis’ shouted directions and you’ll get to the goal in no time.
After that’s done, you can examine the stone near the lake to discover the entrance to a cavern that apparently holds the Seal of Water. After you enter the cavern, you’ll be faced with another semi-tricky puzzle to contend with, but hey - that’s what we’re here for.
The Water Temple
Your goal in the Water cavern is to raise a platform containing a Warp so that you can reach the Seal of Water, but that’s easier said than done. The first room in the cavern contains two exits to the south and a Sorcerer Ring shifter; avoid the shifter for now and head out the leftmost exit. You’ll find two torches on either side of a set of scales; light them both and, if possible, unlock the save point and save your game. There are also three treasure chests hidden near the pillars on the right side of this screen, so search around until you find them.
Now, return to the first room and shift the Sorcerer Ring so that it shoots out water, then head out via the rightmost exit. You’ll eventually come to the lower portion of the screen with the save point. Grab the block here and shove it as far to the right as you can get it, so that it’s underneath the doorway. Then return to the save point area and shoot the bottle of water on the scales with your Ring; this will tip the scales, and shut the doorway below, but since you placed the block underneath it, you’ll still be able to travel through the passage, and travel you should, because you’ll need to walk all the way back to the lower set of scales and repeat the process of filling the water jug. This will raise the platform that you’ll need to warp from. Be sure to save your game before you hit the Warp, though; the boss is a doozie.
Boss Fight - Adulocia
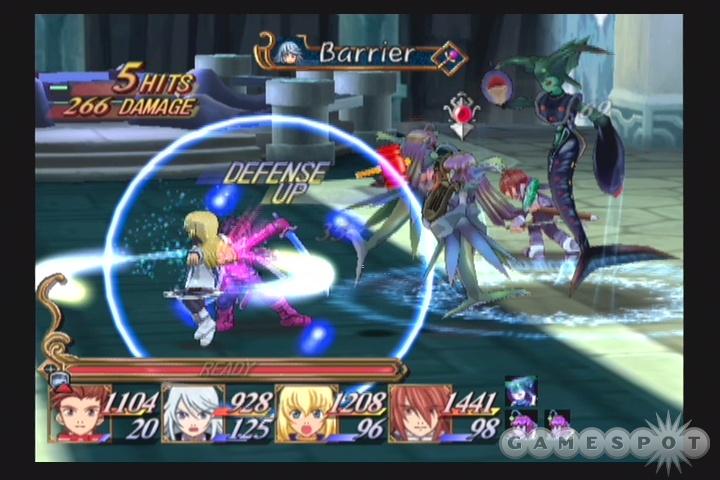
You’ll want to deactivate all of Genis’ spells except those that cause lightning or fire damage for this fight. Adulocia’s twin pets are easy enough to take out, but the water queen herself is immensely powerful, especially when she’s on the attack, so you’ll need to float like a butterfly if you don’t want to get overwhelmed. (The stinging like a bee part of that equation should be tacit by this point in the game.) She still only has 10,000 HP, however, like the last few bosses, so with a concentrated attack pattern, you should be able to dish out enough punishment to take her down before the two minute mark.
When you reach the mainland, head back to Hakonesia Peak and exchange the Statue for the Book of Regeneration. Afterwards, go through the pass and head north. You’ll come across a House of Salvation before long, but your real destination is Asgard, to the west.
Asgard: The City of Ruins
The first thing you’ll probably want to do in Asgard is upgrade your equipment at the weapon shop; take the first set of stairs on the left and you’ll find it. This is where upgrading your equipment can start to be painful; you’re probably going to have to trade in a bit of Grade to get the items you need for the new weapons and armor. Black Silver will be especially dear, as you’ll have to exchange 10 Grade for each piece, and you’ll need three or four if you plan to upgrade to all of the items on the list. If you don’t want to or can’t upgrade, just buy what you can and use that.
Elsewhere in Asgard, you’re going to want to walk up to the ruins that stand atop the hill to the rear of the town. This will trigger a series of events wherein Lloyd foils a plot to destroy the ruins; just walk around to their rear when Raine starts talking about the history of the area. You’ll eventually get kicked out of the ruins by the Mayor of Asgard, so head to the slums in the eastern part of the city and check the buildings until you find Linar’s house. Apparently, Linar’s sister has been chosen to be a human sacrifice to a creature that lives in the ruins. If you return to the Mayor, Raine will offer to take her place, so be sure to heal up and save your game before you head back to him. Raine will have to be in your party; Kratos and Genis will also be useful.
Boss Fight: Windmaster
If you upgraded your weaponry and equipment when you first rolled into town, this should be a cakewalk for you. The Windmaster can attack for plenty of damage, but if you can keep your guard up, you should be able to plow it backwards towards the eastern edge of the battlefield and wail on it until it dies. If you don’t have a Unison attack available, try to match up Lloyd’s Sword Rain or Sonic Sword Rain Techs (or both) with any of Genis’ spells for extra combo damage. If you set Kratos to Frontlines, you should be able to get some massive combos going; this will let you keep Windmaster pinned against the wall, unable to attack. After you finish it off, you’ll gain the Map of Balacruf and the Artifact accessory.
The next morning, return to Linar’s house to pick up Raine and the Map; the ensuing discussion will point you towards your next destination, the Balacruf Mausoleum, which lies on the island to the east of the House of Salvation. (You can also stop by Harley’s place on the same screen to get the Figurine Book.) First, though, head north until you reach Luin, a small town on an island in the middle of a lake.
Luin: City of Hope
There isn’t a tremendous amount to see in Luin, but you will run across Sheena again, and you can pick up a recipe from the Wonder Chef in the town’s item shop. Taking a side trip now will let you see the town before it...changes due to upcoming events. Most of the weapons for sale here aren’t as good as the earlier customizations, save for Raine’s Ruby Wand.
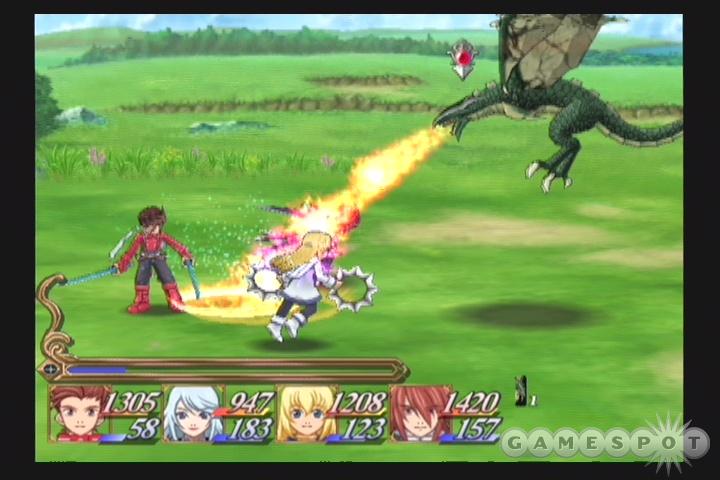
You can also visit Lake Umacy at this point, just to the northeast of the House of Salvation. There’s not much to do at this location just yet, but you can stop in nonetheless. When you’re ready to get moving on, head back to Balacruf. Before you head into the Mausoleum, check the island that it’s on for a Strike Ring in a Field Chest
Balacruf Mausoleum
After unlocking the Mausoleum and heading inside, walk to your right and note the location of the save point. You won’t have a Memory Gem yet, unless you brought one from a previous dungeon, but mark its location, and the gust of wind that blows across the corridor. This being the wind dungeon, you’re going to have to overcome that particular element and bend it to your will if you want to survive.
The first thing you’ll want to do here is head up the steps across from the entrance and gingerly cross the spike traps at the top. You need to get close to them, so that the spikes rise up, then dash across as they retract again; if done properly, you won’t take any damage. As you’re running around on the upper level, note the torches near the walls; light the first torches, then read the murals that they illuminate. These give you clues as to how to bypass a puzzle later in the dungeon. If you want to solve said puzzle for yourself, note the sequence of colors.
When you come across a block, push it down to the lower level of the dungeon and use it to cover up the square in the floor; this will block the wind machine, allowing you to return to the save point and light the torch there. From there, head up the corridor that’s lined with spike crushers, and you’ll eventually come to a doorway that’s unlocked via a torch on either side. Open it up, but don’t proceed through yet; instead, head downstairs again and you’ll find a few treasure chests and a Sorcerer Ring shifter, which will let your ring shoot out blasts of wind. If you’ve read all of the murals, feel free to proceed into the northern room.
The Windmill Puzzle
Puzzle time! This one is a bit more complicated than previous puzzles, mostly because it involves interpreting one or two fairly obfuscated riddles in the previous room. You have to use your wind ring to start the windmills going; when you start them in a particular order, you’ll unlock a couple of items before finally opening the door to the Seal of Wind. If you think you know the order to the windmills, feel free to try your solutions out; if not, we have a little cheat sheet for you here. After each sequence, check the door to the north to stop the windmills.
First Sequence: Red, Green, Yellow, White, Blue
This will net you an EX Gem Lv2, so equip it immediately.
Second Sequence: Blue, Red, Yellow, White, Green
You’ll get a Blue Ribbon for this.
Third Sequence: Red, Yellow, Green, White, Blue
This pretty obviously leads up to a boss fight against a wind monster, so if you have Genis in your party, deactivate any wind or lightning spells that he might have and make sure everyone has a decent amount of TP before proceeding.
Boss Fight: Iapyx
If Lloyd has a full TP reservoir going into this fight, you probably won’t have much difficulty with Iapyx; if anyone is running low, though, you could be in for a long battle, filled with the use of medical items. Your best bet here is to let your auto teammates pound on Iapyx with magic while Lloyd and/or Kratos go to town at close range; if you’ve been levelling up at a decent rate, Lloyd should hopefully have around 1,500 HP at this point, so even if Iapyx hits for 250 or so per shot, you won’t have to worry about getting drained too quickly. If you have Raine along, she won’t do much except heal, so you should be golden.
You can get Iapyx up against the wall with a few combo attacks; when this occurs, start going crazy with spells and sword attacks. Sonic Sword Rain is particularly good for when Iapyx gets close to the ground, but keep in mind that he can fly; you may want to bind Tempest or Psi Tempest to one of your Tech slots if you haven’t already.
On your way out of the temple, Sheena will attack you again. This occurs just before you reach the temple’s save point, so heal yourself up with items or meals before you reach the entrance. You should’ve been completely healed after your fight with Iapyx, so if you can avoid any fights on your way out, you should be a-ok.
Boss Fight: Resolute Assassin
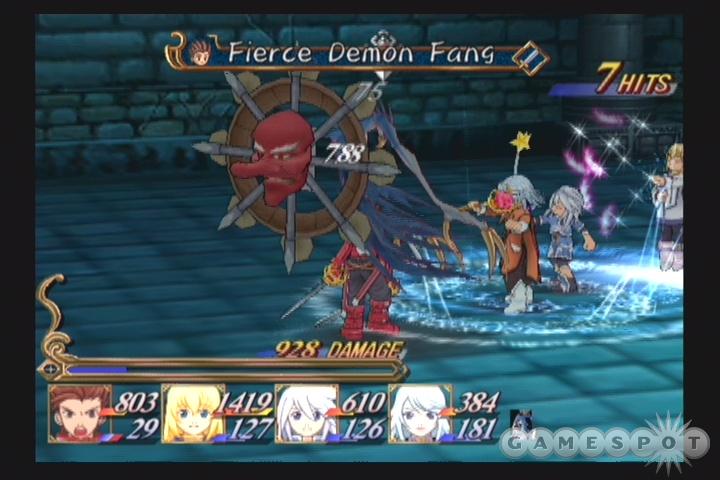
Sheena again brings a Guardian along with her; this time it’s a Guardian: Lightning, so deactivate Genis’ lightning spells before heading into battle. As with the first fight, you’re going to want to concentrate on Sheena first, as she has fewer HP than her pet, but don’t let the Guardian run rampant among your spellcasters if you can avoid it. If you come into this battle with full health, you shouldn’t have many problems.
In point of fact, now that you’ve beaten Sheena twice, she’ll now be willing to join your party and fight alongside you. You won’t gain her services right off, though; you’ll have to head north and return to Luin, which has been devestated by the Desians. After Sheena joins up, return to Asgard to purchase equipment for her, if necessary, then head out to the Asgard Ranch to the north of Luin for some payback. Sheena’s great as a frontlines fighter, where she can contribute to Lloyd’s and Kratos’ attacks to form some truly massive combos. If you visit Lake Umacy with her yet, she’ll hint at a solution to the unicorn-in-the-lake problem, but stick to your task for the moment - you won’t be able to act on her suggestion for a while yet.
In and Out Of The Ranch
Actually entering the ranch isn’t all that difficult; Raine and Sheena will work up a plot involving Desian disguises. After all that work, though, you’ll only be in the Ranch for a few moments. You’ll get one scene involving Kvar, a Desian general, then get to wander around inside the facility (grab the Memory Gem from one of the enemies and the Iron Bracelet from the chest), then get another scene before you leave the Ranch. Don’t worry, you’ll be coming back later.
You’ll want to head back to Luin now, if only to get a pointer on where to go next. Your destination is now Hima, a town to the west and south around the ring of mountains on the map. Before you head in, though, now would be an opportune time to hit the Sword Dancer that you bypassed earlier. You remember the big skull in the underground segment of Ossa Trail? Well, he’s still there, and he’ll still be tough, but you have enough HP and can deal enough damage to take him on and win by this point. He’s weak to Light magic, so let Raine and Colette go to town while Lloyd and either Kratos or Sheena get up close and personal. He’ll drop the Yata Mirror, but that’s not why you’re fighting him - you’re fighting him now so that you can fight him again later, and earn even better items. We’ll point out where he pops up when you can plausibly take him on; he gets much more powerful after each defeat. You can reach him by walking south of Hima and taking the bridge across the water.
Hima
There isn’t much to see or do in Hima, save visit the Inn, nab the Wonder Cook recipe there, and visit the gravesite up the hill to obtain your clue on how to re-enter Asgard Ranch. You can also ascend the mountain here to get a hint of how you’re actually going to get to the Tower of Salvation. Regardless, you won’t be spending much time here; when you’re ready to leave, speak to the pilgrim near the exit and you’ll be able to warp back to Luin. From there you’ll have an easy trek back to the Ranch.
Asgard Ranch
Once inside the Ranch, you’ll have to split up into two teams, with Lloyd leading the team that’ll be proceeding to Kvar. You only get two teammates to bring along, so make sure one of them’s either Kratos or Raine for healing, with Raine being the better choice. You will have to control the other team, though, so don’t stack it with characters you don’t like.
Let’s Split Up
After you pick your team, head out through the northern exit, grab the three treasure chests, then activate the console nearby to shut down the EX Sphere creation process. This will allow you to ride on the conveyor belt that blocked you off on your last trip to the Ranch, which you can reach via the southern door in the first room here. Don’t forget to refresh at the console here and save your game before proceeding.
The conveyor belt room also contains a Sorcerer Ring shifter that’ll boost your fire beam, so switch over before proceeding. In order to stop the conveyor belt, you’ll need to hit the six central pillars in this room with your Sorcerer’s Ring, so get to work. After the belt stops, you’ll have a clear passage to Kvar’s antechamber in the northwestern corner of the room. Don’t miss the treasure chest near the door; it contains an EX Gem LV2.
Now you’ll have to take over the other team and have them shut down the guard system; you won’t have an easy time of it, though. First you’ll have to return to the courtyard, dispatch the guard there, then move some blocks around in the small corridor to your right to unblock the entrance to the guard control station.
When you’re back inside, head northwest until you reach a room with a treasure chest; grab the item inside (and equip Sheena with it if she’s in your party) before examining the switch on the floor. This will lock you in, but you can head west to exit the room. This will free the prisoners, after which you can head south and circle back around to where you were. After entering the room that was unlocked via the switch you pressed earlier, you’ll unlock one of the two guard station switches. The same process can be repeated to the west; you’ll then switch back to Lloyd’s party. Make sure everyone’s healed, then save your game and proceed to meet Kvar.
Boss Fight: Kvar
Kvar makes for a hell of a fight. Well, he and his little group of electronical thingamabobs taken together make for a hell of a fight; you’ve got over 25,000 HP worth of enemies to deal with before you can move on, and since you only have three members in your party, you’re going to be working less efficiently than you normally do.
You’ll need to take out the Energy Stones before moving in to kill off Kvar, but you’ll have to choose your positioning wisely; if you get trapped within range of two or more of the enemies, they can sap your health far more quickly than you can be First Aided. You’ll need to try and use your strongest attacks on an Energy Stone, retreat to use healing items when things get hairy, then jump back into the fray. After you take out a couple of Energy Stones, you’ve cleared the hump and are well within range of victory.
Kvar himself isn’t tremendously difficult to beat, although it does take quite a few blows to disrupt his spellcasting. Just wail on him, and if possible back him up against one of the "walls" of the fighting arena to better concentrate your blows. He’ll keel over with a couple dozen seconds’ worth of physical attacks.
Back to Asgard
After the fight, you’ll return to Asgard, where you can meet up with the fake Chosen group near the ruins at the north end of town. You should also speak to Harley in his workshop on the eastern side of town (in the building just below Linar’s house) to get the Figurine Book, which will open up a typically inscrutable Japanese RPG side quest that involves collecting hundreds of small figurines for only the slightest of benefits.
You still need to track down a cure for Pietro in Hima, as well. Unfortunately, the cure lies in the Tower of Mana, which is locked. The deus ex machinaish answer to this conundrum lies back in Hima, where Dorr’s wife, still in monster form, just happens to be, and just happens to have the key to the tower, and just happens to drop it when she gets chased out of town. Which makes sense, if you think about it...well, no. No it doesn’t.
At any rate, you have the key to the Tower of Mana, so get cracking.
Tower of Mana
You’re going to have to split up into two parties again, so be sure to put a healer into the party along with Lloyd and Colette. You’ll have a chance to reform into a party of four before you fight the boss of the tower, so don’t feel too conflicted about the choice between Kratos and Raine; just get someone in there and get going.
Lloyd’s group will start heading up a longish spiral staircase; defeat the second group to pick up a Memory Gem. You’ll eventually come out into the first of a few easy puzzle rooms. What you have to do is burn the red drape with your Sorcerer’s Ring, then split the beam of light that results so that it hits the orb on the right side of the room; this will unlock the door on the left. Step on out and save your game.
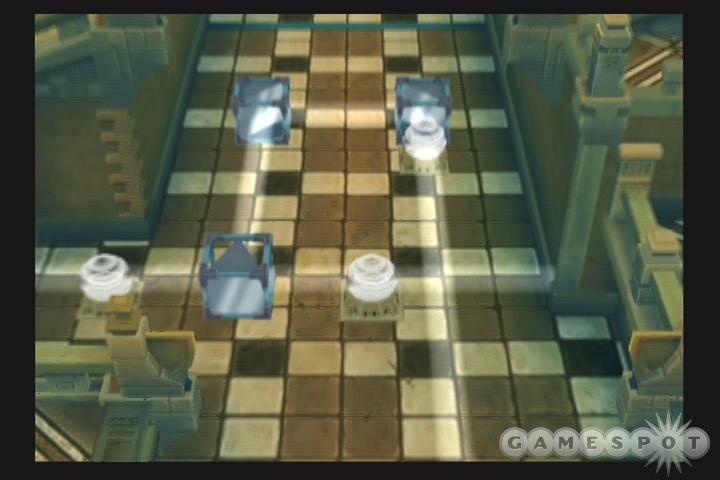
You’ll switch over to the other party when you examine the device below the save point, so take them through their own door and through a couple of light puzzles of their own. One of these is something of a doozy, so check our screenshot to see the solution.
After a bit of walking, your parties will rejoin and will be able to take the warp to the top of the tower. As per usual, get Colette in your party, along with a healer and another member of your choosing.
Boss Fight: Iubaris
Iubaris’ only weakness is Dark magic, which you likely don’t have at your disposal just yet. You may have some Dark Brass, though, which you can use to soup up Lloyd’s weapons with Dark elemental power. If you flex your muscles with the usual strategies, though - get the boss against the wall and let Lloyd Tech away - you should be able to kill Iubaris off without much of a problem.
Curing Pietro
On your way out of the Tower, check the bookshelves in the first room to find Boltzman’s Book, which will reveal a key ingredient in the cure for Pietro and Clara: the horn of a Unicorn. After you leave the Tower, a long, long cutscene will start playing, which reveals that man lives in the sunlit world of what he believes to be reality. But there is, unseen by most, an underworld. A place just as real, but not as brightly lit...a Dark Side!
Well, that’s putting it all a bit melodramatically, but is a good summation nonetheless. Anyway, now that you know what you need in order to restore Pietro, head down to Lake Umacy if you haven’t already. (It’s to the northeast of Asgard.) Afterward, you’ll have to head all the way back south to the Lake Thoda dock and head across to the Seal of Water, where you’ll fight Undine.
Boss Fight: Undine
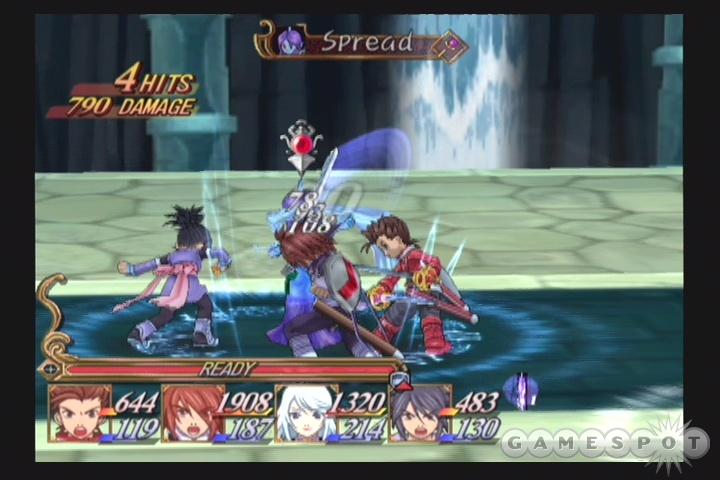
Undine, as you may expect, will use water attacks, and will deal plenty of damage with them. She’ll cast Spread quite often, but if you notice her go into the spellcasting animation, you may be able to disrupt her with a Sonic Sword Blast. This is especially true if you have other melee attackers along for the ride; you may want to bring both Kratos and Raine along for their healing powers, as well, since Spread is unblockable. If Lloyd’s TP drops too low, give him an Orange Gel and get him back on track.
After Undine is defeated, Sheena will gain the ability to summon her in battle, or for storyline purposes, so head back to Lake Umacy and get your unicorn horn. Before you leave Thoda Island, though, stock up on Melange Gels from the item seller near the geyser; these are tough to find elsewhere.
After you reach the mainland, jet on over to Hima and cure up Pietro. Afterwards, you can ride the dragons from the top of the mountain to the Tower of Salvation, but there are a few things you should take care of before you do.
Odds and Ends
First off, head all the way back to Dirk’s House. If you picked up the Figurine Book from Harley after destroying the Asgard Ranch, you can start on the multi-game miniquest that involves constructing figurines of every. Single. NPC. In the game. It’s a helluva miniquest, somewhat akin to the camera quest in Zelda: The Wind Waker, and it’s completely optional. Regardless of whether you intend to go through with it or not, you should still head back to Dirk, as he’ll give you some items when you stop in, including an EX Gem LV3. This should be your first one, and it’ll allow you to purchase more from the Katz Exploration members in the various towns, should you have 150 spare GRADE hanging around, and you definitely should after all of this running around. If you head back to Dirk via the Ossa Trail, and didn’t take out the Sword Dancer earlier, now would be an opportune time to do so.
Boss Fight: Efreet
Next up is to get a couple more summons for Sheena. Since you’ll have to head back past the Triet Ruins anyway, stop in and take on Efreet. This guy has a lot of powerful magic, and he flies, so he’s tough to stun or disrupt with your Techs. You can expect one or two deaths during this fight, so you’ll probably want to come in with plenty of Life Bottles at your disposal.
After he goes down, head out to the Balacruf Mausoleum to take on the Sylph family.
Boss Fight: Yutis, Fairess, Sephie
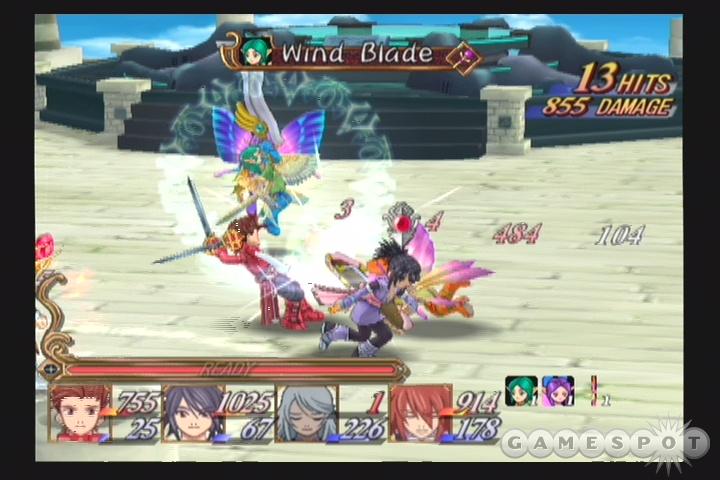
The Wind elemental summons won’t give themselves over to Sheena without a long, hard fight. There are three of them to tackle, and the ones that aren’t being engaged by your frontline fighters will disrupt your spellcasters, so you’re going to have to rely on Gels and Life Bottles to keep your forces together, for the earliest portions of the fight, at any rate. Either Sephie or Fairess should be your primary target at the outset; Sephie does more damage with her sword, but Fairess’ spells can knock two or three of your characters around at the same time. Yutis isn’t as bad as the other two; her bow and arrow can do significant damage, but it only hits once and it takes her a few seconds to recharge.
Return to Hima and hitch a ride to the Tower of Salvation when these side-quests are complete. (Technically speaking, you can fight Efreet and the Sylphs later in the game, but they’ll be much more difficult then. Best to get it out of the way. Also, don’t worry about the Seal at the top of the Tower of Mana; you won’t be able to do anything there yet.) Before you can leave, you’ll have to spend a night in town; be sure to speak to everyone before you walk off with Colette for your little heart-to-heart, and stock up on healing items as well. You’ll want 20 of the Gels and Life Bottles before you go.
Tower of Salvation
Well, it doesn’t seem too suspicious that Kratos would escort Colette to the Tower and then disappear completely? Before you can make note of that little tidbit, though, the plot twists start coming, beginning with the completely-not-a-ripoff-of-FFX revelation that Colette’s journey of regeneration was always destined to end in her death, and she hid this fact from Lloyd to protect him from the truth, etc. Irregardless, the secondary revelation that Remial is a villain will result in your first big fight of the Tower.
Boss Fight: Remial
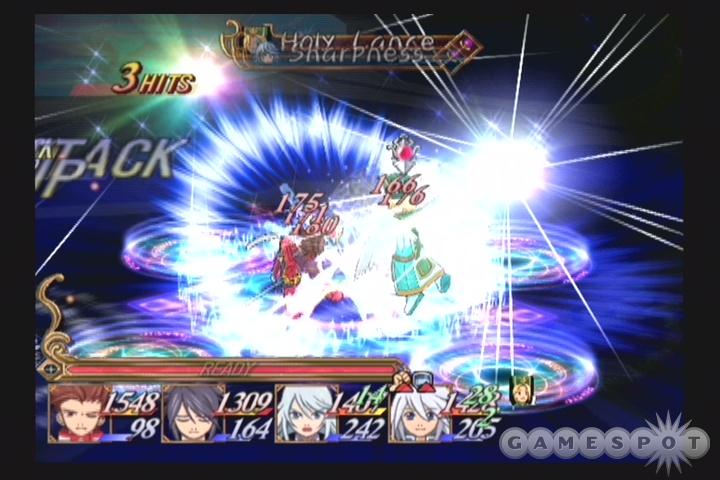
Remial sends out light magic such as Photon and Holy Lance, so you’ll need to keep the healing spells and items flowing; Photon alone does around 800 damage to a single target, while he has another megahurt spell that will probably kill off both Sheena and Lloyd when it hits. This only seems to occur once, though, so as long as Raine and Genis are away from the front lines, they should survive to revive the party’s fighters. Remial will also warp around the battlefield, so locking him against one of the walls is impossible. He has a hard time hurting more than two of your characters at a time, though, so as long as you’re unafraid to use your healing and TP-restoring items, you should be able to beat him, albeit with a few deaths along the way. If you can, cook a meal at the end of this fight, because next up we have...
Boss Fight: Kratos
Well, Kratos suddenly fished out an extra 20,000 HP from his back pocket, apparently, which brings his total up to 22,000. Although you don’t have to beat Kratos - the game continues whether you do or not - it’s nice to get the EX Gem LV3 that he drops, not to mention the 4,000 experience.
The trick to actually outlasting Kratos is in, again, using your healing items like a maniac. Kratos can dish out a lot of pain, and he’s quite mobile, so everyone will be getting their fair share, but especially Lloyd. Kratos’ two main attacks are Thunder Blade and Grave, both of which are area-damage spells that hit you repeatedly. Thunder Blade comes out a bit too quickly to be consistently avoided, but if you run away from Kratos when he starts casting, you should be able to get out of range of Grave, which will save you 500+ HP. He throws out Fierce Demon Fang from time to time, as well, and appends his regular sword slashes with a lightning strike. Raine’s healing magic can take a long time to come out, so you’ll have to rely on your items more often than not. If possible, let Sheena do the item using, as Raine and Genis will often be casting spells. It’s especially important to get Genis’ spells off, as they will disrupt Kratos if he himself is casting.
As mentioned, the game will continue whether or not you beat Kratos. Even if you do beat him, you get to face...
Boss Fight: Yggdrasill
It’s a setup, son! Yggy Stardust here has 40,000 HP, and each of your attacks does a grand total of one damage. So, you’re pretty much already dead at the beginning of the fight, you just don’t realize it yet.
After Yggy defeats you, yet more backstory will be revealed. Eventually, you and your party will wake up in the base of the Renegades, captained by Botta, whom you fought many hours ago. After escaping from their clutches, you’ll have to wander through their base for a bit; you’ll eventually find yourself in a block-pushing room. You’ll need to line up the brown boxes to reach the gray box, which can be inserted on the blue tile to unlock another set of stairs. Before you do this, however, use all three boxes to reach the two treasure chests on the raised platform. Then switch your Sorcerer Ring at the shifter near the stairs and descend.
On the lower level, you’ll spot an energy coil; this will let you control the up-and-down motion of the platform here. The platform extends all the way to the upper level, so you’ll need to head back upstairs while it’s fully raised and push the two brown boxes onto it (in the upper-right and lower-right quadrants), then head back downstairs and lower it to cross the water. Once there, you can charge the machine to lower the water level, push the grey box into the water, then head downstairs to push the grey box onto the blue square. This will give you access to one last energy coil, the shooting of which will unlock the door. Don’t miss the treasure chest that’s revealed as you head back up the stairs.
When you reach the large room beyond the door, head one screen left and one screen right to begin your adventures in Tethe’alla.
Tethe’alla
After you crash-land your supercars, you’ll have to walk down the side of a mountain before you can reach the world map, but reach it you will, and with minimal problems; the enemies here aren’t any more difficult than the ones you were facing in Sylverant.
Your first goal is to make it to Meltokio, which is a short walk to the northeast of where you find yourself when you reach the field. Before you head out there, though, you might want to check around the area for some hidden items; there’s a Reverse Doll to the west of Meltokio, along with an Anti-Magic Bottle and some Super Pellets elsewhere in the area.
Meltokio: The Imperial City
You’ve got a few things to take care of in Meltokio, but before you can begin, Sheena will rather unceremoniously dump your party and head out on her own, which leaves you with only a single decent front-lines fighter. For the moment, at any rate.
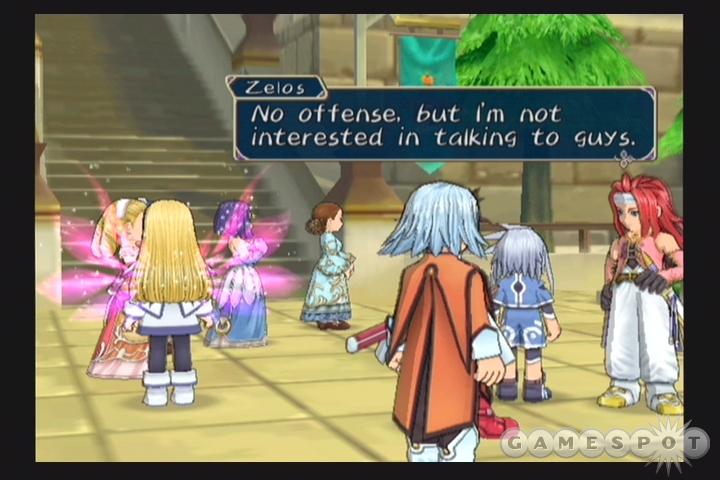
After you regain control of your group, head up the steps to meet up with Xelos in a rather amusing cutscene. To the left and right of the main square here, you’ll find the weapon and armor shops, but don’t bother spending too much money on weapons just yet; you’ll find better equipment in the next town. The weapon and customization shop near the Colosseum is also the host to the first Wonder Chef appearance, so grab the Steak recipe while you’re browsing, then continue north to the upper-class quarter of the city. Before you head into the King’s residence, though, head one screen to your right and visit the genteel houses of Meltokio’s elite. In one of the largest residences (the one with a man named Sebastian inside), you’ll find another Wonder Chef appearance point n the upper level. This time, you’ll learn the easy-to-make Fruit Cocktail.
Two More Members
Back at the royal palace, you’ll be denied entrance, but if you speak to the priest in the Church of Martel to the east, you’ll get an idea of how you can get in to see the King. You’ll need to steal some "sacred wood." The laconic Presea is dragging said wood around, so if you talk her into letting you tag along, she’ll join your party. Equip her with any spare equipment you may have before proceeding.
The King’s chambers are where you might guess, at the top of the palace, so feel free to scout around the rest of the castle before heading up. Talking to the King will lead to the addition of Zelos to your party. Although Zelos is pretty much a carbon copy of Kratos when it comes to Techs and equipment, he does have one unique property: if you set up his level 2 Ex Skill to be "Personal", he’ll get items whenever he talks to female NPCs in towns. You can try it out in Meltokio, if you wish; you’ll get some great stuff, like Lemon Gels, Melange Gels, and the like. If you notice a woman behind a register, walk behind the counter to get her item. You can even mack on the priestesses in the Church of Martel, but don’t forget to switch your skill when you’re on the field; this ability isn’t all that useful in combat. This ability refreshes whenever you leave a city and come back, so you can use it over and over again.
After you’ve collected your new party members, check out the rest of Meltokio before heading out to the field and north to the Tethe’alla Bridge. Your bridge crossing is uneventful, although you can play a few games of Red Light/Green Light with the Katz member to earn a new title for Genis if you wish.
Sybak: Spock’s Brother’s Town
The Royal University is stationed in Sybak, but before you head in, you should check the marketplace in the town square to get some better weapons, and find the Wonder Chef in the archives building to the north. After that’s done, head into the university and start exploring. Don’t forget to switch Zelos over to his ladykiller mode; there are a lot of items to be had in the University if you do so.
After you’re done hitting up strange women, return to the town square and obtain a Key Crest from the junk vendor there. If you return to the University, Lloyd will be able to fix it and equip it to Colette, to no apparent effect. Unfortunately, this turn of events will lead to Genis and Raine getting arrested; you’ll have to track them back to the Bridge in order to save them. From there, head back to the Fooji Mountains.
When you’ve climbed to the top of the mountain, save your game and heal your guys up in preparation for a boss fight.
Boss Fight: Pronyma
Pronyma is something of a dark angel, so you should use Raine and Colette’s Light-based attacks as often as possible. The main things to worry about are her physical attacks, as she’ll strike often, and for 300-400 damage each time, so keep your Gels at the ready.
Meltokio Sewers
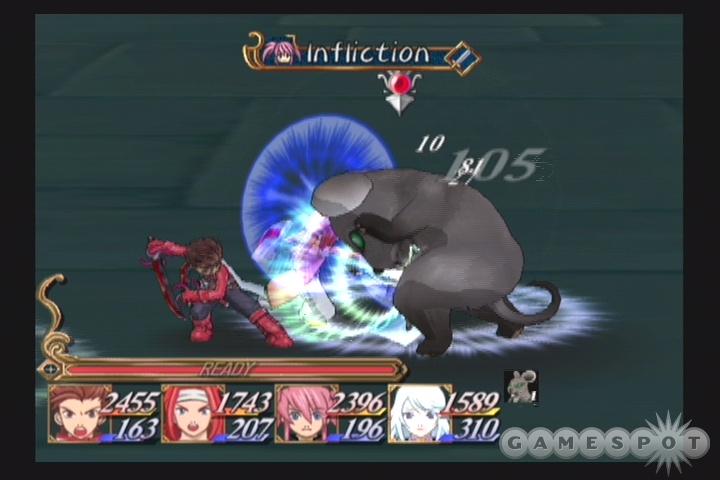
After Pronyma’s dead, and Colette regains her soul, proceed back to Meltokio. You won’t be able to get in through the front gates, so you’ll have to proceed through the sewers. The sewers act like another dungeon, complete with a Sorcerer’s Ring shifter that makes your entire party the size of a rat. Before you start exploring, though, use it to change your party into their tiny-sized equivalents, then walk along the ledge to the southwest of the shifter to find a room that contains an EX Gem LV2.
The Sanitary Workers’ Union Will Be Upset That You’re Doing Their Job
Now, proceed through the rest of the room until you reach the garbage compactor. Before you use it, head through the mousehole on it’s left side to get an axe for Presea, then return and activate it. It’ll start pumping out blocks of garbage that you can push through the slots in the wall to fill in gaps in the walkways below; you’ll need to push one block through the middle gap on the left, and one block through either slot on the bottom side of the platform. When all of those are in place, return below, shift to small size, and walk across the walkway that leads to the blue lever, which will unlock one of the doors below. On your way back, examine the area underneath the stairs; although you can’t see it, there’s a treasure chest there with a Spirit Ring in it.
Now that you’ve unlocked the blue door, go on through and head down the stairs to your right; there’s a Breastplate in a chest that’s barely visible on the lower level here. Head back up, save your game, then take the stairs to your left. There’s a washtub in the water here, so minimize your party and jump in to unlock the red door in the first room.
The red door leads to another trash compactor, so make a cube, then push it down the walkway. You have to use the spiderwebs and the resizers here to maneuver around the cube as you push it. When you reach the second corner in the path, push the block off the right side; this will create a path in the little walkway below, so head back down and follow the path until you reach the cage, which has a pressure plate inside of it. (You’ll need to miniaturize yourself to slip in and out of the cage.)
After you leave the cage by unlocking the door, a new spiderweb will appear on the walkways above this room, which will let you push a block even further along the path. Do so, and drop the block off the right side of the fourth corner, so that it lands directly in front of the cage’s now-open door. Push it into the cage, and make sure it hits the pressure plate, then return to the garbage compactor one last time.
The last cube you construct will need to be pushed all the way to the end of the walkway, then pushed off so that it lands on the small platform on the north end of the room. You’ll have to backtrack all the way to this platform (check the wall here for another mousehole), then push the block off the platform through the slot on the south side. This will finally unlock the yellow door, which leads to the last room of the sewers. Who knew saving the world would require so much manual labor?
Anyway, there are two more mouseholes in the last room, one underneath either side of the broken bridge. Before you exit, though, you’ll be accosted by a few prisoners that the Pope has sicced on you. They’re not difficult to defeat, so beat them down and proceed to the exit.
Back in Meltokio
Now that you’re in Meltokio again, you can head to the Elemental Research Institute, which is located to the northeast of the inn. It’ll take a day for them to arrange for new transportation for you - the bridge having been blocked off - so you’ll have to rest in Zelos’ mansion in the upper-class section of the city for a night. Do so, then return to the ERI to learn that your boat has been placed near the bridge. Head back up to the bridge to retrieve it from Kuchinawa.
Although you may be excited by the prospect of dashing about the game world in a superspeedboat, you’re unfortunately confined to the smallish sea that you’re in by the bridge and the shallow waters that surround it. So there’s nowhere for you to go except back to Sybak; do so, talk to Kate, then head into the Gaosomethingorother Forest.
Gaoracchia Forest
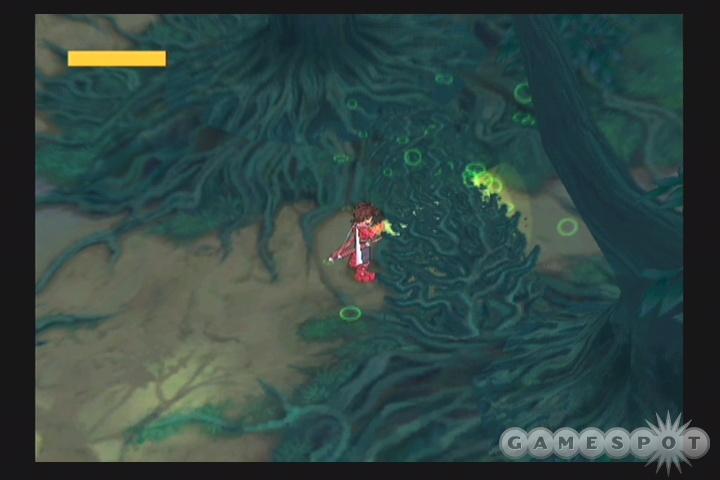
The Gaoracchia Forest acts as something of a maze, albeit one that’s very difficult to get lost in. The first screen will have a Sorcerer’s Ring shifter that will let you shoot out a beam of light; use this to burn through vines that block your path or cover up treasure chests. Speaking of treasure, if you head one screen to the right of the shifter, you’ll find two chests, containing a Drain Charm and a Phoenix Rod; the next screen to the right has another two chests, with a Witch’s Robe and a Pretty Ribbon. You’ll need to stand in the shafts of light to keep your Ring charged up with light. And speaking of light, it’s a common weakness of the enemies here, so keeping Raine and Colette in your party might be a good idea.
One more treasure chest awaits if you keep heading to the right. When you track down the Angel Bracelet, start heading to the southeast, and you’ll eventually come across the same convict that attempted to kill Zelos back in the sewers.
Boss Fight: Convict
You gotta admit, for a guy who’s wearing shackles, Mr. Convict Person can still put out a beatdown. He only uses physical attacks and close-range Techs, though, so as long as you have an adept healer in your party and keep him occupied with Lloyd and another frontlines fighter, you should be leaning over one unconscious prisoner with a minute or so of fighting. After he falls, you’ll have to leave the forest, so head for the small town nearby.
Mizuho: The Mystical Village
Feel free to explore the village before you speak to the Vice-Chief, but don’t buy any items just yet. Instead, wait until after you speak to the VC; Regal will join the party at this point. His Personal EX Skill gets you a ten percent discount on all purchases, so be sure to grab whatever weapon upgrades you need from the ninja shop to the west of the chief’s hut. (You’ll have to scroll down to get past the Gels.) This is another Personal skill that isn’t very useful in the field, so you can change it at the same time you change Zelos’. Also check the foyer to the Chief’s hut to find the Wonder Chef.
After leaving Mizuho, you’ll be able to return to the forest and take an immediate right by the Ring shifter to reach another field area. Across the bridge lies Ozette, where Presea has been wanting to go ever since she joined up with you. If you want to get Regal a quick title, though, head to the beach and beat up on some of the weaker enemies here. If you’ve been levelling up as you play, you should be able to get his Way of the Jungle title after a single fight.
Ozette: The Quiescent Village
After you reach Ozette, Presea will run off to her house and begin choppin’ wood, for reasons only known to her and a mysterious man whom you’ve seen a few times before...nothing good is brewing, but you can’t bring her with you at the moment, so head out of the exit to the field below Presea’s house and head towards Altessa’s residence.
Altessa’s House
You won’t be long here; Altessa sends you packing, but his assistant will tip you off on the need to find inhibitor ore for Presea’s Key Crest. You won’t be able to find any without heading across the sea, but before you do, backtrack to Mizuho and speak to the ninja at the shop. After you perform an errand for him, he’ll give you the Secret Book. You should also buy a Mizuho Potion from him before you head off.
Now that you have unfettered access to most of Tethe’alla (the dock is located to the northeast of Ozette), you can feel free to wander around a bit, if you wish. Many of the locations you’ll be visiting for storyline purposes later in the game will be blocked off, but you can still sightsee all you like. When you’re ready to move on, though, the Toize Valley Mine is located on the southern side of the southern continent. You can find the appropriate dock by simply heading straight north from Ozette, as the map wraps around. When you land, though, walk east from the dock toward the first long stretch of beach before going straight to the Mine; you’ll come across a very handy Rune Cape in a field chest.
Toize Valley Mine
You won’t get too far into the Mine before you come up against something of a boss fight. No need to really rearrange your party, though, as this one’s fairly easy.
Boss Fight: Mine Defenses
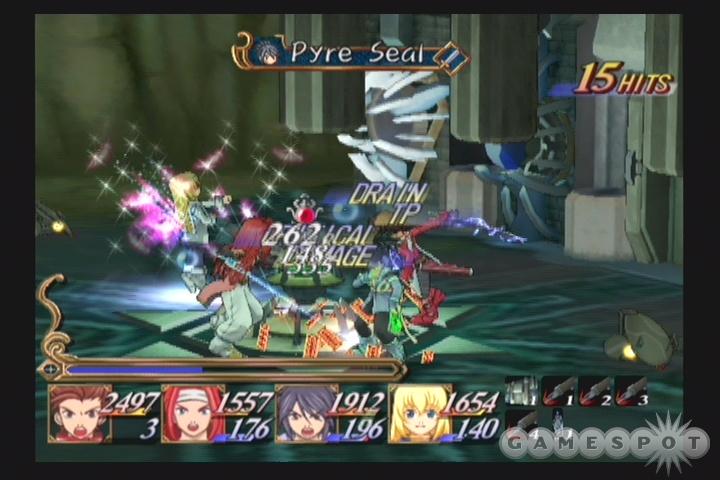
You have a preponderance of targets to choose from in this fight, with enemies totalling eight in number. You won’t have to kill them all, though, and none of them deal an especially high amount of damage, so just go all-out with physical and magical attacks and you should be fine. Your first target should be the Auto Repair Unit, which heals itself and prevents the Defense System from taking full damage from your attack; after it’s destroyed, kill off the Orbits, then go after the door at the rear of the battlefield. There are four mechanical arms that will pop out to try and hurt you, but their blows rarely land, and you can safely ignore them. After the fight, return to the previous screen to find a couple of chests (one of which is partially obscured by a mine cart).
As ever, there’s no simple route through this dungeon; you’ll have to track down and locate the Sorcerer’s Ring shifter before moving on. To do so, activate the machinery in the middle of the room, then hitch a ride on the platform when it comes a-calling. As you ride, however, fire your Ring at the arrowsign to the north of your route; this will switch you over to another track, and when you land, you’ll be able to take a lift down to the bottom level of the room, where the shifter resides.
The shifter here makes mana bombs, so here’s what you do: ride the lift back to the top level, destroy the brick, take the lift back down and shift the Ring back to regular fireballs, ride the lift back up, hop across the gap created by your previous explosion, get on the platform, shoot a fireball at the arrow sign to switch it back to normal, reverse your path and head back to the shifter, shift yourself back to bombs, then get back on the platform above until you reach the doorway on the eastern side of the screen. Got all that? There will be a test.
The next room on has a whole lotta boulders, so start dropping bombs left and right. Activate any machinery you see, and give the Gnomelette a potion. Before you continue along the path to the east, take the lift down to the lower level to get some items.
After a bit of Indiana Jonesish drama, you’ll face off against an unkillable block of stone. What you need to do is lure it back towards the falling-boulder area, then hit the switch for the boulder and hide in the little alcove on the side of the path. If timed properly, the boulder will hit the block, thus eliminating the last major barrier between you and the inhibitor ore. You can run back to the elevator platform and check out the rubble to find a pair of chakrams for Colette...evil chakrams, that is. These will be the instigators to a side quest later in the game, so hang on to them.
The First of Many Kidnappings
When you have the ore, make your way out of the mine and return to Ozette, where, suprisingly, Presea helps the mysterious man kidnap Colette. You’ll have to return to Mizuho to figure out the next step in your journey, but the game luckily gives you a Quick Jump, so you don’t have to go through the agony of walking for 60 seconds.
After you get back to Mizuho, you’ll learn the shocking truth: when Sheena previously tried to form a pact with Volt, the lightning summon spirit, she fouled up in some unimaginably bad way, and one quarter of Mizuho’s population was killed as a result. Granted, that’s only like three people, but Sheena apparently still has a lot of baggage about it, so it’s up to Lloyd to give her a pep talk. Say this: "You tried your best, and you failed miserably. The lesson is, never try." That should get her going.
Anyway, the Lightning Temple lies north of Mizuho, so hop back into your EC and get going. Follow the coastline to the northwest and you should spot the temple without a problem.
Temple of Lightning
First things first: you’ll notice the three pillaresque devices in the first room of the temple. These, along with the pressure plate on the central walkway, control a series of electrical bolts. To fire the bolt that you need, examine the pillars so that only the spike on the leftmost one is sticking up, then hit the pressure plate; this will open up the path to a Sorcerer’s Ring shifter, which will shift your Ring so that it shoots electricity. The electricity is color-coded to a certain type of block that can be destroyed; you can try this out on the blue blocks on the right side of the room to find a Silver Guard.
Now, head north on the central walkway to reveal a large, open room. The seal that blocks you from accessing Volt’s chamber is at the top of this room, so climb up one of the staircases on the sides to reach it and blast the blue box which forms the first lock, then return to the ground floor and head north to the water room.
The shifter that will let you access the next color of electricity is here, but the lightning that courses through the shallow water will prevent you from reaching it. Take a left and head up the stairs until you reach a darkened room. You’ll have to time your movements to the lightning flashes so that you can see where you’re going; if you get bored of waiting around, you might want to try brightening up your television screen or adjusting the contrast. At any rate, you’ll eventually come out at a series of platforms with lightning rods on them. Before you hit the lightning rods, though, you’ll want to blast the blue boxes next to them; this will drop treasure chests onto the ground below. Keep your working your way down through the platforms until you reach a lightning rod on solid ground; activating this one will de-electrify the water, so head back down to it and switch your lightning to yellow.
You can return to the temple’s first room and blast the yellow boxes that safeguard your precious, precious loot. In the open room, you can destroy the boxes that prevent passage to the west, but the resulting doorway won’t lead you anywhere interesting - not yet, anyway. Blast the second lock on Volt’s seal and head east to drop down another lightning rod.
When the rod is in place (insert your own joke here, kids!), walk back to the water room and take a right to activate it. It won’t do anything at the moment, so take the western door and walk through the darkened room until you reach the generator room. The generator machine at the northern end of this area is darkened, for the moment, so don’t worry about it yet, and don’t bother using your electricity on the yellow blocks here, either. Continue on through the eastern door and navigate through the dark until you reach the generator that initially gave you access to the yellow lightning shifter. Switch it off, and the lightning will start hitting the new lightning rod, which will activate the machine in the generator room, so, obviously, you should go back and switch it on.
The Generator
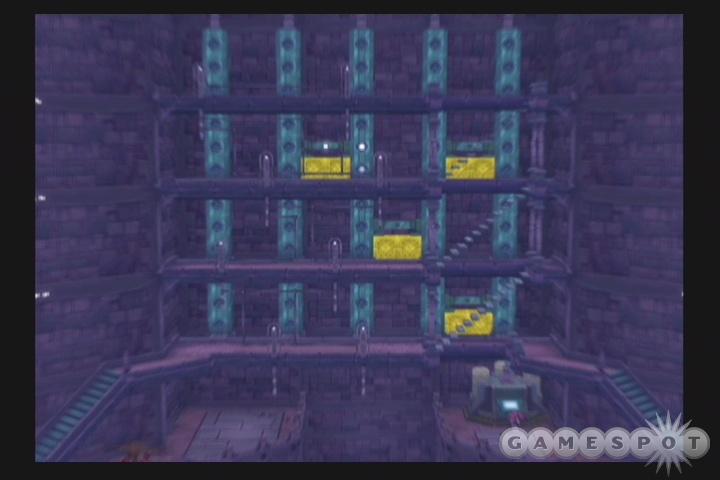
The machine works via sending electricity through conduits, and your goal is to send a charge up to the top of the middle pillar. First, though, walk up the stairs, destroy the two topmost conduits, then activate the machine to drop a chest down. Leave the room and come back to reset the puzzle, then destroy the right conduit on the uppermost level and the left conduit on the second level from the top. Activating the machine after this will send the boulder at the top of the room smashing through the bridge below, giving you access to yet another shifter, which will give you access to red lightning. (Check your ring after you access the device; if your lightning isn’t red, hit it again.)
Now that you have red lightning, you have access to two more treasure chests, one in the first room of the temple, and one accessible via the doorway in the western wall of the large, open room. (You remember breaking through the yellow block only to find that the path beyond led nowhere? Well, now it leads to Power Greaves for Regal.
When you’ve wrapped your business up, heal up, save your game (be sure to equip any EX Gems that you have in your inventory beforehand), and take on Volt, who is by all appearances one p.o.’ed summon spirit.
Boss Fight: Volt
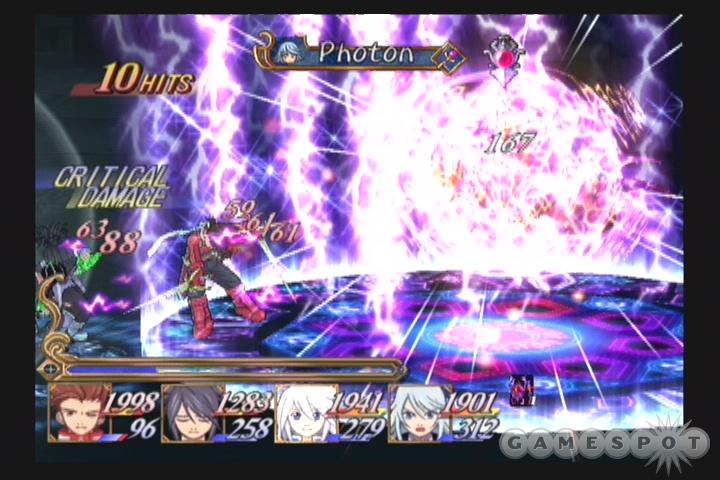
For an amorphous ball of energy, Volt packs quite a punch. His main attack consists of sending out small bolts of lightning towards anyone within melee range; this can do a lot of damage, but can be guarded against. His second, more powerful means of dealing damage centers a lightning storm on him; any melee characters will definitely want to guard when you see him casting. You’ll probably want to have Raine along for her Nurse ability; all of your characters will be taking significant amounts of damage in this fight, but if you can heal consistently, you shouldn’t have to worry about anyone dying.
After banishing Volt, you’ll learn the whereabouts of one of the Renegade bases; apparently they’re underneath the ocean to the east of the Temple. When you’re on the ocean in your EC, check the minimap and look at the arctic area in the northeast corner of the map; you should be able to scry a tiny white dot indicating an area that you haven’t visited yet. Head there and go into the Base.
Tethe’alla Base
You’re going to need more brains than brawn in the Tethe’alla Base, as the puzzle here will have you backtracking quite a bit and shifting things in multiple rooms. Luckily, Orochi in the first room here will act as a free inn, so stop back at him whenever you feel under the weather. The enemies here aren’t very difficult, though, so you shouldn’t have many problems with the fighting. Don’t forget to use the Sorcerer’s Ring shifter to change your Ring so that it shoots electricity before you leave.
To the south of your starting room, you’ll find a large room that acts as a junction connecting corridors running east, south, and west. The southern exit doesn’t go anywhere, so head east to begin with. Your wealth of knowledge of gaming precedents should tell you that laser beams running across hallways = bad, but you will have blocks to push and pull in front of the beams so that you can get by. In the first set of corridors, check the room at the end of the hallway on your right; this is the first of the three Commanders that you’re going to need to take out to get the complete password to the hangar. Apparently he heard you coming and stuffed himself into a broom closet, but no matter; steamroll him and get moving.
To the north, you’ll find a larger room with lasers aplenty; grab the chest here and clear the path to the door on the western wall. The corridor intersection here branches north and east, so head north to begin with, unlock the save point if you’ve found a Memory Gem, and grab the chest atop the steps to the right of the entrance. Then return to the intersection and head east; the purple enemy here is the last commander. Before you leave the room, though, climb the steps and zap the circuit with your Ring. This activates the nearby machine, which you can then use to raise a platform to the ceiling.
Now, run all the way back to Orochi and head west through the junction room. If you scout around, you’ll find a couple of treasure chests, along with a well-furnished room that contains the last Commander. Head north from there to hit the room where you activated the machine. You can pull the block off of the raised platform then push it through the slot near the steps to smash the laser machine below; if you then return to the room via the western passage, you’ll unlock a pair of weapons for Lloyd and Zelos.
Manual Labor
Now it’s time to tackle the main puzzle room, the one in which you found the save point. Return there and look over the situation; there are plenty of circuits, but few of them are within zapping range, which means that the machines are inactive for the most part. Before you start solving the puzzle, though, push the two blocks here into position behind the southwestern staircase to reveal an obscured chest containing an Aqua Cape. Leave the room to reset the blocks, then push them into position in the northwestern corner of the lowest level of this room to reach another chest. While you’re up there, you can zap the first circuit if you stand at an angle. Do so to light up the first platform control.
When the platform has been energized, push one of the blocks onto its upper-right quadrant and activate the lift via the lower panel. When it reaches the upper level, push it one square to the north, so that it’s flush against the right side of the upper panel, then lower the platform again. This will let you take the stairs around to the block’s new position and push/pull it until you can push it off of the edge near the eastern side of the room, placing you within zapping range of the eastern circuit. Light it up and return to the save point.
You’ll need to bring along two blocks on the eastern platform; you can either bring them up one at a time or both at once. Regardless, one will be placed south of the chest here to give you access to it, and the other will slide in along the eastern wall. Don’t take the platform to the north yet, though; instead, head to the western side of this upper level, grab the chest, then ride the western platform down and push the block into place to get the final chest. There’s a boss fight coming up, so save your game before going all the way back up to the top level and riding the northern platform. The code before the uppermost door is "The life of mana is the foundation of the world," in case you’ve forgotten.
Boss Fight: Yuan and Botta
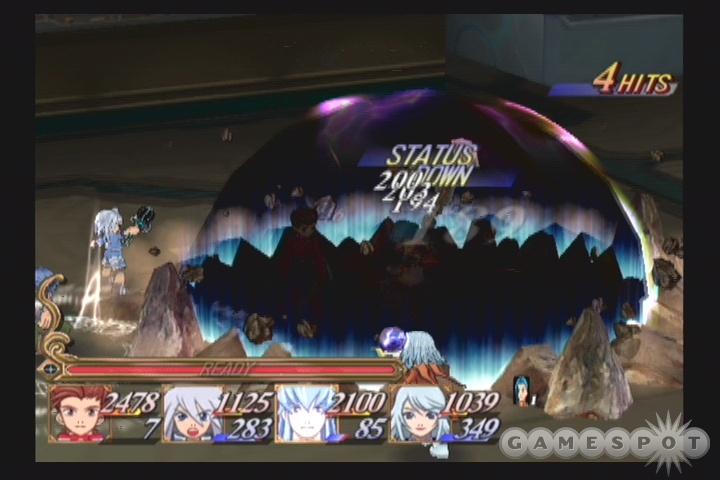
These guys give out massive rewards, in the form of 6,000 experience, a like amount of Gald, and an EX Gem Lv4, but they are going to make you work for your prize. Your healers especially are going to be tough to keep alive; you’ll likely want to have both Raine and Zelos or Regal along for the little party to double up your chances of getting a timely save. As always, though, abuse your restorative items; you can always buy more.
Botta should be your first target, if only because he has less HP than Yuan and won’t have many magical attacks that can severely drain your life. Blast him as best you can, then turn your attention to Yuan. Yuan, in contrast to Botta, will use Techs quite often, including a hugely devastating one called Indignation that will zap anyone within the area of effect for 1,500 damage or so. This takes a few seconds of charging before it will have its effect, so you can get Lloyd out of the blast zone, but any AI teammates within will probably die, so keep those Life Bottles at the ready. If multiple teammates die, resurrect Raine first, and ask her to start casting Nurse while you use Life Bottles on your remaining fallen comrades. (It might be a good idea to just de-activate all of her other Techs before you enter this battle, because this is the one that she’ll use the most.)
If you can keep your health up with items and spells, go all-out on Yuan with your Techs and Unison attacks, and he’ll stagger to his death sooner or later. Or, to what passes for death in the Tales universe; both Botta and Yuan will still hang around, ready to fight you again later in the game.
To The Air!
For now, though, all that matters is that you have your Rheairds, and can thus flit around the overworld map with nary a care in the world. Now’s a great time to get some of the field chests that you may have missed or not had access to so far; there’s even an EX Gem LV4 hidden on one of the islands in the northwestern corner of the map. It’s invisible, though, so you’ll have to wander around to find it.
Other things you can and probably should do include visiting Altessa’s House to learn the Curry recipe from his servant, and getting the Wonder Chef in some of the other cities (he also appears back in Presea’s house in Ozette, which is easy to miss). If you’re looking for equipment upgrades, you can head to Altamira, which is located on the island to the southeast of Ozette and Altessa’s House. The shops are on the second floor of the hotel there, but bring money; a full set of upgrades will set you back 50,000 Gald or more. If you have the scratch, you can also visit Flanoir in the ice fields, where the item shop sells charms that give you a +30% boost to your HP or TP. Expect each one to set you back 25,000 Gald, though.
When you’re ready to get this show on the road and rescue Colette, head to the eastern edge of the map and fly to the tip of the peninsula stick up out of the southeastern continent. You’ll see a big white...thing hanging in the sky, so fly into it.
Dragon’s Nest
A short cutscene here will segue into...
Boss Fight: Dragons
Rodyle’s dragons are no pushovers, babies or not. There are three of them in total, with two being mobile (the babies) and one protruding from a series of tubes around the battlefield (which is called the Winged Dragon, for some reason). The babies should be your first focus, so take them on while dodging the Winged mama’s horrifyingly powerful ground-based fire magic. After they’re gone, you can use all of your remaining TP thwacking the mama dragon into the ground. Or further into the ground, as the case may be.
After you defeat the dragons, the party crashes back to sea level, landing just outside of the Temple of Earth which, surprise surprise, is the next temple that you’ll have to conquer.
Temple of Earth
You’ll encounter the Ring shifter just inside the entrance to the Temple; it changes your ring so that you can create earthquakes. Use it to topple the pillars next to the entrance. If you didn’t get Gnomelette in the Loize Valley Mine earlier, you’ll be barred from entering the Temple, so head back his way and give him a Mizuho potion.
After you get by the first bridge, take the first right and descend the well-guarded path. This leads to a single chest, with a Mythril Circlet inside. When you return to the bridge and walk a little further up the path, you’ll spot a wooden sign. Bust out an earthquake on the rubble to the south of the sign to open up a new path. You shouldv’e walked by a stone pillar earlier; if you get as close to it as possible while on this path, and use another earthquake, you’ll knock free another treasure chest. The path will continue on to the east, but doesn’t lead anywhere yet, so head back to the sign and walk north.
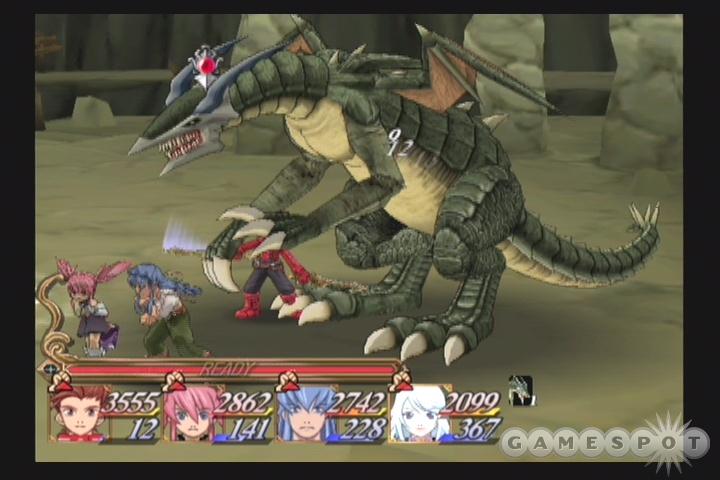
The next room on sees another encounter with a Gnomelette; this one wants you to make some Curry for him. Lloyd can’t be the cook here, so pick someone with a high Curry skill. If you haven’t bothered upping anyone else’s cooking stats, Regal is a good choice. After you get by, you’ll have to use your Ring to start falling through a series of wooden bridges. There are a number of items on the platforms below, but to get them all, you’ll have to circle back into the room at least three times, and break the uppermost bridge once for each of its three segments. Note also the appearance of the Dragon enemy at the bottom level of the room. This guy has 10,000 HP, so he’s not a pushover, but he’s good for 10,000 Gald each time you beat him, and will usually give you a couple points of Grade as well. He’s also decent for chaining together combos, as well, especially if you have numerous melee characters in your party.
At any rate, after you reach the bottom of the room, you’ll have to take a secret passage back up to the first room of the temple, where Gnomelette 3 awaits. He’ll ask you to escort him down the path that originally led to the Mithril Circlet. You’ll have to keep monsters off his back as you go, so stick close to him: the monsters along this path regenerate, so you can’t just clear them out and wait for him at the bottom. Eventually he’ll reach the door, and you can pass through to the next room to have him blow the bridge. You’ll have to use your Ring at the same time that he jumps; try to press the button at the apex of his leap to get the right timing.
When the bridge falls, it’s a short walk to Gnome, the Earth spirit summon.
Boss Fight: Gnome
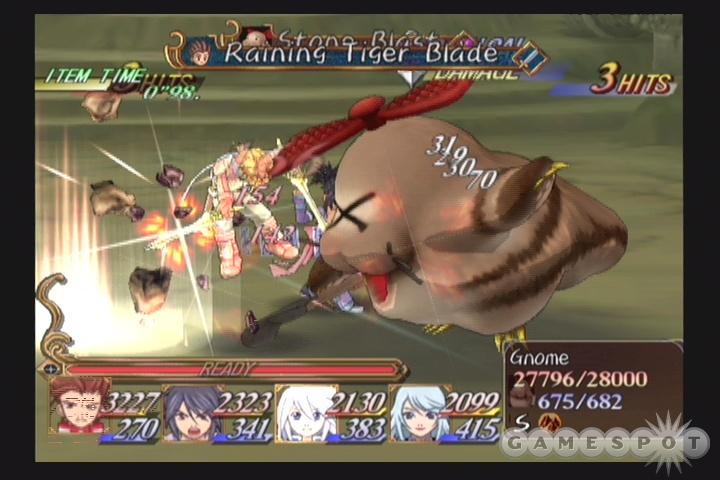
The key to beating Gnome is to keep hitting him; he’s somewhat susceptible to being staggered, so you’ll want to pin him down with one of Lloyd’s multi-hit attacks like Raining Tiger Blade. If Lloyd and Sheena keep Gnome occupied, then Raine should have plenty of time to keep Nursing you back to health. You should be able to Unison Attack Gnome twice in the battle, so be sure to use one at the beginning of the fight if your gauge is full.
When Gnome’s been polished off, retreat from the cave. The next temple that you have to visit lies in the arctic wastes in the northeastern corner of the map, but head to the city of Flanoir first.
Flanoir: The Snowy City
You can start the quest to track down the nine Devil Arms weapons by speaking to the man in red near the entrance to the city, if you picked up the Evil Eye chakrams back in the Toize Valley Mine. You can find details of this quest in the Miscellaneous section at the end of this guide.
As you do your normal dog-naming and awkward-pass-making routine through the city, be sure to speak to the traveller on the east side of the first screen, who’ll tell you about the Celsius Tear flower. Afterward, talk to the old man in the item shop, who’ll offer to make you a pair of Penguinist Gloves if you bring him three Penguinist Quills. You’ll need to obtain these from the Penguinists at the Temple of Ice, but before you go, check out the church to obtain another recipe from the Wonder Chef. Also, don’t forget about the Black Onyx and Moonstone items at the Snow White item shop; getting an extra 30% TP and HP for Lloyd will make a big difference in the long run. If you can afford a pair of these, they’re a worthy upgrade over anything you’re likely to have in his accessory slots.
Temple of Ice
The first thing you should do here is to open the three chests on the first screen and fight the Penguinist group of enemies a couple of times to get the requisite number of Quills for the Penguinist Gloves, then return to Flanoir to have a pair made up for you. Only then should you bother proceeding deeper into the temple. Don’t worry; this dungeon isn’t too long.
After you reach the interior of the cave, you’ll want to go get that Celsius Tear, so shift your Ring over to the freeze ray and start walking up the ramp and proceed towards the northwestern corner of the room - this’ll lead you back outside. The Ring will let you freeze the water that’s dripping from the icicles in your path, which in turn will let you access the ledge that the Celsius Tear is on. Grab it, then head back to the cave and start walking east. You’ll be able to freeze a couple more water drips as you proceed to open up new areas; the uppermost one will give you a view of some stone pillars, and the southernmost one will open up the path to the lake at the center of the room.
Said lake will freeze if you touch it with the Celsius Tear, so have Lloyd examine it to make this occur; you can now slip around on the ice to your heart’s content. You’ll have to move in some pretty specific patterns to get to the far end of the lake, though.
To get to the first treasure chest, start from the rightmost entrance onto the ice. From there, go up, left, down, left, up, left, up, right, down, and left. This will plop you out near the treasure chest, so grab its contents, then shove off onto the ice from the southernmost path. From there, go right, up, left, down, right, up, right, and up to exit the ice.
Now all you have to do is rotate the pillars to unlock the next summon. If you didn’t get a good glance at them earlier, the sequence in clockwise order, starting at the topmost pillar, is: face left, face down, face right, face right. This will open the portal to Celsius’ chamber.
Boss Fight: Celsius, Fenrir
This fight is a pretty straightforward two-target melee. Fenrir is the weaker of the two enemies, so just blast away at him until he drops. Celsius is one of the few spirits with a clear-cut weakness to another element, so take Genis along and disable all of his techs save for those with fire elemental abilities. Both Fenrir and Celsius take extra damage from fire, so use Red Quartz on your weapons, S. Seal: Fire, and other elemental Techs and items.
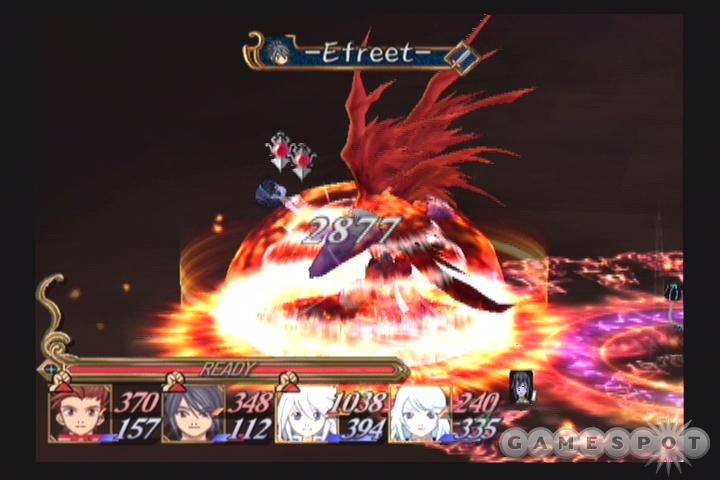
Fenrir can be hard to pin down, but he only has 12,000 HP, so get him in the crosshairs and take him out. You might want to use your Unison Attack on him, just to get him out of the way and let you focus more closely on Celsius herself. She has no really show-stopping powers, save for the fairly effective ice elemental spells that Genis has already unlocked. So long as you can keep her occupied with physical attacks and away from Genis and Raine, you should be in good position to kill her.
After you escape from the Temple, you’ll automatically warp to Ozette. When you’re done with the events there and at Altessa’s house, fly over to Altamira to start tracking down Raine.
Altamira: The Seaside Paradise
If you didn’t upgrade your weapons before, or if you didn’t plan ahead and get Colette weapons when you visited Altamira previously, do so now on the second floor of the hotel here. The storyline propellant is found in the upper quadrant of the first screen; an old man standing in front of what looks like a gravestone will give you an Employee Pass to the Lezareno Company building, which you can take a lift to. You can explore said building all you like, but the only area of interest is the Sky Terrace, where you’ll view another scene involving Presea and her sister.
After that business is done, head to the Otherworldly Gate, near where you fought Rodyle’s dragon pets.
The Otherworldly Gate
After hooking back up with Raine, you’ll be able to use the Otherworldly Gate to warp back to Sylverant. Now would be a good time to wind up any loose ends that you may have left dangling when you jostled off to Tethe’alla. There are a bunch of new scene points all over the place, as well as a few field chests that you weren’t able to access before.
At any rate, your first goal here should be to hit Palmacosta and drop Mithos off at the government building. You’ll be seeing him again later on, of course, but for now, your business doesn’t concern him. After that, fly up to the Palmacosta Human Ranch to meet up with Yuan and Botta one more time. After your conversation with them (note the Tosca-esque subtext in Yuan and Botta’s last lines to each other), you’ll be able to speak to Botta to warp out to wear Rodyle is apparently building his Mana Cannon. Be sure you’ve restocked your restorative items!
Remote Island Human Ranch
This is apparently the last stronghold of the Desians, so be prepared to be called "inferior beings" a few dozen more times before you stop hearing it for a while. The first segment of the base has a couple of simple light-tile puzzles; you have to step on the tiles so that they all light up, but you’re unable to go backwards.
First Puzzle: First, go straight across, then go up or down and circle around from there.
Second Puzzle: From the first square, head down, right, then down at the intersection, right again, up, left at the first intersection, up all the way to the top of the puzzle, right, down through the first intersection, right at the second intersection, then wrap around to the beginning of the puzzle.
This will lead you to a shifter, so shift your Ring over before taking the elevator up. You can release the prisoners on this floor, but first grab the items in the chests around the prison level. It’s all one big room, so they shouldn’t be difficult to find.
After you unlock the elevator to the third floor, you’ll have to spend a little more time tripping the light fantastic. This is a platform game; your Sorcerer’s Ring will tell your little platform whether you want to take a left or right at each intersection. There are spark traps along the path, which deal small amounts of damage and paralyze your party members; use Raine’s Recover or Purify Tech when you reach the end of the line to deal with the latter affliction. This puzzle is impossible to fail, so just keep maneuvering towards the orange rings that send you upwards, and you’ll eventually reach another doorway.
No, Seriously; Are We All Going To Get Cancer After This?
The next puzzle here is fairly complicated, so we’re going to go through it step by step. This whole room is lit up with multiple color-coded warp platforms. You can change the color of white platforms with your Ring; if you change a white platform to red, for instance, it’ll take you to the closest red platform. Your main objective is to unlock three different seals on the door at the very tip-top of the room, but along the way, you’ll find plenty of items and goodies in chests. Our solution is but one way through; there are plenty of ways to clear out the entire room, so feel free to give it a go on your own.
To begin with, change the color of the first platform to green, then use it to pick up some Saffron. Return to the first chamber, change the white platform to red, then warp up one room to grab an EX Gem Lv 2. Change the white platform in this room to blue; this will take you up to the final door of the Ranch, but it’s still locked at this point. Save your game.
Now, head through the red warp in this area to be warped down into another large room. Get both of the chests here before hitting the blue warp; this will take you to an area with another chest and Lock #3, so examine the machine to disengage it. There’s a white and a blue warp elsewhere in the room; first, hit the white warp with your ring until it turns red, go through it to grab a chest, then return and hit the blue warp. Two more chests here, so grab them before hitting the red warp.
As soon as you exit from the warp, change it to green and go through it to reach another chest and lock 1, then return and change it to blue to find yet another chest. Go back through it and head downstairs to find another chest and a green warp. Head through the warp, then shift the white warp to red for one last chest before returning and proceeding through the blue warp. This will lead to yet another white warp, which you can shift to red to find the last lock. After you return to the white warp, head left to find a blue warp, which will return you to the starting room; from here, head back up to the save point, save and heal, and head through the now-unlocked door.
Boss Fight: Rodyle
Even though you’ve been seeing Rodyle since the beginning of the game, and thus were perhaps expecting some kind of super-boss, he actually isn’t all that difficult to beat. You’ll definitely want Raine along, and be sure to disengage any of her Techs that aren’t directly related to healing your characters. If she has Nurse and Healing Circle, those two alone will be all she needs to cast. As for your other members, Genis is, as always, a good man to have along, but be sure to deactivate any of his low-level spells. Your fourth member should be another frontlines character, but if you choose Zelos or Regal, be sure to deactivate their healing Techs; let Raine worry about that aspect of the fight.
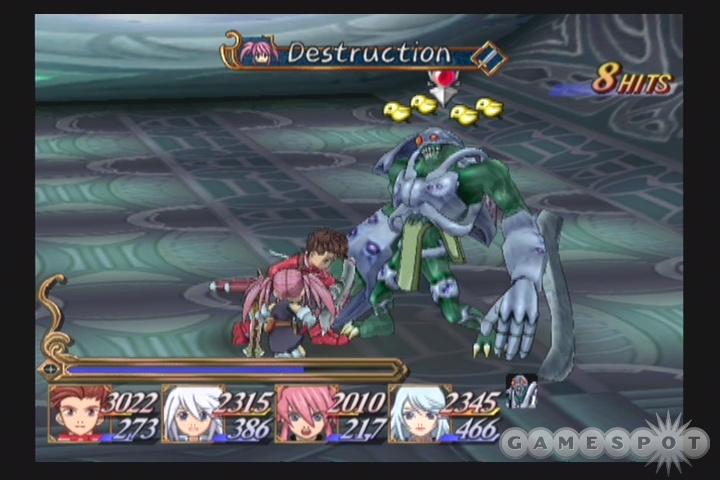
Beyond proper preparation, though, there isn’t much you need to do to beat Rodyle. He alternates pretty evenly between offensive spells and swiping with his blade-arms; don’t forget that you can hit X in midair to land on your feet, because you’re going to get knocked backwards pretty often. He generally focuses his attacks on the members of your party that are attacking him, leaving Raine and Genis to cast their spells in peace. Lloyd and your other fighter will be taking severe damage, so don’t hesitate to use items to boost their HP. If you’ve been wooing the ladies with Zelos since you obtained his services, you should be overflowing with restoratives.
Rodyle is something of a novelty, in that he actually dies when you kill him, instead of acting like your fight was just a scrimmage. A breath of fresh air, that, but you won’t have time to rest on your laurels, as you’ll soon be fighting three Baby Dragons. These guys are a piece of cake compared to Rodyle, so off them and get back to business.
Back To Altamira
The next piece of the puzzle lies in Altamira, so after Yuan shifts you over to Tethe’alla, head there and take Regal up to Presea’s sister’s grave to get a bit of his backstory, which makes no sense whatsoever. Something really must’ve been lost in translation here, because, well: Regal and Alicia fell in love, but his servant George somehow split them apart? And sold her into slavery? After which she was turned into a monster, whom Regal was later forced to kill? And somehow, for killing a monster in self defense, he gets thrown into prison? And yet, Regal’s not mad at George at all, and in fact made him president of his company while he was in prison?
Bah! The sooner you can get out of Altamira, the better, but before you go, head over to the hotel and ask to leave during the night. During the night, you can head to the casino, where there’ll be a dog that Colette can name, and a man on the bridge that sells one of the Devil’s Arms. There’s also a Wonder Chef appearance on the fourth floor of the hotel. After you’re done walking around at night, examine the bed on the fifth floor of the hotel to return to daytime and leave the city. If you check back in Mizuho, you’ll hear rumblings of a Dark Temple to the south, so head down to the Fooji Mountains, where a new white spot should appear on your minimap, near the southern tip of the southwestern continent. Head on inside. Unfortunately, you can’t see anything inside the Temple because, well, it’s dark. You’ll need to head to Meltokio and the Elemental Research Laboratory to find a way inside.
When you reach the lab, you’ll learn that Kate has been imprisoned and is scheduled for execution because she helped you earlier. The way to save her? Fight in the colosseum. Apparently, there’s a passage from the gladiator’s chamber to the prison. If you head to the colosseum and fight one battle (choose Zelos to get around the registration fee), you’ll be able to enter the prison without anyone seeing you...because the door to the high-security area will be left unguarded. A stretch of logic, but roll with it for the moment to get the Blue Candle that you need to enter the Dark Temple.
Temple of Darkness
The Upper Level There are two main levels to the Temple; one puzzle level on top, and then a looong sequence of steps below that which lead to the seal. You’ll need to deal with the puzzle first, obviously, so head inside and check out the shard of Shadow that stands in your path. There are five of these; you’ll need to group them together and snuff out the lights in the path so that they can proceed down to the seal with you.
Begin by heading off to the east and proceeding through the doorway until you reach a flight of stairs. Halfway down these steps, you’ll run across an opening in the wall; let Lloyd go through to shift over your Ring. When you’ve shadowed the block on the wall, pull it one step, and one step only. This will move the block near the entrance enough for you to head back to it and push it into its little socket. Be sure you push it all the way in; it can go in further than just being flush with the wall. When it’s fully inserted, head back to the stairs, go all the way down, and maneuver your way back to the path that was created near the Ring shifter. If you touch the shadow fragment here, it will start following you; lead it to the lowest level of this room, near where the save point is. These fragments are supposed to wait for you here, but they seem to be a bit buggy, and will keep following you even after you reach the save point. Try to get them off your trail by using Lloyd’s Personal EX Skill to run quickly away.
Now that you have one of the shadows trapped, run back up to the middle level of this room and locate a block with blue eyes. It should be running east to west, with the eyes on the rightmost part of it. Hit it with your Ring and push it all the way into the wall, then run back down to the steps and return to the entrance of the temple; there’ll be a path opened here that leads to a chest and a shadow. Grab the item from the chest, then get the shadow to return with you to the other side of the block before moving through the door to the east. Head through the passage halfway down the stairs to where the Ring shifter was, light the block there, and pull it all the way out.
Your last block-pull cleared the path to the left of the temple entrance, so walk up the steps again and collect both shadows. Proceed to your west and head south towards a pair of stairs. There’s another shadow here, so grab it, then pull out the block with green eyes. This will open up the path leading down to the save point, where you can deposit your shadow charges. Four down, one to go.
Walk back up the ramp and return to the block with green eyes. Instead of manipulating it, though, blast the block to its right and push it in; this will drop the final shadow onto the middle level below. Pull the green-eyed block back out to open up the ramp heading back down there, then pull the shadow’s block into position next to the ramp to allow it to walk off. Grab it and the rest of the shadow fragments, save your game, and head down the ramp at the northern end of the lower level.
The Lower Level
If all of these puzzles are wearing on you, then fret not; the lower level of the Temple is one big gauntlet of enemies. You shouldn’t have any problems in the fights, but make sure that you don’t lose any of your shadow fragments as you proceed. You’re going to be heading downstairs constantly, but there are also a few assorted chests scattered around this level, so if you see a flight of stairs, be sure you’ve explored every other corridor before heading down.
Eventually, you’ll reach a sealed save spot, so unlock it with a Memory Gem and get your boss team ready to go. If you shephard your shadow shards down the steps, you’ll square off against...
Boss Fight: Shadow
Shadow, like most single bosses, is capable of dishing out a lot of damage to one or two of your characters at a time, but gets overwhelmed when you throw out four party members to take him on. As per usual, Lloyd, Raine, and Genis will make good choices for your party, with Sheena being a necessary fourth member. (If you don’t care much for Genis, switch him out with Colette; her Light magic abilities will come in handy.) The main danger in taking on Shadow lies in his ability to warp around the battlefield; he’ll often do this just as Raine is about to get a healing spell off. There’s not much you can do about, of course, but if you’re quick with the healing items, it shouldn’t matter too much. Unfortunately, after all your hard work, you’ll have to slog your way all the way back up the steps to reach the outside world.
Restoring the Linkite Tree
Now that you have the shadow spirit summon on your side, it’s time to track down the spirit of light, Aska. Return to Sylverant on your Rheairds and you’ll discover a new location, the Linkite Tree, very close to the Treit desert. Land, and you’ll be told that you need to find professor Nova in order to know what to do. You can go around asking in the various cities as to his location if you wish; if you want to jump right to him, head to Hakonesia Peak and look around.
After you get the recipe for rejuvenating the Linkite Tree, head back to its location in the mountains and do your thing. Aska won’t let you make a pact with him just yet, though; you’ll need to head to the Tower of Mana and form a pact with he and Luna at the same time.
Boss Fight: Luna and Aska
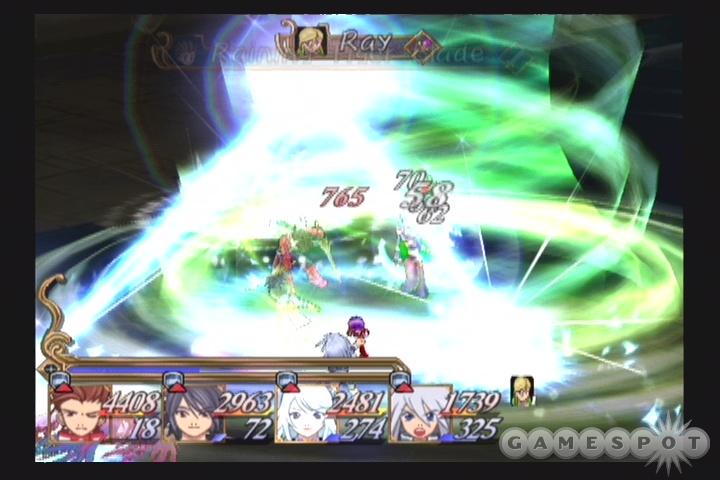
Of these two enemies, Aska is definitely more adept at dealing damage, so focus everyone on him first. He’s the melee component of the team; Luna will sit back and cast Photon over and over again for most of the fight, so you don’t really need to worry about her at the outset - concentrate on taking out Aska with your Unison Attacks, Techs, and, well, everything else at your disposal. Luna’s magic will occasionally disrupt your spellcasters - she shifts to Ray midway through the fight - but there isn’t much you can do about that. Use items as needed, and you should be able to clear out both baddies without much of a fuss.
After the fight you’re treated to a cutscene, of all things. Instead of people sitting around talking, though, there’s a bona fide cinematic sequence thrown in for good measure - you managed to blow up the world, more or less, with all this mana link severing and spirit summon pacting you’ve been doing. Kratos points out the error of your ways, although you should feel free to point out that he never really got around to warning you about what would happen when your quest was complete. So, really, it’s all his fault.
Iselia Human Ranch
When you reach the interior of the Iselia Ranch, you’ll have to split up into two teams again. Pick whomever you choose to accompany you, then check out the area north of the control room for some brand new weapons. Head east from the control room (you’ll have to use your shifted Ring on the pedestals by the door to unlock it) to find the ranch’s prisoners. Set them free, then use the door on the lower level of the prison.
Another set of light traps will block you off; if you’re having trouble bypassing them, use Lloyd’s Personal EX Skill to boost your movement speed. This area has a lot of smallish rooms with treasure chests, so before you leave, make sure you’ve explored it thoroughly. When you’ve checked everything out, activate the save point in the southeastern corner of the room and use it, then head through the door there to find a new weapon for Presea and a path back to the control room. You can head back that way and save, if you wish, but your destination is to the north of the save spot.
Boss Fight: Forcystus
Forcystus is flanked by two Exbones, which only possess 6,000 HP apiece; go after them first and knock them out of the fight. Old Fo himself is a bit of a tougher task, mostly due to his high defense and his ability to cast spells like Cyclone, but, as with any other single-target boss, if you pound on him enough, he’ll fall.
Now that you’ve shook up the world, switch disks and get ready to head back to Iselia. There’s a lot of talking coming up, and you won’t be able to move about freely for a while, so start tapping through dialogues. You’ll eventually wind up back at Dirk’s House, where you’ll have the opportunity to speak to all of the members of your group. When you’re ready to move on, talk to the character on the balcony outside of Lloyd’s room, then check next to his bed for another Wonder Chef recipe.
Another Red Herring
Back in Tethe’alla, your first goal should be to check up on Mithos, so head back to Altessa’s house. You’ll get the verdict on Colette’s illness, as well: "Chronic Angelus Crystallus Inofficium." Mithos will offer to take you to Sybak, so head there and enter the main library, next to the item shop. Afterwards, you’ll jet off to Meltokio, where the prevailing mood among your party will become decidedly Protestant; it seems the Pope was behind Vharley’s Exsphere-peddling, and the King’s illness, and various other nefariousnesses. You’ll have to confront him at the Church of Martel, near the King’s palace, where you’ll get the classic "If it weren’t for you meddling kids!" treatment.
Unfortunately, the Pope gets away, but you do get to save the King and examine the royal family’s records of the Kharlan War in the archives (through the door near the save point). You’ll need a Mana Fragment, a Unicorn Horn, a Mana Leaf Herb, and some Zircon to prevent Colette from turning into an Exsphere. You already have the Unicorn Horn, and QVC regularly has good deals on cubic Zirconium, so find a TV. As for the Herb, go to the corner of Springfield and Tropicana and dial the number that’s been written in red ink on the payphone there. Ask for Earl, he’ll hook you up.
Were that it that simple.... Alas, you’ll have to do some major-league running around to find the ingredients that you need. The first stop should be the Lezareno company in Altamira, where you’ll have to talk to George, then check the records on the second floor to discover that there may be some Zircon at Sybak. Kuchinawa appears in the midst of all this, and Sheena challenges him to a duel, but let that ride for the moment, and head to Sybak to get your Zircon.
(The fight with Kuchinawa is difficult due to the fact that Sheena has to take him on alone, and you can’t use items during the battle. If you’ve been progressing through the game as normal, you probably won’t be able to beat him just yet. You don’t need Corrine’s Bell for anything, so just hang off until Sheena is level 60 or so and whup him then.)
Ymir Forest
Gathering the Seeds
In order to reach the Elven (Elvish? Elfish?) village of Heimdall, you’ll need to maneuver through the swampy Ymir Forest that surrounds it. The Sorcerer’s Ring here shifts to become an animal-summoner; whenever you play it while you’re standing atop a pink flower, boars will come running and smash into whatever obstacles you face. As you manuever through the forest, then, keep an eye out for flowers, and also for chests that are hidden behind trees.
The first place you can use the Ring is to the east of the shifter; walk along the planks until you reach a chest that’s sealed shut, then climb atop the stump to call in a boar to open it. From there, check around the tree to the north for another hidden chest, then keep walking along the planks to the northwest.
You’ll come to another screen shortly. Take the first left here and use your Ring to slam a boar into the boulder. It won’t be dislodged yet; you’ll need to hit it on both sides for that to be accomplished. Head back to the planks and take the first right, then keep hitting pink flowers with your Ring until you find the Blue Seed. There’s not much else you can do in this portion of the forest, so return to the Ring shifter and plant the Seed next to the pink flower there. This will let you command fish via the lilypads that float throughout the forest.
Before you start impersonating Namor (or Aquaman, if you’re a DC fan), take the roots to the west of the shifter up to the higher level of walkways and proceed north until you reach a save point, near which a frightened boy stands. You’ll need to find a widget to get past him; in this case, he needs a Ymir Fruit. After you’ve saved your game, find the lily pad on the boy’s screen and activate it with your Ring; a fish will float a chest near the save point, which contains the White Seed. Return to the shifter and plant it.
Getting the Widget
Now that you have all of the seeds, head south of the shifter and walk up the nearby root. You should notice that a white flower has grown on the nearby branch; jump onto the branch and use your Ring to fly away to another tree, then push the block there into the water below. This will create a passage to an island in the northeastern corner of the forest; maneuver to it and use your Ring there to drop the Ymir Fruit...right into the water. Nothing’s ever simple in Tales of Symphonia, so you’ll have to use your Ring a few more times if you want to move the Fruit to where you can actually reach it.
The ground rules of the game are thus: the big fish in the water will eat the little fish that you summon with the Ring, so before you can move the Ymir Fruit with the little fish, you’ll have to distract their predatory friends. Begin by walking to the island just to the southwest of the one from which the Ymir Fruit dropped and using your Ring at the pink flower there. This will drop a bug into the water, which will distract the big fish there. Now walk to the east and use the blue flower on the lilypad nearest to where the Ymir Fruit dropped; this will summon a fish who’ll push the Fruit past the big fish.
Now, head around to the island where the fish leaves the Fruit and hit the pink flower there. If you then maneuver to the lilypad south of the Fruit (it’ll be on the same screen), you can use the Ring to push the Fruit off to the screen on your left. Don’t head that way yet, though; instead, move all the way to the north end of this screen and find the white flower on the upper walkway. This will take you to the other side of the boulder you hit earlier; hitting it again will smash it. If it doesn’t blow up, you’ll have to return to the other side and wham it with a boar again.
Now, the Fruit should be near the two big fish in the middle of the lake. You’ll need to jump on the lilypad near them, and time your sounding of the Ring to properly avoid the fish that’s swimming around. The best time to do it is when he’s swimming north; if you wait until just after he pauses and thinks before sounding the bell, you should be able to get your fish through the gap without a problem. After that’s done, hit one last lilypad to the west of the Ring shifter to maneuver the Fruit to a position where you can pick it up and move on to Heimdall.
Heimdall: The Hidden Elven Village
Your first stop in Heimdall will likely be the weapon and armor shop; you can find a lot of high-end equipment here, so upgrade as needed. Don’t forget to check the options for Raine and Genis, even though they’re not in your group. After you get done there, you’ll need to head to the Elf Elder’s hut, where you’ll obtain the ability to enter the Latheon Gorge. (The Wonder Chef makes his appearance at the rear of the Elder’s Hut; speak to him to learn Cream Stew.)
Latheon Gorge
Rolling Like a Tumbleweed
Your goal in the Gorge is to ascend to the top of the mountain here; this is made possible by the plants that continually blow out gusts of air, and the fact that your Ring will make you light as a feather when you activate it. There’s only one path you can follow at the outset, which ends at a tree which lets you pick Kirima fruit. Grab as many as you can hold, then use one on the dead plant near the entrance to restore it and ride its wind across to the other side of the little valley.

From there, cross the bridge and explore the area for more treasure chests, including one that contains one of the nine Devil’s Arms weapons. Feed the dead plant here a Kirima, and then move back to the plant on the south side of the screen to move across the valley. You’ll run across an Amango tree; the fruits of this species kill the wind-emitting plants.
The third screen here features a multitude of plants, including one large breed that you haven’t seen before. Before you start killing and raising the plants, though, you’ll probably want to retrieve that chest on the ledge that you couldn’t get on the first screen. To do so, climb up the ledge on the right side of the screen, ride the southern plant’s air across the valley, then do the same for the big blue plant up the ramp. This will drop you onto another screen; find the southernmost red plant here, revive it if necessary, and ride its wind back to the chest, which contains an EX Gem LV4. After that, return to the third screen and catch the air of the northernmost big blue plant. This will plop you down onto an island near the bottom of the large waterfall here. Grab the chest from behind the waterfall, then escape back to the second area.
When you reach the third screen again, revive both of the dead plants, then use the southeastern plant to drift across the valley. When you land, hit the red plant’s airstream; if both of the other plants are active, you should float up to a higher level, where you’ll find two new weapons and another dead plant. Revive it, then use the southwestern red plant on the upper level to float across. You’ll wind up near a blue plant; use it to float over to the fourth screen.
The bottom half of this fourth screen has four main quadrants, with plants to the southeast, northwest, and southwest. Kill the plants that blow to the southeast and northwest; the only plant you need here is the one that blows to the northeast. Once it’s revived, and its airpath is cleared of any other influences, you can ride its air to find another section of the screen. Revive the dead plant, then ride the northernmost plant’s air to the fifth screen.
Don’t worry, you’re almost done. Ride the wind to