The Elder Scrolls V Skyrim Walkthrough
Stop right there criminal scum. Our The Elders Scrolls V Skyrim Walkthrough provides strategies for the main quest, crafting tips, and secrets about guilds.

- Storyline Walkthrough: How to complete the main quest and powers you'll gain
- Guild Walkthrough: A walkthrough for the Companions, Dark Brotherhood, and other guilds
- Daedric Walkthrough: Complete objectives for Daedric Princes for special gear
- Crafting: Learn about potions, forging, and magical enchantments
- Xbox 360 Achievements: Boost your Gamerscore with a huge list of Achievements
- PlayStation 3 Trophies: Gain new Trophies for your collection
What's New:
- February 13 2011: It's been some time but we are going back and checking out the Thieves Guild.
- February 10 2011: Xbox 360 Achievements and PlayStation 3 Trophies have been added to the guide.
- November 21 2011: Version 1.2. More Daedric quests and crafting tips.
- November 15 2011: Version 1.1. We've updated the first few quests about the Civil War in Skyrim, Companions, Dark Brotherhood, Mage's College, and Daedric Gods.
- November 11 2011: Version 1.0 of the The Elder Scrolls V Skyrim Walkthrough is here. We are starting our walkthrough with the main storyline begging to end, but will continue to update with all major guilds and the war in Skyrim. Check back later for more info.
Unbound
Street Fighter 6 - Mai Shiranui Update Launch Trailer Capcom Fighting Collection 2 - Release Date Reveal And Pre-Order Trailer Welcome to the Kingdom - Kingdom Come: Deliverance II Helldivers 2 - Servants of Freedom Warbond Overview Trailer Street Fighter 6 - "Say Hello To Mai!" Fighting Pass Trailer Wreckfest 2 | Early Access Announcement Trailer Onimusha 2: Samurai's Destiny - Announcement Trailer Monster Hunter Wilds: 6th Trailer | Into the Iceshard Cliffs Breakout Beyond - Announce Trailer Introducing Battlefield Labs | Battlefield Studios Street Fighter 6 - Special V-Rival Event: Fight Professor Woshige! The Sims & The Sims 2 Legacy Collections - Official Reveal Trailer
Please enter your date of birth to view this video
By clicking 'enter', you agree to GameSpot's
Terms of Use and Privacy Policy
First you'll need to make a character. What kind of hero do you want? Each race has different base skills and a special power, but with enough hard work you can master most anything.
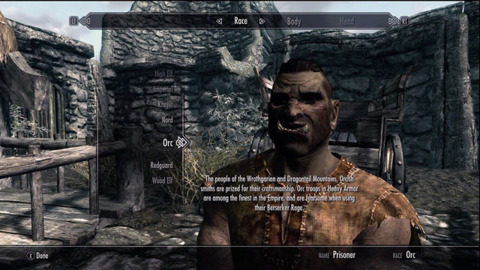
Redguards, Nords, and Orcs have an advantage in close range combat. Redguards specialize in one-handed, Nords Two-handed, and Orcs in Heavy Armor. There are rogue type races: Argonians have lockpicking, Khajiit sneaking and Wood Elf Archery. For slight magical advantages Imperials have Restoration, High Elves have Illusion, Half Elves Conjuration, and Dark Elves Destruction.
We picked a hearty Orc melee-caster and while we mainly used close range combat, we mixed up some other skills that will hopefully assist any build.
Street Fighter 6 - Mai Shiranui Update Launch Trailer Capcom Fighting Collection 2 - Release Date Reveal And Pre-Order Trailer Welcome to the Kingdom - Kingdom Come: Deliverance II Helldivers 2 - Servants of Freedom Warbond Overview Trailer Street Fighter 6 - "Say Hello To Mai!" Fighting Pass Trailer Wreckfest 2 | Early Access Announcement Trailer Onimusha 2: Samurai's Destiny - Announcement Trailer Monster Hunter Wilds: 6th Trailer | Into the Iceshard Cliffs Breakout Beyond - Announce Trailer Introducing Battlefield Labs | Battlefield Studios Street Fighter 6 - Special V-Rival Event: Fight Professor Woshige! The Sims & The Sims 2 Legacy Collections - Official Reveal Trailer
Please enter your date of birth to view this video
By clicking 'enter', you agree to GameSpot's
Terms of Use and Privacy Policy
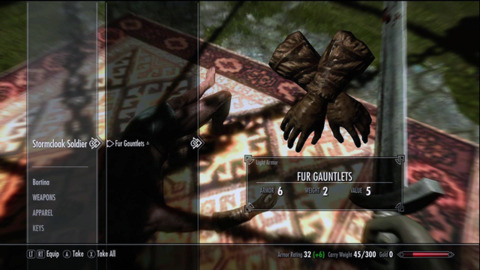
When you first gain free control of your movement you'll just be following NPCs: first a Stormcloak soldier that will teach you the basics of running and jumping. Second will be Hadvar who will brief you on the basics of combat. The latter will release your prisoner bindings and take you into a small armory. Search both chests in the room to uncover some Imperial Light Armor and a one-handed Iron Sword. Don't worry if you want to specialize in magic or two-handed weapons. You'll get those soon enough; in fact if you go into your magic menu you'll always have simple flame and healing spells you can wield.

After Hadvar opens the gate you'll fight against two rather simple Stormcloak soldiers. Strategy is rather minimal here. Block their attacks and countering with a normal blow will work fine. If they do guard use a power attack to stagger them. Take out the one with a two-handed sword first and stronger damage dealers always pose a greater threat. If you are going to play as a two handed-character it's a good idea to loot his sword.
Keep following Hadvar and he'll lead you to another encounter two more easy Stormcloak soldiers. After killing these enemies, be sure to grab any spare potions from the nearby barrels. When ready, move on and you'll come to a battle between the Legion Torturers and two more Stormcloak Soldiers. In most cases your allies will deal with the enemies before you get a chance to attack. You'll want to read the books laying around the tables and many published novels will raise your skill points. Additionally search the nearby sack to gain a few lockpicks.

If you're going the mage or rouge build you'll want to open up the cage on the left. The lockpicking mechanics are the same as in Fallout 3: You'll need to adjust the lockpick into a certain position before moving the lock with your dagger. If you get some resistance (and vibrations on consoles) stop turning your knife and readjust the lockpick's placement. Inside the cage are a few gold coins, a poition of Minor Magika, a Tome of Sparks (Destruction) and a dead mage. Loot his corpse if you want to look the part of a caster.
Even though there aren't any other actual good treasure behind any of the other cells and caged doors, if you want to boost your lockpick skill take the time to unlock any cage you find. Either way talk to the younger Torturer Assistant and he will follow you shortly as well. Despite how intimidating he looks, this fellow will die rather quickly, so not need to get attached. Head down the next hall for a fight with four more Stormcloaks. Two are below in the water, while the other two are above on the bridges. Split up from where ever Hadvar goes and clear out the enemies. You might notice some multicolored goo on the floor. This is highly flamable, so if you use your flame magic you can start a blaze. Be careful with this strategy, as this fire can harm anyone including allies.
Once the Stormcloaks are dead, continue down the path to encounter three small and two large Frostbite Spiders. They can easily poison you, so it's a good idea to have your healing spell or some healing potions handy. Another good alterative is to let Hadvar go in sword swinging. This will give you enough leeway to attack the enemies from behind.

Continue to the left and you'll find a sleeping bear. Hadvar will now hand you a bow and a few amount of arrows. You should now crouch into a sneaking position to keep from being detected. It's up to you if you want to sneak by or snipe down the bear. If you go for the latter, let Hadvar get into melee range and tank the bear. With his health and strong sword the bear isn't much of a problem.
Continue further and you'll find the exit. If you were unhappy with your racial choice or ability scores you'll have one last tiem to change your character and appearance. Congratulations on escape the Vault…er Helgen.
Before the Storm
Street Fighter 6 - Mai Shiranui Update Launch Trailer Capcom Fighting Collection 2 - Release Date Reveal And Pre-Order Trailer Welcome to the Kingdom - Kingdom Come: Deliverance II Helldivers 2 - Servants of Freedom Warbond Overview Trailer Street Fighter 6 - "Say Hello To Mai!" Fighting Pass Trailer Wreckfest 2 | Early Access Announcement Trailer Onimusha 2: Samurai's Destiny - Announcement Trailer Monster Hunter Wilds: 6th Trailer | Into the Iceshard Cliffs Breakout Beyond - Announce Trailer Introducing Battlefield Labs | Battlefield Studios Street Fighter 6 - Special V-Rival Event: Fight Professor Woshige! The Sims & The Sims 2 Legacy Collections - Official Reveal Trailer
Please enter your date of birth to view this video
By clicking 'enter', you agree to GameSpot's
Terms of Use and Privacy Policy
Hadvar will suggest traveling to Riverwood and meeting his uncle Alvor. If you're going to continue the storyline, this will be your next destination. However, if you really want you can simply leave this for later and explore the rest of Skyrim. Going to Riverwood is a good idea either way as you can learn more about the Legion and gain your first companion. Head down the hill and follow the path to eventually get to the small town.
The encounters on the way to Riverwood are random. You might see nothing or may have to fight your way there. For the most part you'll only face basic wolves. For a melee character they shouldn't be much a problem. Still, if you want you can run back to Hadvar and have him deal with whatever enemies you come across. Still, it's much better to deal with enemies yourself as it will grant quick skill ups in both your offensive and defensive abilities.
In Riverwood, Alvor's house will be the first on the left. Talk to the smith as he sits down for dinner or works his forge. Ask for supplies you can take and you can further inform him about what happened in Helgan. Pick this dialogue option to learn about Whiterun and Jarl Balgruuf. Whiel the storyline tells you to go here. It's worth it to further explore Riverwood to gain a follower and take care of a later task.
Street Fighter 6 - Mai Shiranui Update Launch Trailer Capcom Fighting Collection 2 - Release Date Reveal And Pre-Order Trailer Welcome to the Kingdom - Kingdom Come: Deliverance II Helldivers 2 - Servants of Freedom Warbond Overview Trailer Street Fighter 6 - "Say Hello To Mai!" Fighting Pass Trailer Wreckfest 2 | Early Access Announcement Trailer Onimusha 2: Samurai's Destiny - Announcement Trailer Monster Hunter Wilds: 6th Trailer | Into the Iceshard Cliffs Breakout Beyond - Announce Trailer Introducing Battlefield Labs | Battlefield Studios Street Fighter 6 - Special V-Rival Event: Fight Professor Woshige! The Sims & The Sims 2 Legacy Collections - Official Reveal Trailer
Please enter your date of birth to view this video
By clicking 'enter', you agree to GameSpot's
Terms of Use and Privacy Policy
You can choose to recruit either Sven or Faendal. Either option is fine as they are both mainly archers with a daggers to back them up. We went with Faendal, but Sven works just as well; additionally Faendal can improve your archery skills if you pay him. They are both pining for the affections of Camilla Valerius and will each ask you to deliver a fake nasty letter to Camilla. Take the letter to Camilla who will either be walking around town or inside her brother's shop. Give the letter and lie about who penned the vulgar note. Return back to the real author and they will join you as a follower. Don't worry about outfitting them just yet, as you probably don't have enough equipment to use yourself. Besides, you'll be gaining plenty of armor very soon.

Since you may have just been in Valerius's shop, talk to the elder brother Lucan to learn about a missing golden claw. You can leave this job for later, but it's worth it to complete it now. Lucan will point you towards Bleak Falls Barrow which will now be placed on your map. If you want, talk to Camilla again and she will lead you out of town and point you towards the barrows. Head out of Riverwood and head out to recover the Golden Claw.
The Golden Claw
Street Fighter 6 - Mai Shiranui Update Launch Trailer Capcom Fighting Collection 2 - Release Date Reveal And Pre-Order Trailer Welcome to the Kingdom - Kingdom Come: Deliverance II Helldivers 2 - Servants of Freedom Warbond Overview Trailer Street Fighter 6 - "Say Hello To Mai!" Fighting Pass Trailer Wreckfest 2 | Early Access Announcement Trailer Onimusha 2: Samurai's Destiny - Announcement Trailer Monster Hunter Wilds: 6th Trailer | Into the Iceshard Cliffs Breakout Beyond - Announce Trailer Introducing Battlefield Labs | Battlefield Studios Street Fighter 6 - Special V-Rival Event: Fight Professor Woshige! The Sims & The Sims 2 Legacy Collections - Official Reveal Trailer
Please enter your date of birth to view this video
By clicking 'enter', you agree to GameSpot's
Terms of Use and Privacy Policy
Head up the mountain to the north to gain access to Bleak Falls Barrow. The encounters along the way are random, but you can expect to fight a bandit or two, especially ones that could be hiding in the towers up towards the Barrow. At this point it's a good idea to have your healing spell in your left hand or at least ready to switch to by favoriting it. And of course Faendal sniping your enemies will help loads early on. It takes a lot of a follower to outright die, so feel free to let your sidekick take all the punishment. We were lucky enough to gain a suit of Iron Heavy Armor and a new greatsword (Which we handed to Faendal); even with some randomness it's likely that you'll gain the same equipment to outfit yourself and your comrade.
Eventually you'll reach Bleak Falls Barrow proper. Here will be three more bandits, likely with two-handed axes or ranged bows. If you haven't used on yet it's a good idea to whip out your shield. Shields are great for absorbing damage and staggering enemies. A successful block will stagger an normal attack. However if the enemy uses a power attack it will break your guards. This also holds true for when you fight a defending enemy. You can also block with a two-handed weapon or while dual-wielding, but isn't nearly effective as a shield.

You'll likely still be level 1, so most of the enemies will still be weak. A few swings of your weapon and shots from your follower will be enough to clear most encounters inside and around the Barrow. With that said, after clearing out the three enemies, enter the door on the right to enter inside the Barrow. There will be two bandits within the first room. You have enough time to sneak and get in a free hit or two. However, unless you made a Khajiit or already trained before entering your sneaking may be too low to get by these guards.
The loot on the bandits isn't anything great, but the nearby chest has some goodies inside. It has a novice lock on it, but you should hopefully still have plenty of lockpicks from Helgan to easily bust it open. Inside the chest is some gold, souls gems, and a Scroll of Hysteria. We personally never use scrolls as they are one time use. But what's great is you can sell scrolls to other casters for a nice sum of gold.
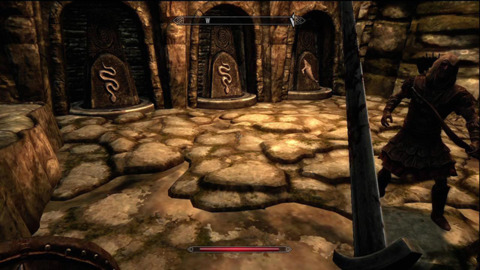
Continue down the path and you may notice various urns and pots sitting around. Most of these are empty, so however your crosshairs over them before needlessly interacting with them. There are a few poitions sitting around the bookshelves, so be sure to grab them. Once you've looted anythign you need, head down the hall and Kill the Bandit Outlaw. There will be a puzzle ahead and the answer is on the pillars overhead. Or rather was up there, the middle symbol has collapsed on the ground. However, since it's the only one dislodged it's still easy to figure out. Mover over to the pillars on the left and rotate them so that from left to right they show a snake, a snake, and last a fish.
This will open a gate leading to the basement. As you enter through there will be more petty soul gems and chest to loot. However, expect to be interrupted as Skeevers will emerge from below. These are large rats and are easily killed. For the real battle head down the spiral stair case and slash through the webbing on the left. This will reveal the Wounded Frostbite Spider. It's a large version of spiders you might have already fought. Its poison is even more deadly, making it very important to have a healing spell on the ready.

The easiest way to heal up is to simply run back out the entrance as the spider is too big to follow you. Faendal or whatever companion you have will also make this battle rather simple. After the spider is dead, move left to find Arvel stuck in some webs. Free from the webbing and continue to slice him to bits. He's the one with the Golden Claw and would simply flee or attack you than hand over the treasure. It simply saves time to bash his skull in and loot the warm corpse. Continue down the path and you'll face undead Draugrs. These enemies are susceptible to fire if you feel like switching to Destruction magic, but aren't that hard anyway.
You should be careful about traps in the area, there is a spike gate just ahead that will spring is you step on the pressure point. Traps like these will do serious damage if they hit you in the heat of combat. If you've already killed the enemy, you can likely heal the damage quickly before moving on. You'll face three more Draugrs. They have basic armors and weapons so there still isn't much to worry about. Their Ancient Nord weapons aren't that great so there isn't much reason to loot them unless you simply want some different gear. Up ahead will be a swinging set of blades. Remember back to Helgan where you sprinted out? If you haven't been using sprinting, now is a good time to start again. The sprint is fast enough to get by traps like that.
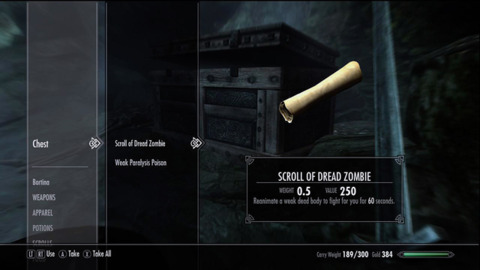
Head down the next few halls and slice through three more Draugr. At the end of this hall will be a chest that will possibly contain more stamina potions and arrows. Pull the chain near the chest and it will open the gate headed towards outside. There will be two more chests: one to the right as you exit that might have another sellable scroll and possibly leather armor. Kill another Draugr and head down the icy path on the east to reach the second chest. This chest has a novice lock and may contain a Scroll of Dread Zombie and a Weak Paralysis Poison. Once done looting, head back up the ice spiral and into the next cave to the north.
Here will be a Restless Draugr, a stronger version of the undead you've faced so far. It's a good idea to have both a shield and healing spell on the ready. The Restless has way more health and his two-handed sword can do some heavy damage. Block his blows as best as you can and heal up when you take too much damage. Your follower may be the main source of damage from this fight as you keep yourself healthy. Through the next door will be two more Draugr: one melee one at the bottom floor and an archer above. This are the normal Draugr, so they are fairly weak. Climb up the stairs on the right and loop around left until you come to the bridge. Soon you'll come to a door with a clawshaped keyhole and several rings. Look at the claw in your inventory and it will show you the code: Bear, Butterfly, Owl. Set up this combo and place the claw in to unlock the door.

Move down the path and you'll arrive at a tomb. On the wall will be a flashing dragon word that will teach the first shout: Unrelenting Force. You most likely can't use this yet. Though if you took the time to kill a dragon you can learn and equip the shout. Learning the word of power for the shout will also revive a Draugr. This enemy is even stronger than the Restless you fought earlier. His attacks are strong enough that you might want to switch to a ranged spell or a bow. If your follower has a brutal two handed weapon and some armor they might be able to take the boss a little better than yourself. As long as you have some distance and make use of your shield you can resist the brunt of the damage and easily counter.
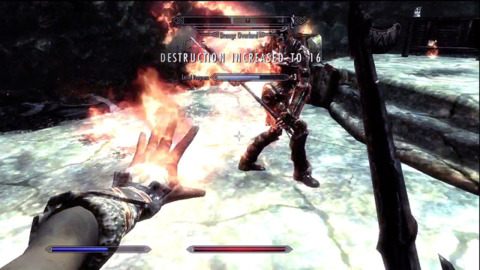
Loot the Overlord to gain the Dragonstone (Which was the real prize here) and you can also take his Cold Ancient Nord Battle Axe which can deal extra frost damage to health and stamina. Loot the area for a petty soul gem, Weak Frenzy Poison, a Tome of Conjure Familiar and up to eighty gold. Head up the stairs on the left to unlock the exit. Stop along the way to loot another chest with a Garnet, extra gold and lockpicks. Now you're free to return to Skyrim's overworld and can fast travel to River wood.
Deliver the Golden Claw to Lucan and receive your reward. With the Dragonstone in hand, you'll be more then ready for Whiterun.
Dragon Rising
Street Fighter 6 - Mai Shiranui Update Launch Trailer Capcom Fighting Collection 2 - Release Date Reveal And Pre-Order Trailer Welcome to the Kingdom - Kingdom Come: Deliverance II Helldivers 2 - Servants of Freedom Warbond Overview Trailer Street Fighter 6 - "Say Hello To Mai!" Fighting Pass Trailer Wreckfest 2 | Early Access Announcement Trailer Onimusha 2: Samurai's Destiny - Announcement Trailer Monster Hunter Wilds: 6th Trailer | Into the Iceshard Cliffs Breakout Beyond - Announce Trailer Introducing Battlefield Labs | Battlefield Studios Street Fighter 6 - Special V-Rival Event: Fight Professor Woshige! The Sims & The Sims 2 Legacy Collections - Official Reveal Trailer
Please enter your date of birth to view this video
By clicking 'enter', you agree to GameSpot's
Terms of Use and Privacy Policy
Travel to Whiterun, which is northwest of Riverwood. Apparently the guards are charging for entrance, so you can either pay, talk your way in, or can state you're there to see the Jarl. The middle options are good if you want to practice your speech skills. Once inside, head to the main keep, Dragonreach. Talk to the Jarl and state what happened in Helgan. He will instruct you to meet with the court wizard Farengar. The court wizard will ask you to gain the Dragonstone from Bleak Falls Barrow. What luck, we already did that quest (and hope you did as well, but if not you can check for details in the Golden Claw section). Give the Dragonstone to Farengar and you'll get word that a dragon is attacking the Western Watch Tower.
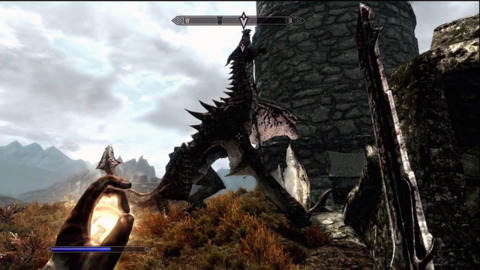
Head outside and follow Irileth towards the tower. This is your first dragon fight and at this level it can be tough. You have enough aid from the Whiterun guards and any follower that this isn't flat out impossible. You'll notice that the dragon mainly flies, so that means it's time to resort to magic and archery. This is much easier to do if you get to the top of the tower and have a better vantage point. The amount of arrows pelting the dragon will eventually ground it. At about the 50% health mark it will stop flying, taking this back to a ground battle. If you're hearty melee character like our Orc, you can go in close and bash it. It's easier to attack from behind as it will have to turn or move about if it wants to use it's deadly bite. You aren't completely safe while attacking it's rear though. The dragon can actively flail its tail as it bites one of your allies. Always be ready to switch to a healing spell and run away if you are taking too much damage. The Whiterun guards will help keep the dragon distracted long enough.
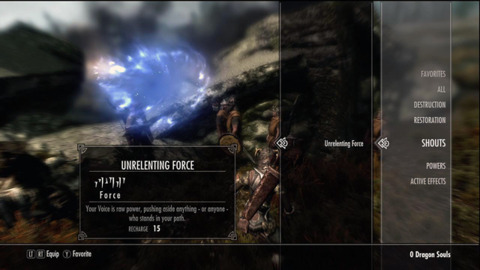
Soon enough the dragon will meet its end and you can absorb its essence. You can combine the word of power from the Barrows and the dragon soul to fully learn Unrelenting Force. Show off your shout to the Whiterun guards and they will declare you Dragon born. Return to Jarl Balgruuf and report what happened. You'll hear a call from the Greybeards, meaning it's time to head to High Hrothgar. Before leaving, you can also recruit Lydia as a new follower, though you'll need to dump anyone you're already partnered with.
The Way of the Voice
Street Fighter 6 - Mai Shiranui Update Launch Trailer Capcom Fighting Collection 2 - Release Date Reveal And Pre-Order Trailer Welcome to the Kingdom - Kingdom Come: Deliverance II Helldivers 2 - Servants of Freedom Warbond Overview Trailer Street Fighter 6 - "Say Hello To Mai!" Fighting Pass Trailer Wreckfest 2 | Early Access Announcement Trailer Onimusha 2: Samurai's Destiny - Announcement Trailer Monster Hunter Wilds: 6th Trailer | Into the Iceshard Cliffs Breakout Beyond - Announce Trailer Introducing Battlefield Labs | Battlefield Studios Street Fighter 6 - Special V-Rival Event: Fight Professor Woshige! The Sims & The Sims 2 Legacy Collections - Official Reveal Trailer
Please enter your date of birth to view this video
By clicking 'enter', you agree to GameSpot's
Terms of Use and Privacy Policy
High Hrothgar is at the top of the huge mountain to the south, just east of Riverwood. This rock is massive, and most of the terrain is too inhospitable to climb. However, there is an easy clear path on the outskirts of Ivarstead. This small village is on the south eastern side of the mountain. You'll need to come here if you want reach the top of High Hrothgar. The pilgrimage up these steps in long and many random encounters can occur. If your lucky only wolves may attack. In some cases you might face a stronger tiger, which is still manageable with your follower. The worst situation is if you face a random Frost Troll. This enemy is very powerful at this point and has fast regenerating health. Fire is your best option here, but that's still being generous. If your level is too low, you can drag the troll all the way back to Ivarstead and let the guards kill it for you.
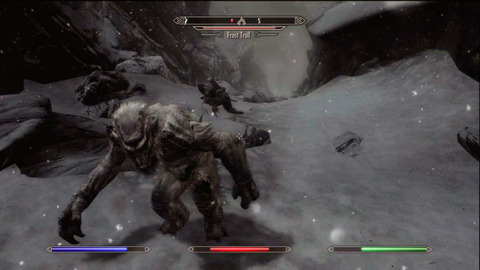
The Frost Trolls don't scale with you, so if you come back at a higher level they will be much easier. Overall their AI is really clumsy and you can get them stuck on walls or have them simply leap off the cliff as they pursue you. Either way, once clearing a path through whatever enemies you encounter you'll be at the top of High Hrothgar. Inside the sacks at the base of the stairs are mainly vegetables and a few potions, including cure poison. Regardless if you pick up the offers, enter inside of High Hrothgar.

Inside the Greybeards will help you master your Unrelenting Force. Listen to the instructions they give and follow suit. You'll mainly be pushing around spirits that the Grebeards summon to the center of the room. Next the Greybeards will take you outside and teach you the Whirlwind Shout. This is a quick dash, even faster than your sprint. Use it to get passed traps and other obstacles. Talk to the Greybeards again and they will instruct you to recover the Horn of Jurgen Windcaller. It is located in Ustengrav, far north near Solitude.
The Horn of Jurgen Windcaller
Street Fighter 6 - Mai Shiranui Update Launch Trailer Capcom Fighting Collection 2 - Release Date Reveal And Pre-Order Trailer Welcome to the Kingdom - Kingdom Come: Deliverance II Helldivers 2 - Servants of Freedom Warbond Overview Trailer Street Fighter 6 - "Say Hello To Mai!" Fighting Pass Trailer Wreckfest 2 | Early Access Announcement Trailer Onimusha 2: Samurai's Destiny - Announcement Trailer Monster Hunter Wilds: 6th Trailer | Into the Iceshard Cliffs Breakout Beyond - Announce Trailer Introducing Battlefield Labs | Battlefield Studios Street Fighter 6 - Special V-Rival Event: Fight Professor Woshige! The Sims & The Sims 2 Legacy Collections - Official Reveal Trailer