Grand Theft Auto: San Andreas Walkthrough
Don't trip if you've been getting busted up by the Ballas. Peep this guide to Grand Theft Auto: San Andreas for everything you need to get through the 'hoods of Los Santos, San Fierro, and Las Venturas.
Design by Collin Oguro
Carl Johnson’s back on the set after five years in Liberty City, returning to his old haunts in San Andreas to mourn for his mother, dead after an act of senseless violence. An already unpleasant homecoming gets worse, though, as crooked cops set him up for the murder of a policeman, he discovers that his neighborhood is falling apart under an influx of drugs, and that his old gang is barely capable of holding their territory. Needless to say, the solution to all of these problems involves a whole lot of violence, as befits the latest and greatest entry in the extraordinarily popular GTA series of games.
Given that Rockstar created a massive game world in Grand Theft Auto: Vice City, with only a year’s worth of development time between that game and Grand Theft Auto III, it should come as no surprise that the world of GTA: San Andreas, with two years of development soaked into it, is one of the biggest worlds ever modeled in an action game. Instead of focus on a mere state, Rockstar has enlarged their focus, this time choosing to model an entire state, with three separate cities and a huge amount of countryside to explore. Everything is bigger and better in San Andreas, so get exploring!
In this guide, we’ll provide you with a rundown of the game’s weapons, a complete walk-through of the game’s many missions, locations for all of the hidden oysters, photo ops, graffiti tags, a listing of weapons, and the proverbial much, much more. Big thanks to the guys from gta-junkies.com for supplying the location maps for this guide.
Table of Contents
Getting AroundStaying Alive
Walk-through
Sweet
Nines and AK's, Drive-By, and Sweet's Girl
Cesar Vialpando, Doberman, and Los Sepulcros
Reuniting the Families and The Green Sabre
Ryder
OG Loc
C.R.A.S.H.
Catalina
Against All Odds, Gone Courting, and Local Liquor Store
Made in Heaven, Small Town Bank, and Farewell My Love
Cesar Vialpando
Back to School, Photo Opportunity, and Jizzy
Outrider, The Courier, and Ice Cold Killa
Pier 69, Toreno's Last Flight, and Yay Ka-Boom-Boom
Wu Zi Mu
C.R.A.S.H.
Cesar Vialpando
Las Venturas
Architectural Espionage and You've Had Your Chips
Key to Her Heart, Dam and Blast
Cop Wheels and Up, Up, and Away
Fish in a Barrel, Breaking the Bank, and A Home in the Hills
Ken Rosenthal
Madd Dogg
C.R.A.S.H.
Training Challenges
Vehicular Challenges
Other Challenges
Quarry Missions
Import/Export and Freight Train
Courier Missions
Girlfriends, Gyms, and Nutrition
Gambling and Triathlons
100% Completion Checklist
Tips and Miscellaneous
Gang Warfare and Costumes
Cheats
Maps for Hidden Items
Getting Around
There are many, many different ways to get around the world of San Andreas. This chapter will introduce you to the most popular ones, but there are still others in the game world for you to discover, such as trains, SWAT tanks, and a certain 60-million dollar military secret project. Anything not listed here will likely pop up as a mission reward, so it’s unlikely that you’ll miss anything.
On Foot
Nothing’s quite as reliable as your feet when you need to escape from a sticky situation. Although GTA characters have always ran like big spazzes, CJ has a few improvements over his predecessors. For one, you can now increase his stamina by leaps and bounds at the gym, allowing him to run much longer than could Nameless Guy or Tommy Vercetti. Secondly, you can now scale boxes and ledges by hitting the square button to jump. If you’re near a ledge, you should attach to it automatically, and can press the square button again to pull yourself up.
Car
Cars are going to be your primary mode of transportation in San Andreas. They’re plentiful, easy to steal, and come in a wide variety of makes and models. Although you’ll begin the game in the hood, where most of the vehicles are slow-moving coupes and the like, you’ll soon graduate to more stylish and speedy autos. Obtaining One
The triangle button, as ever, will let you jack a car for yourself. Very few cars are actually locked (probably because the game wouldn’t be very much fun if they were), so feel free to walk up to parked cars and take them as you like. If the car’s empty, you won’t have any problems, but if there’s someone in the driver’s seat, CJ will have to hit them before throwing them out, which results in a jacking motion that’s a bit slower than in previous GTA games. You can also usually cause someone to exit the vehicle by hitting it with a weapon, but they’ll sometimes decide to floor it instead.
Note that jacking vehicles will cause a bit of resentment in some of the game’s inhabitants. If you jack a gangbanger, you’re liable to get shot at as you drive away; by the same token, some drivers will attempt to jack you right back if you stick around their location too long. There are also some occasions where you’ll just get jacked out of the blue, usually while you’re in a bad part of town, so keep an eye out for people running to your driver’s side door and floor it if you spot anyone. Of course, the cops will attempt to wrestle you out of your vehicle if you have any wanted stars, so you should keep moving if there’s any heat on you.
Driving One
The basic car controls are the same as they were in previous GTA games for the PS2: the X button accelerates, the square button acts as a break, and the R1 button serves as your handbrake for tight, squealy, uncontrollable (but fun) 180-degree turns. Of course, different vehicles will handle in different ways, so try as many of them as possible and build an internal reference so that you’ll know which ones to avoid when you have to get away from the cops.
Although the cops don’t seem to use spike strips in San Andreas, as they so annoyingly did in Vice City, you can still get your tires shot out by the police, or anyone else that’s shooting at you, for that matter. Some vehicles are more impacted by this than others, but it’ll always impact your maneuverability; visit the Pay N Spray if you want to repair the tire.

A new addition to the cars in San Andreas is the inclusion of shootable gas tanks. If you can nail a shot directly on a car’s gas panel, it should blow instantaneously. Since this is nearly impossible to do on a moving target (let alone during a drive-by), this is really more of a party trick than anything else. Try it on cars that are stopped at stoplights if you want to have some fun. Luckily, your enemies will never hit your gas tank if they fire at you, random mission-failing explosions not being conducive to fun gaming.
- Many missions, especially those where you have to drive other characters around, will be failed if you can’t keep the car you started the mission with in one piece. You’ll have to drive carefully in these kinds of situations, or keep an eye out for the Pay N Spray, which will completely restore your car’s health.
- Although each car has its own particular speed and handling characteristics, in general, the faster and more expensive it looks, the faster it’ll go, but the fastest cars often have the lowest health and poor handling.
- Similarly, the taller a car is, the more likely it is to tip over when you have to make a sharp turn. Beware of going too fast or turning too quickly with the delivery trucks in the game.
- Don’t forget that you can take your cars to the chop shop to outfit them with custom upgrades. Nitro is the most useful of the bunch, especially when you’re cruising for unique jumps, but there are plenty of options to choose from.
Techniques
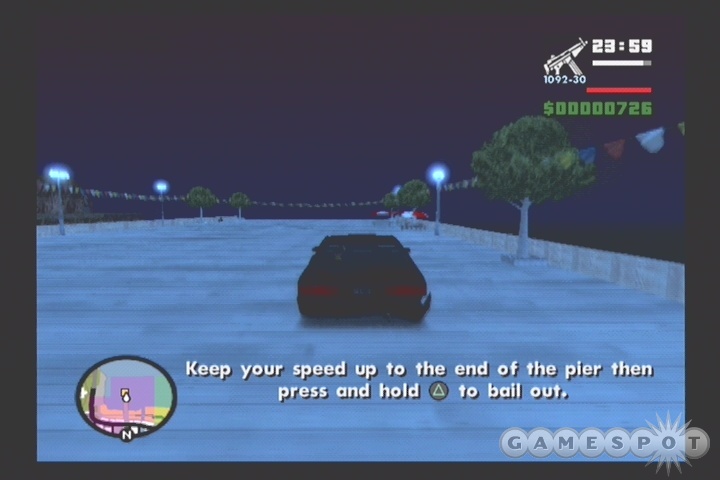
Bailing Out: If you’re going fast and need to exit your vehicle quickly, just hit the triangle button to bail; CJ will jump out the passenger side door and take a bit of damage, but your car will keep on moving. This is most useful when your car is on fire and you don’t think you’ll have time to stop before it blows.
Drive-By: After you obtain a machine pistol, such as an Uzi, you’ll be able to use a car to perform a drive-by. When you’re near a target, drive slowly past it and hit the R2 or L2 button to point your gun out the window, then use the circle button to fire. Drive-bys are the preferred method to take out individual soldiers, since any gunfire that comes in will be absorbed by the car itself and not CJ.
Rear-view: If you hold down the R2 and L2 buttons at the same time, you’ll be able to see what’s coming up behind your car. This is tremendously useful during police chases, since the cops will often try to ram into your car from the side; if you can see them coming, you should be able to cut them off or just avoid them.
Bike
The newest addition to the GTA family of transportation is the bicycle. Ok, ok, try not to laugh - you won’t often be jumping out of a car to pick up a bike, but a few missions will require you to use them, so you might as well learn how they work. Obtaining One
You can get a bike in much the same way as you can a motorcycle, but getting a bike is even easier, due to the fact that they’re much slower than motorcycles. In most cases, people will ride slowly enough for you to pop them in the head with your pistol as they ride by, although you can, of course, just hit the triangle button to throw them off the ride and take it for yourself; either way, you’ll have a shiny new bike for yourself.
Driving One
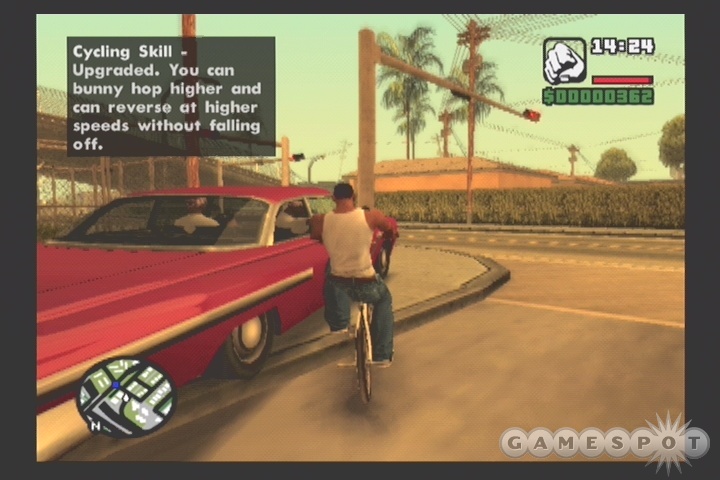
If you’re familiar with the motorcycle mechanics of Vice City, you shouldn’t have any trouble with the bikes. The one new inclusion is that you can tap X repeatedly to go faster, just like when you sprint; as with sprinting, though, you can’t do this forever, since you’ll eventually get tired out. As with motorcycles, it’s fairly easy to get thrown off a bike, especially if you hit something head-on, or get twisted around in mid-air and land awkwardly. You’ll also have a lower speed than most other vehicles while you’re on a bike, and will be completely open to enemy gunfire.
Techniques
Bunny Hop: Bikes are unique, in that they’re the only vehicle in which you can make jumps while riding over a flat surface. Anything can hit a ramp for monster air, but only a bike can hop over small obstacles in your path. Remember, though, if you drop too far, you’ll get thrown off the bike. To hop, hold L1 and release it when you’re near whatever you want to clear.
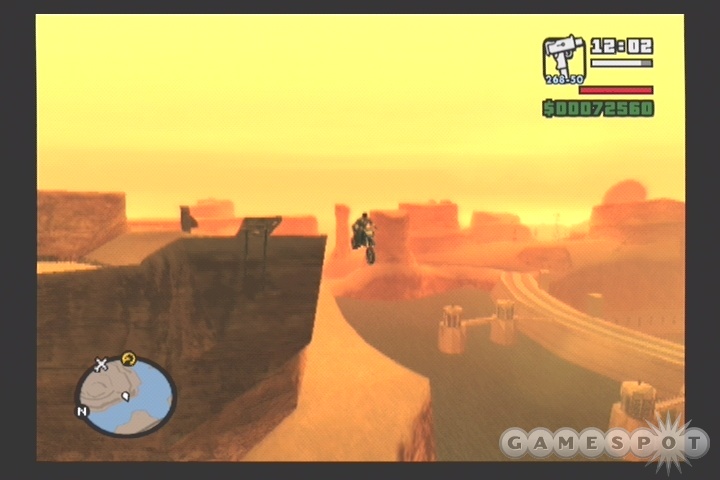
Motorcycle
Obtaining One
Motorcycles are a bit trickier to obtain than cars, if only because the people who ride them tend to make smaller targets and will often weave their way around you if you attempt to block their path with your body. It’s usually easier to jack them while they’re stopped at a light, or to just shoot them off of the bike, then take it for yourself. It’s quickest to jack a bike from the front, where CJ will execute a swift little kick to the driver and take off with tires squealing.
Driving One
Driving a motorbike is much unlike a car, mostly in the way that they handle. While there are a number of different types of motorcycles, including choppers and highway cruisers, the ones you’re going to be looking out for are the sport bikes and dirtbikes. While they will leave you exposed to fire while you ride, bikes give you a benefit of high maneuverability, good acceleration, and relative durability.
- In order to turn on the sportbikes, you’ll need to rely on your handbrake (the R1 button). Pressing the normal brake button will prevent you from making sharp turns, which is one of the reasons that you’re riding one, isn’t it?
- Be careful to avoid collisions while on a bike, as any shock too severe will send you flying over the handlebars. You take less damage from these impacts than you did in Vice City, though, so if you’re just running around a city, don’t be too cautious.
- One of the advantages of motorcycles is that they can accelerate very quickly compared to most cars. You can use this to make some of the unique jumps that have a short run-up space.
Techniques
Stoppie: While on a bike, press forward to shift your weight in that direction, then hit the brake (normal, not handbrake). If you’re on a crotch rocket, you should see your rear wheel lift up into the air for a few minutes. The longer you keep it off the ground, the more money you’ll get when it touches down; this is a good way to make small amounts of cash early in the game.
Wheelie: This is essentially the same thing as a stoppie, save that you’re lifting your front wheel, and you have to keep it up while tapping on the gas. It’s much more difficult to do than a stoppie; just make sure you don’t tip too far backwards, or you’ll fall off.
Drive-By: The main difference between car drive-bys and bike drive-bys is the way that you can shoot forward with your SMG. This can be a big help if you’re using a police bike to do Vigilante missions; just follow behind your target and unload on it until it catches alight.
Boat
Obtaining One
Boats, obviously enough, are stationed in the waterways of San Andreas; most of the docks in the game will have a boat or two somewhere nearby. All you need to do to get one is climb aboard and press the triangle button. If you’re attempting to board a boat while swimming, use the square button to climb out of the water. Note that boats don’t play nearly as big a role in San Andreas as they did in Vice City; planes are where the real action’s at now.
Driving One
Not much to it here; just hit forward and try to avoid really sharp turns, which will send the boat spinning. Rather, use small adjustments to your steering to keep yourself oriented where you want to go.
Techniques
Drive-By: As with cars, you can perform drive-bys (float-bys?) in a boat with the R1 and L1 buttons.
Planes and Helicopters
Obtaining One
San Andreas is the first entry in the GTA series where you can truly take to the air. Although GTAIII had its Dodo, and Vice City had the Sparrow, these were difficult to control and had limited uses. With the sprawling size of the game world, though, the designers of San Andreas have seen fit to give players a quick way to get between cities.
You won’t be able to get a plane right away, though; in fact, you won’t be able to fly until you complete a set of flying tests before you reach the third city in the game. After you get your pilot’s license, though, the airports in each city will unlock their gates, letting you roam in and find a vehicle to your liking.
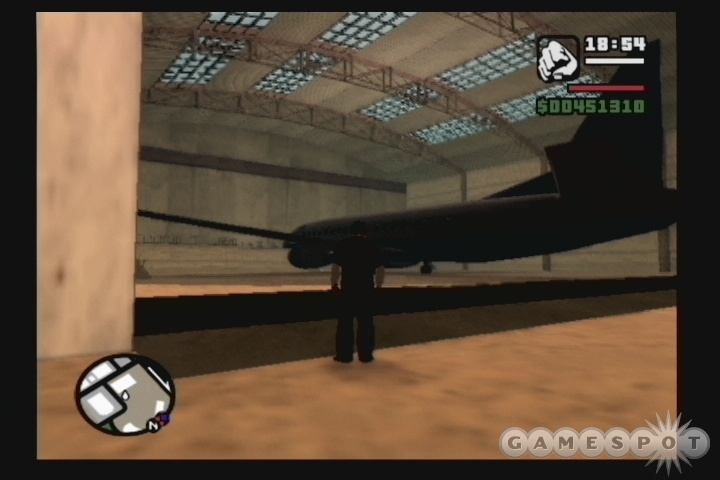
There are numerous different planes and helicopters in San Andreas. You won’t use helicopters as often as you will planes, though, and there are usually a few different kinds of the latter at any of the airports in the game. For our money, your best bet for transportation is the Shamal jet, which is extremely fast and very easy to control. There’s also a jetliner available at the Las Venturas airport, for the pilot who likes his planes big and massive; it’s in a large, enclosed hangar in the southeastern corner of the airstrip. It doesn’t always appear when you open the hangar doors, but if it’s not there when you arrive, let the doors close and try again. There are also a few more flying machines that you’ll come across as you complete the later missions in the game, but we won’t spoil the surprise by listing them here.
Driving One
Planes and helicopters have vastly dissimilar flight controls, but, luckily for you, there’s a lengthy tutorial you’ll have to pass before you can actually gain access to the beasts of the sky. For planes, all you need to know is that X speeds you up, Square slows you down, and clicking R3 will retract or extend your landing gear. Helicopters are a bit more difficult to control, and will require you to use the R2 and L2 keys to rotate them while they fly.
Techniques
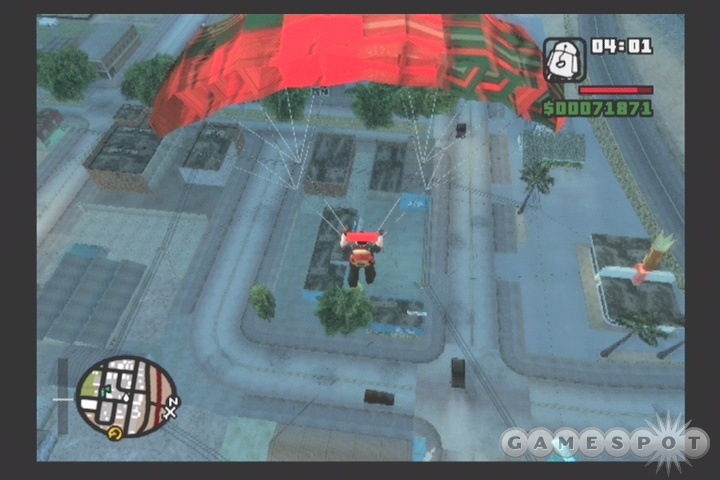
Parachute: If you exit from a plane while in flight, you'll be able to parachute by holding the O button. You don't need to have a parachute in your inventory; one will automatically be given to you when you leave the vehicle. You do, however, need to be fairly high in the air, or you'll hit the ground before the chute opens, with predictable results. While chuting, you can steer yourself somewhat by moving the left analog stick, and you can pull your feet up in preparation for landing by pulling back on the right stick.
Staying Alive (And Healthy) In San Andreas
Whether you enjoy playing the game’s many missions, or prefer to just run around the game world causing chaos, you’ll need to ensure that CJ stays safe and relatively healthy. This chapter is intended to give you a bit of a primer on what to expect and how to prepare for the bad, bad world of San Andreas.
Shooting Basics
In order to be effective in combat, you’ll need to learn to use both of the shooting modes; you can flip between automatic and manual as you need to. 
Of the two, the automatic mode will be the one you use most often. If an enemy is within range of your chosen weapon, pressing R1 will automatically target them, while the R2 and L2 buttons will cycle between targets. While you’re locked on, you can hit either the O button or L1 to fire your weapon. In most fights against multiple enemies, your lock-on will be the easiest way to get targetted; simply hit R1 to get an enemy, fire until he dies (the targeting cursor will go black when this occur), then release the R1 button and hit it again to get another target. Note that you have to be facing your enemy to lock onto them; if they’re off to your side or behind you, you’ll just wind up manually aiming your weapon at a wall, or locking on to some civilian.
The manual method of firing takes some getting used to, and has more circumscribed applications, but can still be handy in tight quarters. When you hold R1 to enter manual firing mode, you can use the right and left analog sticks to move CJ and aim, and use the L1 button to fire away. The aiming here is a bit too sensitive to easily line up your reticule with enemies beyond close range, and you won’t automatically lock onto enemies unless you release the R1 button and hit it again. Still, when you have a weapon that puts a lot of metal in the air, like an M4 or AK47, you can sometimes mow down multiple enemies that are close to each other more easily with manual aiming than with automatic firing. Manual aiming will also let you hit enemies that are outside of lock-on range.
Some weapons can only be used in manual aiming mode, such as the sniper rifle, the minigun, and the rocket launcher.
Weapons
There are many dozens of weapons in San Andreas. You can find most of these at the various Ammu-Nation stores in each city, but they’re expensive, and you’ll have to progress through the game’s missions before each will become unlocked. You can also obtain weapons from slain enemies, or find them in hidden pick-up spots around the game world.
Melee
There are a huge number of melee weapons in the game, from golf clubs to canes to swords. The most useful will usually be the knife, with which you can get stealth kills, and the katana, which will let you get decapitations and won’t prevent you from using your normal hand-to-hand fighting techniques.
Pistols
9mm: When you absolutely have to buck down fools, there’s nothing quite like a good 9mm handgun at your side. Cops drop these when they die, so if you’re looking for a plentiful supply of ammo, find an exterior save spot, get a few stars, then kill all the cops that come to hunt you. Save before you die, and you should have a lot more ammo than when you started. You can dual-wield nine’s when you hit the Hitman level of skill.Silenced 9mm: You can’t dual-wield a silenced pistol, but they do come in somewhat handy when you have to keep quiet. They’re also just plain cool.
Desert Eagle: Again, no dual-wielding here, and the rate of fire is drastically lower than a 9mm, but the Desert Eagle packs a lot of stopping power; even if your initial shot doesn’t kill your target, it will usually knock them down, letting you get in the killing blow before they get up. The low ROF and small clip makes the Desert Eagle a poor choice for dealing with multiple targets.
SMGs
Tec9: The Tec9 is the weapon of the streets, and will be what most gangbangers drop when you instigate a gang war. It has a slow rate of fire and poor accuracy, so as soon as you can upgrade to a MicroSMG, do so. You can dual-wield a Tec9 if you max out your weapon skill.MicroSMG: The MicroSMG is an improvement over the Tec9, both in terms of ROF and accuracy. You can dual-wield these as well, or use one MicroSMG and one Tec9.
SMG: The "real" SMG is similar to the MP5 of Vice City, and isn’t capable of dual-wielding, but will usually outclass the other SMGs in firing distance, and has superb accuracy, making it a great all-around weapon in any situation. The only weakness here is the small magazine; you’ll plow through the 30 rounds pretty quick, so get used to hitting R2 and L2 to reload it without having to wait for the animation.
Shotguns
Shotgun: If you have to take someone down at extremely close range, a shotgun is a good choice for you. Considering how rarely you engage people at point-blank, though, you probably won’t find yourself using this one too often.Sawn-Off Shotgun: Slightly larger spread than a Shotgun, if you consider that a good thing, but can only fire two shells before needing to reload. You can dual-wield this if you max your weapon skill.
Combat Shotgun: Essentially the same as a Shotgun, but with a much more rapid rate of fire.
Rifles
Rifle: If you have access to a sniper rifle or the M4, there’s really no reason to use a generic rifle, as it doesn’t possess a scope, and its range, while nice, doesn’t quite outweigh its poor rate of fire.
Sniper Rifle: This is really all you need from the rifle class. Although you won’t have much need of a sniper rifle in the game’s missions, it can still be fun to get up atop a building and snipe away at pedestrians or cops on the street below.
Assault Weapons
AK47: The world’s most popular weapon, the AK47 will be found in the hands of numerous bangers in your hood. After you unlock the gang war mechanic early in the game, you can instigate wars on enemy turf to find numerous AK’s, so stock up on ammo.
M4: You won’t get your M4 until later in the game, but once it’s buyable at the Ammu-Nation, you won’t ever use an AK again. It improves upon the AK in rate of fire, accuracy, magazine size, etc. This and the SMG will be the mainstays of your arsenal, with the M4 being a bit better at taking out foes at long range.
The Big Guns
Heavy weapons such as these aren't available at the Ammu-Nation, not even late in the game; you'll need to find pickups for them, or wait until you complete the game's final mission, when you'll be able to find them all at a certain spot in the game world. (Check the end of the walkthrough for more info.)
Flamethrower: The flamethrower will usually be the least-used of all the heavy weapons. Although you can use it to torch out large crowds of people, you can easily set yourself alight while spraying flame, and it barely affects vehicles at all.
Rocket Launcher: Old faithful! The rocket launcher is, as usually, pure death when used against dense crowds or vehicles. It’s a bit easier to find than the minigun, but isn’t quite as useful in this iteration of the GTA games, both due to the fact that it’s easy to blow yourself to pieces with a poorly-aimed shot, and they way that the helicopters move now - they’re much more difficult to hit with rockets in San Andreas than they were in VC or GTAIII. Still, if you can’t find a minigun, a rocket launcher serves as a handy back-up weapon when your back’s against a wall.
Heat-Seeking Missile: Although the M60 from Vice City has been removed, it’s absence is made good by the inclusion of the heat-seeking, shoulder-launched missile. While these are incredibly rare - you’ll never get them as part of a core mission - and only come in packs of three, their ability to lock onto targets makes them the weapon of choice when dealing with helicopters or pesky FBI trucks. All you need to do to use these is hold R1; you’ll get a green reticule at first, which indicates that the missiles are locking on. When the reticule turns red, let the missiles fly and they’ll trace towards their target and destroy it. As mentioned, though, you only get three with each pick-up, as opposed to ten rockets with a rocket launcher.
Minigun: If you’re looking for pure killing power, the minigun is probably your best bet; it even seems to outclass the perennial favorite, the rocket launcher, in terms of destructive capability, mostly due to the fact that you can’t hurt yourself with it. The minigun spits out dozens of shells a second, and even the slightest contact with the stream of lead will be enough to put down any foe in your way. Cars and helicopters are likewise easy to destroy with it. The one weakness is that you can’t automatically target foes with it, but this is small potatoes when weighed against its power.
Eating and Working Out
One of the much-hyped inclusions to the GTA gameplay are the eating and exercise mechanics. There’s no need to fear that GTA is turning into The Sims; these inclusions are relatively minor, and you can feel free to ignore them if you wish. If you do decide to partake in a bit of bulking up, though (whether it’s fat or muscle that you’re packing on), you’ll find that people will react to CJ in different ways, and he’ll have different abilities in the game world.
Eating
There are diners and fast-food joints all across San Andreas, serving up a variety of meals for CJ’s consumption. While the game intimates that CJ will lose maximum health if he goes without eating for too long, the length of time required for this to occur is apparently quite long; so long as you get a square meal once a week of in-game time or so, you shouldn’t have to worry too much about losing health. If you’re trying to get CJ nice and big, though, feel free to stuff his face with fast food; it’s cheap enough to do.
Exercise
A little exercise can go a long way in San Andreas, especially if you want to muscle up CJ. If you want to exercise, hit a gym; in each one, you’ll find both stamina-building workout machines (the exercise bike and treadmill) and muscle-building items (freeweights and the benchpress).
Muscle and Fat: Building muscle is really easy; just start with a small set of weights, place your index finger and middle finger over the X and O buttons, and tap them as rapidly as possible. The muscle index will build fairly quickly; you should be able to completely max yourself out in just a few visits, after which you can go to your wardrobe and remove your torso clothing to show off your rippedness. (Don’t forget to stop by a tattoo shop to get some ink!) Building muscle will also remove fat, and improve the power of your physical attacks.
Muscle will naturally decrease over time, so you’ll need to stop by the gym if you want to retain your honed physique. Again, though, this occurs fairly slowly, so don’t worry about hitting the weights every day. On the other hand, you’ll gain fat if you go too long without exercising. Again, though, this won’t affect you too much at low levels, and can be burned off incredibly quickly while you weightlift, so you shouldn’t ever have to worry about it.
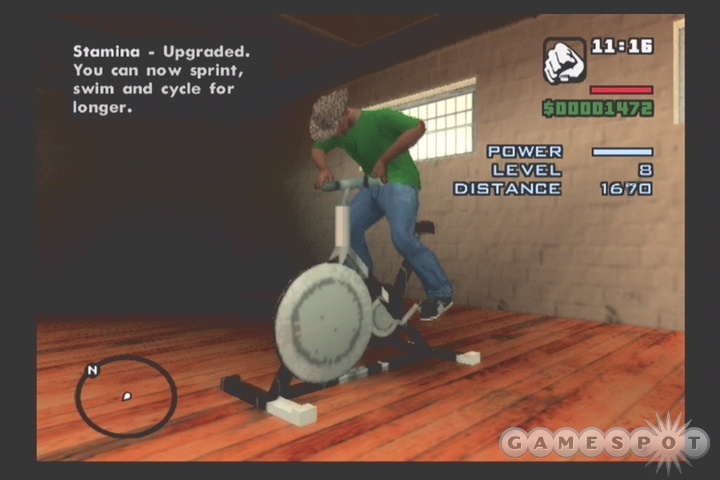
Building Stamina: You can build stamina by using the treadmill and exercise bike. This has much more of an impact on the game than does building muscle - you’re going to be running and sprinting much more often than you’ll be using your fists in combat - but also takes much, much longer to improve. The technique is similar, but instead of tapping the X and O buttons in short bursts, you’ll have to repetitively jam away at the X button while you’re on one of these machines - if you have a controller with turbo fire, this is an ideal time to whip it out.
Although your stamina increases slowly, it will never decrease through lack of exercise; the running-about that you do in the course of your travels will be enough to slowly improve your stamina resources.
Hitting The Wall: You can only exercise so much in a single day; eventually CJ will wear himself out, and you’ll have to save your game or advance the clock in order to continue with your workout. You can usually hit around 35 reps on the weights, or clock in for around five kilometers on the bike or treadmill before you have to pack it in. You can combine exercises, if you wish, but there is a sum total of exercise you can do for the day, so you won’t be able to do any treadmilling if you’ve already worn yourself out on the weights.
New Melee Attacks: As you bulk CJ’s muscle up, you’ll be able to talk to the various trainers in the gyms to learn new melee attacks. All you have to do here is defeat a single opponent in hand-to-hand combat; we managed to defeat three or four of these guys while only receiving a single blow in return, so trust us when we say that all you need to do is keep mashing your attack buttons, and you should win easily.
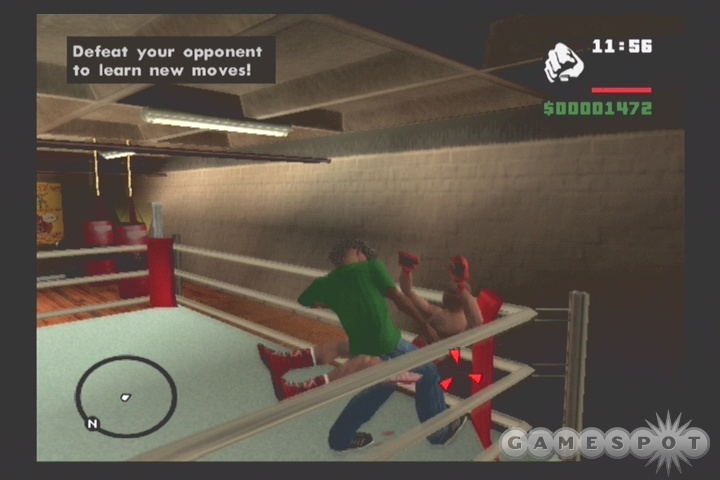
After you win your challenge, the gym or dojo’s trainer will give you a few new techniques to use in melee combat. This is more of a neat extra than anything that really impacts the game; you’ll rarely encounter situations where you’re forced into melee combat.
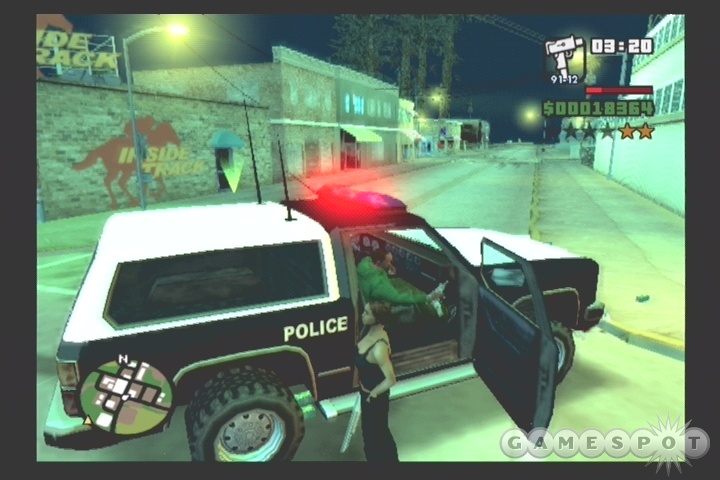
The Cops
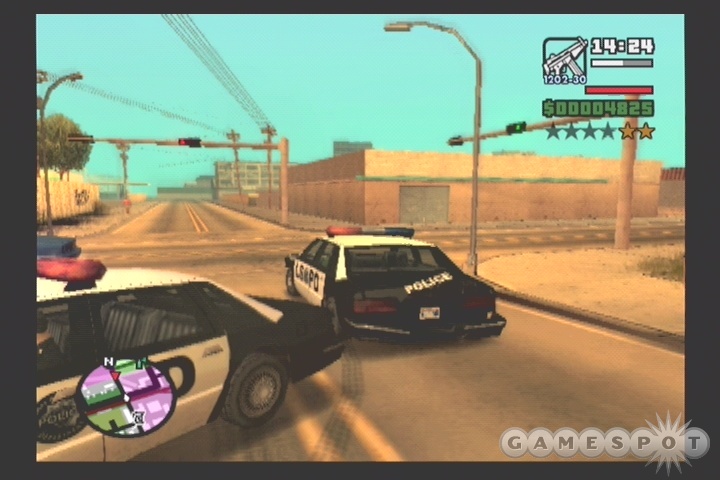
Say what you will about the cops of San Andreas, but you have to admit that they have a pretty tough job, even without a super badass, minigun-wielding, maniacal psycho roaming the streets. The cop population in SA has been increased over that of Vice City; it’s now fairly difficult to jack a vehicle in the cities without gaining at least a single star. There have been some other changes to the way cops work - you’ll now occasionally see them chasing down other criminals, for instance - but, for the most part, they’re still much the same as ever. In other words, you’ll probably have to fight your way through a bunch of them when they get wind of your crime sprees.
On the in-game HUD, you’ll note that there are six stars beneath your weapon and health displays; this indicates how aware the cops are of your deeds. You can have anything from zero stars to six stars, with increasing numbers indicating more fierce resistance from law enforcement professionals. You can increase the number of stars you have by committing random acts of violence, such as running people down, destroying cars, shooting cops, etc.
If you want to get rid of your stars, on the other hand, you have three options. The first is to find the hidden star pick-ups around the game world; walking over or driving through one of these will reduce your wanted level by one star.
The second method is to hit a Pay N Spray, indicated on your map with a can of spray-paint; entering one of these will let you repaint your car and eliminate all your stars at one go. The catch here is that you effectively have a probationary period after you exit the garage, during which you can’t commit any crimes, lest you return to your full wanted level; if you accidentally run over someone, you’ll return right back to your former wantedness, in other words. You also can’t take any police, military, or medical vehicles into a Pay N Spray.
Lastly, hitting a save spot and saving your game will fully eliminate all of your wanted stars.
One Star
You can earn a star in a few ways, but you’ll usually gain one by hitting a police car or bike, or by committing a crime, such as shooting someone or running someone over, within eyesight of a policeman. Since there are more cops than before, you’ll probably find yourself with a star if you do much of anything within the city limits.
At one star, the cops are on the lookout for you, but they’re not yet looking for you, if you follow our meaning. Any cop that sees you will attempt to chase you down and arrest you, but cops won’t suddenly spawn in and hunt you down. One of the big changes from Vice City is that cops will start shooting at you when you have a single star, so try to avoid doing anything naughty if you want to avoid getting blasted.
Two Stars
The cops start getting a bit more serious when you have two stars to your credit, in that they’ll start sending patrol cars out to bring you down, and will be a bit more aggressive in their pursuit. In most cases, killing a cop will jet you straight to two stars, but you can also get there by killing mobs of civilians or instigating massive property destruction.
Note that, when you only have one or two stars, they’ll fade away naturally over time, so long as you avoid any criminal acts.
Three Stars
The three-star level is really what separates the men from the boys. The quickest way to get here is to kill a cop, then kill any of his fellow officers that come by to arrest you. When you reach this level of notoriety, the cops start displaying new kinds of behavior, designed to box you in and kill you, in addition to their markedly increased numbers and aggression.
First off, they’ll set up roadblocks when you travel in a vehicle. You can bust through roadblocks fairly easily, but your car’ll take a beating from the collision, and from the gunfire of the cops arrayed nearby; it’s usually best to try and get up on the sidewalk and go around.
Secondly, cops will start to randomly spawn in on foot. Even if you’re atop a building, you’ll start to run into sheriffs everywhere you turn. If you’re in an enclosed space, you’ll probably be able to protect yourself from gunfire, as the cops aren’t very good at jumping fences and the like.
Thirdly, they’ll send out SWAT teams to take you down. These guys arrive in large trucks, and pack a bit more firepower and armor than regular cops.
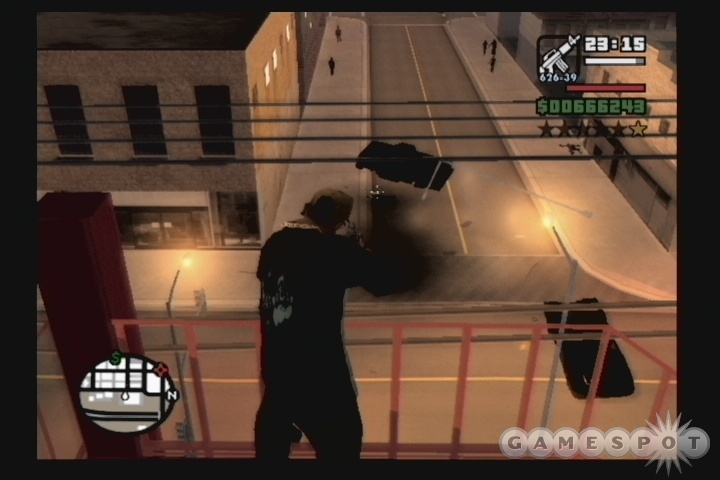
Lastly, the police will send helicopters to deal with you. The helicopters in San Andreas are much more difficult to take down than they were in Vice City, at least with rockets, due to the way that they bob and weave in the air. When you’re on a building, they also have the annoying habit of flying at eye-level, making them even more problematic to hit. These guys are trouble, both because SWAT members will rappel in from them, and because they’ll use their machineguns to blast you from above.
Four Stars
At four stars, you haven’t quite gotten to the level where the government feels the need to step in and take you down, but the local police force will have gotten well and truly sick of you, and will be sending in everything they’ve got to kill you before you can do any more damage. We’re talking massive numbers of cops, multiple helicopters, the works! Get to a Pay N Spray or save spot, or you’ll be dead before too long.
Five Stars
Although the sleek FBI coupes of the previous games are gone, the FBI themselves will still get involved when you hit five stars; this time around, they’ll exclusively use their SUV-style vehicles to roll up on you. FBI agents pack SMGs, and arrive in groups of four, so if you let them get too close, you’ll be toast.
As a note, flying over restricted airspace will automatically bump you up to five stars. Luckily, the only restricted airspace in San Andreas is the Restricted Area in Bone County, to the west of Las Venturas. If you fly over this military installation, the surface-to-air missile sites will lock onto you and attempt to take you down, and the Air Force will have its own little surprise waiting for you... (In point of fact, entering the Restricted Area on foot will also bump you up to five stars, prompting the incongruous appearance of massive numbers of sheriffs in the middle of an Army base.)
Six Stars
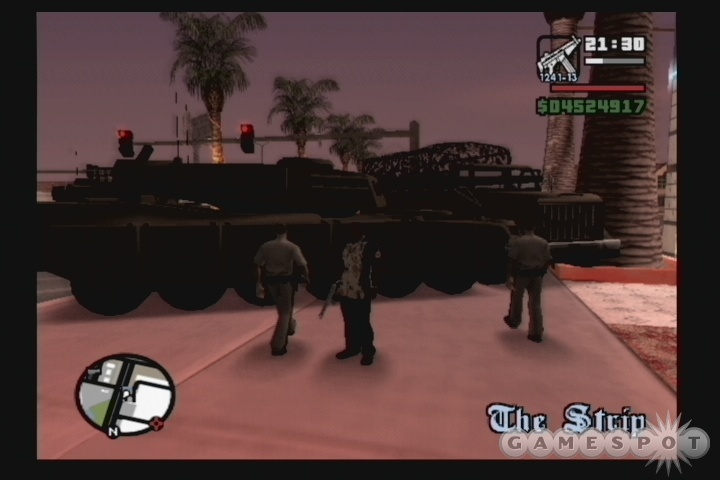
Everyone likely remembers the first time they spotted a Rhino tank rolling down the street in GTA III, and while the surprise of seeing the Army arrive to take you out might’ve dulled a bit by now, the coolness factor remains. The Army will, in fact, spawn two vehicles when you hit six stars; both the Rhino and the heavy troop truck return from previous games. Both pack grunts that wield M4’s, so you’ll have to keep your distance if you want to retain your bodily health.
As with previous games, you can jack a Rhino, and it’s still the awesomest land vehicle in the game. Check the Extras section for tips on getting one of these beasts.
Walk-Through
As with previous GTA games, San Andreas will see you obtaining missions from a number of different individuals. These will come in fits and bursts; occasionally you’ll run out of missions from a character, only to get more later on. For simplicity’s sake, we’ve listed each mission under the character that gives them, even though you usually won’t be able to run through all of a character’s missions in one go.
Los Santos
As with the previous GTA games, San Andreas begins with your character at a low point in his life. Your mother’s dead, crooked cops are hassling you, and you can feel the pull of the gangsta life that you left Los Santos to escape. Luckily for you, there’s nowhere to go but up, so get out there on the streets and start gettin’ paid.
After the initial cutscene, you’ll have to make it back to your home before you can start taking missions. If you want to go by the book, grab the bike near you and pedal it back; knowing how to use it will come in handy shortly. If you’re in a hurry, though, jack a car from the road nearby and head south until you hit the CJ icon. When you reach your house, get out of your vehicle and head into the red mission icon to head out to your Mom’s gravesite.
Big Smoke
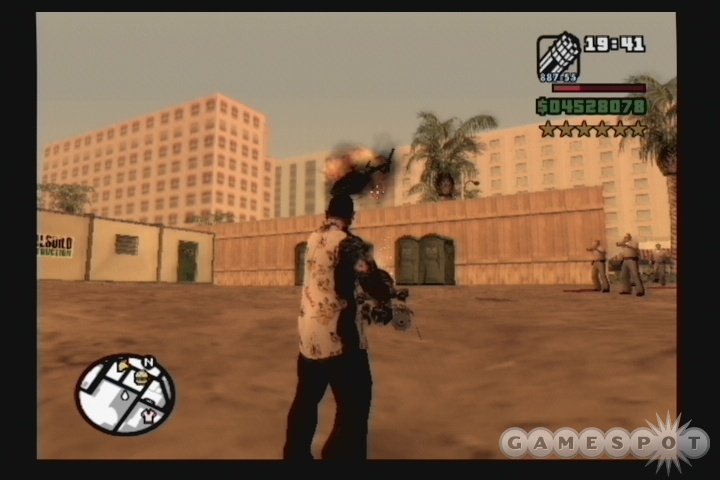
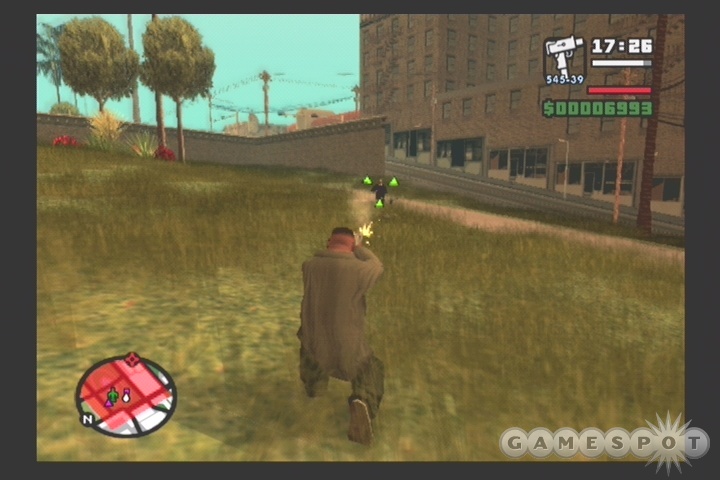
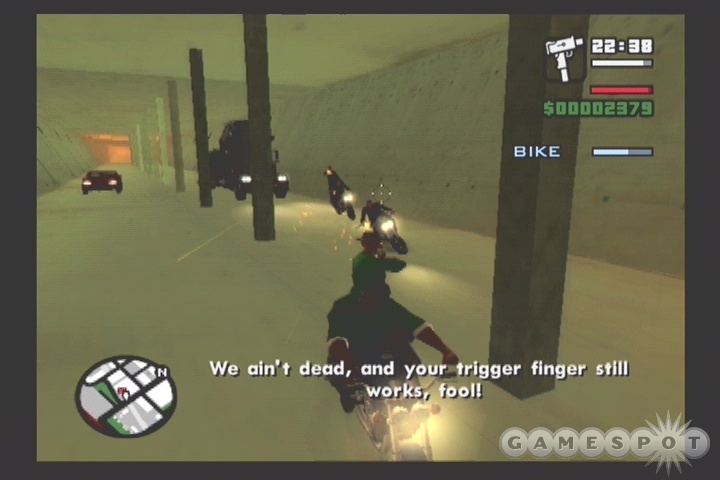
Your first real mission here is to escape from the Ballas gang members that are trying to gun you down while you bike away from the graveyard. Certainly not a proud moment in CJ’s life, and it can actually be a difficult task compared to some of the previous starter missions, so stay frosty! You’ll have to be conservative with your sprint, both because of the fact that you can’t pedal quickly for too long before you get tired, and because you have to make sure that you stay behind Sweet or Ryder as they lead you back to the hood. The Ballas are more trigger-happy than anything, so they won’t try too hard to run you down; just stay clear of the sides of their car and you should be able to avoid most of their gunfire.
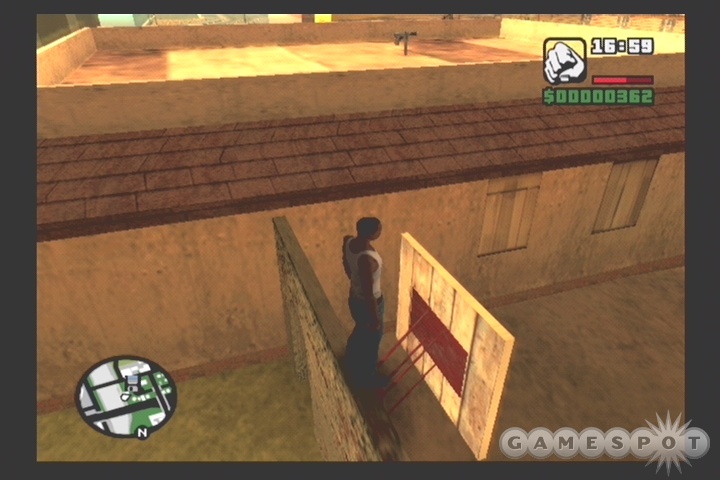
When you get back to CJ’s house, the mission will end. You can now enter the house to save your game and start with the game’s core missions, but you’ll want to outfit yourself before you do so! There isn’t a whole lot of equipment within easy walking distance, but you can grab a couple of submachineguns if you look around. The first is atop Sweet’s house; if you jump to the top of the wall that the basketball rim is attached to, you should be able to spot it and jump from there. The second is obtained by jumping down into the canal behind the houses and walking south a bit; the gun is located beneath one of the bridges. Between the two of them, you should be able to net 110 rounds of ammo each run, and they’ll respawn each time you exit CJ’s house, thus giving you an easy way to stay strapped in the early game. Try to get the gun atop Sweet’s house first, then pick up the one from the sewers, as the MicroSMG in the sewers is the superior of the two weapons, and you can no longer grab the ammo from a pickup without getting the gun itself.
Now that you’ve got a place to hang low, you can start taking missions, or start exploring the game world. The early missions are given by the other leaders of the Grove Street Families, namely Sweet, Big Smoke, and Ryder.
Your primary objective in Los Santos is to return your gang, the Grove Street Family, back to prominence in the city. Of course, you can’t make an omelette without breaking a few eggs, and there are plenty of eggs looking to get broke, mostly members of the other street gangs that have expanded their influence while C.J. was out of town. To that end, you’ll have to follow the lead of the other gang members in setting a course for the rest of the soldiers.
Sweet
Tagging Up Turf
This serves as your introduction to the spraypainting mechanic in San Andreas. You and your brother will have to spread out a bit and tag up the neighborhood, obscuring the tags of the Ballas and the Front Yard gangs. This is simple enough to do; just find the tags of the opposing gangs and spray over them with the normal weapon buttons. The first three are in Idylwood, and won’t be a problem to find; just make sure there aren’t any cops around when you spray, as it does get you a wanted star.
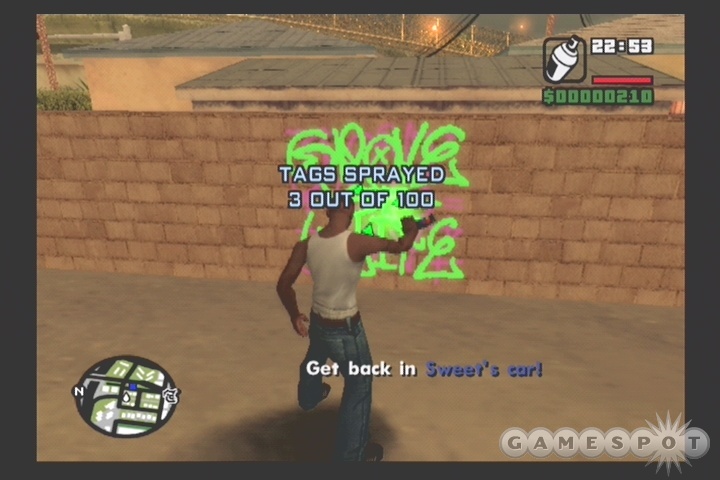
After you make your way through the Front Yard turf, you’ll have to head into Ballas territory and spray over three more tags. You’ll probably come into your first direct contact with hostile characters here, as one of the tags is guarded by a couple of Ballas; if you took our advice and got some SMG ammo, you can just blast them. Otherwise, you’ll have to spraypaint them in the face so that they bend over in pain before hitting the tag and running away. The last tag is atop a building; you’ll need to jump up to it. After you jump the second fence, turn left to find another jumpable block leading to the roof. After you tag that one, return to Sweet’s car and book it back to the hood.
Cleaning The Hood
Three tasks here:
First, check in on a pair of your friends. (They’re not interested in joining up...yet.) Secondly, find and beat up the crack dealer. This can be easily accomplished with your fists, but if you’ve obtained a gun, killing the guy works just as well. Lastly, clear out the crack den! As with the previous mission, you can either use your fists, or go straight for the Uzi and get right to the wetwork. The latter is a bit simpler, as there are multiple enemies to deal with.
Drive-Thru
Get to the Cluckin’ Bell drive-thru window. When the Ballas drive by, start following them and try to get alongside their car; your passengers should eventually deal enough damage to it to set it on fire. When this happens, the Ballas will get out, so either run them down or let your passengers finish them off.
Nines and AK’s
This mission serves as your aiming and firing tutorial. If you’ve played any previous GTA games, you likely won’t need the help, as the mechanics haven’t changed too much, save for the manual aiming mode. The sole new inclusion is the ability to fire at gas tanks to instantaneously blow up cars, but this is difficult to do when someone’s actually shooting at you.
Next up, Sweet will ask you to get some new clothes. Buy anything you like; the Binco store doesn’t have a huge selection of stuff, so you might not be straight ballin’ just yet, but you should be able to upgrade yourself from the plain t-shirt look that you’ve been sporting thus far.
Although this isn’t part of the mission, the Binco is right around the corner from the gym, so you might want to head inside and work out for a bit. If you hit the exercise bike and do four kilometers at level six or seven, you should be able to burn off almost all of the fat that you’ve built up so far; you can also use the weights to buff up a bit. There is a limit to how much muscle you can build per day, though.
Drive-By
You’ve got four groups of Ballas to get dead before you can complete this mission, so you’ll have to be watchful of your car’s health. Sometimes it’s easier to just run the Ballas down rather than stop and let your friends shoot them, but again, you can’t switch cars, so try to avoid taking too much damage.
After you finish off the Ballas underneath the bridge, you’ll get two wanted stars, so you’ll have to hit the Pay N Spray before you can clear the mission. It’s a few blocks to the south, so try to keep your car at or near max speed on the way, if only to avoid any police entanglements. Your car will likely be on its last legs at this point, and the cops will try to ram you when they spot you, but the faster you go, the less likely they’ll be to hit you.
Sweet’s Girl
Sweet’s pinned down in Seville, and needs a quick extraction from a sticky situation! Unfortunately, after you get his call, you’ll return outside to find that there isn’t a single vehicle on the street, so before you pick up this mission, you’ll want to stow one inside your garage and grab it. Sweet won’t stay alive forever, so you’ll have to get over to his location before his life meter runs out. If you’ve been faithfully getting the SMG ammo from atop Sweet’s house, you shouldn’t have to make a side-trip to Emmet’s to pick up any weapons, so just get over to Seville.
When you arrive, you’ll find no fewer than five gangsters trying to take out your brother. You can cap four of them with a standard drive-by motion, but the fifth one, who’s crouching on the steps, will likely require you to exit the vehicle and take him out on foot. After they’re all dead, grab a four-door vehicle and get back to your house before the Seville Families destroy your car!
Cesar Vialpando

Sweet wants you to check out your sister’s new boyfriend, the eponymous Cesar. In order to do so, you’ll have to engage in a bit of a lowrider competition. This is set up like a rhythm game, where arrows will float across the screen; if you push your right analog stick in the direction of the arrow just as it passes through the circle, you’ll gain points. Your opponent won’t do too well, so if you want a bit of easy money, save your game before attempting this mission, then bet the full thousand dollars on the competition; you should make it all back if you’re at all decent at hitting the buttons in time. That said, the timing is a bit sensitive, so don’t bet more than you’re willing to lose. (You can always just reload your game if you lose all your cash, though.)
Doberman
After you take the Cesar mission, Sweet will likely stop giving you missions for a while. After you pick up some CRASH missions, he’ll pop back up on your cell phone and send you out to take over Glen Park, which is Ballas territory. The Ammu-Nation store has a bunch of expensive weapons, but you should be fine for this mission so long as you have a few hundred rounds of ammo for your machine pistol.
When you’re ready to move on, head over to Glen Hill and start offing gangbangers; you should have plenty of targets to choose from. After you cap a couple, you’ll start the gang war. You’ll now need to survive against three waves of enemies, and you have to fight them all on foot, so stay crouched and fire at them from as far away as possible. If you stick to the middle of the park, you should have a clear view on all sides, and since the gangstas appear on your radar, you shouldn’t have a hard time locking onto them with your Uzi and taking them out from a distance. The game will explain a bit of the mechanics of the gang war mechanism here; when that little tutorial is through, the Grove Street traitor will pop out of a house and make a beeline for you. All you need to do to end the mission is take him out.
Although you can proceed onto another mission after this, you should probably take a little time to expand the Grove Street turf around your house. Gang wars are a great way to get money, both because of the tribute that will appear at your house, and because the bangers will often drop tons of cash. You can also find plenty of SMGs and AK-47s, so it’s a wise idea to get at least a little turf before saving your game and moving on.
Los Sepulcros
Sweet’s climactic mission revolves around ambushing a Ballas funeral which Kane, a Ballas bigwig, is attending. You’ll have to bring along a couple of gang members to the party, and use them to cover your approach while you focus on killing Kane. There are plenty of Ballas in the cemetary, though, so when the shooting starts, proceed with caution and use your SMG to drop any bangers that you see; when Kane pops up in your vision, though, switch over to your AK and use that to blast him from long range. He’s got armor, so he’ll take a few more rounds than usual, but you should be able to take him out without a problem.
Unlike a normal gang war, though, all this killing will attract the cops, so you’ll probably have a star or two before you get done. After you get into the getaway car, then, you’ll have to avoid any cops trying to bust you; if there are officers on foot, run them down and keep your car on them to prevent them from getting up while your homies get back in the car. After that, make a beeline back to the Grove before you get taken out.
Reuniting The Families
As always, the grandest plans are the most likely to go awry, and Sweet’s mission to reunite all of the families against the Ballas gets spectacularly upset by an influx of police. You’ll have to rescue Sweet from inside the motel in another corridor-crawl level before you finally reach the exterior. The one important bit here is the fact that there’s a body armor atop the stairs near where the SWAT team busts in through the skylight; if you can get that, you should be able to sweep through the rest of the building without a problem.
When you do leave the motel, though, you’ll face off against no less than a helicopter, so focus on taking down the SWAT members before killing off the helicopter itself. After that, Smoke and Ryder will pull up, resulting in another rail-shooter mission. The cops in the passenger seats of the cars are really difficult to hit, so you might want to concentrate on shooting the cars themselves until they get set on fire. You can expect to take a lot of damage, but you’ll hopefully reach the end of the rail before your car blows up. After you bust through the billboard, check out the modified tagline on it for a chuckle.
The Green Sabre
After you get through Sweet’s pep talk about destroying the Ballas, you’ll have to hook up with Cesar, who’s apparently been keeping an eye on Tenpenny & Co. Unfortunately for you, but perhaps not too unexpectedly, he’ll reveal that Smoke and Ryder have been working with the cops - and the Ballas - all along. You’ll need to rescue Sweet from the Ballas ambush, so get a car and get over to where the battle’s going down before Sweet’s life meter runs out!
Unfortunately, there isn’t much you can do for Sweet. He’ll live, but he won’t be able to help you kill off the Ballas in the vicinity. There shouldn’t be too many of them, though, so use whatever weapons you have at your disposal to off them. Eventually you’ll get a pop-up message alerting you to the presence of a Ballas car; use your R1 and L1 buttons in conjunction with the right analog stick to blow it.
After this little series of events unfurls, you’ll have to take a bit of a breather from Los Santos; you’ll lose all of your weapons and be forced to play around in the countryside for a while. Skip down to the Los Santos Countryside portion of the walk-through for tips on these missions.
Big Smoke
OG Loc
Before you can open up OG as a mission-giving character, you’ll have to pick him up as he walks out of jail. As soon as he hits the bricks, though, he wants to get right back into the gangsta life, and asks CJ to help him kill someone who disrespected him in prison.
When you reach the marker that leads you to the target’s house, he’ll hop out onto a bike, forcing you to give chase. Despite Loc’s best effort, he won’t be able to kill the guy while you’re riding around, so you’ll have to follow the mark until he gets off his bike. (And it’s going to be a looong ride, so keep the guy in front of you and watch his tire tracks to get an idea of where he went if you lose sight of him.) When he finally does de-bike, he’ll wander into a group of comrades, so take them out with extreme prejudice.
OG won’t give you missions just yet, though; you’ll have to drop him off at his job before that occurs. If you got wanted stars during the chase, it’ll be difficult to get all the way to the restaurant without getting arrested, so you may want to check your map for a Pay N Spray before heading out.
Running Dog
Running Dog is one of the simplest missions in the game! Just drive Big Smoke to the "meet," then, after the cutscene’s over, chase down and kill the marijuana dealer.
Wrong Side of the Tracks
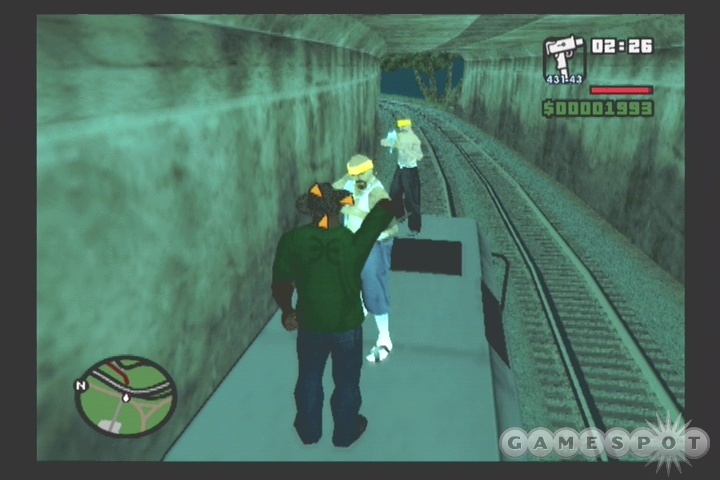
This is another simple mission, in theory, although it can be difficult. After you escort Big Smoke to the marker, you’ll have to hop onto a Sanchez and chase a train that’s loaded up with rival gangstas. Smoke will fire away as you drive, so long as you can stay near the front of the train, he'll automatically lock onto one of the gang members and start plugging away, but you'll have to keep him in position for a while before each gang member dies, as they have a ridiculous amount of health. Also note that Smoke aims at the rearmost banger first, then switches to the guy in front of him, and so on; thus, you should keep a little bit behind the train's engine car to prevent the gang members that he's not shooting at from having an easy shot at you.
The train is about as fast as your bike - faster when you’re going uphill - so you’ll have to avoid accidents and crashes if you want to take out all four of the foes. You may notice jumps on either side of the train tracks on occasion; if you can run your bike off of one of these and land on the train itself, you can shoot away at the gang members yourself, but you may leave Smoke a ways behind if you do so.
Eventually you’ll take them all out, though, although it’s likely to take some time, so enjoy your little trip through the backcountry before escorting Smoke back home.
Just Business
The last two missions can’t quite prepare you for Just Business, a sprawling two-parter that will probably take you a couple of dry runs before you succeed. Be sure to save your game before attempting it, if you don’t want to lose all of your weapons when you get processed through the hospital!
The first segment here sees CJ and Smoke fighting their way through a horde of Russians. Why? We’re only left to wonder; the Russkies don’t really figure into the rest of the game’s plot. Anyway, you’re going to be in a ton of trouble if you don’t have a couple hundred rounds for your SMG; if you do, though, you can just cycle your locks to clear out most of the first room. Quickly scoop up any cash or ammo on the floor, and be certain to grab the body armor from the rear of the room before meeting up with Smoke. You’ll have to make your way through another gauntlet outside, but you’ll get a health refill after you do so, so stand up and take them down any way you can.
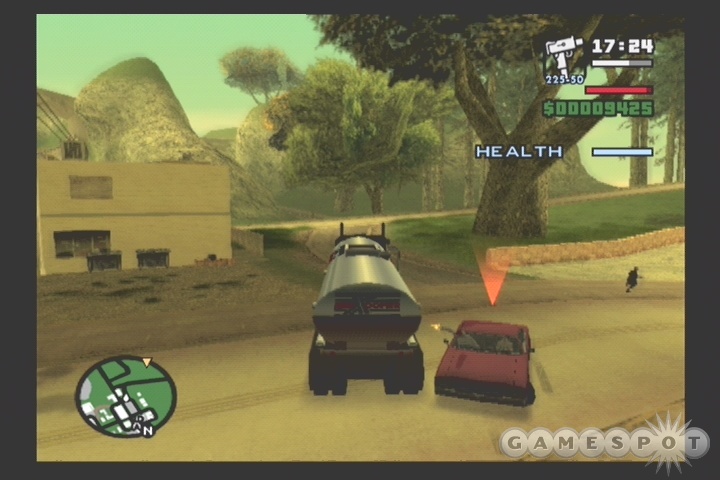
The second part is by far the harder, as it sees CJ hop on the back of a motorcycle, firing away at Russians as Smoke attempts to escape through the crowded city streets. The Russians will pursue you in cars and motorcycles, as well as in a car-transport truck. You can’t hurt the truck, which is the source of most of the scripted events during the chase, so focus on the motorcycles first. Both the drivers and the passengers of the motorcycles will fire at you, so pick them off (you’ve got unlimited ammo) before moving on to the cars. The Russians in the passenger side seat of the cars will shoot at you, as well, so you’ll need to shoot them (either through the side or through the windshield) to eliminate that threat.
It’s a long, long chase, so you’ll have to keep your finger on the trigger if you want to survive. You’ll know that you’re almost near the end when you jump over the exploding truck. Like we said, though, it’ll likely take a few runs before you actually beat this mission, so don’t feel too discouraged if you happen to die.
Ryder
Your first mission with Ryder is a simple tour of the shops around the neighborhood. You can get a haircut at the barbershop, if you wish, although you shouldn’t spend too much before you have time to go shopping for clothing; you might want to get a hat that’ll obscure whatever you get done now. Next up is learning how to buy a meal; you’ll need to do this occasionally to prevent the loss of health. The cheapest meal is only two dollars, though, so you shouldn’t have to worry about going broke.
Unfortunately, Ryder will try to rob the place after you get your meal, and you’ll have to beat a hasty retreat. If you want a shotgun, run down the pizza clerk after he follows you outside and grab his; otherwise, just get back to your house to end the mission. Next up is Sweet’s Tagging Up Turf mission.
Home Invasion
Your first Home Invasion mission is relatively simple; just take Ryder’s truck to the house marked on your map, tilt the right analog stick very gently to sneak around, and grab three or more of the crates within the house and return them to the truck. Three is all you really need; you can grab more, but it doesn’t seem to have any effect on your mission rewards. When you’ve loaded the truck, drive it to the storage facility and enter it to end the mission.
Catalyst
There are three parts to this mission. In the first, you have to hijack a train laden with crates of ammo (which obviously pass through inner-city LA all the time); unfortunately, by the time you reach your destination, the train is already under siege by a rival gang. You’ll need to kill them and the trainworkers (use your car to run them down), then fend off the Ballas who’ll come to finish the deed.
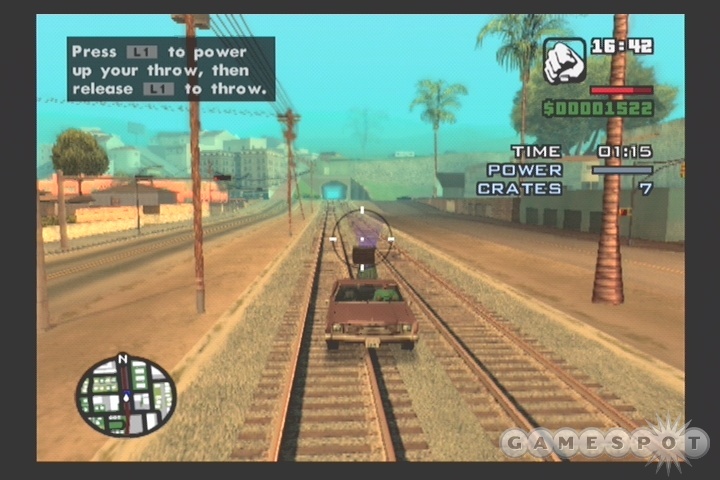
After you get onto the train by entering the red trigger area near the end, you’ll have to throw the delicate and highly explosive crates to Ryder as he trails the train in a car. This isn’t too difficult to pull off; just aim a bit above his head and hold down the O button for a longer period of time if the car falls too far behind you.
When Ryder has his ten crates, you’ll have to make it to the Pay N Spray to avoid the police. Hit it up, then return to the hood.
Robbing Uncle Sam
Ryder’s role as unofficial armorer of the Grove Street Families encourages him to come up with some pretty crazy scheme, but knocking over the National Guard seems to betray some kind of deathwish or sociopathic tendencies. Regardless, you’re going to be along for the ride, so hop into the truck and make your way down to the Ocean Docks.
When you arrive at your destination, you’ll have to hop over the wall and get into the National Guard compound. When you’re inside, kill the guard and shoot the switch on the wall near the gate, then repeat the process for the warehouse, but watch out for more Guardsmen, as they’ll continually pop out of the buildings nearby during this mission.
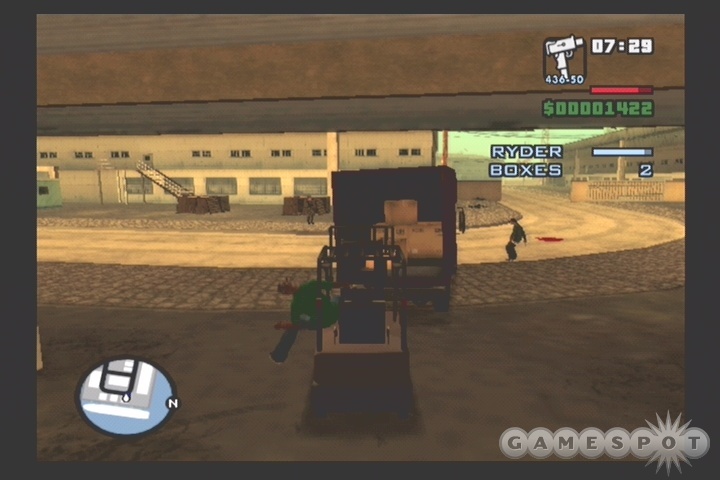
After you’ve opened the warehouse and killed the soldiers within, grab the forklift and use it to fill the truck with crates. You’ll need six crates in all, but you can’t leave Ryder unprotected, or he’ll get swiss cheesed by the soldiers. After every crate loading, then, hop out of the forklift and blast any Guardsmen in the area; this should keep Ryder above half health until you finally get into the truck and make your way back to the hood. You’ll have to make your way back to Emmet’s place to end the mission, so check your map and plot a course ahead of time. If you get followed by the National Guard hummers, you can have Ryder throw explosives at them from the back of the truck by clicking on the left analog stick.
Cesar
High Stakes, Low Rider
This is a simple checkpoint race against five other cars; if you’ve played either of the other GTAs, you should know the drill. To enter the race, you’ll need a low-rider, but don’t worry if you don’t have one, as there should be a Blade parked a couple doors down from Cesar’s house that’ll do the job fine. One of the nice new additions here are the inclusion of arrows in the waypoints, which’ll let you know which way to go. Once you see the pier, you’ll know that you’re at the homestretch, so floor it and take home your thousand dollar reward.
OG Loc
Life’s A Beach
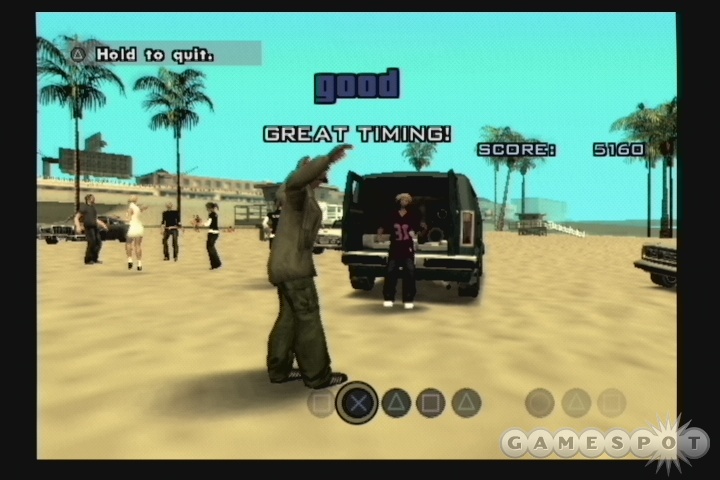
Life’s A Beach is another funkdafied rhythm contest for you to get frustrated with. This one’s a lot, lot tougher than the lowrider competition, as instead of simple analog stick movements, you’ll have to hit the face buttons of the controller as they scroll by. It’s all in the name of music, though; the end goal of the dancing contest is to steal a sound truck for Loc’s rap party. When you’ve proved yourself a master dancer, get in the truck, kick out the DJ, and cruise back to the stash and drop the vehicle off.
If, for some reason, you really like dancing, you can hit up clubs that are scattered throughout the cities in San Andreas for more fun.
Madd Dogg’s Rhymes
Loc seems to be catching on to the fact that he’s not a very talented rapper, so your next task is to find and retrieve the lyrics journal of one Madd Dogg, presumably a rapper himself. You’ll have to find his home before you can break into it, which can be easier said than done, as it’s high up in the Mulholland hills. If you find yourself passing underneath the bridge leading to the house, you can get out of your car and climb up the hill on foot; it’s much easier to ascend slopes while running than it is while driving.
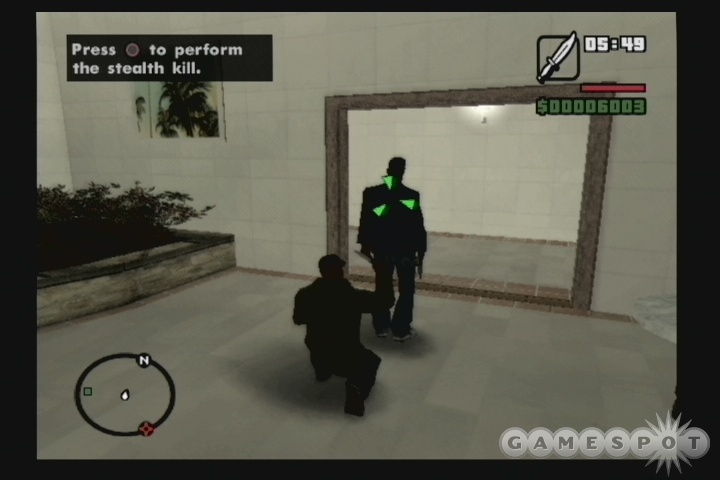
When you reach the mansion, you’ll be pointed to the back of the house; after heading inside, you’ll get a little tutorial on stealth kills. If you happened to play Manhunt, Rockstar’s other paean to mindless brutality, you should recognize the mechanic, since it’s fairly similar (in manner, if not in pure cathartic violence) to those of that game. You’ll need to sneak up behind the guards while crouched, wait for CJ’s hand to raise, then hit the O button for a stealth kill.
There are two more guards between you and the recording studio, where the rhymes are kept. The first paces around the swimming pool, so wait until he turns his back to you, then follow him along - at a distance - until you reach the next room. Another guard will approach, so duck into one of the changing rooms and wait for him to assume his position before moving on. When you hit the bar, sneak past the first guard, then stealth kill the man playing video games. The recording studio is right around the corner, so grab the body armor, knife the sole guard, then grab the rhymes.
After you obtain your treasure, new guards will spawn in, carrying silenced pistols. If you wait for a minute, one will take up position near where the body armor was, so sneak up behind him and knife him to obtain the new weapon. You only have five rounds for it, but you should only need two to kill a guard, so make your way back to the door through which you entered and escape.
Management Issues
Now that you have Madd Dogg’s rhymes, it seems that his manager is putting the squeeze on Loc. Since CJ seems somehow compelled to help him out no matter what the cost, it’s up to you to kill off the manager while he attends an awards ceremony.
Before you can get close enough to the manager, though, you’ll have to steal one of his cars. A driver is eating at a burger shop nearby, so head there, then damage the car enough to force the driver out. You can ram it with your own car, after which the driver will step out and start firing at you.
Now comes the hard part! You have to meet up with the other drivers before ten o’clock (22:00), but you have to arrive in a pristine car, meaning that it can’t be damaged at all. You’ll have to drive down to the spray shop by the beach, then carefully maneuver yourself up to the driver rendezvous without hitting anything. No pedestrians, no cars, no streetlights - nada. You’ll need at least an hour of game time to get to the rendezvous, which means that you probably won’t have enough time for more than two shots, so if you think you’re going to miss the deadline, just reload your save and try again.
When you actually get the car to the rendezvous, though, things get a bit easier. You have to stay between the other two cars until you get to the awards show, but it’s a straight shot there and the drive only lasts 30 seconds or so. When the manager gets into your car, jam on the gas and head towards the pier marked on your map. When you reach the end of it, bail out of your car and watch it sail off into the ocean.
House Party
After you finish off Management Issues, Loc wants to throw a party. He’ll relocate back to Grove Street, so head back home and hit up his house after ten o’clock, when he’ll start showcasing his NBA superstar-grade rap talents. Things quickly take a somewhat less-than-festive turn, though, as the Ballas gang initiates an ambush!
You’ll have three waves of enemies to deal with here. The first will be on ground level, and will hide behind their cars, so you may have to maneuver a bit in order to hit the last stragglers. The second group is atop the bridge that runs over your hood; these are easy to kill, since they have no cover. The last and biggest group will attack from the alleyway nearby. If you have some body armor, you should be able to just stay in the open and blast away, but it really helps a lot if you have a lot of SMG or AK-47 ammo. Watch your targeting, and make sure no one (especially Sweet) gets between you and your target. After all of the enemies go down, you can rest easy knowing that the Ballas won’t try anything that stupid again.
C.R.A.S.H.
Burning Desire
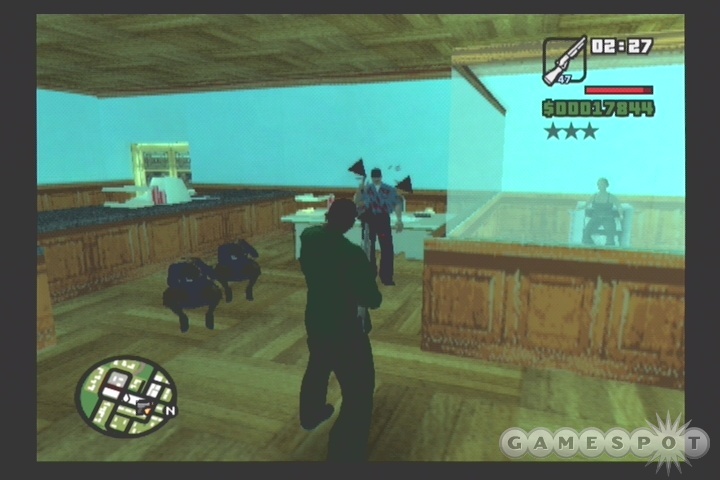
After you pick up your first mission from the cops (at a donut shop, yuk yuk), track down the Molotovs and head over to the gang den. There are plenty of bangers around the house, so make the rounds and clear them out before you start chucking firebombs through the windows. When the house does get nice and toasty, though, you’ll discover that you’ve stranded a girl inside, and it’s up to you to get her out.
After heading in through the front door, locate the fire extinguisher in the kitchen (to the right of the entrance), then proceed to the rear of the house to find the steps. You can use the extinguisher with the normal weapon keys to extinguish any fires in your way; just use the R1 key to automatically point it at the base of a fire, and spray away.
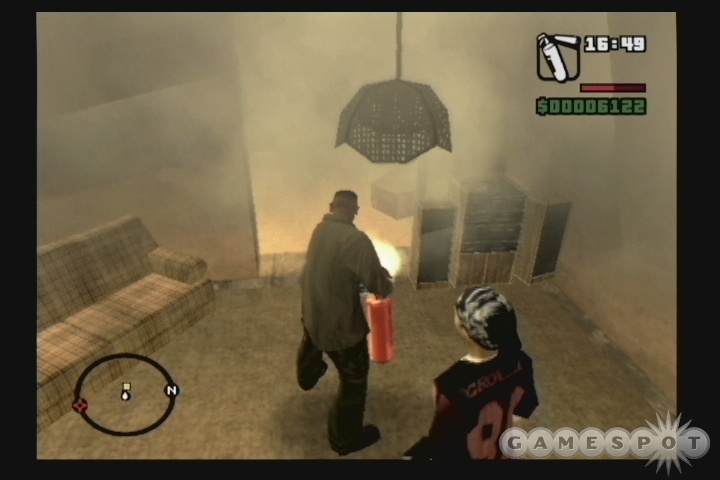
When you reach the girl, you can start escorting her out, but stay close to her, because her pathfinding isn’t all that great, especially on the first floor. Be sure to stay out of the fire, though, as you’ll lose around half a health bar when you get set aflame. Eventually you’ll get the girl out of the building, and will be able to drop her off at her house, where she’ll become your first girlfriend. If you want to fool around with this feature, feel free, but if you haven’t made enough money to buy a new house near the OG Loc and CRASH missions, you should probably pinch your pennies until then.
Gray Imports
Tenpenny’s got a tip for you: the Ballas and the Russians are meeting at a shipping facility near the docks. It seems that the Ballas are looking to bring in some more firepower with which to finish off the Grove families, and it’s up to you to stop them.
Begin by heading down to the warehouse and clearing out the exterior. Watch out for the forklifts which’ll come to attack you; one of them has explosive barrels loaded up, so manually aim for them to destroy the whole vehicle. To get into the warehouse, you’ll need to shoot the switch on the wall, but be careful, as there are three Ballas just beyond the doorway.
When you reach the interior, you’re going to have to clear it out row by row. Get used to manually aiming and firing with the L1 button; if you stick with the O button, you won’t be able to fire very quickly due to the fact that you’ll also need your thumb for the right analog stick. There are health and armor pickups inside the warehouse, so walk over them if you’re running low.
After you clean out the bulk of the Ballas, you’ll have to head upstairs to find the Russian arms dealer. He’ll attempt to escape, and will probably make it to his car before you can kill him due to an insane health count. Just keep on his tail, ignoring the gunfire of the guards outside unless you’re near death. When the arms dealer reaches his car, jack another one and give chase! You’ll need to destroy his car in order to complete the mission, so bang him around and do drive-bys while you coast alongside him.
Los Santos Backcountry
After Tenpenny evacuates you from Los Santos, you’ll have to do a few favors for him and a pal of his before you can move on to San Fierro. The missions here sometimes involve annoyingly long rides across the country, so if you fail and die or get busted, you can choose between loading your savegame to get all of your weapons back, or just hitting the mission again. If you reload, you’ll have to make the trip to your destination again, but if you just try again without reloading, you can take advantage of the game’s trip-skipping feature.
C.R.A.S.H.
Badlands
Your first mission for the CRASH bandits involves tracking down and killing an internal affairs snitch. He’s way up in the mountains, so you’ll probably want to track down one of the Sanchez dirtbikes before you head up. You’ve been stripped of all your weapons due to your "arrest," but you can find an Uzi behind a trailer to the southwest of the CRASH mission spot. There’s also a save spot right next to the CRASH trailer, so save up before you head out.
When you reach the hideout, get out of your vehicle and approach on foot towards the back of the cabin. The Feds are all over the place, but the guy you really have to worry about is the snitch; he’ll leave from the back door and head towards the car in the driveway. If he gets in, you’ll have to chase him down and kill him, but if you tag him as he’s leaving the cabin, you can drop him before he gets in the car and make your way back to the drop zone on your own time.
Catalina
First Date
Cesar’s cousin is...feisty, to say the least. After you escort her from the bar, she’ll have four sub-missions for you. They’re not mission-critical, but they pay well, and you’ll have to do at least one before you can move on with the story. Since it’s close by, head over to the gas station near the bar to start with Tanker Commander.
Tanker Commander
Since your stickup at the gas station doesn’t go too well, Catalina decides that it’s time to hijack a nearby big rig and tanker. You’ll have to back the rig into the tanker quite slowly before it hitches on; after you’ve got your load, start heading west out of town. If you follow the road, you should find your destination without a problem. The only trouble here will come from losing the tanker; if you turn too sharply or go over a big bump, it can detach, which will fail your mission. If you do happen to fail, don’t be stupid and reload your game like we did; you don’t lose any weapons or anything, so just head back to Catalina and try it again.
First Base
Thanks, Rockstar, for putting Catalina halfway across the damn state. You’ll need to drive for five minutes or so just to get to her, but at least she’s near a save point, so hit it before entering the house. After a little sweet talk ("I’ll let you kill anyone you wanna kill, baby!"), you’ll have to hit one of the other three robbery missions. The closest one is the off-track betting shop in Montgomery, so take the Buffalo and head out.
Against All Odds
The actual robbery of the betting shop goes fairly smoothly; after you blow open the safe and retrieve the cash (stand well away from the explosion!), though, you’ll have to deal with a four-star wanted level. The nearest spray shop is all the way down in Dillimore, so plan your route with the zoomed-in map and get there right quick.
Gone Courting
Love...is a very tender thing.... This is another interlude mission, so do your business and hit the road. Your next robbery takes place in Blueberry, due west of the hideout.
Local Liquor Store
Unfortunately for you, the liquor store you and Catalina were planning to rob will be hit just before you get there by a gang of rednecks on ATV’s. You’ll manage to nab one for yourself, though, so you’ll have to do your best to keep up with the robbers while Catalina kills them. They’ll drop briefcases full of cash when they drop, so drive over them or retrieve them on foot before continuing your pursuit. Don’t forget that CJ can shoot his Uzi as well, even straight ahead (by pressing the O button), so don’t let Catalina have all the fun. When you retrieve all of the cases, return to the hideout to get your share of the cash.
Made In Heaven
Well, the honeymoon is officially off. Head out to the last robbery after Catalina cuts you loose.
Small Town Bank
When you arrive at the bank, Catalina will tell you to cover the employees with your shotgun. You can hit the L2 and R2 buttons to cycle through them, which will encourage them to keep their hands in the air, but it doesn’t matter, as their hands will drop faster and faster until one of them presumably reaches the alarm. Instead of going through the motions, then, aim at the security guard (on the far right) and blow his head off, since he’s the only one of them that has a weapon.
After the alarm sounds, bust open the three ATMs and grab the cash before heading out the backdoor. You’ll have another little gauntlet of sherrifs to run through before a couple come in on bikes; kill these and start riding off through the backcountry.
When you reach the next town, Catalina will get surrounded by cops, so let her go on ahead and dismount while you’re still a ways away from the police, then take them out with whatever long-range weapon you have. After you finally get back to the hideout, you’ll be able to take another mission from Cesar; just wait for him to call you on his cell phone.
Farewell, My Love
Another race, this time involving someone who appears to be the unnamed main character of Grand Theft Auto III. The race itself is an exact reversal of Wu Zi Mu race that Cesar initiated, but you’ll be in a tight little ZR-350 this time, meaning that you’ll have an even harder time controlling yourself while you’re on the dirt roads. The good news is that you should be a lot faster than the AI cars, especially in the straights, so if you can build up a good lead, you can take the twists and turns near the river at the end of the race at your own pace.
After you win, get out of the car to get a cell phone call from The Truth, who has another mission for you.
The Truth
Body Harvest
When Tenpenny says jump, you say how high (for now, anyway), and, for the moment, he wants you to help the enigmatic stoner known only as The Truth. Truth wants a combine thresher for his farm, and since the only one around is tooling around on a survivalist retreat, guess who gets to retrieve it?

Said task is, as ever, easier said than done. The survivalists are armed with hunting rifles, and although they can only fire one shot at a time, those things sting. You’ll want to enter the farm in an enclosed vehicle, jacking one from the highway if necessary, then slam on the gas until you hit a wall. When you can’t go any further, get out of the car, jump the wall to the field, then jack the thresher and hit the road. You can’t be hurt while you’re in the combine, and it appears to be indestructible, so go crazy and mash up all the survivalists; just don’t get jacked out of it. Feel free to go off-road with the combine; the easiest route to Truth’s farm is actually straight south from the survivalist camp and over the cliff. The combine should right itself if you land funny, and Truth’s farm is only a short distance from the train tracks.
After you deliver the combine, Cesar will appear to give you missions back in Angel Pine.
Are You Going To San Fierro?
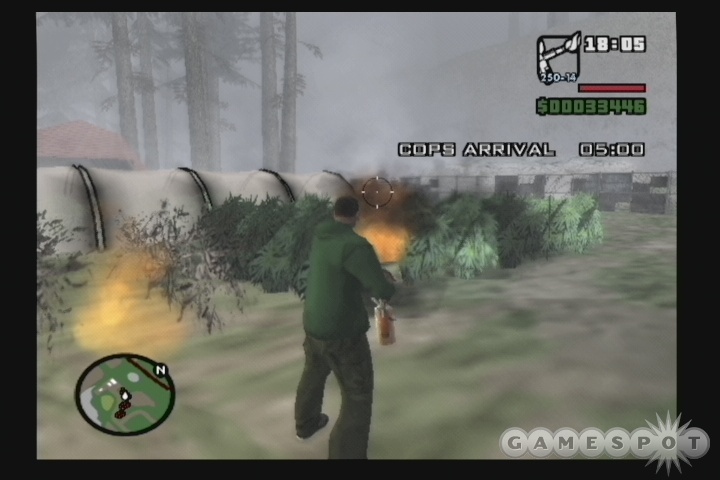
The Truth finally has your weed, and you finally have his money, so hook up with him to get the heck out of town. Things don’t go as planned - when have they ever? - as the cops arrive, forcing you and TT to burn all of his weed with flamethrowers. You have a surfeit of time here, so be thorough, and don’t roast any weed patches longer than you have to, or you might run out of ammo.
After the weed’s all burned, the police helicopter remains, but luckily, TT has an answer for that, too, in the form of your very first rocket launcher. Get as misty-eyed as you wish, but don’t dawdle too long; blast the chopper and get going to San Fierro.
Cesar
King In Exile
This isn’t much of a mission; although Cesar gives you some disturbing news, all you’ll be able to do afterwards is take another mission from Catalina.
Wu Zi Mu
This Chinese businessman sponsors racing around the back country, for some reason or another; since you’re always on the lookout for money, you can take a spin for a cool 5,000 dollars. If you do this mission after you get done with Catalina’s robbery missions, the Buffalo might not spawn at the hideout; if you have to run down to the highway, be on the lookout for Ranger-class cars, as they have both the mass required to knock other cars around and the stamina to survive a long race, which this surely is.
You’re going to want to take it slow during the first part of the race, until you cross underneath the bridge and get on solid ground. The only real sticking point here is the farm; after you find yourself on a ranch, you’ll want to avoid the tempting ramp in the middle of it, and instead veer off to the left or right to stay on solid ground. From there, keep working around the track until you hit a logging camp; you’ll double back to it up the twisting road nearby, and end the race inside of it.
San Fierro
This city, based on San Francisco, has a number of huge hills on which to get Insane Stunts. It also features one of the few exterior save points, so if you want to build up your weapon skills, start blasting away with your chosen weapon on the civilians near the garage, then hit the save point when the cops start coming. A couple dozen cycles of this will let you max out a weapon skill, but you’ll have to have plenty of ammo, obviously.
The hidden items here come in the form of screenshots that you can only see when you’re using your camera. Check our Extras section for more details and locations of these.
CJ
With Flowers In Your Hair
After you’re done screwing around in San Fierro, you can start taking missions. The first isn’t given by any specific NPC, but is listed as "CJ" on your map. This is a simple little escort mission, where you have to take Truth around to find a few friends. No combat, no wanted stars, no high-speed chases; just get your garage set up and start getting your business running.
555 We Tip
Tenpenny wants you to frame a D.A. by loading up his car with dope while he makes a stop at a hotel.
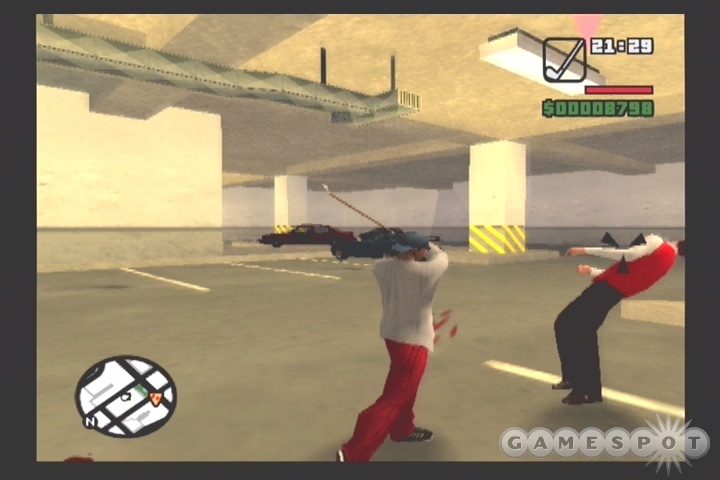
First off, head to the Vank Hoff hotel downtown and follow the valet into the garage. After he gets out of the car, kill him and take his uniform before returning to the hotel’s driveway. You’ll have to wait for the D.A. to arrive in his car, but don’t worry about memorizing its make and model; you’ll be notified when it arrives. Note that you can’t just kill the other valets here to make sure that they don’t get the car, because if you do, you’ll fail the mission.
After the D.A. comes up, grab his car and drive back to your garage. You don’t have to worry about any damage, so head two blocks west, then floor it back south until you hit your stash. You’ll then have to drive it carefully back up to the hotel; you can damage it a bit, but if it takes too much damage, you’ll fail. When you get to the hotel, watch out for valets on the ramp down to the parking garage, as killing either of them will be an insta-fail as well.
When you have the car safely stowed away, return outside and call the cops.
Deconstruction
This is another two-parter. Firstly, grab a bulldozer and destroy the six portable trailers in the construction lot above your garage. You have to get a bit of momentum behind yourself before you can actually pop the trailers, and you’ll have to be careful about getting jacked by the construction workers, but apart from that, this shouldn’t be too difficult.
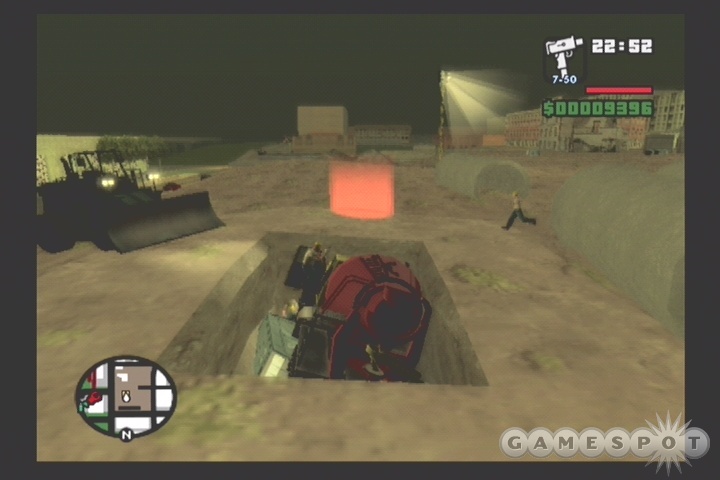
Next up, you have to kill off the construction foreman, who’s holed up inside a portable john. You’ll have to maneuver him into the ditch near his position - the dozer should suit you well for this task - then back up a cement mixer and fill in the ditch while he’s in it.
After that bit of Hoffaesque business is taken care of, wait for Jethro to call you on your cell; when he does, you’ll be able to take some driving school classes at the facility down the road to the south.
Back To School
The driving school takes the form of 12 discrete driving challenges, each of which will force you to score 70% or higher to pass. For most of them, the trick is to avoid hitting cones, as they pop up a 10% or 20% penalty. The good news is that the tests are short, and thus easy to repeat over and over until you pass them.
The exception is, of course, the last mission. This sees you trying to get from the driving school all the way to a bay halfway across the city without getting damaged, all in under two minutes. You have significantly more leeway on the damage than you do the time, though; the damage takes the form of a percentage penalty, not an automatic failure, so don’t get too concerned if you bump somebody. A good path is to take the inner-city streets until you hit the waypoint, driving on the lines or on the trolley tracks to avoid traffic, and then scoot down the eastern coast on the highway there before jetting back up towards the school. If you’re on the highway, keep an eye out for a big brown factory on your right side; when you see it, drive up to its northern side, where there’s a ramp just big enough to fit your car onto. (There’s also Body Armor here, so note the position for future item runs.) Taking your car up the ramp will get you onto the rail lines, and it’s a short trip south to the road leading back up to the school.
Photo Opportunity
Cesar’s got a line on some Ballas that have been running dope into San Andreas, so meet up with him in the back country. Don’t worry about keeping your car in nice condition on the way down there, but Cesar will refuse to get into any car but his own, so you’ll need to keep his in one piece until you hit Angel Pine.
When you do reach your old haunt, all you have to do to complete the mission is photograph four men, but you’ll have to get a close-up of their faces. Two arrive in the garage across from your position, while two more roll up on the road off to the right. After you get them all, you’ll have to make your way all the way back to the garage in San Fierro before your next mission. Ugh.
Jizzy
The delightfully named Jizzy is apparently the biggest pimp in town, and if CJ wants to get close to the Ballas connections, he’ll have to get close to Jizzy.
You’ve got four tasks to run for Jizzy before he’ll start giving you missions, though, and you’ll have to do all of them in his pimpmobile, so keep the collisions to a minimum. First off, drop off the girl at the hotel, then head up to Hashbury and take out the rival pimp. The pimp will run south when you catch up to him, so approach from that direction and drop him before he manages to get around the corner.
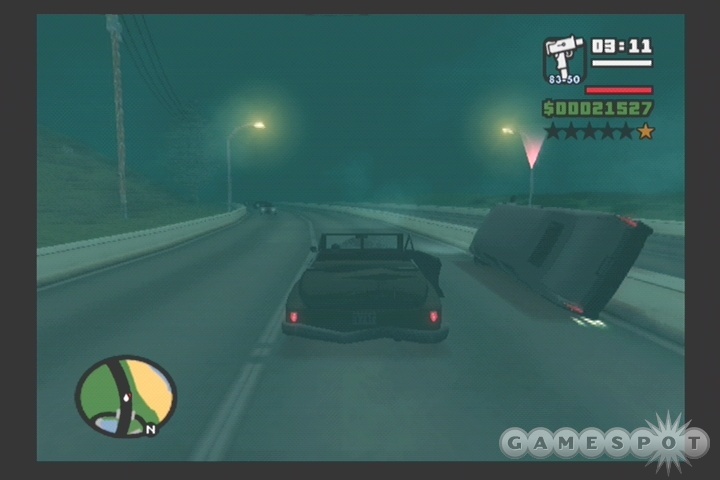
Next up is a timed run towards a ho in trouble, so get to her before the hometer runs out and kill the two freaks before they ice her. The last mission here is the toughest, as you’ll have to take down two cars while still in the same pimpmobile; use your Uzi to do most of the damage to avoid wrecking your ride. After both cars are destroyed, you’ll end the mission, but you will have a two-star wanted level to contend with as you make your way back to a save point. Luckily, you can ditch the ride and grab something else to ride back to the garage with.
Outrider
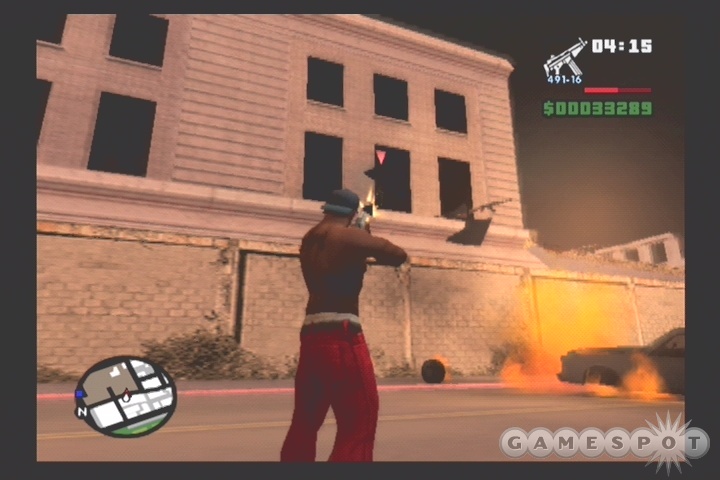
Now, this one’s just plain fun. After the cutscene with T-Bone and Toreno ends, grab the rocket launcher and sniper rifle and get on the bike. You’ve got four roadblocks to take out before the van can get to its destination, so hit the first one as soon as possible. The other three are fairly close to the first, so if your Sanchez gets destroyed, you can probably just proceed on foot. The only thing to be careful for are the soldiers that are watching the road from the windows of buildings; you can lock onto them fairly easily with your Uzi or SMG, though, so you shouldn’t have a problem.
When you get the van to where it’s going, you’ll complete the mission, but you’ll get three wanted stars. Book it back to the garage and save your game to get in the clear.
The Courier
The Courier isn’t actually a discrete mission. Rather, if you accept Cesar’s phone calls on Wednesdays and Saturdays, he’ll let you know that a courier is running drug money from San Fierro to San Andreas; if you take him up on the challenge to track the courier down, you can make a fair amount of money when you get the kill, but it’s difficult to actually find the guy. As Cesar says, the guy goes off-country, so if you don’t have a Sanchez or some other kind of vehicle that can handle itself in the dirt, you can expect to have the courier ride circles around you. You can always wait until he hits pavement before making your move, but it’s still an awful amount of effort for a relatively small payday (you generally get a couple thousand dollars).
Ice Cold Killa
After you nab the silenced pistol from Cesar, take a ride down to Jizzy’s club and climb in through the skylight. You’ll have to use the scaffolding near the bridge pillar to get above the roof, then drop down. Once you’re inside the club, you can just turn around and drop to the floor to start the next cutscene; although it looks like you’re high enough to take some major falling damage, the cutscene actually begins before you hit the ground, so no need to worry.
After the cutscene, you can either blast out all the fools in the club, or head straight for the door to give chase to Jizzy. He’ll take off in a fairly speedy car, so avoid the limo next to him and go for one of the cars in the parking lot instead. Blow his car, chase him down on foot, and grab his cell to complete the mission.
Pier 69
Now that you’ve put a dent in the cocaine cartel by killing Jizzy, you’ll have to take down T-Bone and Ryder. Start off by meeting up with Cesar on a building near the docks; there’s a barely visible alleyway behind the building, with a set of stairs leading up to the roof. On it, you’ll have to use a sniper rifle to pick off the gang members that are assaulting your Triad friends.
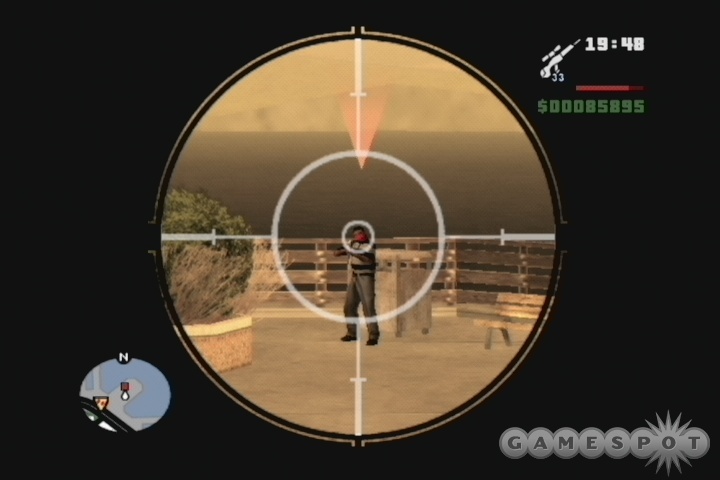
When the roof’s clear, move down to the streets and start proceeding towards the rear of the building. Although the cutscene made some noise about smoke grenades, you should be able to use your sniper rifle to full effect here, after you clear the first little set of car obstacles. You can use the sniper rifle to shoot out the bangers from farther away than they can see you, so take your time and get your headshots. Your initial target is T-Bone, so get up onto the wooden walkways and snipe him out from above.
After T-Bone gets grilled, Ryder’ll make a break for it in a boat, so give chase and engage in one of those always-plausible marine drivebys. If you run out of ammo, you’ll have to ram his boat onto land to make it blow up, but Ryder can’t shoot you, so you shouldn’t have any problem staying alive long enough to effect this.
Toreno’s Last Flight
After Jizzy, T-Bone, and Ryder’s deaths, the only living member of the cartel is Toreno. Cesar’ll give you a little intel at the beginning of the mission; seems Toreno is riding out of San Fierro in a helicopter, which you’ll need to shoot down if you want to ensure that Grove Street stays free of base.
Begin by riding over to the helipad. There’ll be a bunch of Ballas around the area, firing away at you, but try to avoid killing every single one of them, as you will get stars for their deaths, and having a wanted level higher than one star will make the following little test much harder. You see, after you get close to the helicopter, it’ll take off, forcing you to give chase, rocket launcher in tow. Jump on the motorcycle at the bottom of the helipad and ride down the freeway, stopping every once in a while to fire away at the heli. All it takes is two good shots to crash it, but it’s tough to hit due to the way it slides from side to side over the road. If you can’t hit it before it heads south of San Fiero, it’ll hover over the point where the freeway forks, so wait for it there and slam it.
Yay Ka-Boom-Boom
Now that you’ve offed the heads of the crack operation, you can strike the decisive blow by destroying the factory that they use to make their product. Begin by getting a wired car from the garage that Wu Zi refers you to. Don’t worry, there isn’t any requirement to keep the bouncing to a minimum, as there was in Vice City; you can bang the car up as much as you want, although you’ll want to keep it fairly healthy before you reach the factory.
When you do hit up the facility, kill the guards outside to convince them to open their gates, then bust through the guards, find the ramp leading into the building, and drive until you reach the bombing location. Ignore anyone you meet; it’s not worth risking damage to your car by running around and attempting to drive-by everyone that’s firing on you.
After activating the bomb, you’ll have 40 seconds to get out of the building before it blows. Again, don’t worry about the guards; just hold down your run button and head for the exit, and you should make it out without any problems. You’ll have to fight your way back to the gate, but before you can run out, it’ll shut! Your last resort is to take the car that the homeboys were driving and jump the ramp to leave the factory. This isn’t difficult, but the car isn’t armor-plated or anything, so you’ll need to get out fairly quickly or it’ll explode due to all the gunfire.
Jizzy
T-Bone Mendez
This is another relatively simple task; just chase down the motorcycles, get real close to their rear ends, then snatch the cocaine with your L1 button. The bikes will start chasing you as you pluck them of their sweets, but you should be able to lose them without a problem, and you’ve got plenty of time in which to maneuver. Take all the packages back to Jizzy when you’re done.
Mike Toreno
Mike, the badass brains behind the whole cocaine operation, has apparently been kidnapped by more bangers looking to score by taking a van of the coke. It’s up to you and T-Bone to track him down while he talks to you on his cellphone.
Luckily, whomever grabbed the van apparently enjoys joyriding immediately after they jack a truck full of blow, as you’ll have to track Toreno to the building site next to your garage, then down to the docks, then over to the airport before you catch up to them. If you get there with more than two minutes remaining on the clock, the van will be situated near the radar tower in the northeastern corner of the airport; after that point, it starts to move around. When you roll up, the gangsters will dump their rides and come gunning for you, so drive a distance away before getting out of your car and taking them down from range.
After you torch the van, you’ll have to get Mike and T-Bone back to the Pay N Spray to lose the cops. You can only do this in a car that can be painted, so avoid jacking a police car if you can avoid it. The easiest way to get to the spray shop is to take the turn onto the highway, then drive in the oncoming lane until you reach the section with the unfinished left wall. You can drop from there right onto the Pay N Spray ramp.
Wu Zi Mu
Mountain Cloud Boys
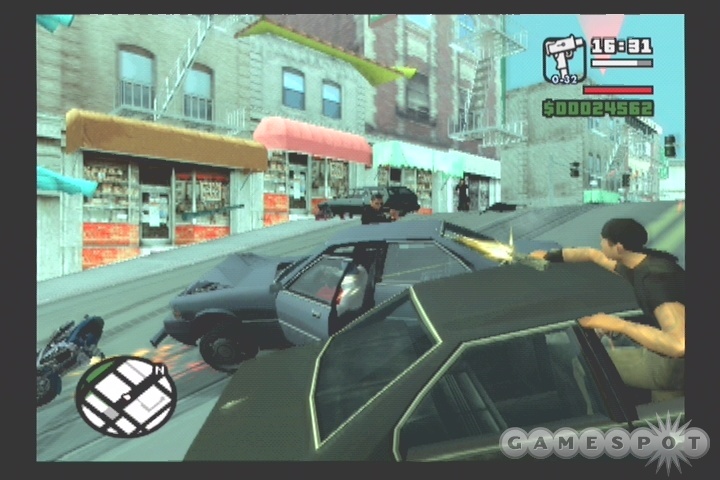
It looks like Wu Zi’s been having some trouble from the Vietnamese gangs, and shortly after you begin this mission, you’ll be caught up in the middle of it, as the Vietnamese ambush you and Wu Zi in an alleyway. You should be any stranger to fighting off hordes of enemies, so beat them back with your Uzi until you reach your car. At this point, you’ll have to let Wu Zi shoot away at the cars that chase you; you’ll need to stay close enough to let Wu Zi fire away, but keep enough distance to avoid getting blown away yourself when the other cars explode.
Ran Fa Li
An associate of Wu Zi’s requires a favor, and Wu, like any good puppetmaster, places the favor on you. You’ll need to retrieve a package from the underground parking lot at the airport and move it all the way back to the docks. Getting there is the easy part; you’ll have to deal with Danang assassins during the entirety of the trip back to the docks. The main trouble will come in the form of a pair of biker blasters; let them get alongside you, then try to ease them into a building or wall to shake them for a bit. Avoid the city streets during your trip; instead, just take the road along the coast. If you can make it to the docks, all you have to do is park the car in the red circle to end the mission.
Lure
Besides the long-ass ride out into the countryside, this is a pretty simple mission. It’s essentially a race, checkpoints and all, save that your opponents will be trying to shoot at you. You’ll be in a Ranger, and although you won’t be able to stave off the motorcyclists’ fire, you will have a bit of a speed advantage on declinations, so floor it and get to the gas station before you get too badly damaged.
Amphibious Assault
If you haven’t been training up your underwater breathing skills - and let’s be honest, you haven’t been - you’ll need to upgrade your lung capacity before you can take this mission. The easiest way to do this is to find a body of water, dive underneath and swim downwards for a bit, then let CJ float back to the surface. You won’t lose as much breath while CJ is motionless, allowing you to spend more time underwater per dive, thus letting you upgrade a bit more quickly. You’ll need to get three or four full lung capacity upgrades (meaning that it’ll pop up a message letting you know that you can breath underwater for a longer period of time) before you can actually go through with Wu Zi’s plan.
Said plan, obviously enough, involves a lot of swimming. Wu wants you to plant a bug on a boat in the harbor, but you’ll need to swim underneath the surface to avoid the Da Nang patrol boats. Getting past them, thankfully, isn’t too difficult; swim just underneath the surface until you run out of breath, then come back up for another lungful. The guards won’t shoot you when you surface, so long as you don’t move until you dive again. The boat has a ladder on the far side from the shore, so dive underneath it and jump onto the float there to get aboard.
Now, if you make a lot of noise, the guards will come running, so it’s worth your while to get stealth kills. You can use the knife near the ladder, if you wish, but it’s a better idea to just get through the garage and Jizzy missions until you get the Ice Cold Killa mission, in which you’ll be furnished with a silenced pistol. Use that to make headshots on the guards, then proceed to the boat’s cargo hold and plant your bug. All that stands between you and a completed mission at this point is a swim back to shore, so jump off the boat and get hoofing.
The Da Nang Thang
Get some body armor before you begin this mission! Trust us, it’ll come in handy.
You’ll start out here on a rail-shooter mission, but don’t fret if you’re bad at these, as you actually can’t win this one; the helicopter you’re in will get hit by an RPG, forcing CJ to sidle up the side of the freighter and start killing Da Nang boys the old-fashioned way. You can get some easy stealth kills as you move along, but eventually you’ll run across a couple of guards that’re facing your way, forcing you to get back to basic spray-n-pray mechanics. Hopefully you’ve upgraded your Machine Pistol skills to Hitman, as dual-wielding these TEC-9’s will come in really handy here.
Regardless, make your way back down the boat (don’t miss the health refill in one of the small passages), then drop down into the hold. More bastards here to kill, and keep an eye on the red mark on your radar; it pinpoints the location of the refugee’s main guard, who’ll open his assault by chucking a grenade at you. Run into his line of sight to trigger the attack, then run back out to avoid the blast before returning to drop him.
After you free the refugees, you’ll have to return up to the deck of the ship and move up to the bridge to kill the snakehead. He’ll force you to a katana duel, but he’s not too hard to take down, especially not if you’ve trained up in some martial arts. Begin by using the triangle button for a kick to stun him, then just wail on him until he dies.
C.R.A.S.H.
Snail Trail
Another joyous assassination mission from Officer Tenpenny, who wants you to shut up a journalist and a snitch. This one’s simple, but annoyingly time-consuming, as you’ll have to follow the train that the journalist’s on all the way to Los Santos. In point of fact, you shouldn’t follow it at all, but rather speed ahead of it until you reach Market Station in Los Santos, at which point you can get out of your car and jack a new one on the street above in preparation for following the journalist after he gets a taxi. Once the journo makes it to the pier, kill both of the targets to complete the mission.
Zero
A note: Zero’s missions are optional; you don’t have to complete them to finish the game. Keep this in mind when you hit the Supply Lines mission, which can be terrifically frustrating. If you do manage to complete these missions, though, you’ll unlock the RC Shop as an asset, which will generate money for you over time.
Air Raid
Air Raid may be just another point-and-shoot mission, but it’s a toughie. Your goal is to protect Zero’s transmitters from hordes of incoming RC airplanes. You have a minigun with unlimited ammo, but your targets are very small, and the minigun jumps when it fires. If you want to up your kills, don’t fire while aiming; you’ll improve your accuracy if you’re zeroed in on a target before blowing it out of the sky. Also, keep an eye on your radar to discern between the incoming targets and those that are leaving the area; after a plane drops its bomb, it crashes, so don’t waste your time shooting anything other than incoming targets. Also, keep an eye out for clumps of planes; there are a couple of instances of planes arriving in groups of four or five. If you can’t shoot them all down, you’ll probably lose a transmitter.
Supply Lines...
Supply Lines is one of those missions that separates the men from the boys. It’s almost certainly going to be the most difficult mission you’ve come up against thus far, if not in the entire game, so don’t feel too frustrated if you don’t succeed on your first few (dozen) tries.
The basic gist of it is that Zero wants you to take a remote-controlled plane, find five of Berkeley’s deliverymen, kill them with the plane’s machineguns, and return the plane to Berkeley’s shop without the plane running out of fuel or getting shot down. The first time you get into the plane, though, just ignore the deliverymen and concentrate on learning how to fly the plane itself, as it’s a beast to control. What you should try to focus on is keeping the plane level and lining up behind targets before throttling back and opening up with your machineguns.
The deliverymen travel much more slowly than most cars, which is to your benefit, but you’ll still be required to make an almost perfect run if you want to get the plane back to Zero’s place while it still has fuel left. The trickiest one to take out will be the deliveryman on the motorcycle, as he’ll fire back at you after he’s alerted to your presence, and can shoot down the plane relatively quickly, so focus on getting him lined up before you open fire. If you find yourself consistently crashing and burning due to lack of fuel, try running a different route on your next attempt. The van to the south of your start point is usually a good place to start, as he will continue moving south from there and will require more fuel to hit if you save him for later.
(If you're having a lot of trouble beating this mission, and are willing to cheat to get past it, enter the Faster Gameplay code. This will let the plane move much more quickly than normal, without burning extra fuel. If you want to revert to normal afterwards, use the Slower Gameplay code to counteract the effects of the first code.)
If you have a truly difficult time hitting people, try landing the plane behind or in front of a target and firing from the ground. You can rotate on the ground by using the R2 and L2 buttons to line up with your target. Also, keep the X button depressed while you’re in the air; it doesn’t affect your fuel consumption at all. If you want more time to fire on a target while flying, hit the Square button to decelerate.
Beyond those rudimentary tips, this is essentially a mission based on a little bit of skill and a whole lot of luck.
New Model Army
Zero’s last mission involves a large-scale model of a battlefield. Zero’s going to be attempting to enter Berkeley’s base in his little car, while you get to do the heavy lifting in your helicopter. Don’t worry, though; if you passed the last mission, this one should be cake.
Take a couple seconds to get used to how the helicopter handles; it’s much easier to control than the model airplane. Your primary tasks here are: lifting barrels out of the way of the car; placing planks across the rivers that don’t already have bridges; and destroying Berkeley’s tanks with bombs. You can use your magnet with the O button, but you can’t hold it down; you have to tap it while you’re hovering over a metallic object in order to trigger it. The biggest risk of failure comes from the tanks, which can quickly damage Zero’s buggy if you let them. You can use bombs to kill them in one good shot, or you can drop barrels on them form a height to inflict somewhat less severe damage. Barrels are sometimes the better choice, though, especially if you’re low on time. If you find that things are going well, though, you may want to leave Zero at one of the barrel obstacles and grab bombs to take out the tanks before they get a chance to hit him.
When you complete this mission, you’ll gain the RC Shop asset, which will generate cash for you over time, as well as a cool 7,000 smackers up front.
Cesar
As with Zero, Cesar’s missions in San Fierro are optional. When completed, they’ll open up the car dealership asset. They’re much easier to do than Zero’s, though.
Zeroing In
Getting cars for the dealership isn’t just about jacking them and riding them back to the garage, as it was in Vice City. At least, not initially; instead, you’ll have to run discrete missions to get a few of the cars on the list.
To begin with, ride out with Zero and track down the car that a woman is driving. You’ll have to follow the triangulation signals until you catch up to her, then use a P.I.T. maneuver to spin her around and force her out of the car. The P.I.T., in case you skipped driving school, involves coming up alongside a car, then tapping it on the rear side to spin it around. If you perform one of these on the car you’re pursuing, the woman will exit the vehicle, allowing you to drive it back to the garage.
Test Drive
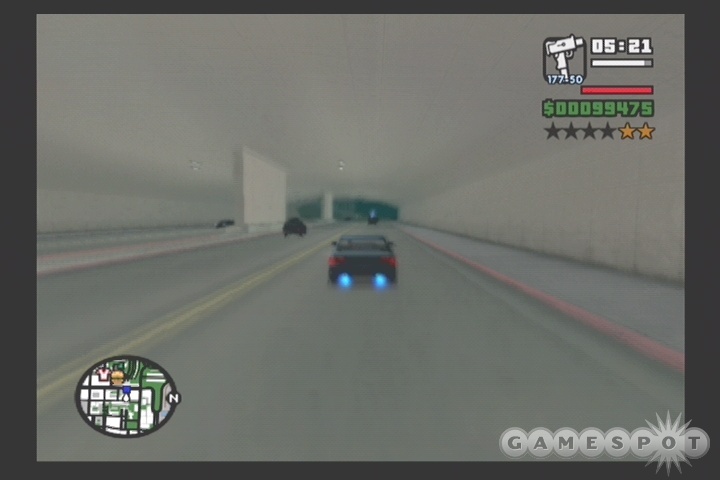
After you grab the cars out of the garage, you’ll have to follow Cesar on a little scripted adventure through the city. Nothing too troublesome here, but you might want to lay off the nitro, as it makes your car somewhat difficult to control.
Customs Fast Track
All you have to do here is go down to the docks and use the crane to get the crates off of the ship. The leftmost crate was the one that contained the car for us, but it may be randomized, so grab any that you wish and lower them to the ground for Cesar to inspect. After you get the correct car, exit the crane, kill off the attackers, and drive back to the garage to pick up your winnings.
After you complete this mission, you’ll unlock the import/export mini-game at the docks.
Puncture Wounds
Another fairly simple one. Take the car you’re supplied with, track down the car you’re targeting, get in front of her, and hit the O button to drop your spike strip behind you so that she runs over it. Luckily for you, the tires miraculously regenerate when you get into her car, so drive it back to your garage to unlock the asset money for the dealership.
Las Venturas Countryside
Toreno
Monster
Your first mission for the enigmatic voice is a simple race against time. You’ll have to maneuver the monster truck through 35 checkpoints in less than six minutes and thirty seconds, but you shouldn’t have a problem meeting this time if you take it nice and slow. The main problem here is flipping the truck; there are plenty of bumps in the path, and the truck itself is rather springy, so you’ll likely wind up upside down once or twice. Do your best to right yourself quickly, so as to not sink too much time into flailing about. The 35th checkpoint is the end of the race, so keep yourself paced with that in mind.
Highjack
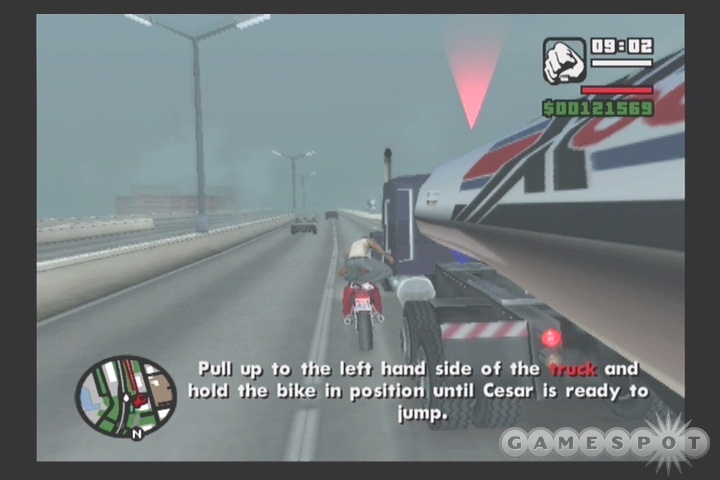
You and Cesar are going to have to get all Indiana Jones on a semi if you want to stay in Tereno’s good graces. To begin with, head northwest from Toreno’s place on the bike until you get onto the gray suspension bridge leading back to San Fierro; the tanker’s going to be on the road heading south, so you’ll need to come up alongside it and hover there until Cesar can jump over. This can be pretty difficult to manage, as contact with the truck will often send you careening off to the left, but you should be able to manage it eventually.
After Cesar eliminates the driver of the tanker, bring it back to the garage in San Fierro to complete the mission. You’ll need to wait for Tereno to call you before you can pick up another mission.
Interdiction
There aren’t any simple wait-behind-the-plane-and-pick-up-the-packages missions in San Andreas; instead, you’ll have to get to Toreno’s checkpoint, ride your vehicle up to the top of a nearby hill, use a rocket launcher to protect the chopper as it drops its package, retrieve the package, return it to another checkpoint, then finally return to Toreno to get your paycheck. Although you cover a lot of ground here, you’re not on a timer for any of these steps, so get cracking and get paid. Of particular note is the fact that there’s a Seasparrow heliboat near the point where the package lands, so you can use it to deliver the package and then fly back to Toreno’s location, if you wish.
Verdant Meadows
There’s nothing to this one; just return to the airport that you passed by during the last mission and purchase it. Despite Toreno’s intimations, you won’t actually be able to buy it for a dollar; you’ll have to pay a cool $80,000. If you don’t have the scratch, you’ll need to raise it in whatever manner you see fit: exporting cars, collecting cash from your assets back in San Fierro, etc. After you get the airstrip, you’ll have to learn to fly before you can take any more missions from Toreno.
Learning To Fly
If you thought the driving missions were tough, then you should be unpleasantly surprised by the airplane and helicopter training sessions; these things are hard. The tutorials are explained fairly well, so it comes down to a matter of practice and repetition before you get past them, and get past them you must; you have to complete all the tests before you can move on with the core missions of the game.
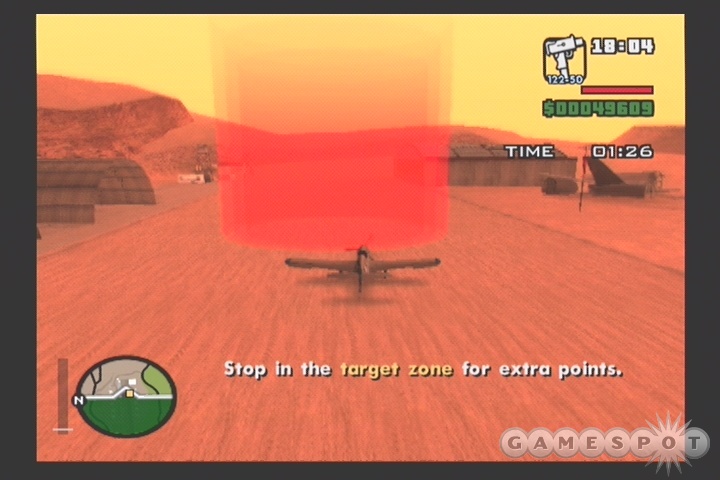
For the plane, try to keep adjustments to a minimum while you’re in the air. In the banking missions, make soft turns after each corona and wait for your plane to level itself off; the fewer adjustments you have to do as you approach a corona, the better. The helicopter missions are generally easier than the planes, although using the weapons will take some getting used to. You can expect to spend at least half an hour trying to get through all of these, so get to it.
N.O.E.
N.O.E. (which stands for Nap Of the Earth, meaning to fly really, really low) will see you taking up an airplane and, well, flying really, really low. You’ve got way more time than you need for this mission, so don’t feel pressured on that count.
After you take off, avoid making a hard left; Fort Carlson is restricted airspace, and they will shoot you down with SAM’s if you fly too close. The main caveat for the rest of your flight is the fact that you have to fly no more than a couple hundred feet off the ground; if you stay above radar level for too long, the Air Force will scramble out someone to check the area. This isn’t an auto-fail, though, so just get back below radar level and stay there until the heat’s off.
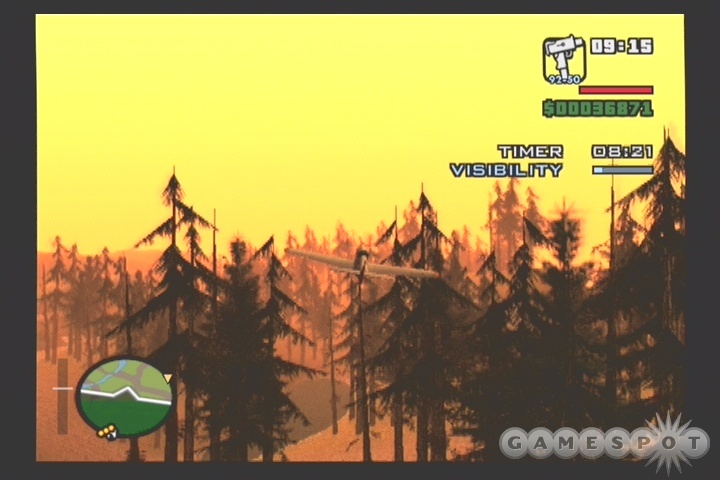
The drop-off point, as you’ll discover, is surrounded by trees. You might just want to stay safely above them and accept the radar lock before diving through the corona and losing the Air Force by flying low over the water beyond. Beyond that, it’s a simple delivery and return. Don’t screw up the landing, though; you have to get your plane back in one piece to beat the mission.
Stowaway
Although this takes place at the airport, there’s no flying involved, unless you count the kind of flying that involves jumping out of a perfectly good airplane. Granted, it’s not in great condition by the time you jump out...
You’re going to have to repeat the whole bike-chase sequence at the beginning a number of times before you get it right. The "trick," assuming there is such a thing, is to keep going straight on your bike, following along the plane on its right side, until you’re near the ramp and going fast enough to hit it. This’ll occur towards the end of the runway. When your screen is shaking from the speed, wait for one last load of barrels to drop out of the plane’s rear, then veer onto the ramp before the plane takes off. It’s difficult, but it can be done.
Thankfully, the interior segment of the mission is a bit simpler. If you fire a weapon on board, the plane will explode and you’ll fail the mission, but you can still ease your way through the feds with your fists or any other melee weapon. The last guy on board has a parachute, so kill him and grab it, then lay down a satchel charge and jump out the back.
The Truth
Black Project
You won’t be able to pick up Black Project until you complete Toreno’s missions at the airport, at which point The Truth will drop by and convince you to see what the heck the government has going on at Area 69. Area 69, get it?
Fourteen-year-old humor aside, this is a pretty cool mission if you like wandering into heavily secured army bases. The soldiers here, and there are plenty of them, all pack M4’s, so you’ll want to kill off the one by the gate, then turn his weapon on his friends. The M4 can either be auto-aimed or manually aimed, so click your R1 key periodically to see if there’s