Harry Potter: Wizards Unite - Wizarding Challenges, Battle, And Fortresses Guide

GameSpot may receive revenue from affiliate and advertising partnerships for sharing this content and from purchases through links.
Magical duels are a big part of the Harry Potter books and movies, which means they're also a centerpiece of Harry Potter: Wizards Unite. As you work to stop The Calamity, you'll square off against dark wizards, creatures like giant spiders, and curiosities such as vampires and werewolves. If you want to advance through the game's story, team up with friends, and unlock the rarest collectible Foundables along the way, you're going to need to learn how to deal with hostile forces. (There are many other things to learn about the game, too--check out our Harry Potter: Wizards Unite hub for more coverage.)
Battles mostly take place in Fortresses, where you'll engage in Wizarding Challenges to earn special rewards you can't get out in the regular world. That said, sometimes you'll run into enemies during your search for Foundables, requiring you to duel them, too. Much of what goes on in a Wizards Unite battle is pretty straightforward, but there are a lot of elements about the fights that are easy to miss. The stats that are important in battle, how best to cast spells, which Runes you should use in Wizarding Challenges, and more, are all things to keep in mind as you engage in your magical fights, because victory.
We've got a quick rundown of everything you need to know to win battles and complete Wizarding Challenges in Harry Potter: Wizards Unite. From effective spell-casting to team composition, these are the things you that'll help you defeat your opponents and become the most powerful wizard you can be.
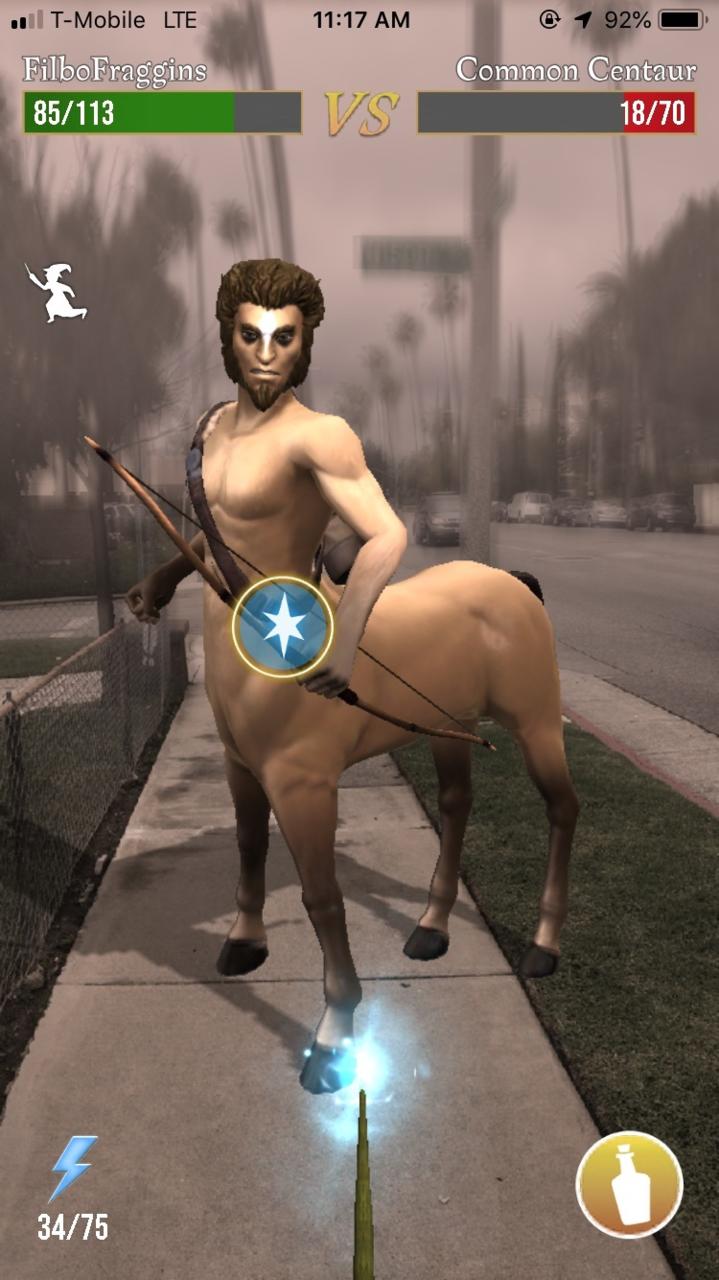
Starting With Targeting
Battles are different from your usual spell-casting experiences when dealing with Traces, adding an extra layer of strategy and mechanics. Before you can cast your spell, you need to target your enemy. You do this by lining up a star-shaped targeting cursor with the corresponding icon on the enemy, but the whole thing is a bit counterintuitive at first. When you see the targeting icon on your opponent, start dragging your finger around the screen to make the cursor appear--it usually starts at the top of the screen. Remember that you're not just putting your finger on the target, you're actually aiming your wand, so you need to move your finger around to line up the wand's tip with the target.
Once you get the cursor over the target icon, you need to keep it there. That can be tough since your enemy is sure to be moving around, but you'll need to be quick and accurate to avoid a counterattack.

Cast Quickly
When the ring around the targeting cursor fills up with blue, you'll get your chance to attack your opponent. As with casting other spells, you'll need to trace your finger along a line that appears on the screen. The most important part is to cast quickly; as with dealing with Confoundables, the speed of your cast determines most of its success. Accurately tracing the line is also important, but it's better to cast quickly and sloppily than slowly and accurately.

Protego Yourself
When your enemy attacks you, you'll have a brief chance to ward off some of the damage you'd otherwise take with the spell Protego. It's easy to execute--you just trace a quick line in the direction indicated on screen to activate it--but Protego is not complete protection and you'll still take damage from your enemies even when you cast it. To increase its effectiveness, invest in Protego-boosting nodes on your Profession's skill tree. If you need more info, check out our Harry Potter: Wizards Unite Professions guide.

Use Potions To Stay Alive And Gain An Edge
You're not stuck just trading blows with enemies as you go through a battle, especially if you feel like you're overmatched and might lose. If that happens, or if you take too much damage, hit the Potion button in the bottom-right corner of your screen. That'll pull up your inventory of potions, allowing you to instantly use one to help you in the fight. The one you'll use most often is the Healing Potion, which can give you back some Stamina and help you outlast enemies, but other potions can give you an edge in different ways as well. You should also note that damage you take in Wizarding Challenges with multiple battles carries over between each fight, so it's worth taking a moment to heal yourself before starting the next fight.

Use Spells Ahead Of Wizarding Challenge Battles
As you work through the skill tree of your Profession, you'll unlock a variety of spells that can be used in battles. These spells don't pop up during your fights, though--they're actually for use strategically while you fight through Fortresses and take on Wizarding Challenges. When you enter a challenge, you'll notice that the opponents you face have a row of squares beneath their icons. If you've unlocked spells, you'll see their icons at the bottom of the screen. Dragging the spell icons onto the enemies allows you to use those spells against them to do things like damage their Stamina or inflict some kind of status effect on them before the battle begins.
Spells you use ahead of the battle cost Focus, a consumable resource you get at the start of the battle and can earn by winning fights during a Wizarding Challenge. Once you unlock certain spells, you can also transfer Focus to other players in a Wizarding Challenge to help them use their abilities, too.

Pay Attention To Your Profession Stats
Leveling up your Profession will make you more effective in battle, but you're going to want to pay attention to your overall stats, as well as which ones are affected by your upgrades. Stamina increases your health, Power dictates how strong your spell attacks are, Protego marks how much damage you deflect with a spell, Precision dictates how often you'll land Critical Hits, and so on (we have a full rundown in the Professions guide). Pick your Profession upgrades carefully to increase the stats you need to be successful in battle, but remember that your overall goal is to unlock the strongest spells you can, which are toward the bottom of the skill tree.
Find Friends And Teammates and Vary Your Teams
Each of the three Professions you can choose from has benefits and drawbacks, and while it's possible to change Professions at any time, you'll want to try to pick one and stick with it so you can build out its skill tree and unlock its strongest capabilities. While you can get away with any Profession if you play alone or casually, if you're serious about beating tough Wizarding Challenges, you're going to want to team up with other players and diversify your jobs.
The three classes are Auror, Professor, and Magizoologist. Aurors excel in damage and Critical Hits. They get bonus damage against Dark Forces enemies like Death Eaters, but take extra damage from Beast-type enemies. Magizoologists are high-Stamina, high-defense fighters who specialize mostly in healing, and get bonus damage against Beasts while taking extra damage from enemies known as Curiosities. Professors are somewhere between the other two classes, focusing on status effect spells that make their teammates more effective and their enemies less effective. Professors are strong against Curiosities, but take extra damage from Dark Forces enemies.
Building a strong team requires helping each other out to shore up each class's weaknesses, while sharing their strengths. You'll want to avoid fighting with a group of all Aurors, for instance; try to coordinate with your Wizards Unite pals so you can build effective teams to take down more Fortresses.

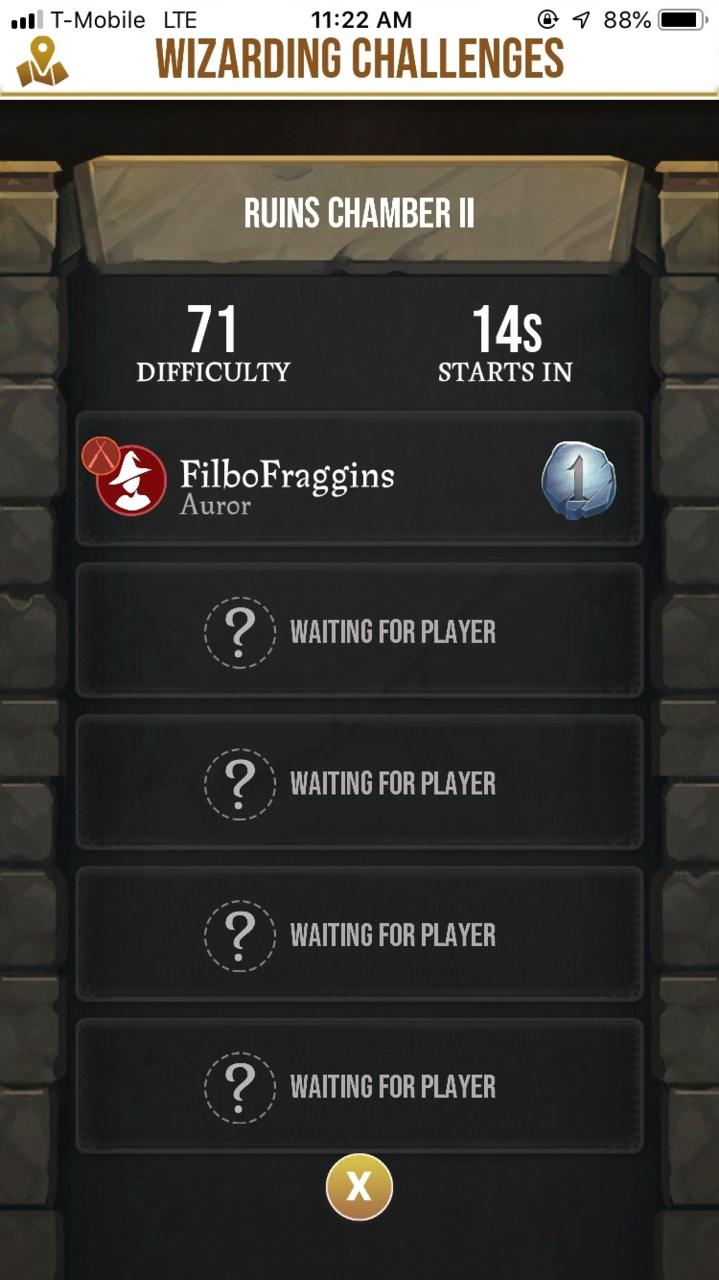
Bring Lots of Spell Energy And Watch The Fortress Timer
As with catching Foundables, your ability to cast spells is dictated by Spell Energy. Running out of Spell Energy in the middle of a Wizarding Challenge can cost you the entire battle, so don't go into a Fortress without first stocking up at Inns and Greenhouses.
The other thing that can stop you as you fight through a Wizarding Challenge (other than running out of Stamina) is the Fortress timer. You'll notice it ticking down in the top corner of your screen. It dictates how long you have to finish a Wizarding Challenge, and it keeps ticking even between battles when you might be using your special spells. Keep an eye on it to avoid getting bounced from the Challenge before you earn your rewards.