How to Properly Maintain Your PC for Peak Performance
GameSpot may receive revenue from affiliate and advertising partnerships for sharing this content and from purchases through links.
Owning a PC is a lot like being in a committed relationship, or at least it should be if you want the honeymoon stage to last beyond the first few months. It’s a weird analogy, we know. But simply put, the more care and attention you pour into your PC, the better it will treat you and serve your own needs in return.
We’re not talking about whispering sweet nothings to your system or taking it out on dates like in the movie Her. The care and attention we mean has to do with ways of keeping your PC running in top form, just like the day you built or bought it. Over time, computers tend to degrade in performance for a number of reasons, many of which are avoidable with a little bit of preventive TLC. All it takes is a little effort into maintaining your system. Here’s what you can (and should) do to keep your PC in peak condition...
Evict the Dust Bunnies
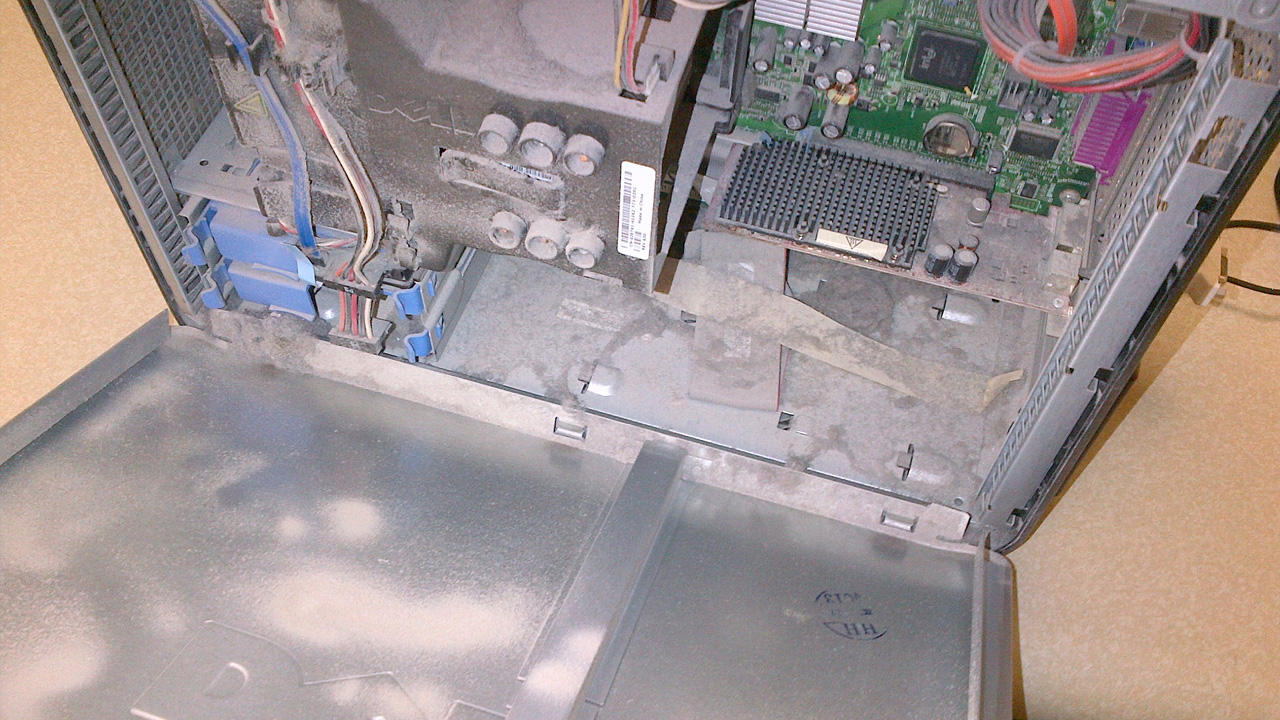
Let’s start things off with physical maintenance. Like any machine with vents, dust is going to find its way into your PC. Over time, dust and debris can accumulate into a scary mess, especially if you live in a smoky environment or, as this editor does, off a busy road where cars and trucks are constantly kicking up dirt. Blech!
Dust bunnies that form over time are bad for your PC. They restrict airflow and can ruin moving parts, such as the motors that run your fans. Take the time to crack open your case and give it a thorough cleaning at least every three months, or more often as needed. Before you do that, turn off your PC, flip the power supply switch to the off position, unplug it, and hold down the power button for around three seconds to drain any lingering juice.
If your case has dust filters, clean them off. If they’re especially dirty, bang them against a hard surface outside and watch the dust fly. You can also wash them with water, just be sure they’re completely dry before reinstalling in your system.
Air Out the Situation
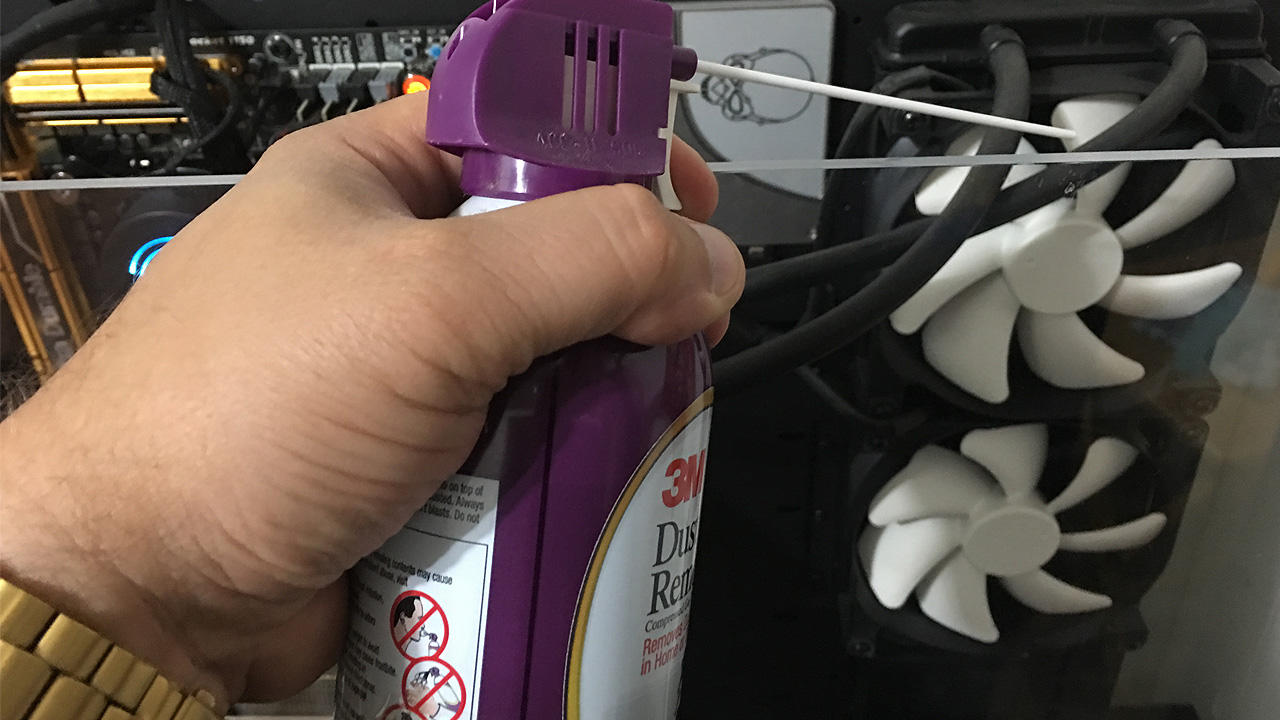
While you’re in your PC, give a few blasts of compressed air to various nooks and crannies around the motherboard, as well as the fan/heatsink combination on your CPU and GPU. Make sure you hold the can of compressed air upright—if you tilt it sideways or upside down, the contents inside will turn to liquid. You don’t want that (and neither does your PC).
Compressed air is also handy for less intensive cleaning chores. Whereas a deep cleaning is recommended every few months, giving your system’s fans a few quick bursts of air every so often can help prevent dust from accumulating into giant hairballs or caking onto your fan blades. Compressed air also helps unclog vents for optimal airflow into and out of your system.
If you’re able to, move your system outside before doing this so the dust won’t settle back into your system. Even if that’s not an option, use compressed air anyway—not all of the dust will land back in your system, but more importantly, you’re breaking up buildups that can block airflow.
Swiffer is Quicker
If you own a laptop, the same rules apply about cleaning it out periodically, though you might not be able to take it apart without voiding the warranty, or at all depending on how it’s designed. In that case, a few blasts of compressed air in the vents (with the system turned off) and on the keyboard every few weeks will prevent dirt and dust (and Pizza Pocket remnants) from piling up.
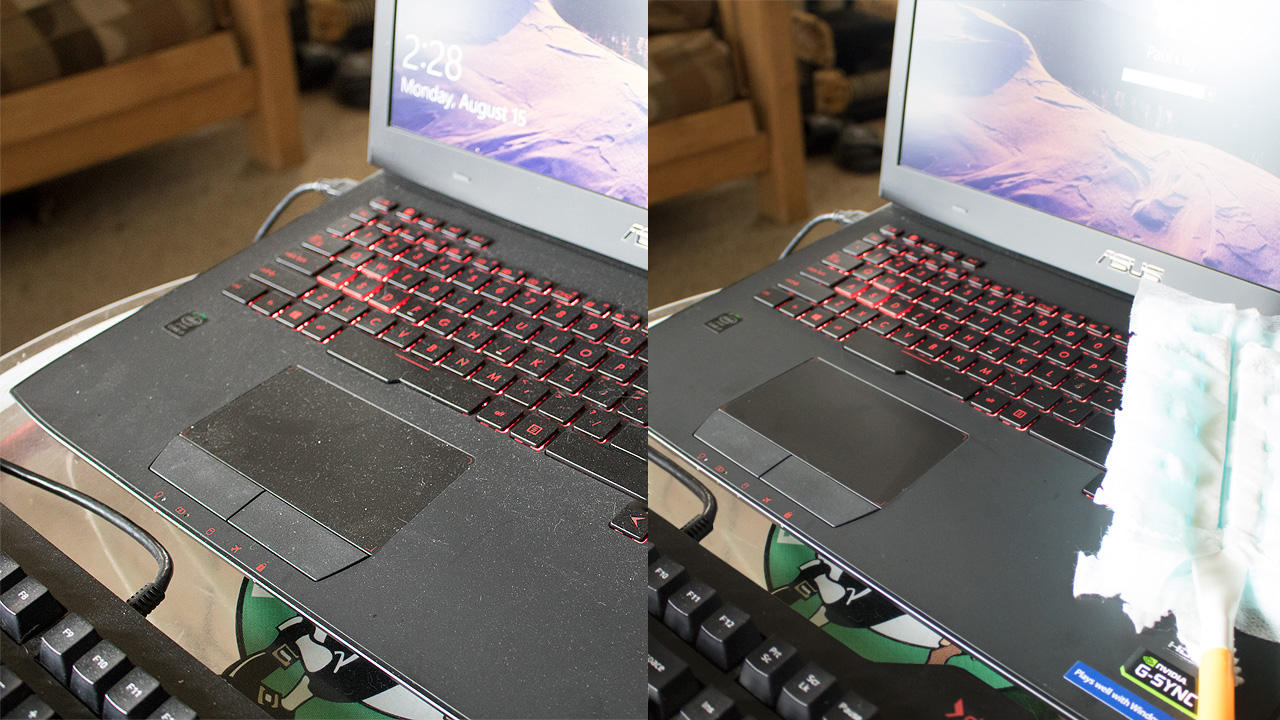
In addition to compressed air, a Swiffer Duster (dry and unscented) is a handy cleaning aid for keyboards and laptops. Yes, seriously! A few swipes across a keyboard, whether it’s a standalone plank or the one integrated into your notebook, does a great job of getting into those hard to reach crevices that sit between keys and clearing out dust.
We’ve also had good luck using Swiffers on LCD panels using light swipes, though if the idea of using anything other than a microfiber cloth gives you the heebie jeebies, use one of those instead. For a deeper cleaning, pick up a pack of alchohol-free monitor wipes. These pre-moistened wipes, like Dust-Off’s Anti-Static Monitor Wipes, are formulated to clean your display without scratching the surface or removing any anti-glare coating that might exist.
For peripherals such as your keyboard and mouse, isopropyl rubbing alcohol is handy to have around, preferably the 99 percent formula because it cleans better and dries quicker. Scrub your gear with a moistened cotton ball or Q-tip to remove sticky grime.
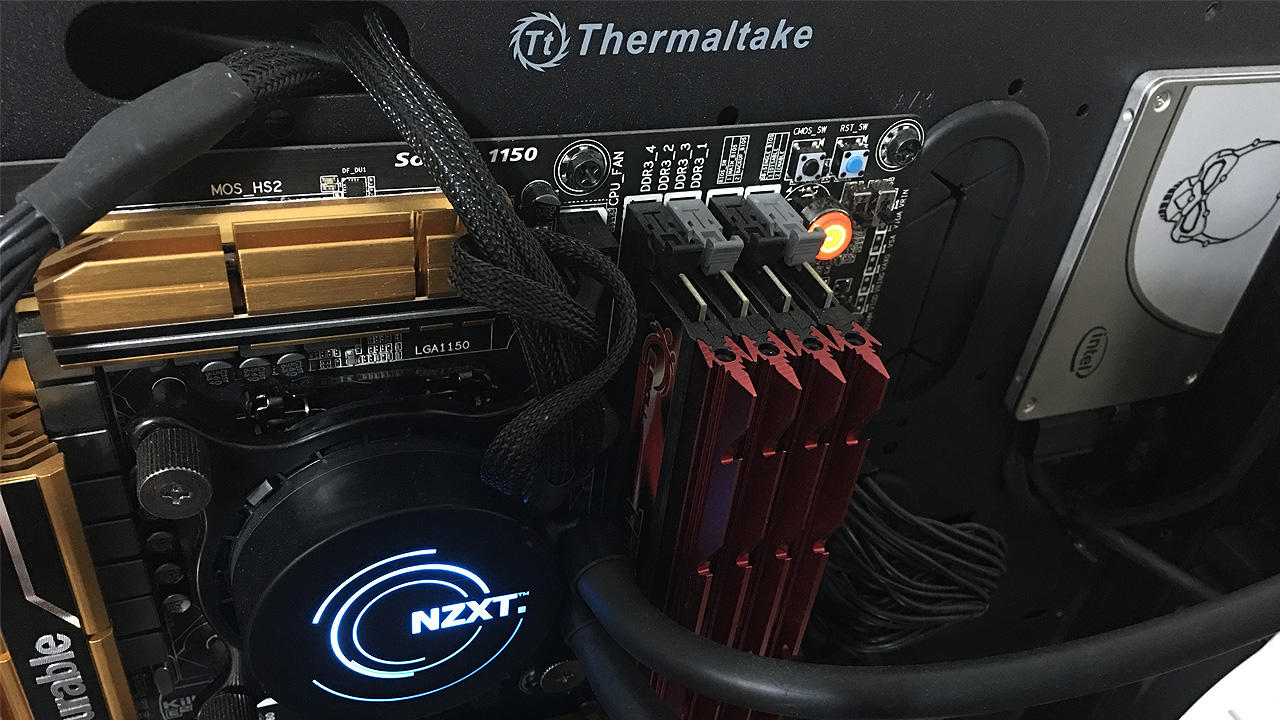
Wrangle Those Wires
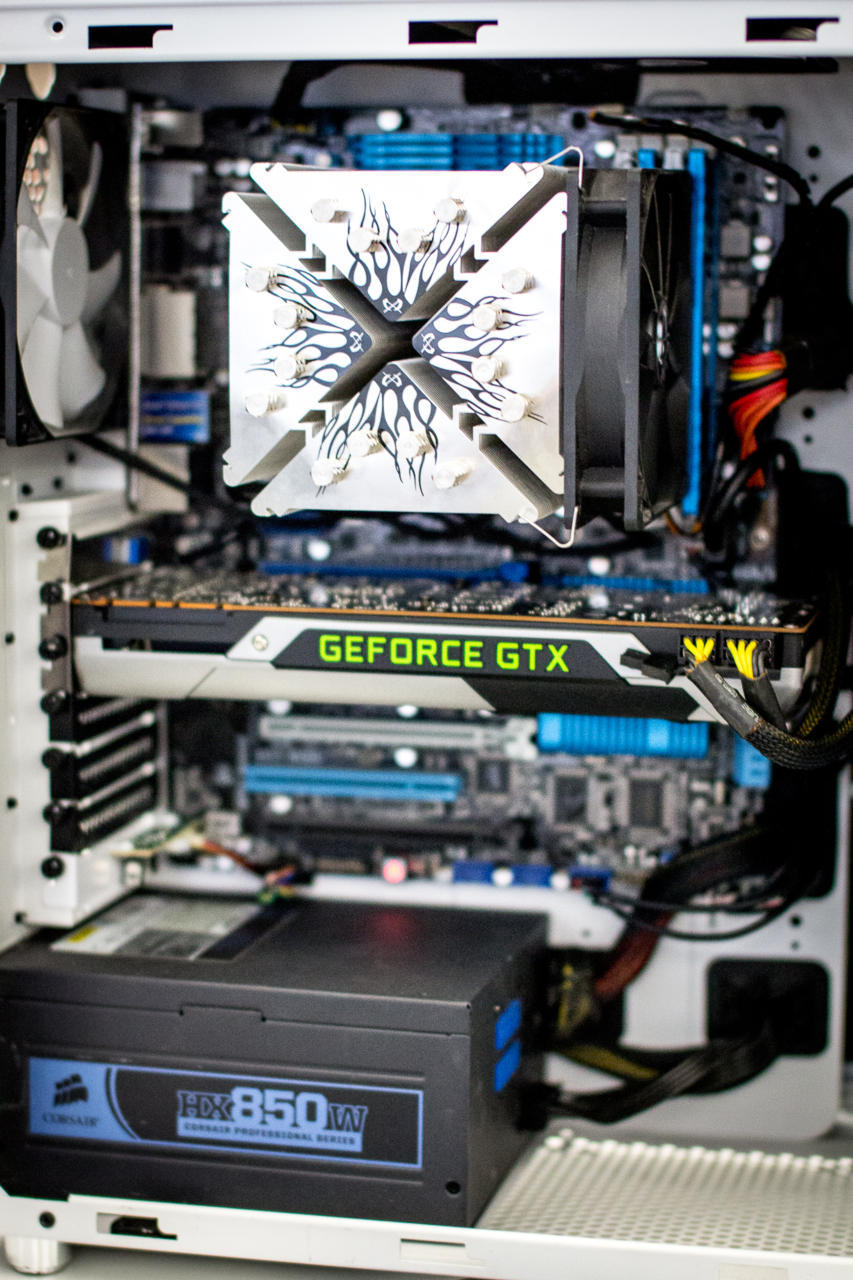
A properly built PC is like a work of art, though the insides of some systems look more like a Picasso than a Rembrandt. That’s not good for your hardware because an unkempt PC with cables strewn about can block the flow of air and cause components to heat up. Even if your PC isn’t overheating to the point of failure, performance can still suffer. Take your graphics card, for example. At a certain heat threshold, it’s programmed to throttle back clockspeeds to protect itself. And if it’s a modern video card, it has a boost clockspeed for extra performance, but the hotter things get, the less time it will spend running above its base clockspeed.
The solution is to clean up your cables. You want to make sure there are no wires or thick cables dangling in front of any of the fans. If your case has cable management cutouts, use them to route cables behind the motherboard tray as much as possible. You can also use zip ties to bundle wires together and hold them to the side of your case or other areas that won’t obstruct airflow. This is one instance where form and function go hand-in-hand—a pretty PC is also a cool running one.
Batteries Not Included (But Recommended)
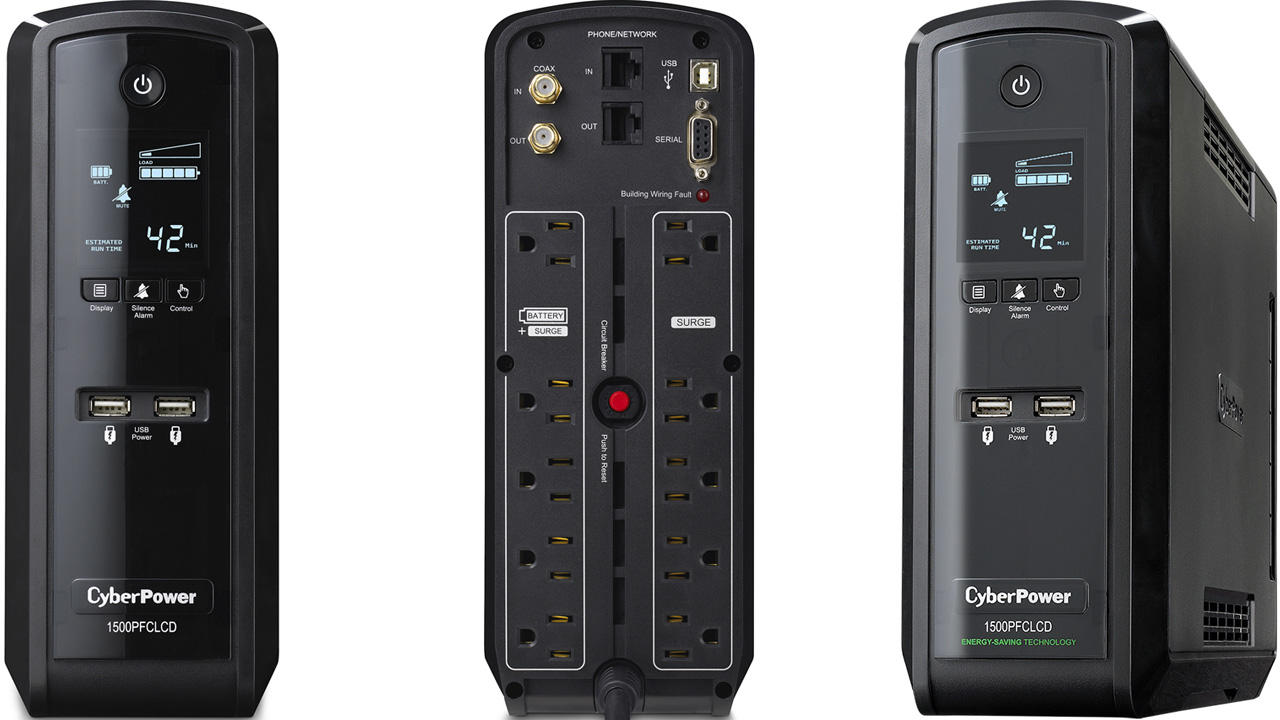
While it’s essential to keep your PC clean of debris, airflow isn’t the only point of failure to prepare for. Lightning storms can zap your components with dangerous spikes in voltage, and if there’s a power outage in your area, your PC has no way of shutting down properly on its own. That’s where an uninterruptible power supply (UPS) comes in.
When shopping for a UPS, look for a model with automatic voltage regulation (AVR) such as CyberPower’s CP1500PFCLCD. A UPS with AVR constantly monitors and regulates the AC power to maintain a safe operating range. While stable voltage is good for your components, it can also prolong the life of the battery in your UPS.
With or without AVR, a UPS will protect your system from power spikes and provide backup power when there’s an outage. There are two benefits there—one is that it gives you time to save whatever it is you’re working on, and secondly it allows you to properly shutdown your system.
If you don’t have the funds for a battery backup, the next best thing is a surge protector. Having any kind of surge protector is better than none at all, though not all are created equal. The better ones will let know when they’re worn out and no longer effective at stopping power surges. Tripp Lite’s TLP1008TEL and Belkin’s PivotPlug BP112230-08 are two examples that have this feature.
Keep Your Drivers Fresh
Your system has more drivers than the Daytona 500. Way more. Your graphics card, audio hardware, Ethernet, chipset, and everything else that makes your PC tick relies on a software driver, and it can be tough keeping track of them all. Some components and related utilities let you know when there’s a driver update, such as NVIDIA’s GeForce Experience software, but that isn’t always the case.
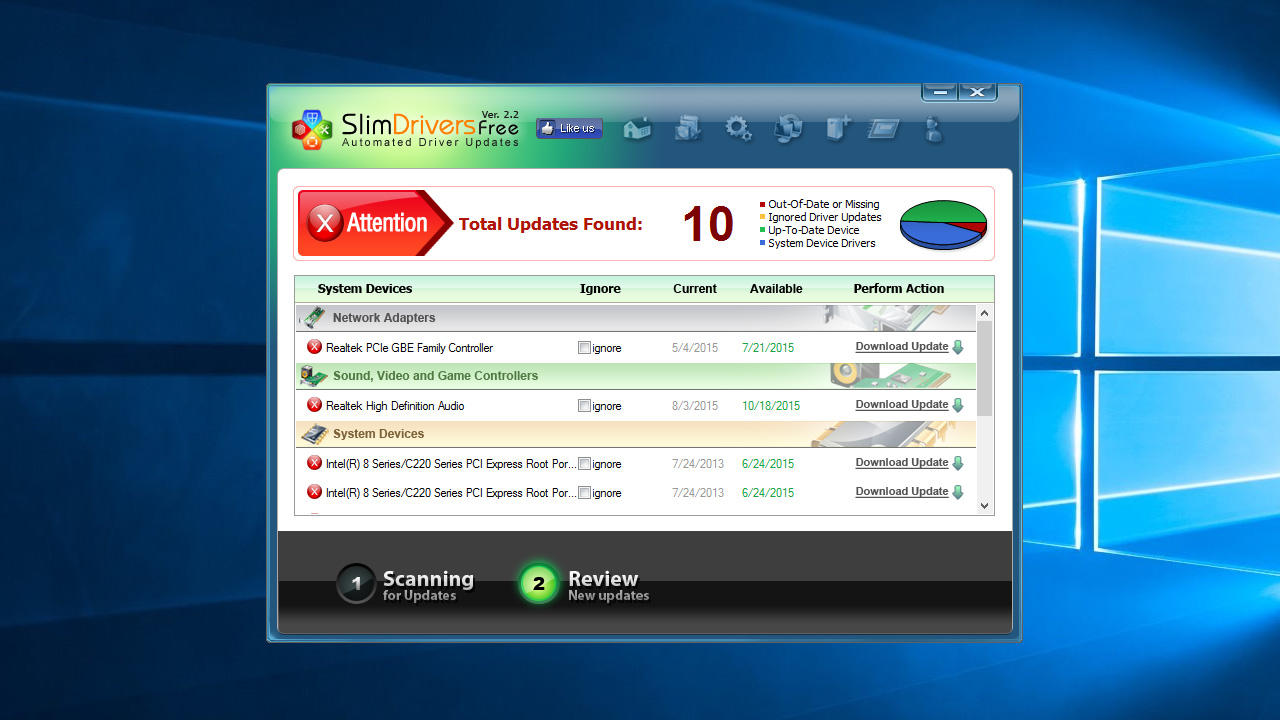
SlimWare’s free SlimDrivers utility scans your system for out-of-date and missing drivers and provides links to update them individually. It also lets you know the date of your currently installed driver versus how recent the newer one was released to help determine just how out-of-date a driver might be.
Even though it’s free, it’s a fairly powerful tool with the ability to backup your current drivers and restore them if the new ones have unexpected side effects. There’s even a scheduling function to configure SlimDrivers to periodically scan for new drivers on its own.
If you have $30 burning a hole in your pocket, SlimWare’s DriverUpdate utility ups the ante with one-click updates, along with email and chat support.
Of course, you don’t need a special utility to run the latest drivers for your hardware, you can fetch them for yourself. It’s just easier to use a program like SlimDrivers. Either way, it’s important to stay up to date to ensure your hardware is running at its best.
Patch It to Protect It
While updating your drivers ensures your hardware is running optimally, it’s also important to patch your software when applicable. Not only do software updates sometimes introduce new features and performance optimizations, they can plug security holes so that you’re not a sitting duck for the latest online threats.
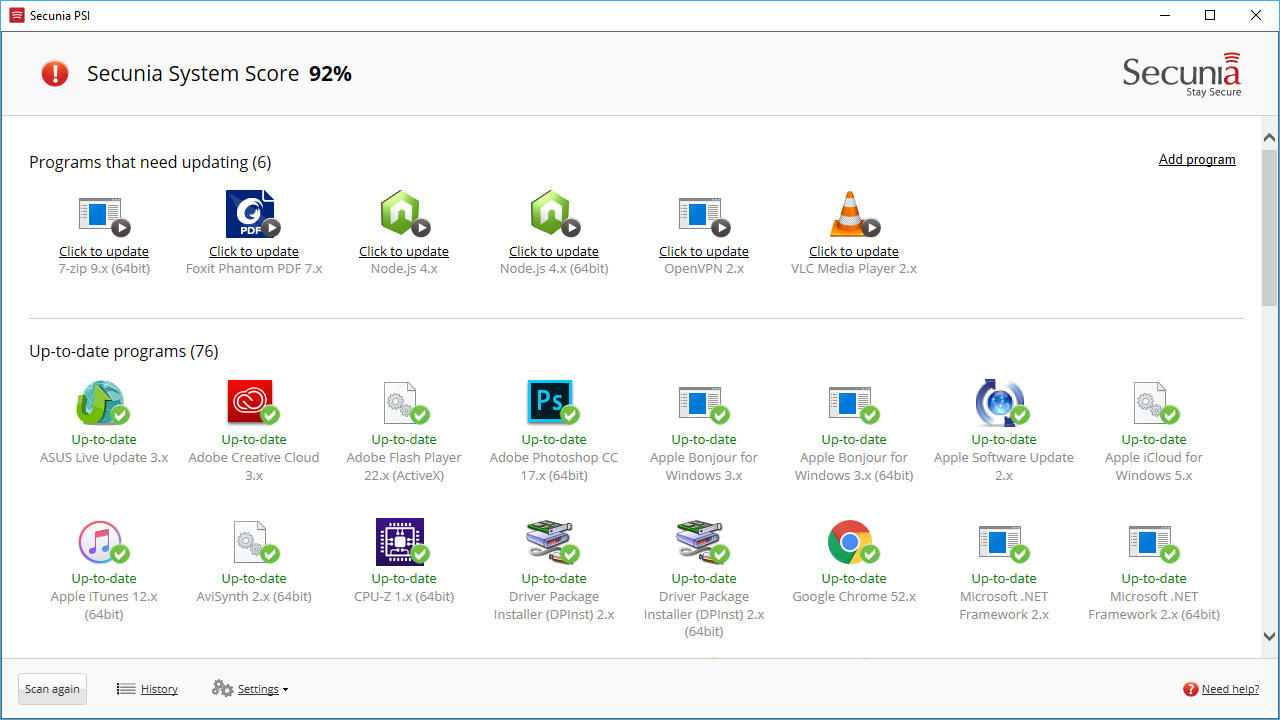
The more programs you have installed, the tougher it is to keep track of all the updates. Luckily there are programs that streamline the process. One of them is Secunia Personal Software Inspector (PSI). This free program scans your system and separates software into sections, including those that are up-to-date and another set that needs updating. PSI then goes the extra mile by grabbing the latest update and applying it, if you want it to. It doesn’t get much easier than that.
Banish the Bloat
Disk space is precious, and that’s especially true if you’re rocking a lower capacity solid state drive compared to a roomy hard drive. It’s not uncommon for systems to ship with just a 256GB or even a 128GB SSD, and that can fill up fast as you take advantage of frequent Steam sales. Don’t let any of it go to waste.
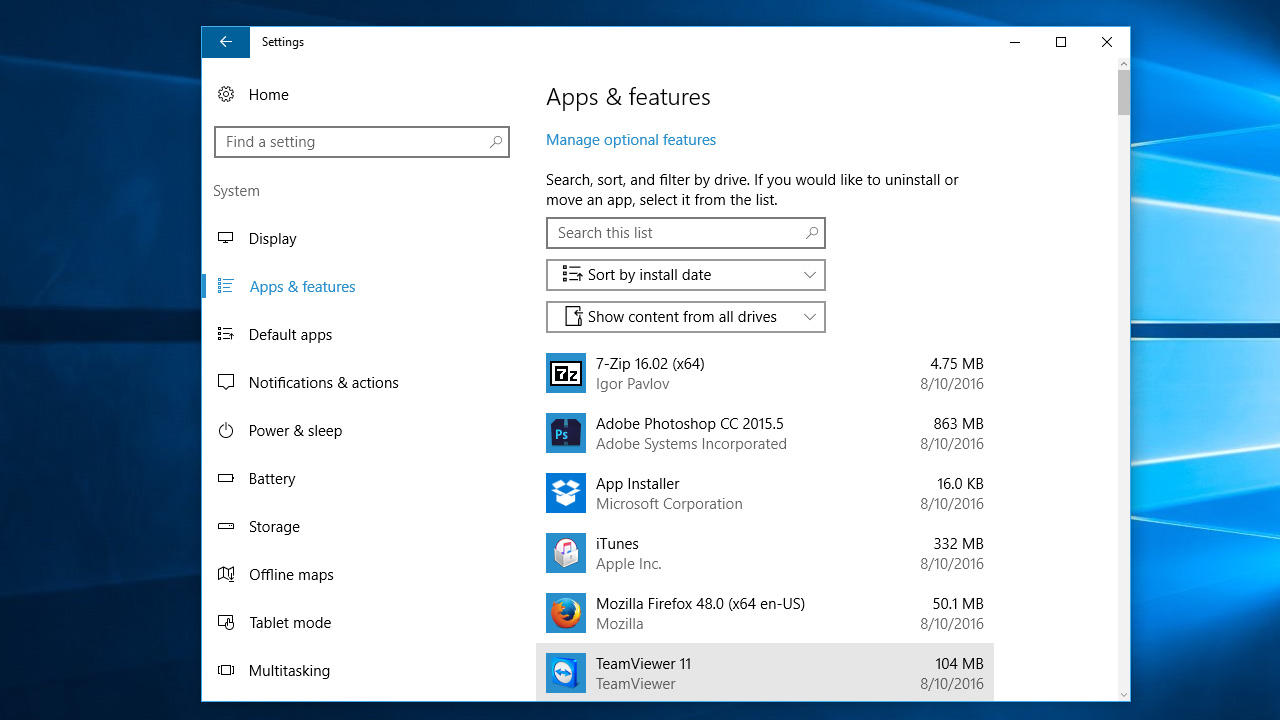
You can reclaim precious drive space by uninstalling programs you no longer use, including ones that might have come pre-installed when you bought your PC. Just go to the Control Panel and click on Uninstall a program underneath the Programs heading. In Windows 10 you can also go to Settings > System > Apps and Features. Both methods will tell you how much disk space a program is taking up and when you installed it.
Use CCleaner for a Leaner, Meaner PC
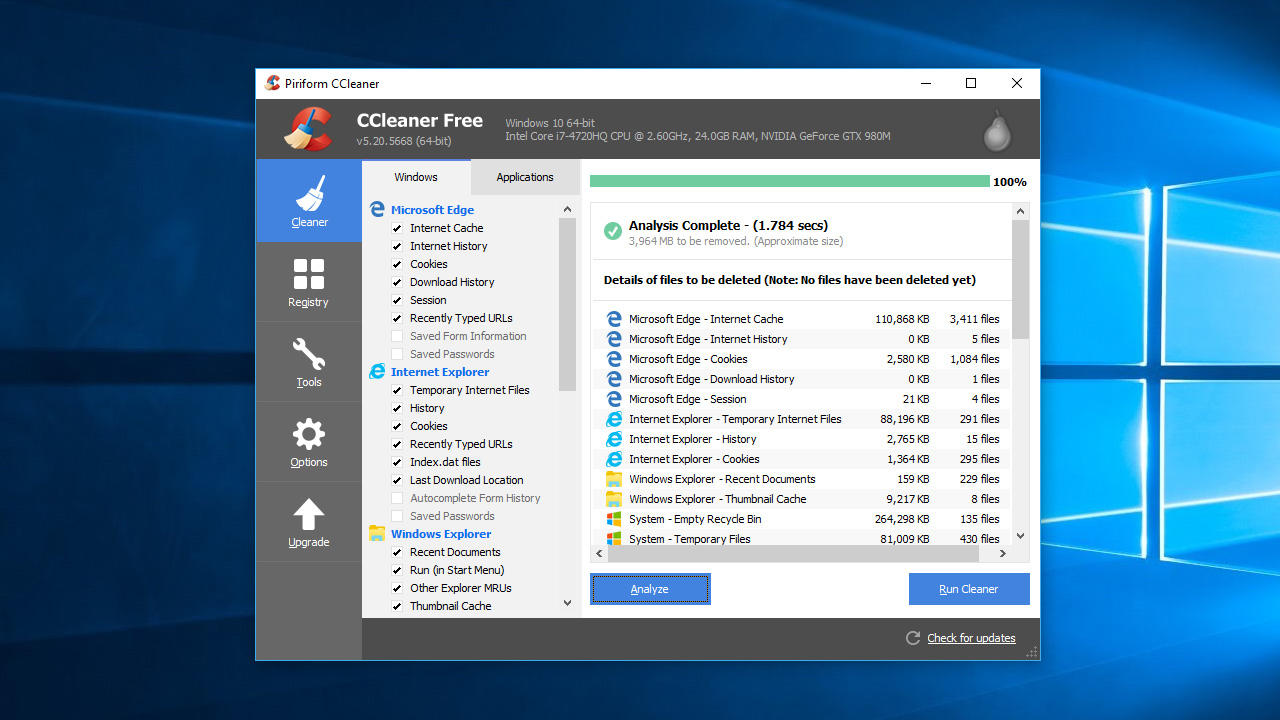
Applications aren’t the only things that take up disk space, so do web browsing remnants such as temporary Internet files and cookies. These and other behind the scenes data can also slow down browsing and lead to wonky behavior if there’s a corrupt file. CCleaner gets rid of these files in one fell swoop, but it doesn’t stop there.
Files taking up space in the Recycle Bin, thumbnail cache, clipboard data—CCleaner can rid your disk of these too, and more. You might not reclaim oodles of storage space by wiping away things like temporary files, but every little bit counts. On top of that, it’s like giving your PC a fresh start. Just be aware of what you’re deleting. For example, if you have a bunch of stored passwords and settings for different websites you visit, having CCleaner devour your browser’s cookies will wipe all that out.
One other word of caution. CCleaner has a section for analyzing your system Registry for what it deems are problematic issues, such as missing shared DLLs and obsolete settings. While much of what it finds is legit, messing with the system Registry can be risky business. Deleting a setting that you actually need could potentially cause any number of problems, even preventing your PC from booting properly. Unless you know what you’re doing and recognize the settings CCleaner wants to delete, it’s best to just leave the Registry alone.
Streamline the Startup
Background activities use up system resources that can cause longer boot times and rob you of performance. Some are necessary or otherwise helpful to run in the background, but not all of them all are. And the more programs you install, the larger the number of background activities that are likely to be running at any given time, each one chewing up a portion of your system’s RAM.
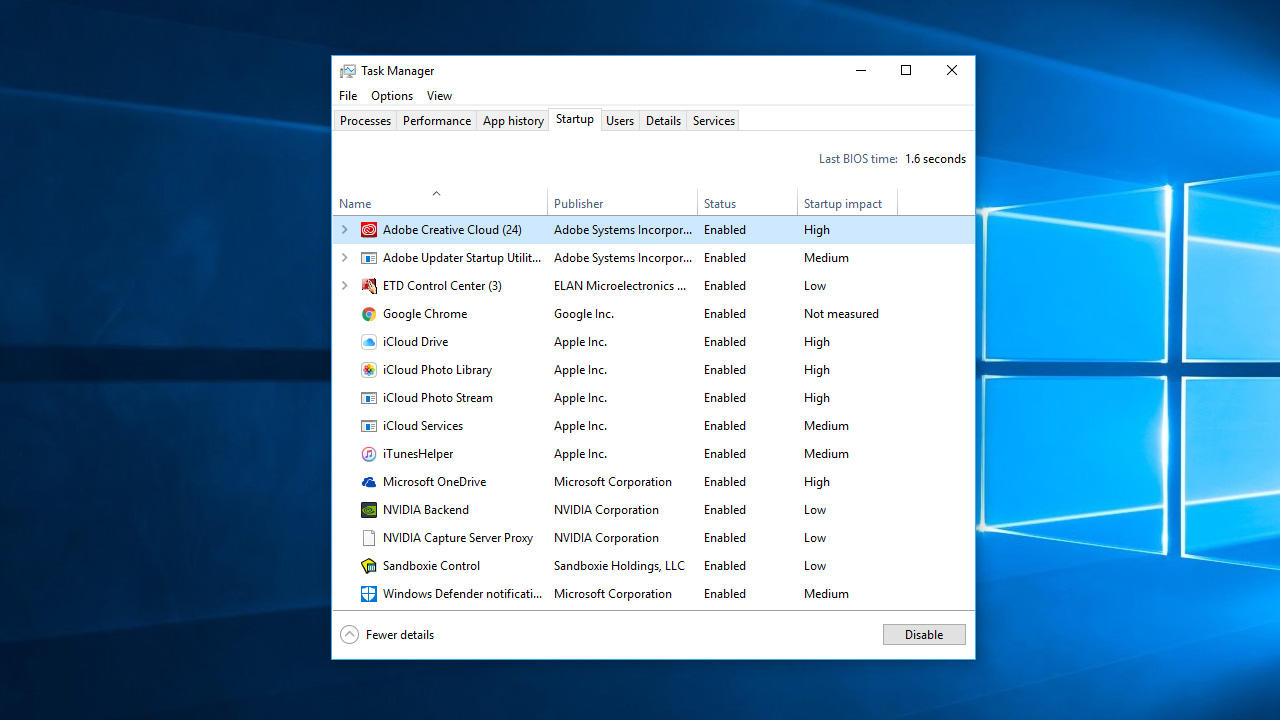
In Windows 10, fire up the Task Manager and click on the Startup tab to see which programs load when Windows boots up. One of the columns is labeled “Startup impact” and just as it sounds, it tells you what kind of impact a particular program has on your system’s boot time. For faster boots, disable the ones listed as High that you don’t need running in the background. Which ones? These items mainly check for updates in the background and load bits for faster access, so you can be as aggressive as you want here.
Some of the items you should let run, such as items belonging to AMD and Nvidia that have to do with your graphics card. Others that you can do without should be disabled. To do that, right-click on a entry and select Disable. If it ends up having negative consequences, you can always go back and re-enable a startup item.
Malware Bites, Malwarebytes Doesn’t
The web is a dangerous place, and worse yet the threats aren’t always obvious. You can tip the odds considerably in your favor by avoiding shady corners of the web, not clicking on links in email and instant messages willy-nilly, and generally just using common sense. Unfortunately, that isn’t always enough. If a legitimate website is compromised, you can catch an infection simply by visiting that site.
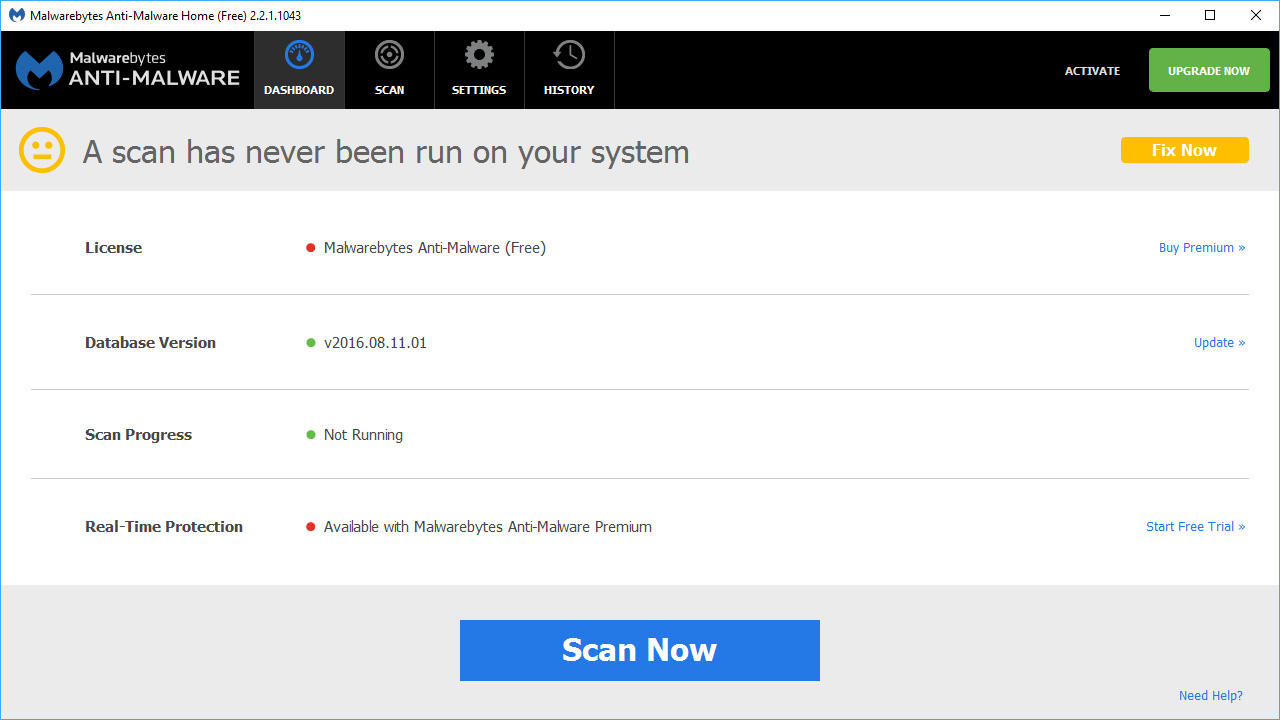
Even if you think there’s nothing wrong with your PC, you should routinely check your system for malware. You can do that by running an antivirus scan with Windows Defender, but for a more thorough evaluation, use Malwarebytes Anti-Malware. The free version has all the tools you need to give your PC a clean bill of health or, if necessary, mutilate any malware it finds. We recommend sweeping your system weekly or bi-weekly.